Boot the Mars CM
Mars CM has two versions based on storage, one is Mars CM with eMMC storage, and the other is Mars CM Lite without eMMC storage. The Lite version can only be accessed through SD card on the base-board. If the base-board you are using does not have a SD card interface, you cannot use the Lite version. In addition, the eMMC version shares the hardware interface with the SD card, so they cannot be used at the same time. In other words, when using the eMMC version of Mars CM, you cannot insert a storage card into the SD card slot on the base-board.
Mars CM adopts a core board design, with pin compatibility with Raspberry Pi CM4. It can be used with different base-boards. The firmware we currently release is compatible with the Raspberry Pi CM4 IO Board.
Taking the Raspberry Pi CM4 IO Board as an example, we will introduce how to burn firmware for the eMMC version and the Lite version.
Mars CM eMMC version image burning
Prepare
- Necessary
- Mars CM eMMC version
- Raspberry Pi CM4 IO Board or other Raspberry Pi CM4 compatible base-board
- USB to TTL serial cable
- USB data cable
- Optional
- HDMI cable
Download image and burning tools
- Download the Debian system image: Official Image
- Download the eMMC image burning tool: UsbFlashTool
Install driver for the burning tool
Driver installation is only required for the first use.
Extract the downloaded Mars-UsbFlashTool-*-Windows.zip into the Windows system.
-
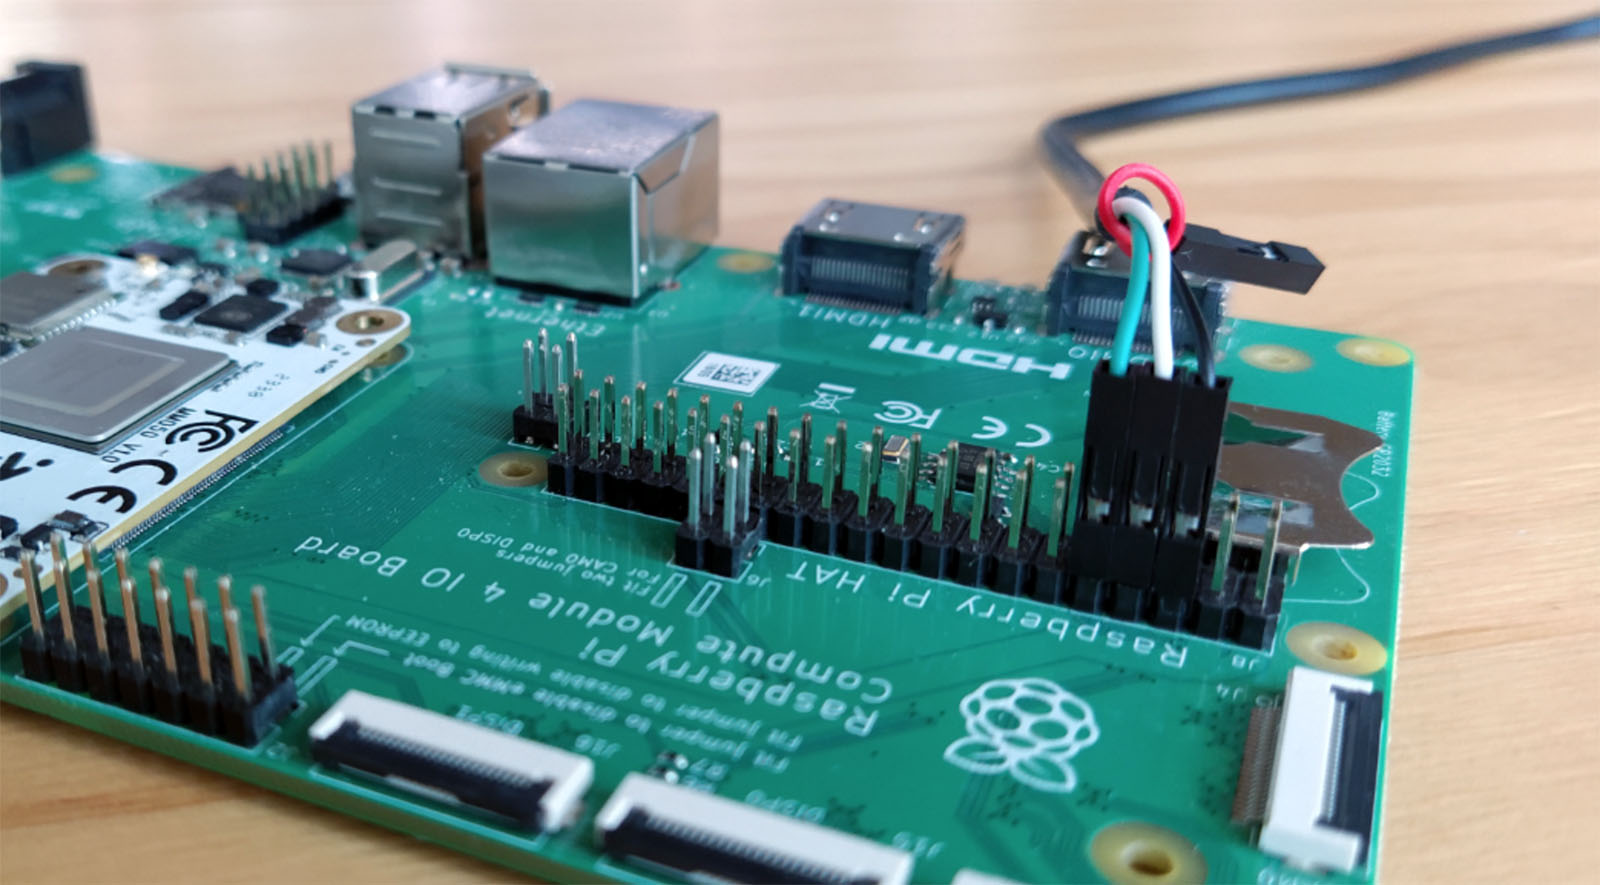
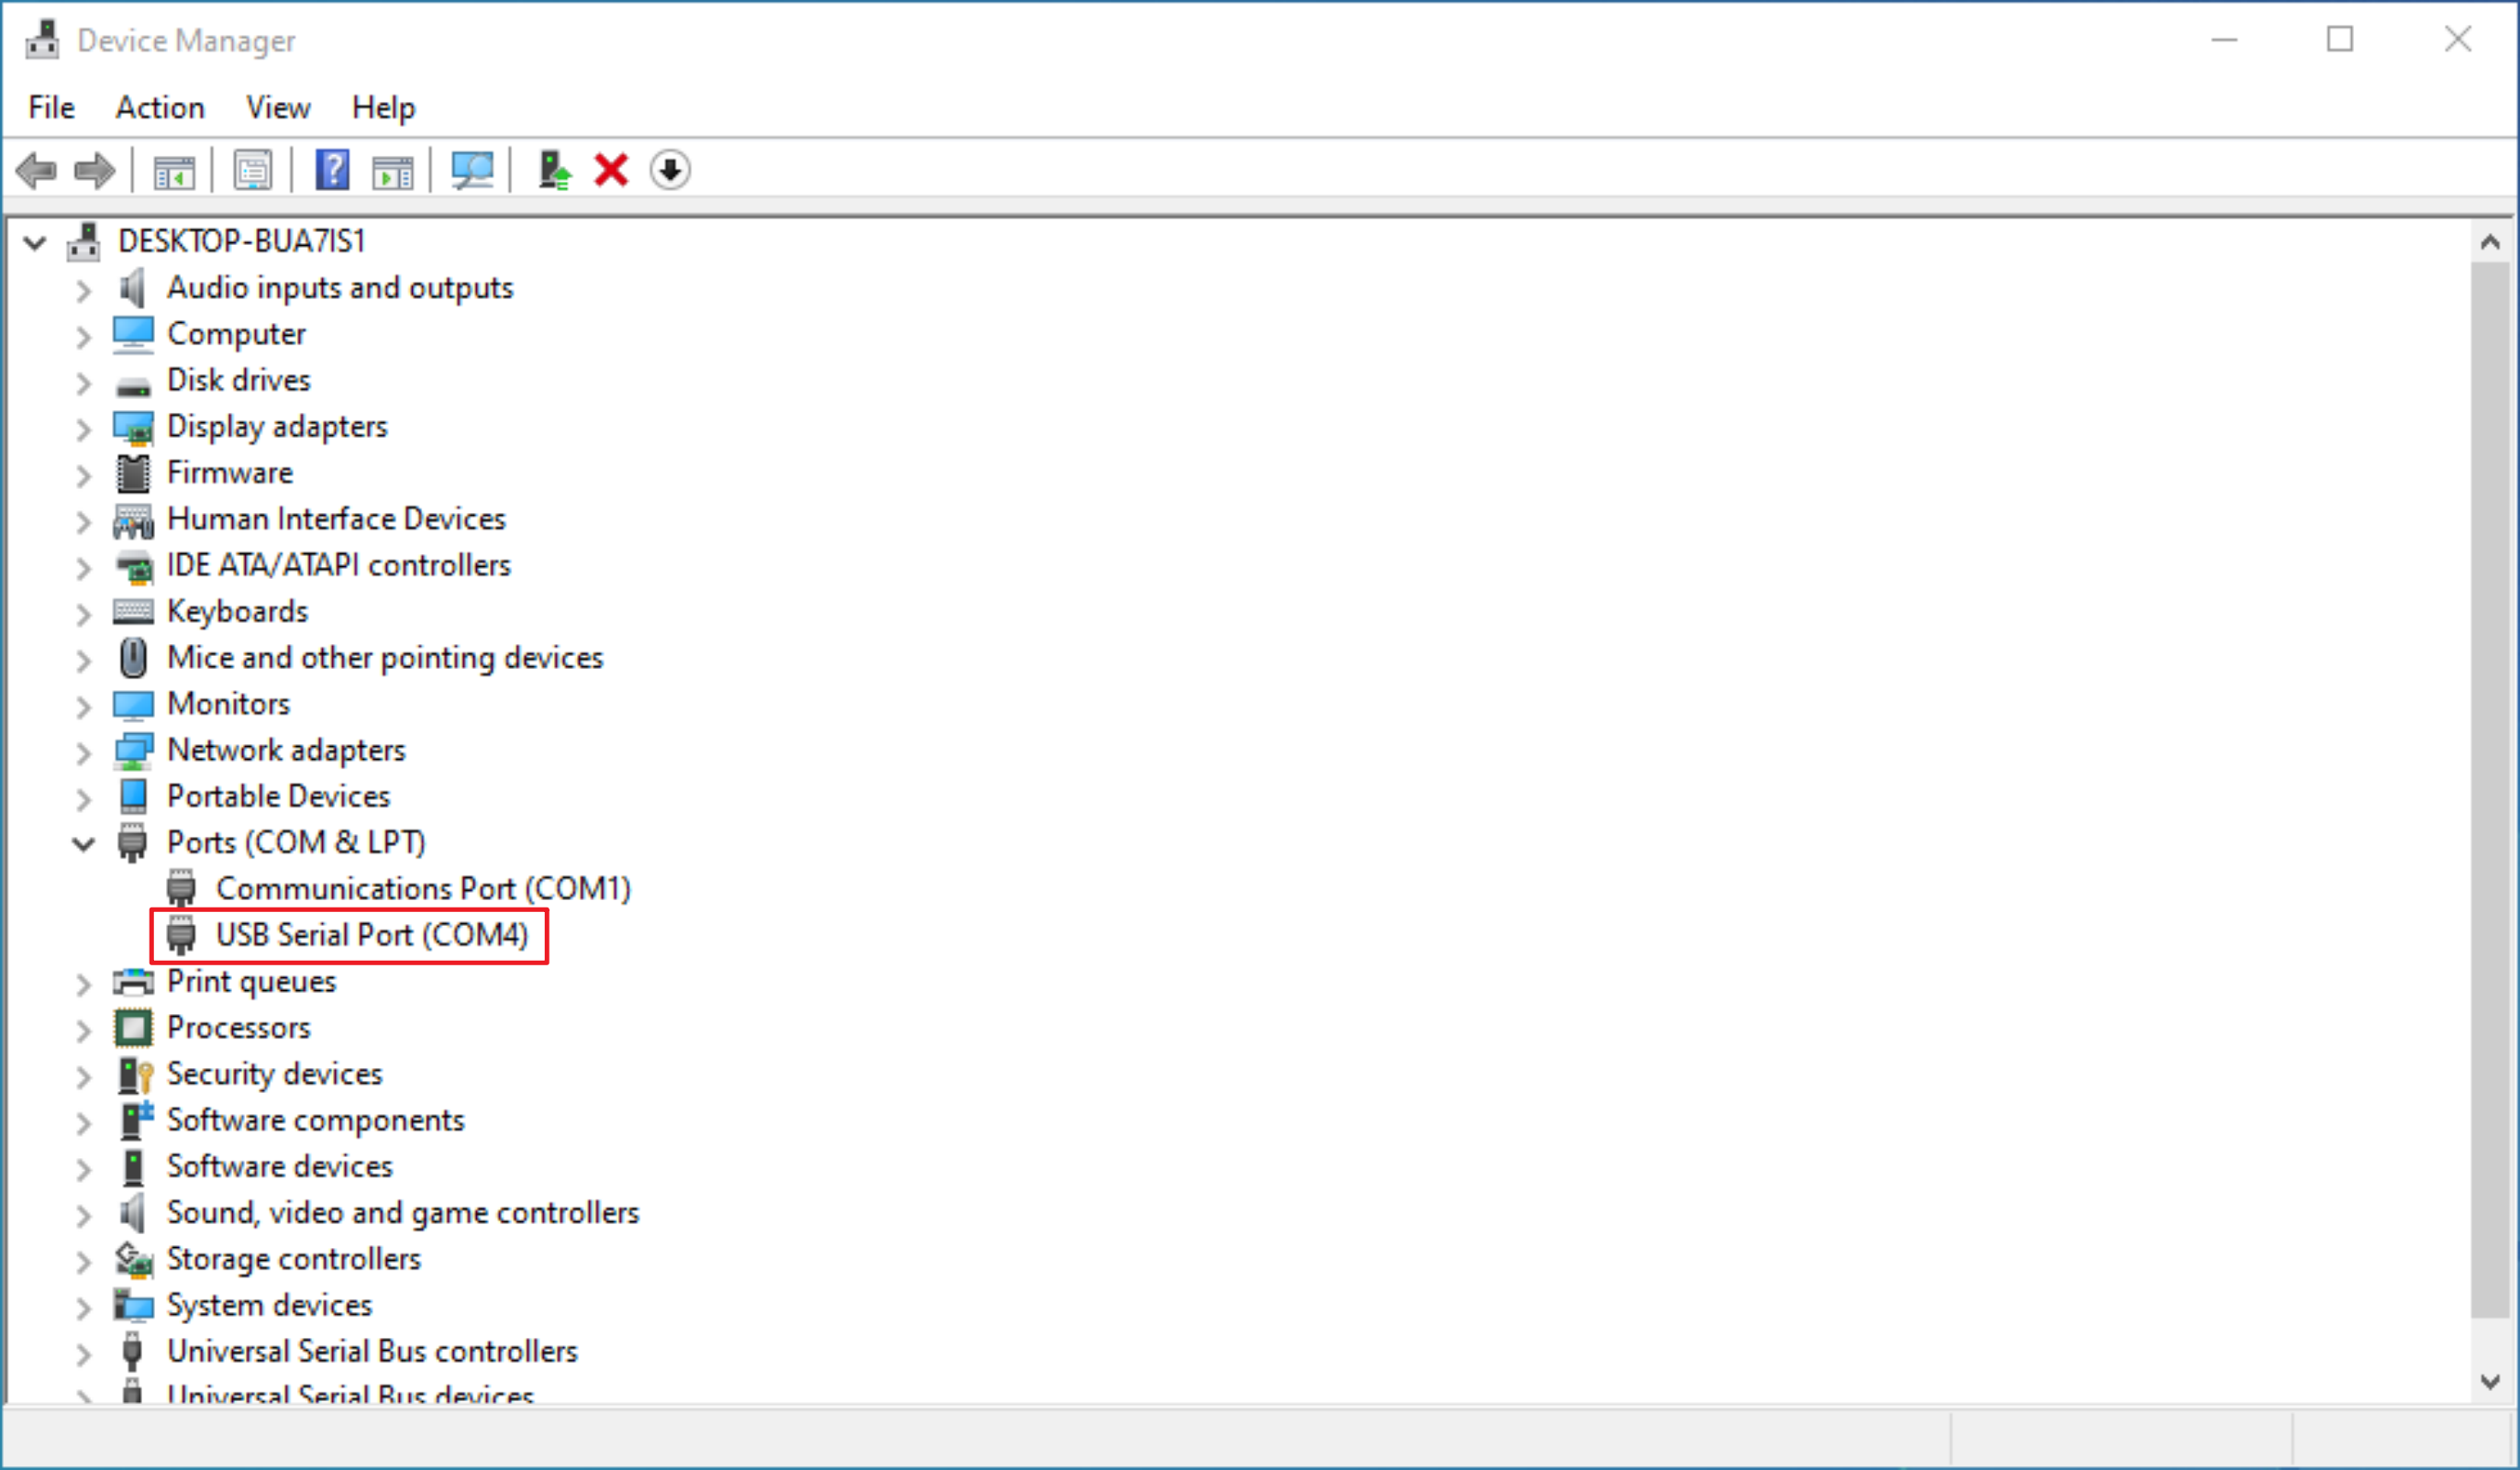
Connect the USB to TTL serial port cable to the 40 pin header on the base-board, connect the USB to the PC and note down the serial port number
Note: If any other serial port program is open and using the serial port, please exit the program to release the port and avoid occupying it.
-
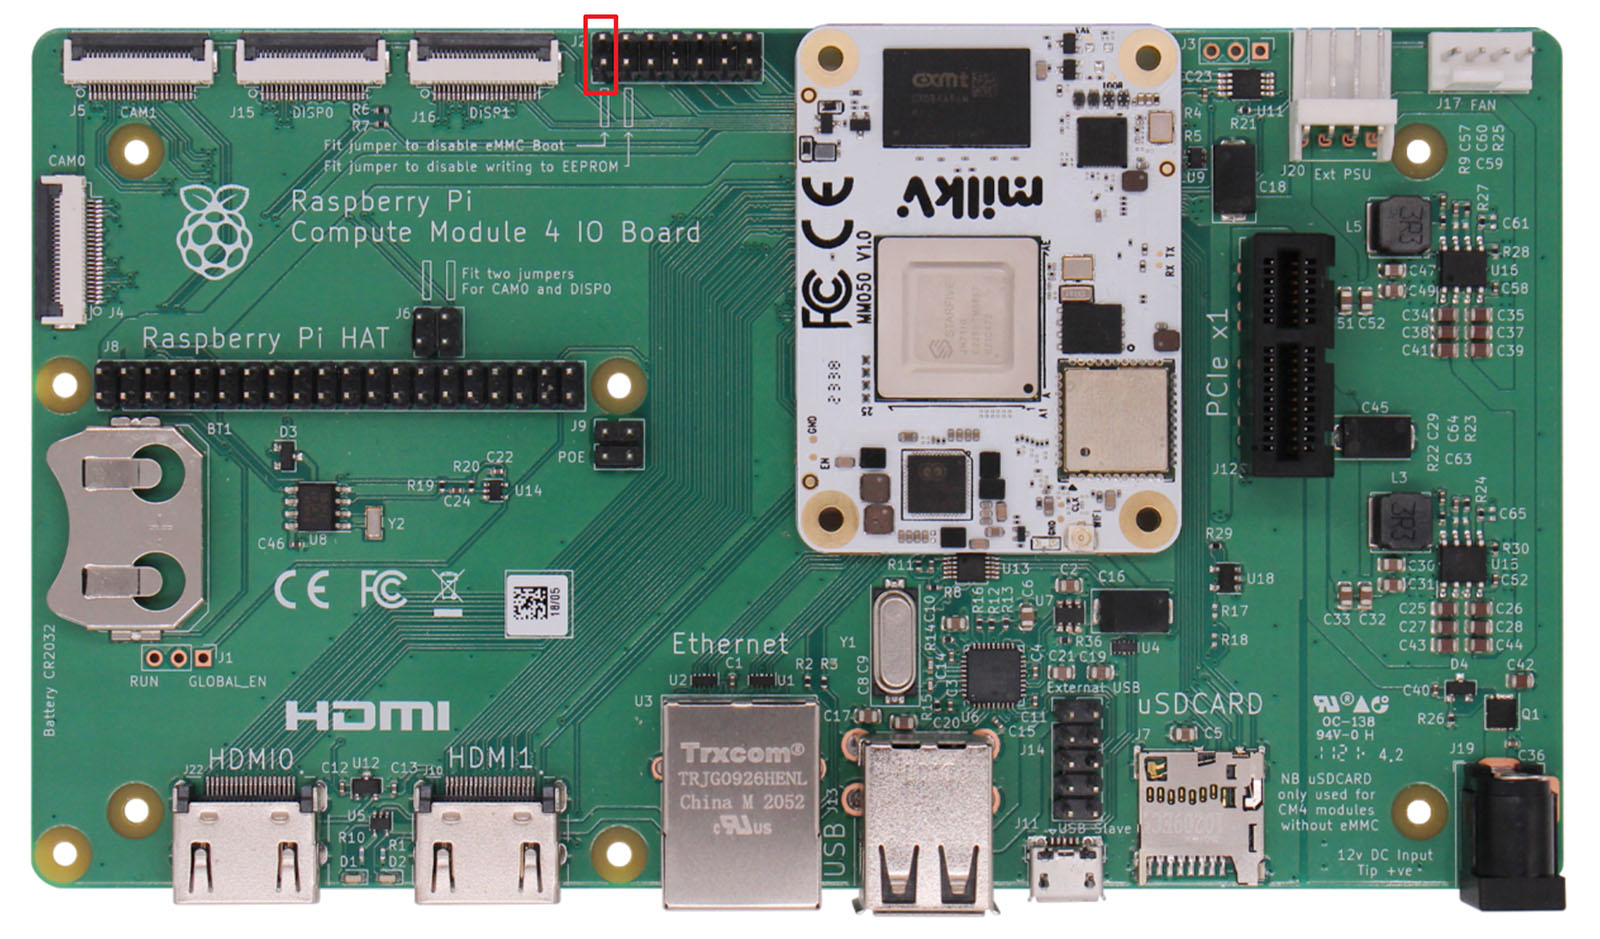
Short-circuit pins 1 and 2 of the J12 header on the CM4 IO Board using a jumper cap (USB flashing mode)
-
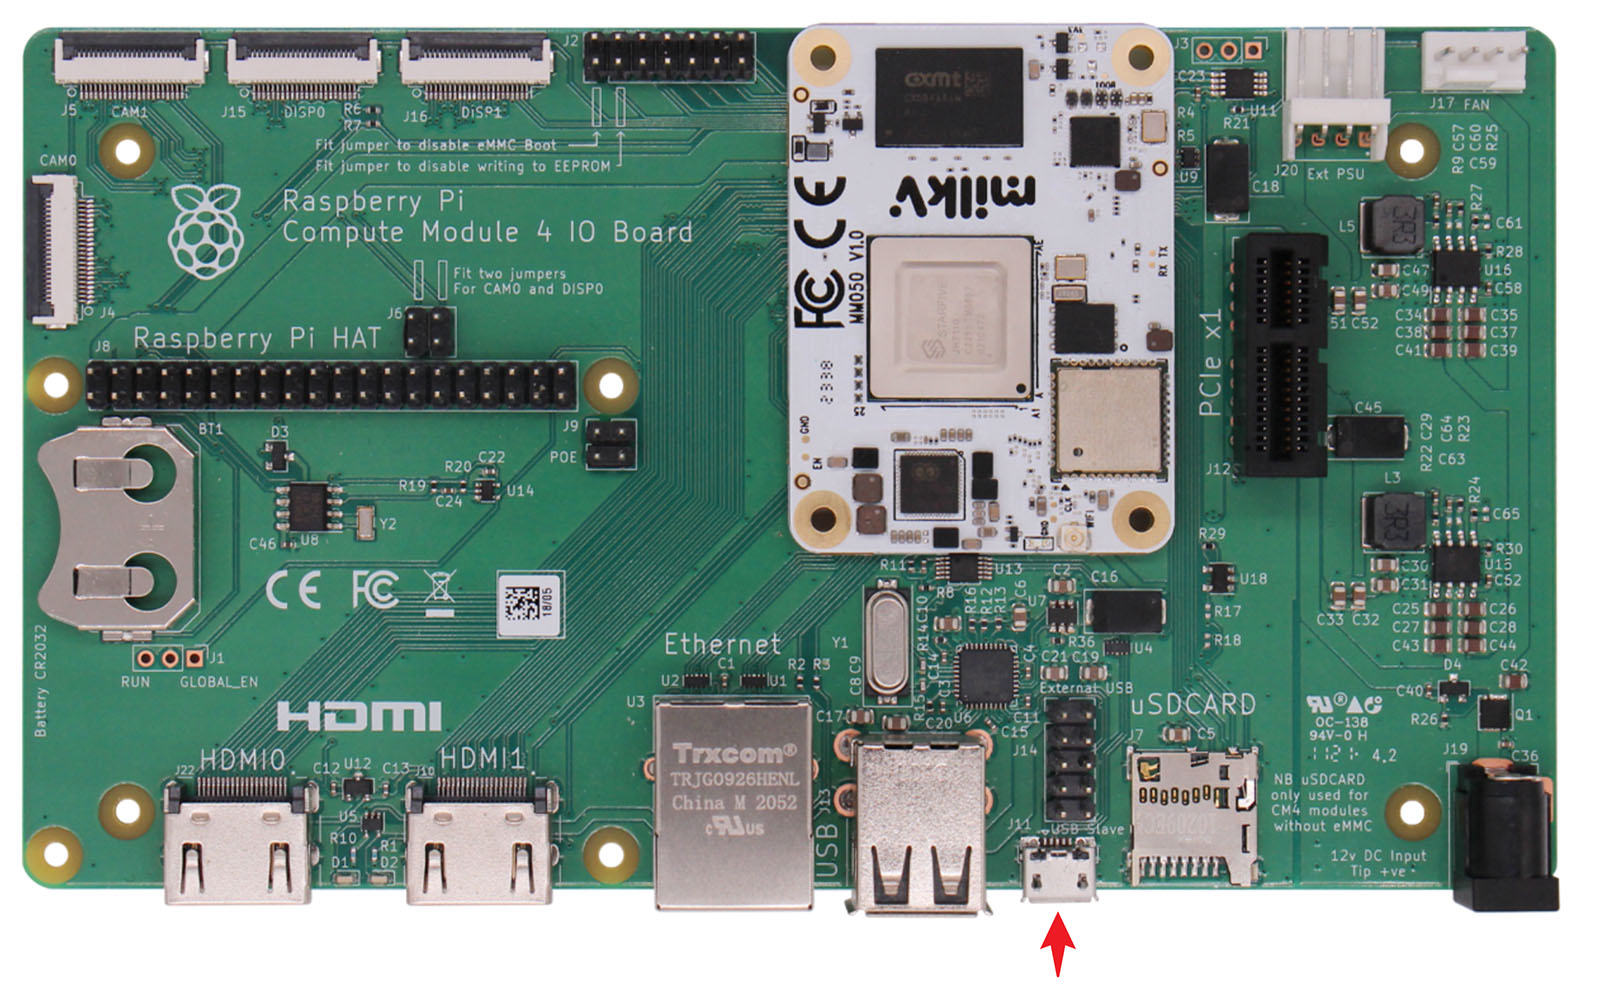
Connect the PC and the base-board's J11 USB Slave interface using a Micro USB data cable
-
Run the
UsbFlashTool-*-Windows.exeflashing program in the flashing tool directory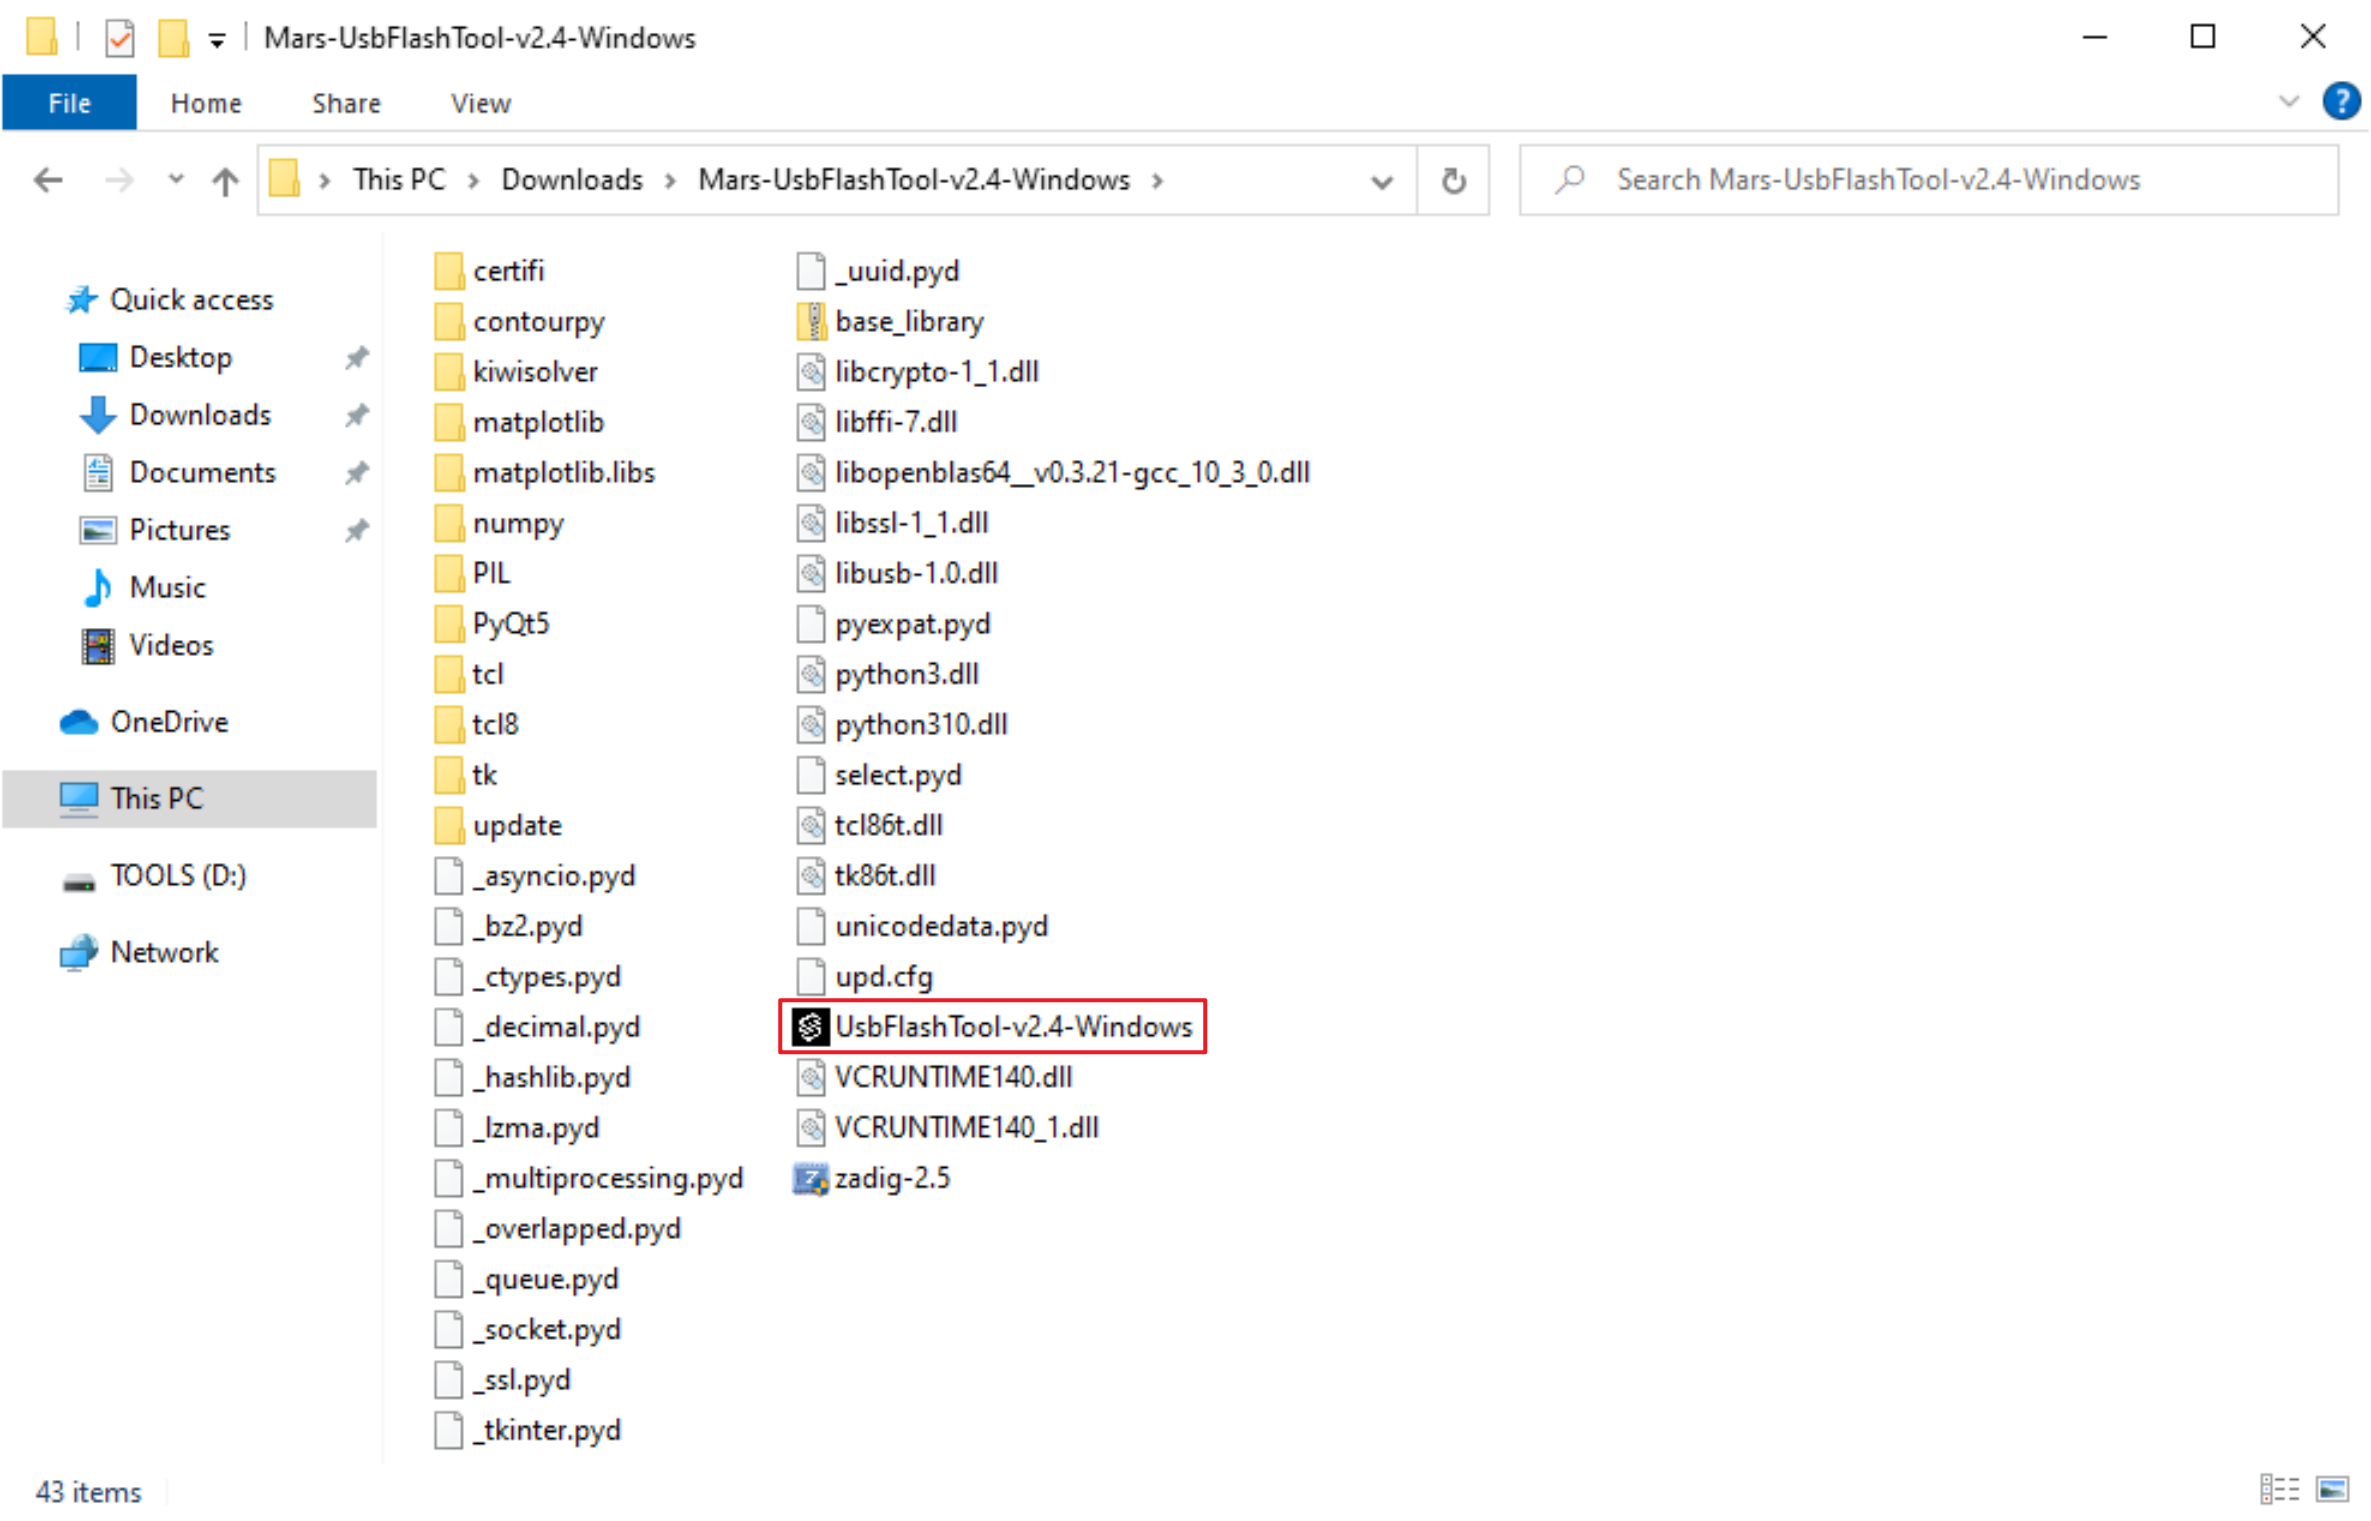
-
Set the serial port number in the
Serial Settingon the right side to the serial port number noted in step 1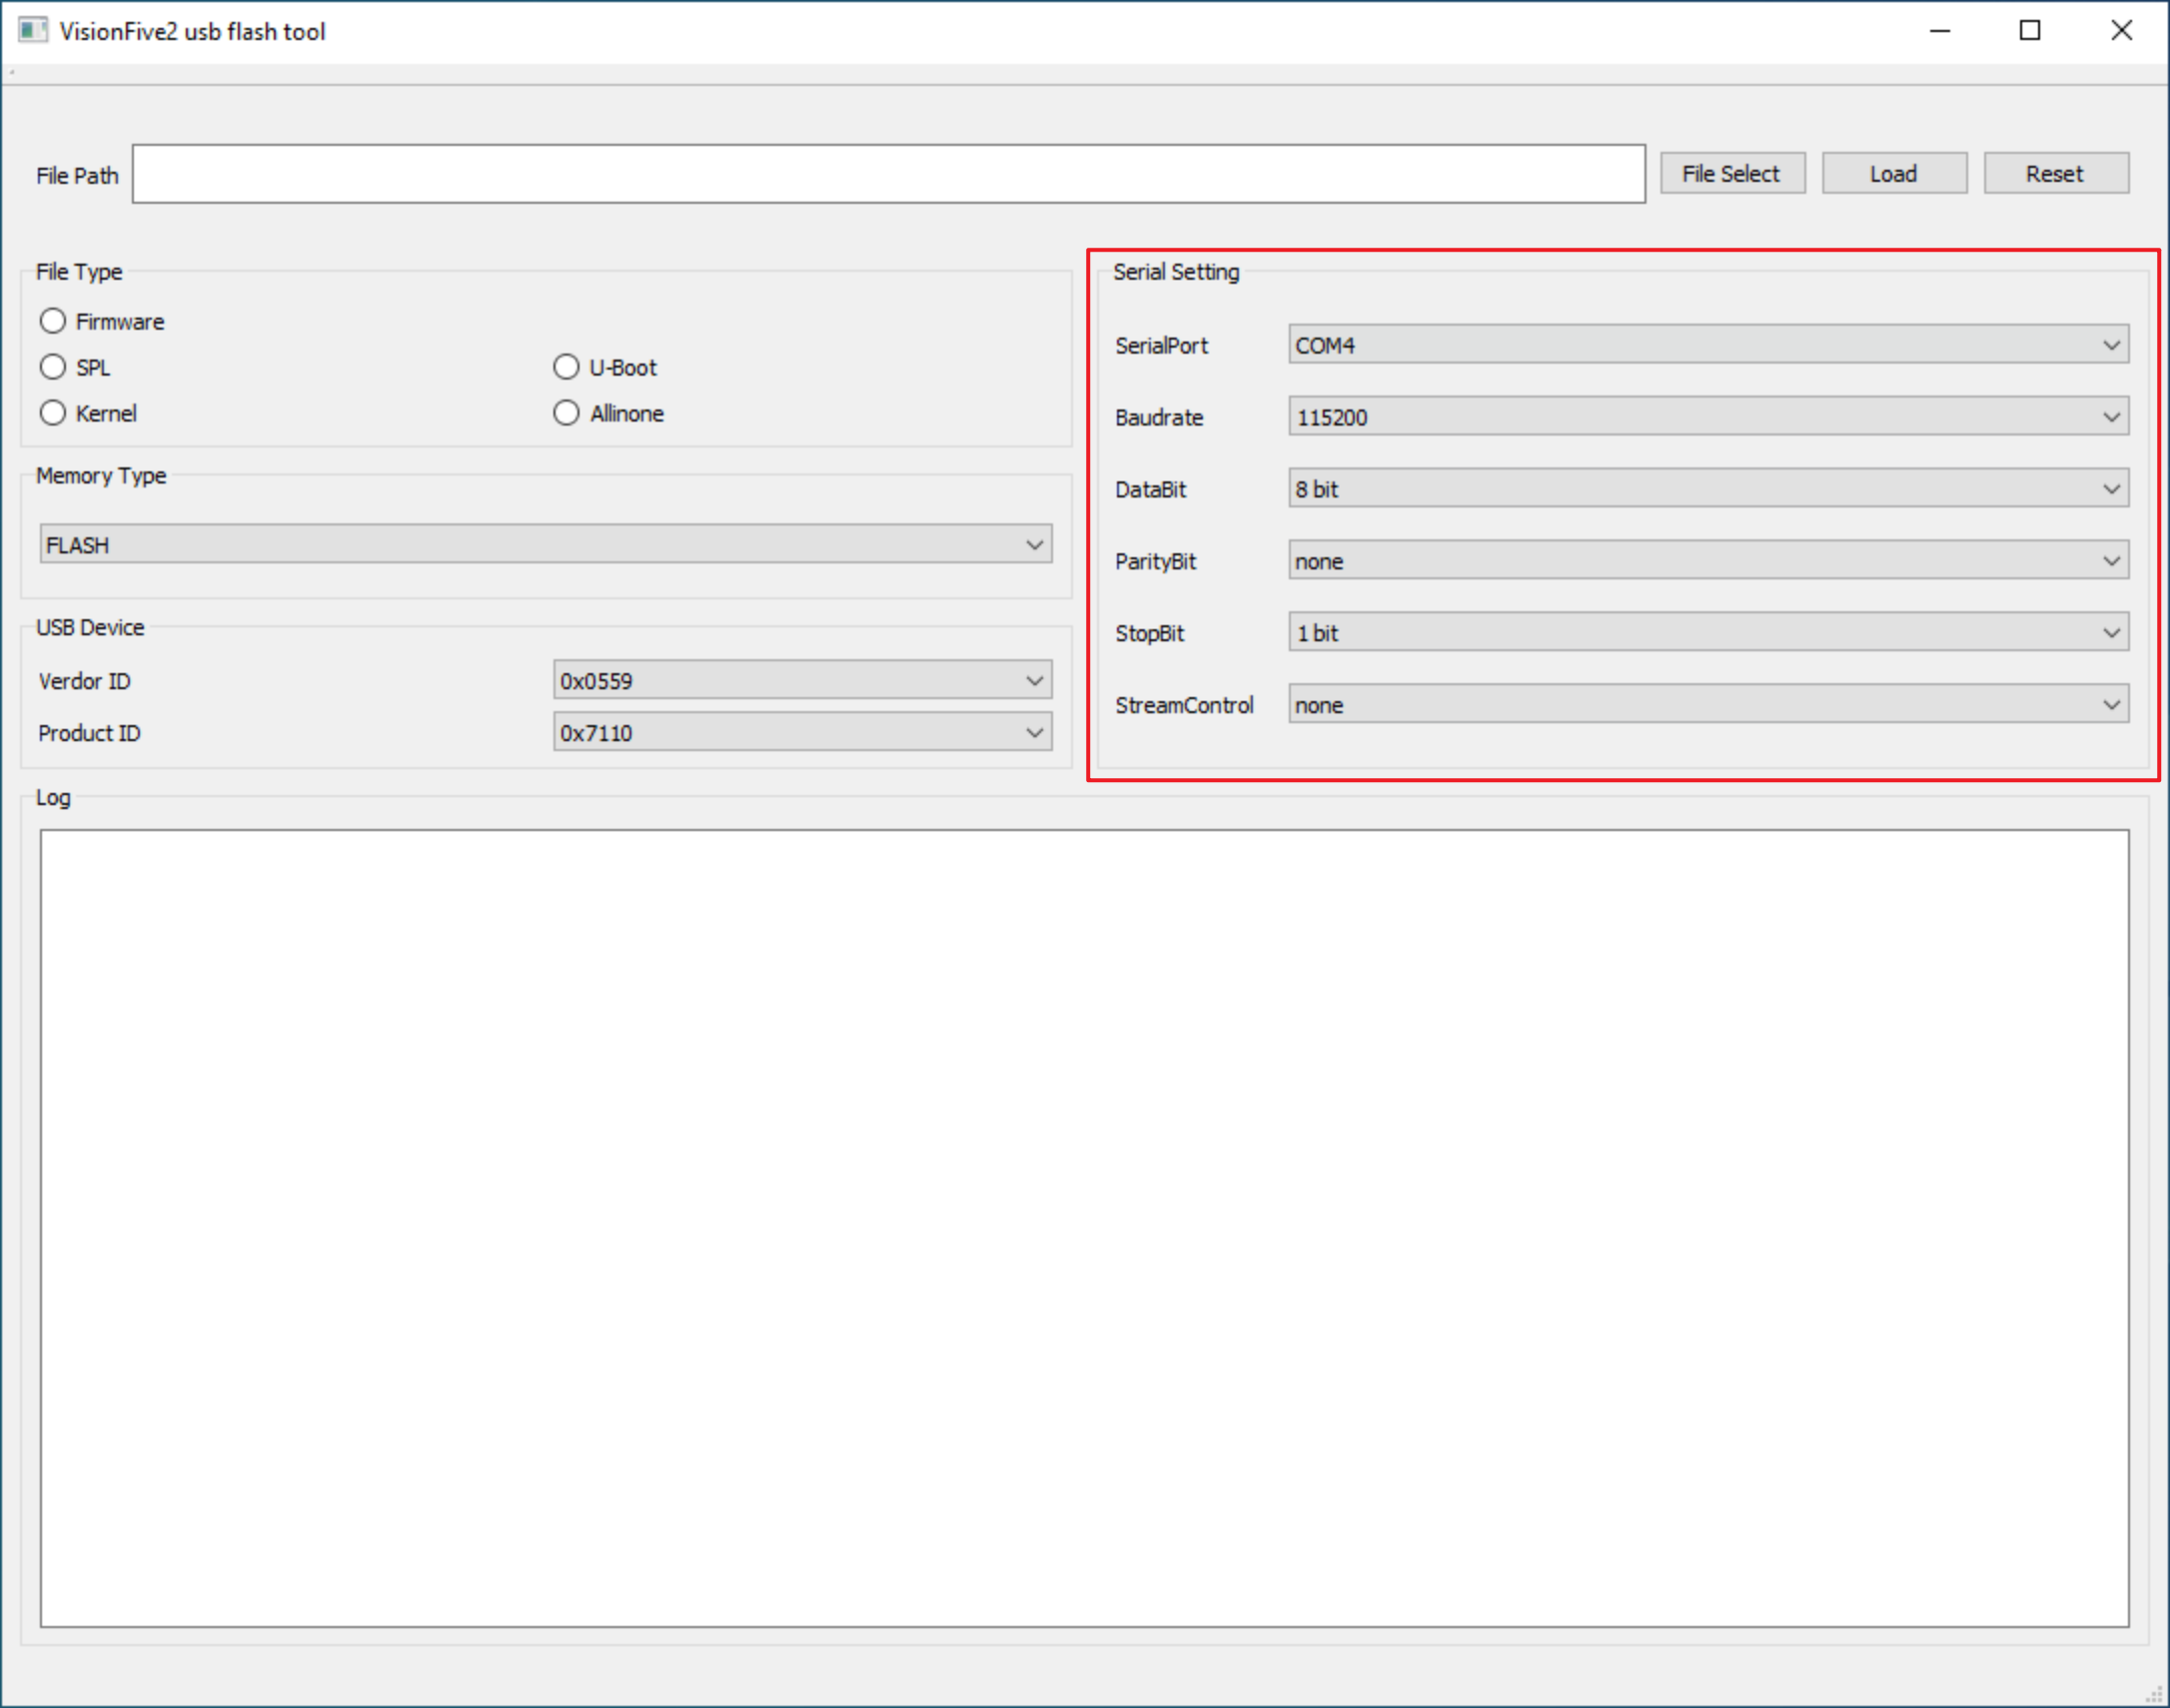
-
Power on the base-board through the 12V DC interface
-
Select
FirmwareinFile Type, then clickFile Selectto select theusbprog-mars-230510.outin theupdatedirectory, then clickLoad, and wait for the messageLoadedto appear after loading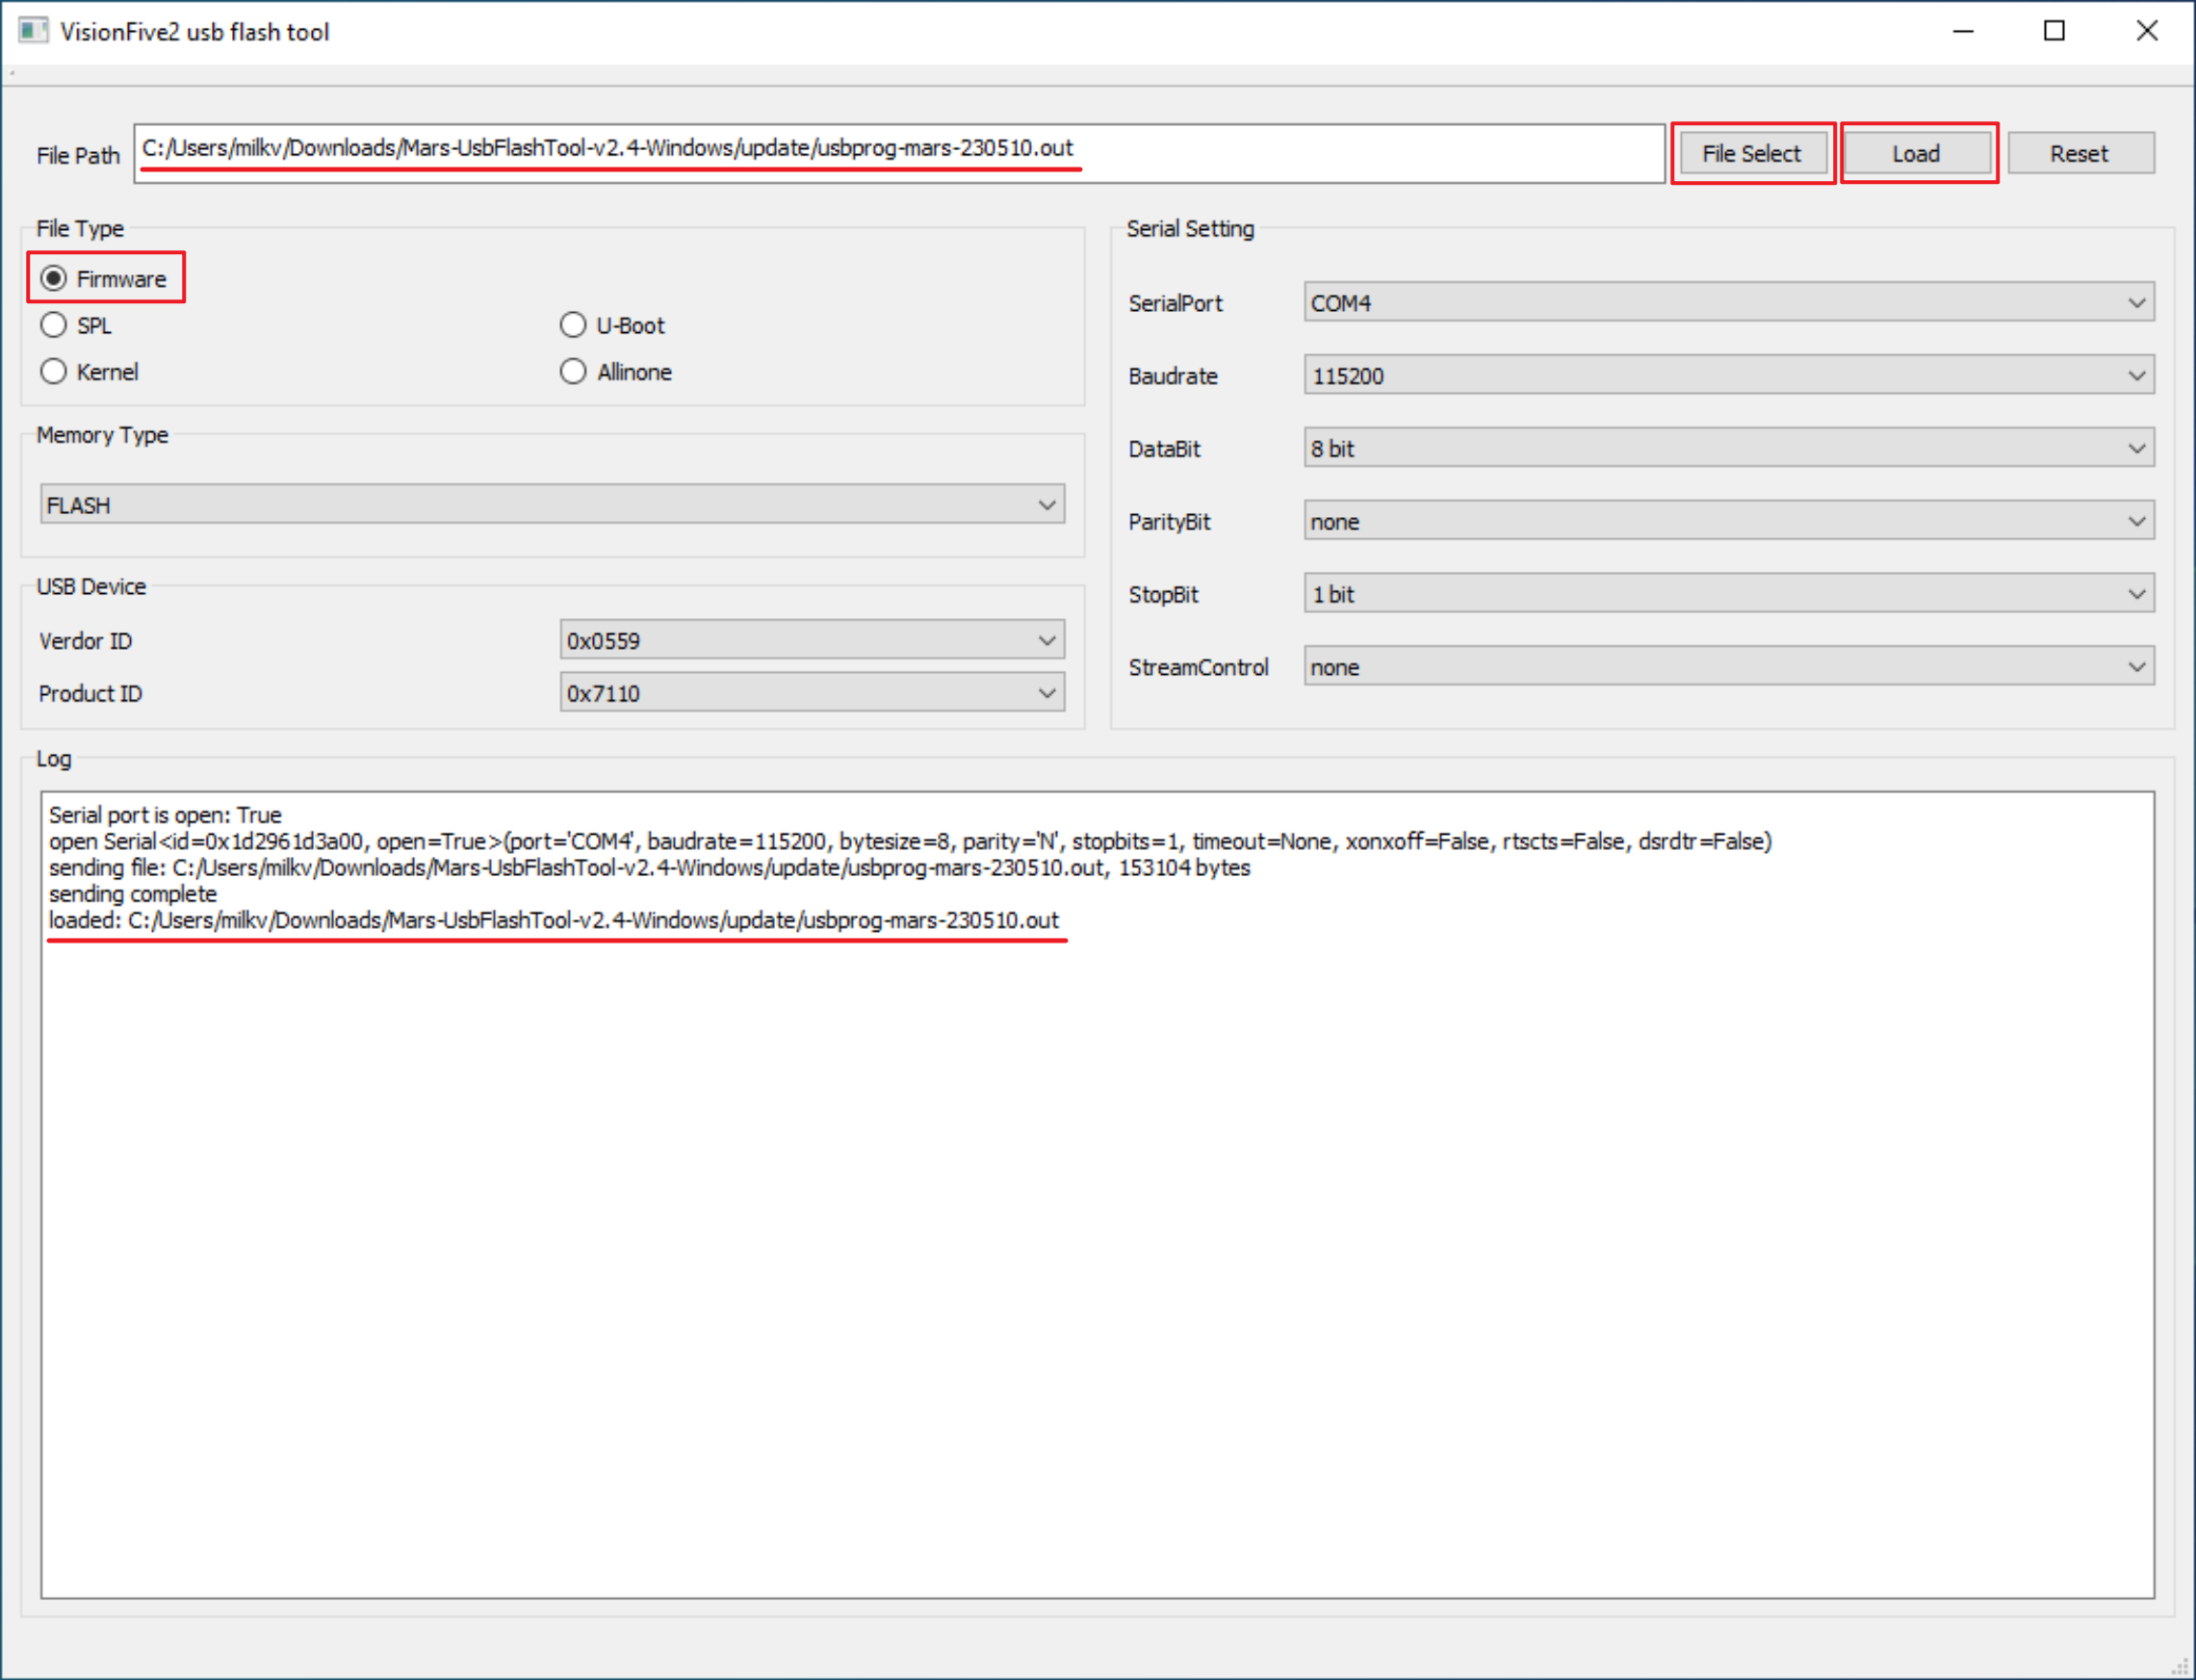
-
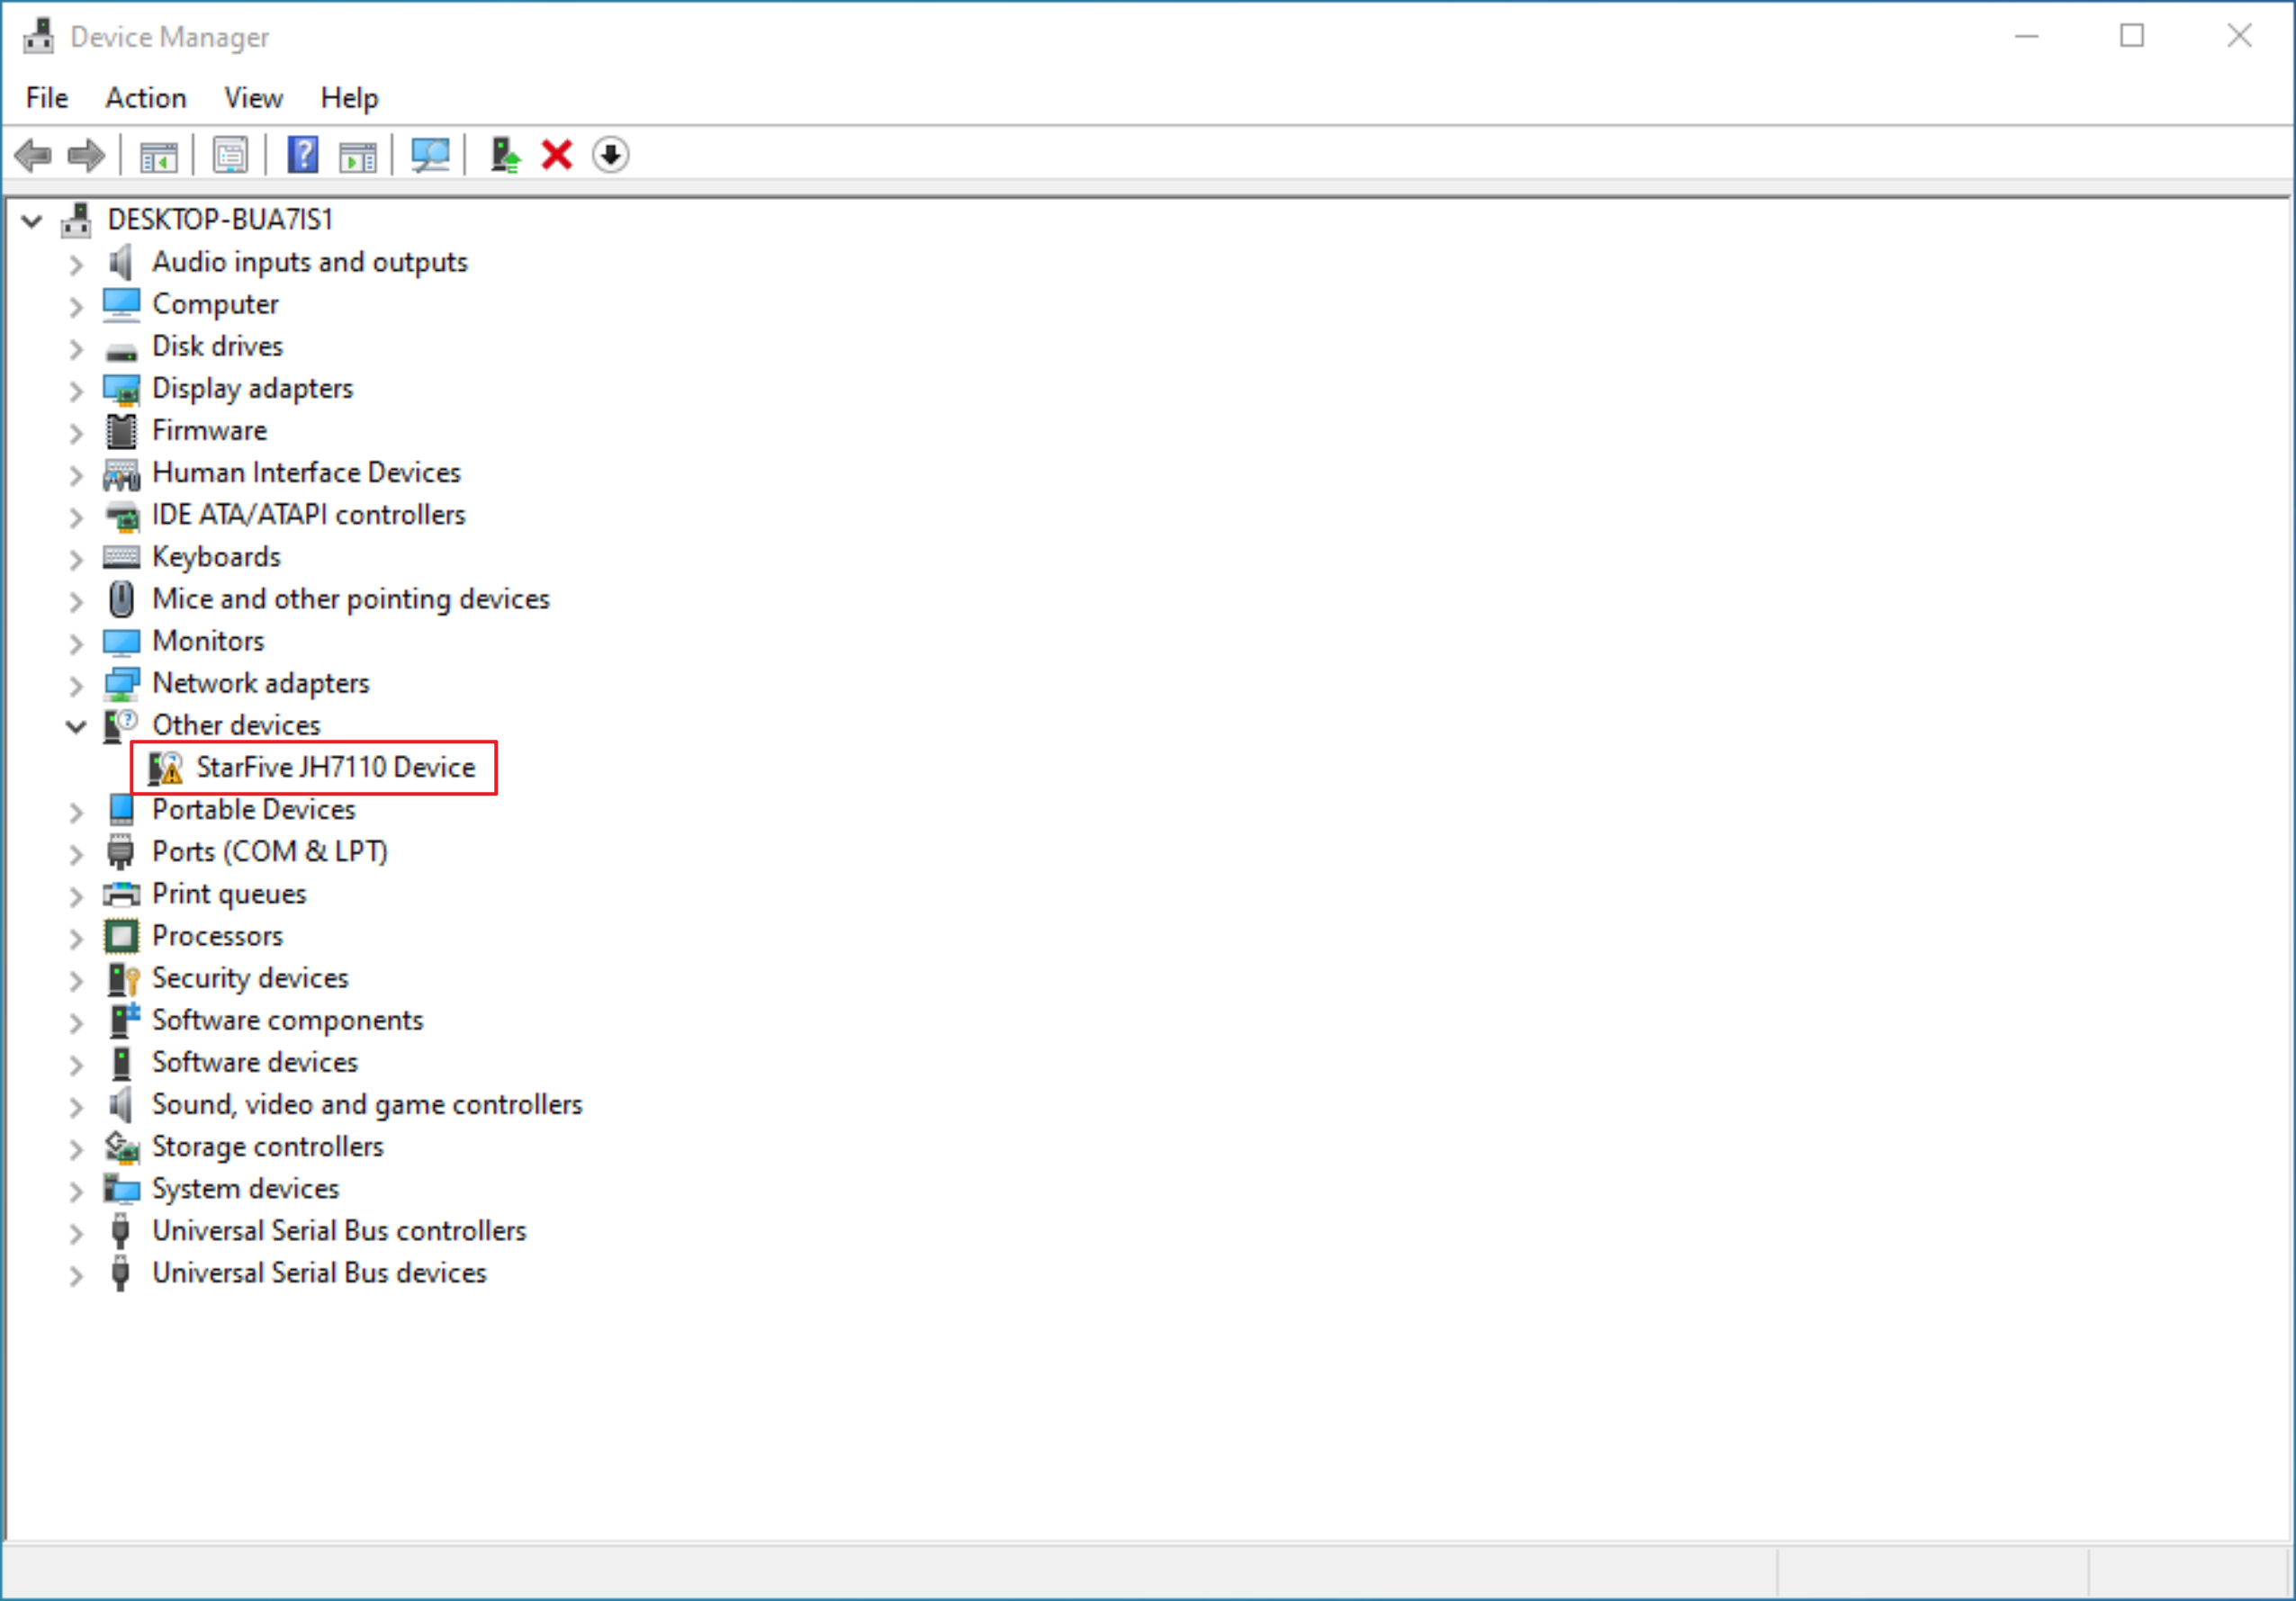
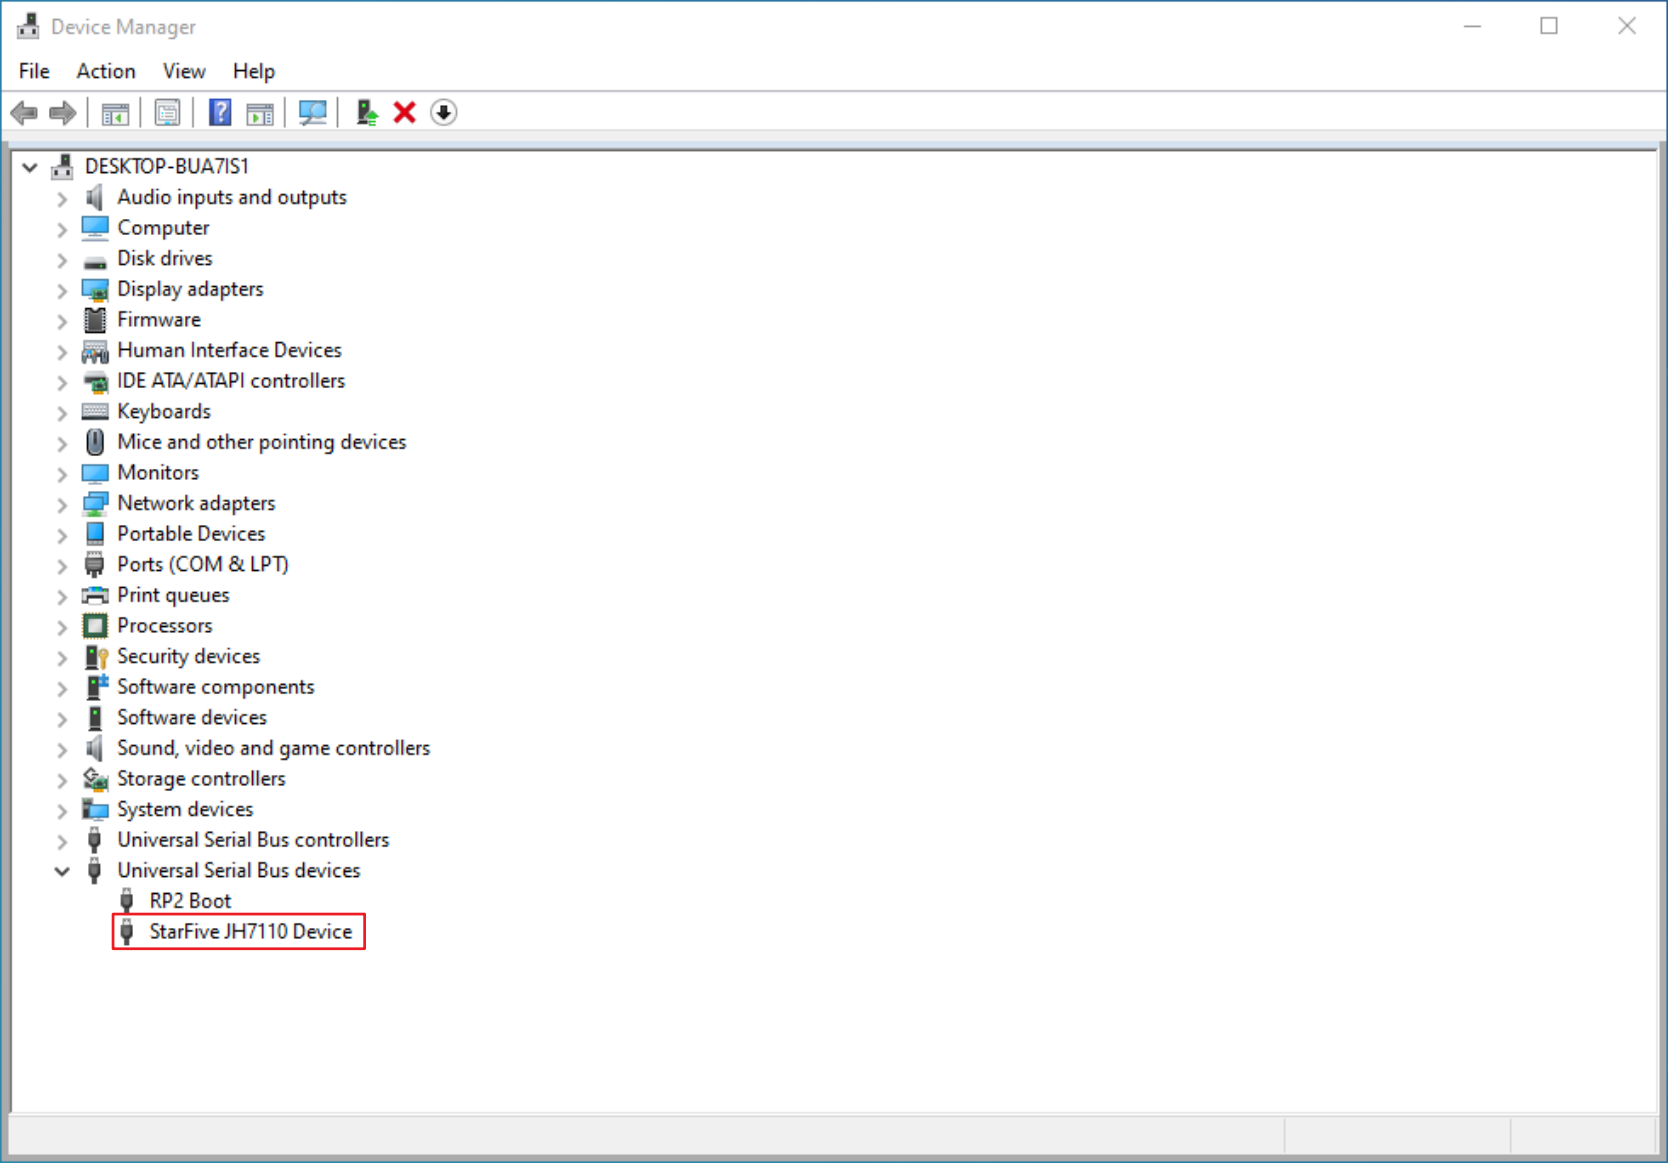
At this time, the JH7110 device has been identified in the Windows Device Manager and the driver needs to be installed
-
Run the
zadig-2.5program in the flashing tool directory, selectList All Devicesin the menuOptions, selectStarFive JH7110 Devicein the drop-down list, and then clickInstall Driverto complete the driver installation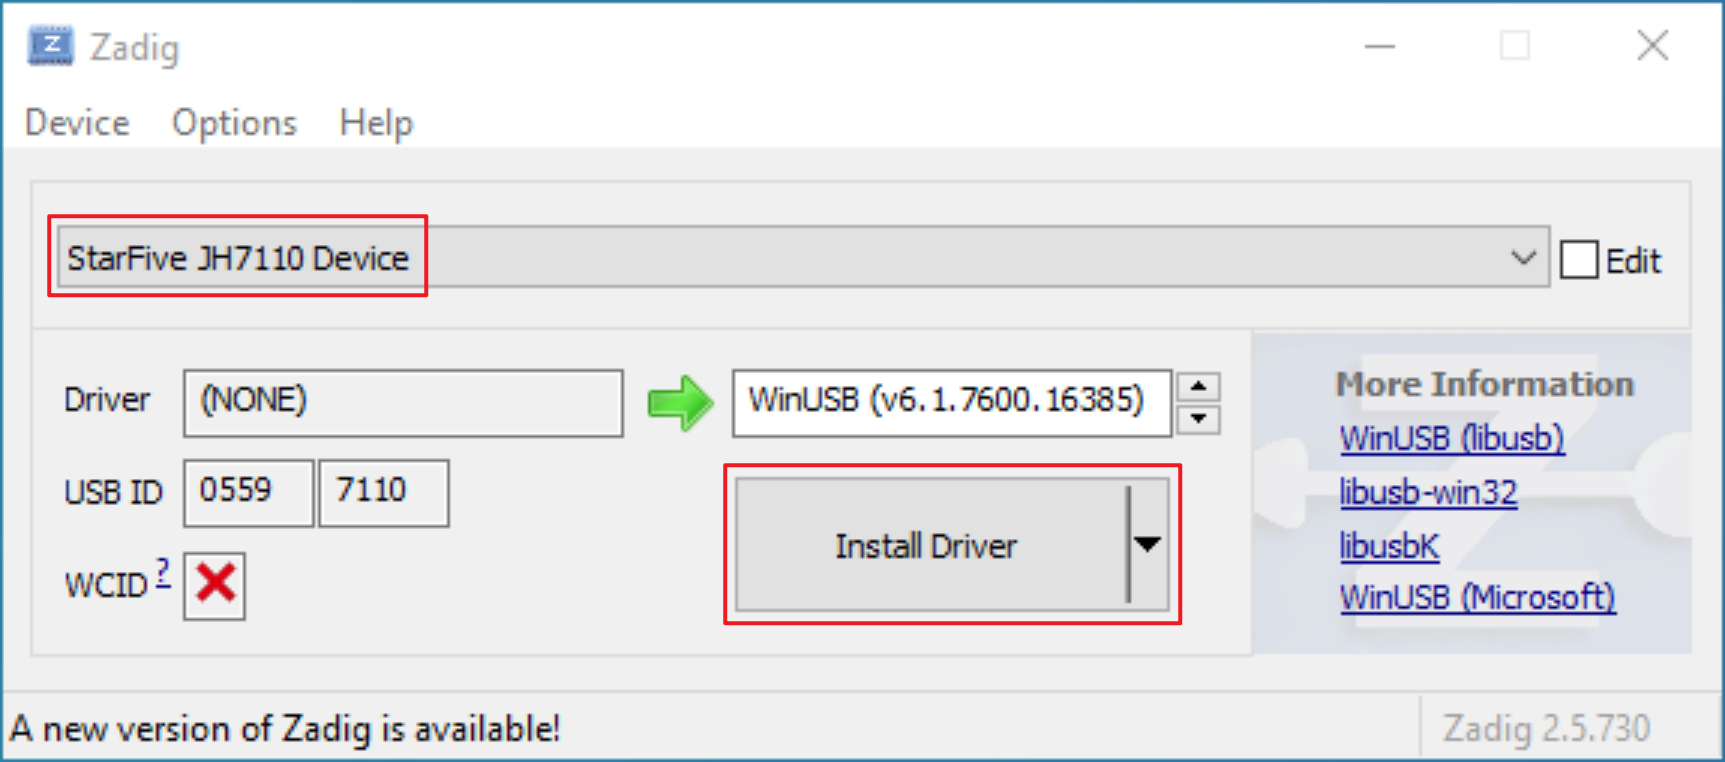
After the driver is successfully installed, check whether the status in the device manager has become a normal USB device
-
After the driver is installed successfully, close the UsbFlashTool window, power off the base-board, and remove the jumper cap in step 2
Burn image
The first 6 steps of burning the image are the same as the first 6 steps of installing the driver above.
-
Connect the USB to TTL serial port cable to the 40 pin header on the base-board, connect the USB to the PC and note down the serial port number
Note: If any other serial port program is open and using the serial port, please exit the program to release the port and avoid occupying it.
-
Short-circuit pins 1 and 2 of the J12 header on the CM4 IO Board using a jumper cap (USB flashing mode)
-
Connect the PC and the base-board's J11 USB Slave interface using a Micro USB data cable
-
Run the
UsbFlashTool-*-Windows.exeflashing program in the flashing tool directory -
Set the serial port number in the
Serial Settingon the right side to the serial port number noted in step 1 -
Power on the base-board through the 12V DC interface
-
Select
FirmwareinFile Type, then clickFile Selectto select theusbprog-mars-230510.outin theupdatedirectory, then clickLoad, and wait for the messageCompleteto appear after loading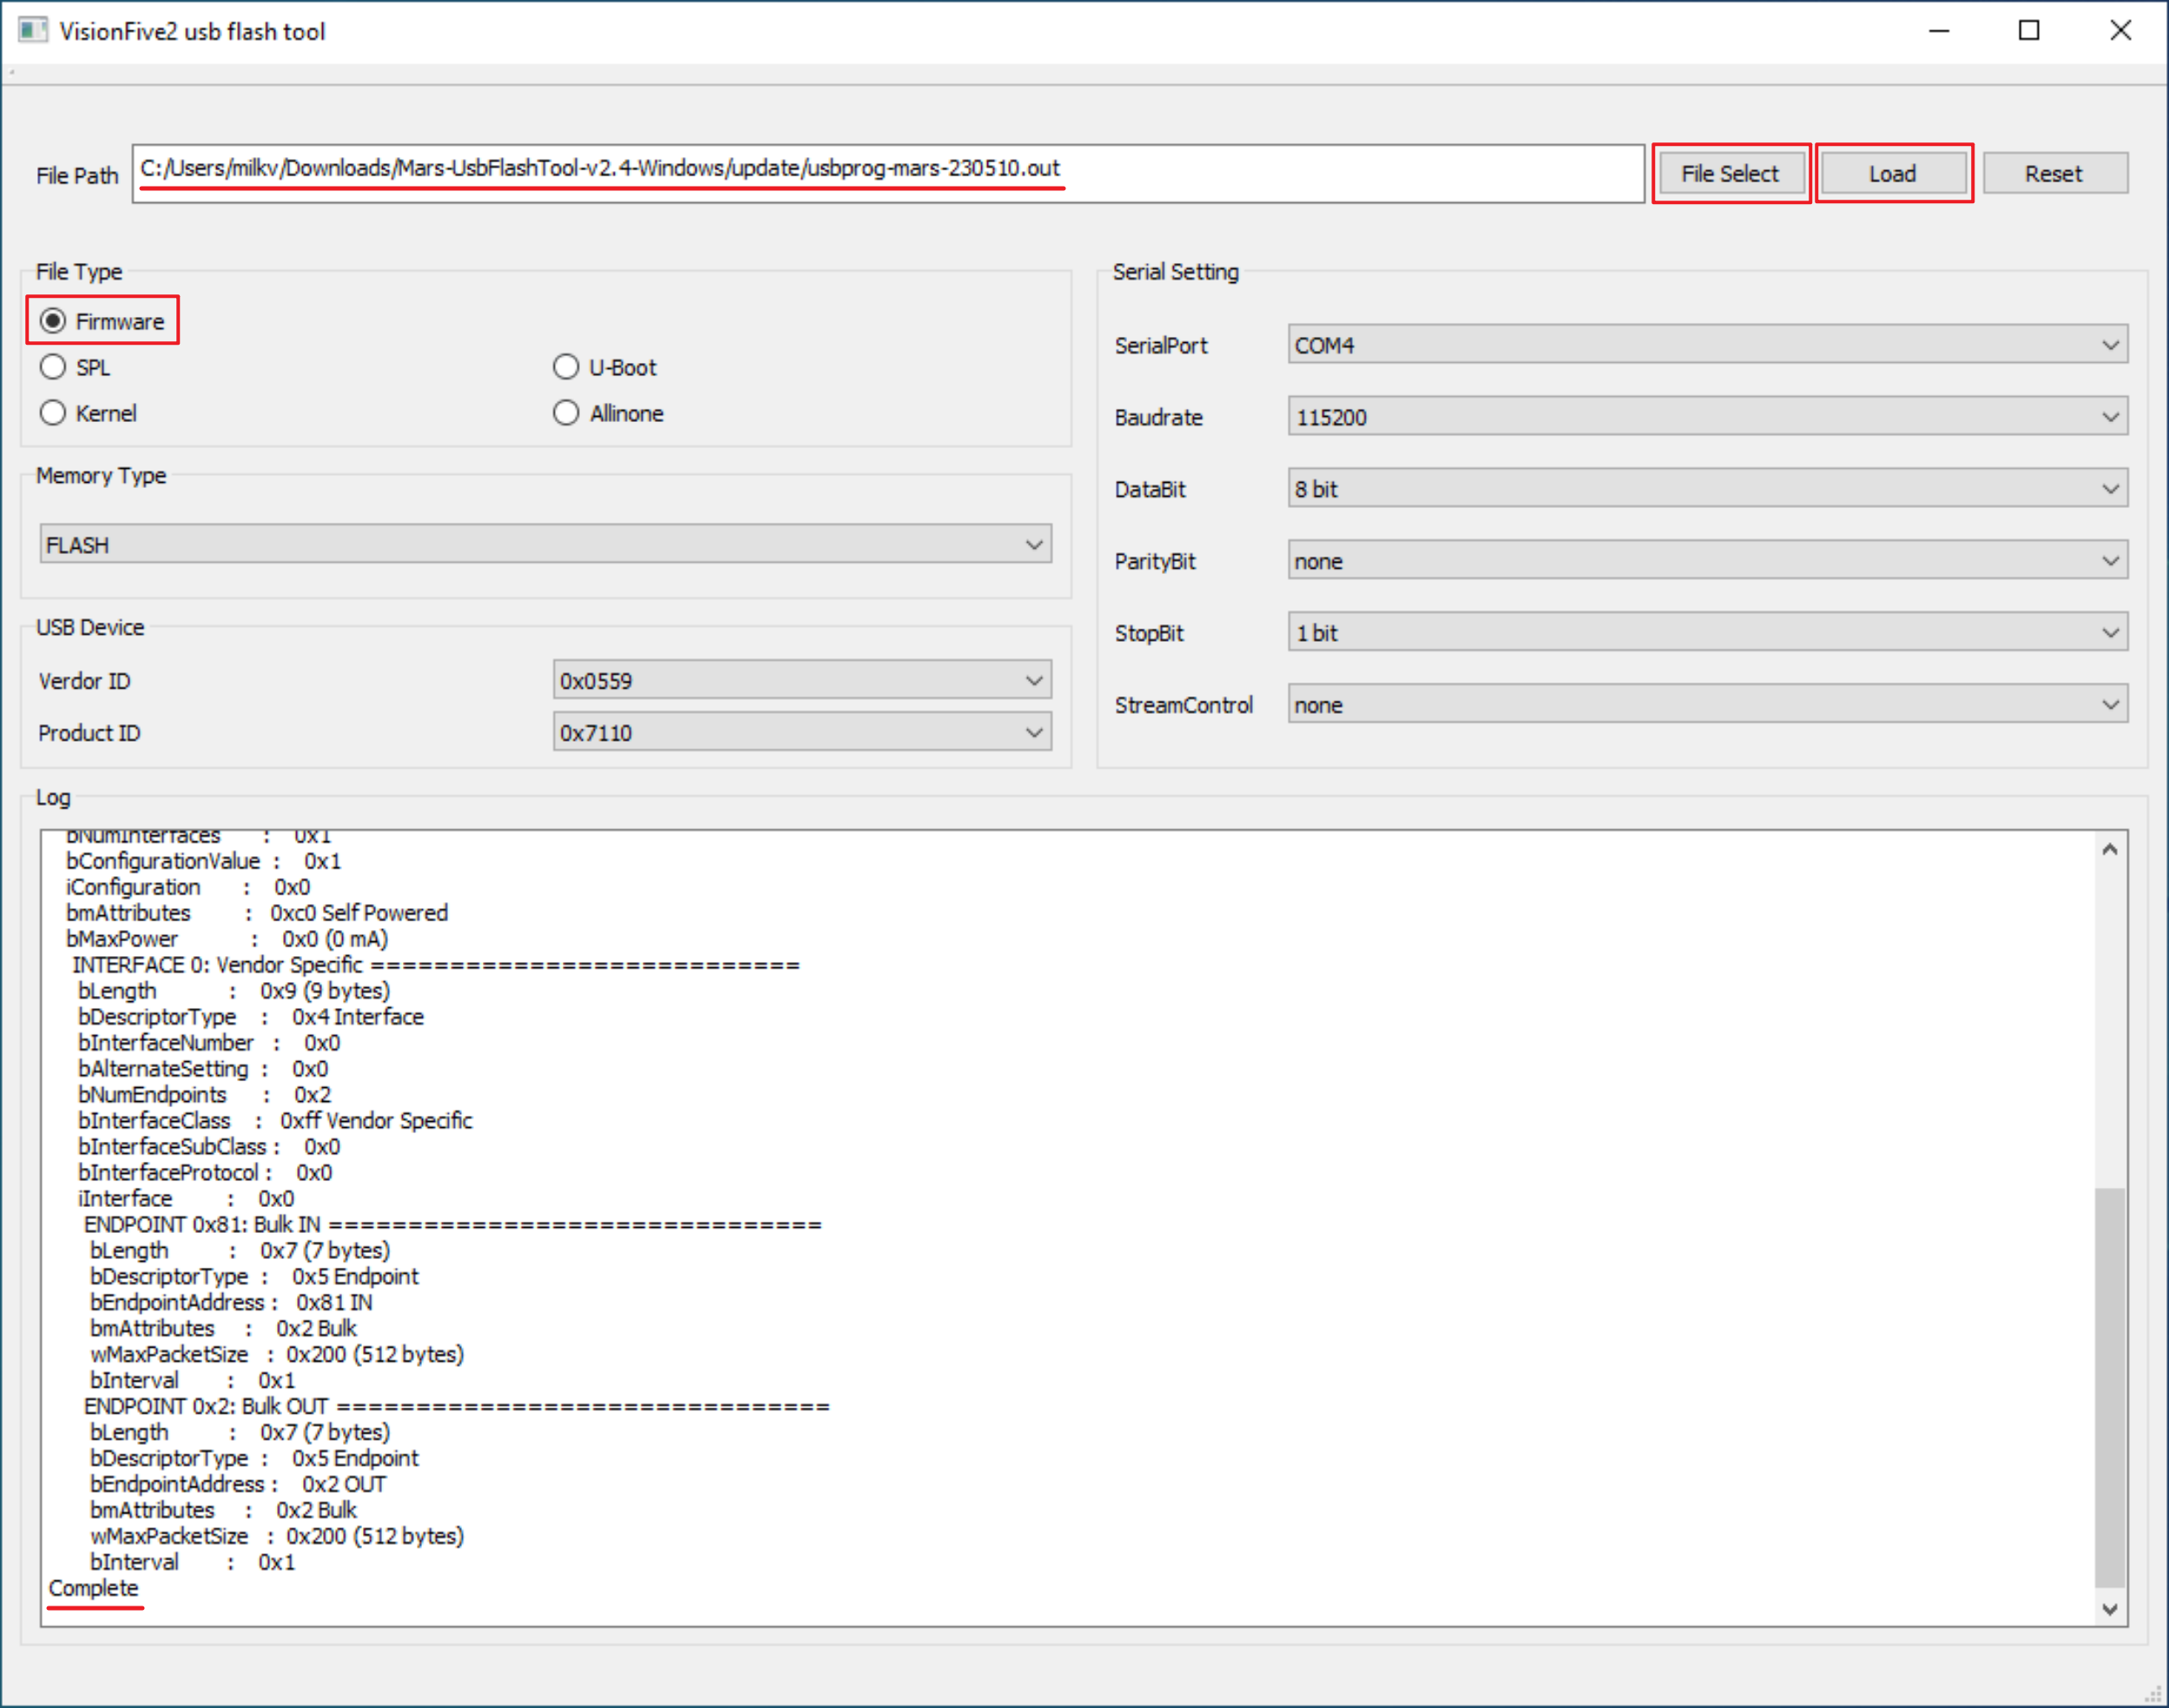
-
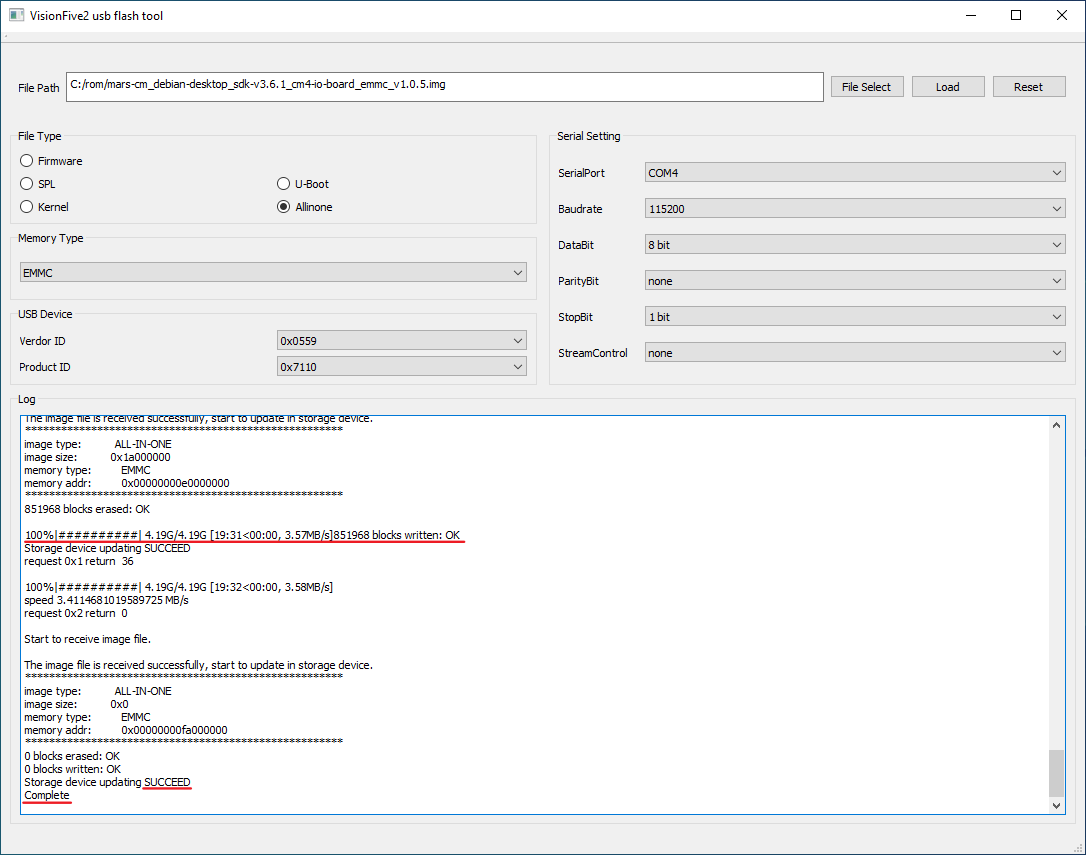
Click
File Selectagain, select the firmware for Mars CM eMMC version, selectAllinoneinFile Type, selectEMMCinMemory Type, and then click Load to start burning the image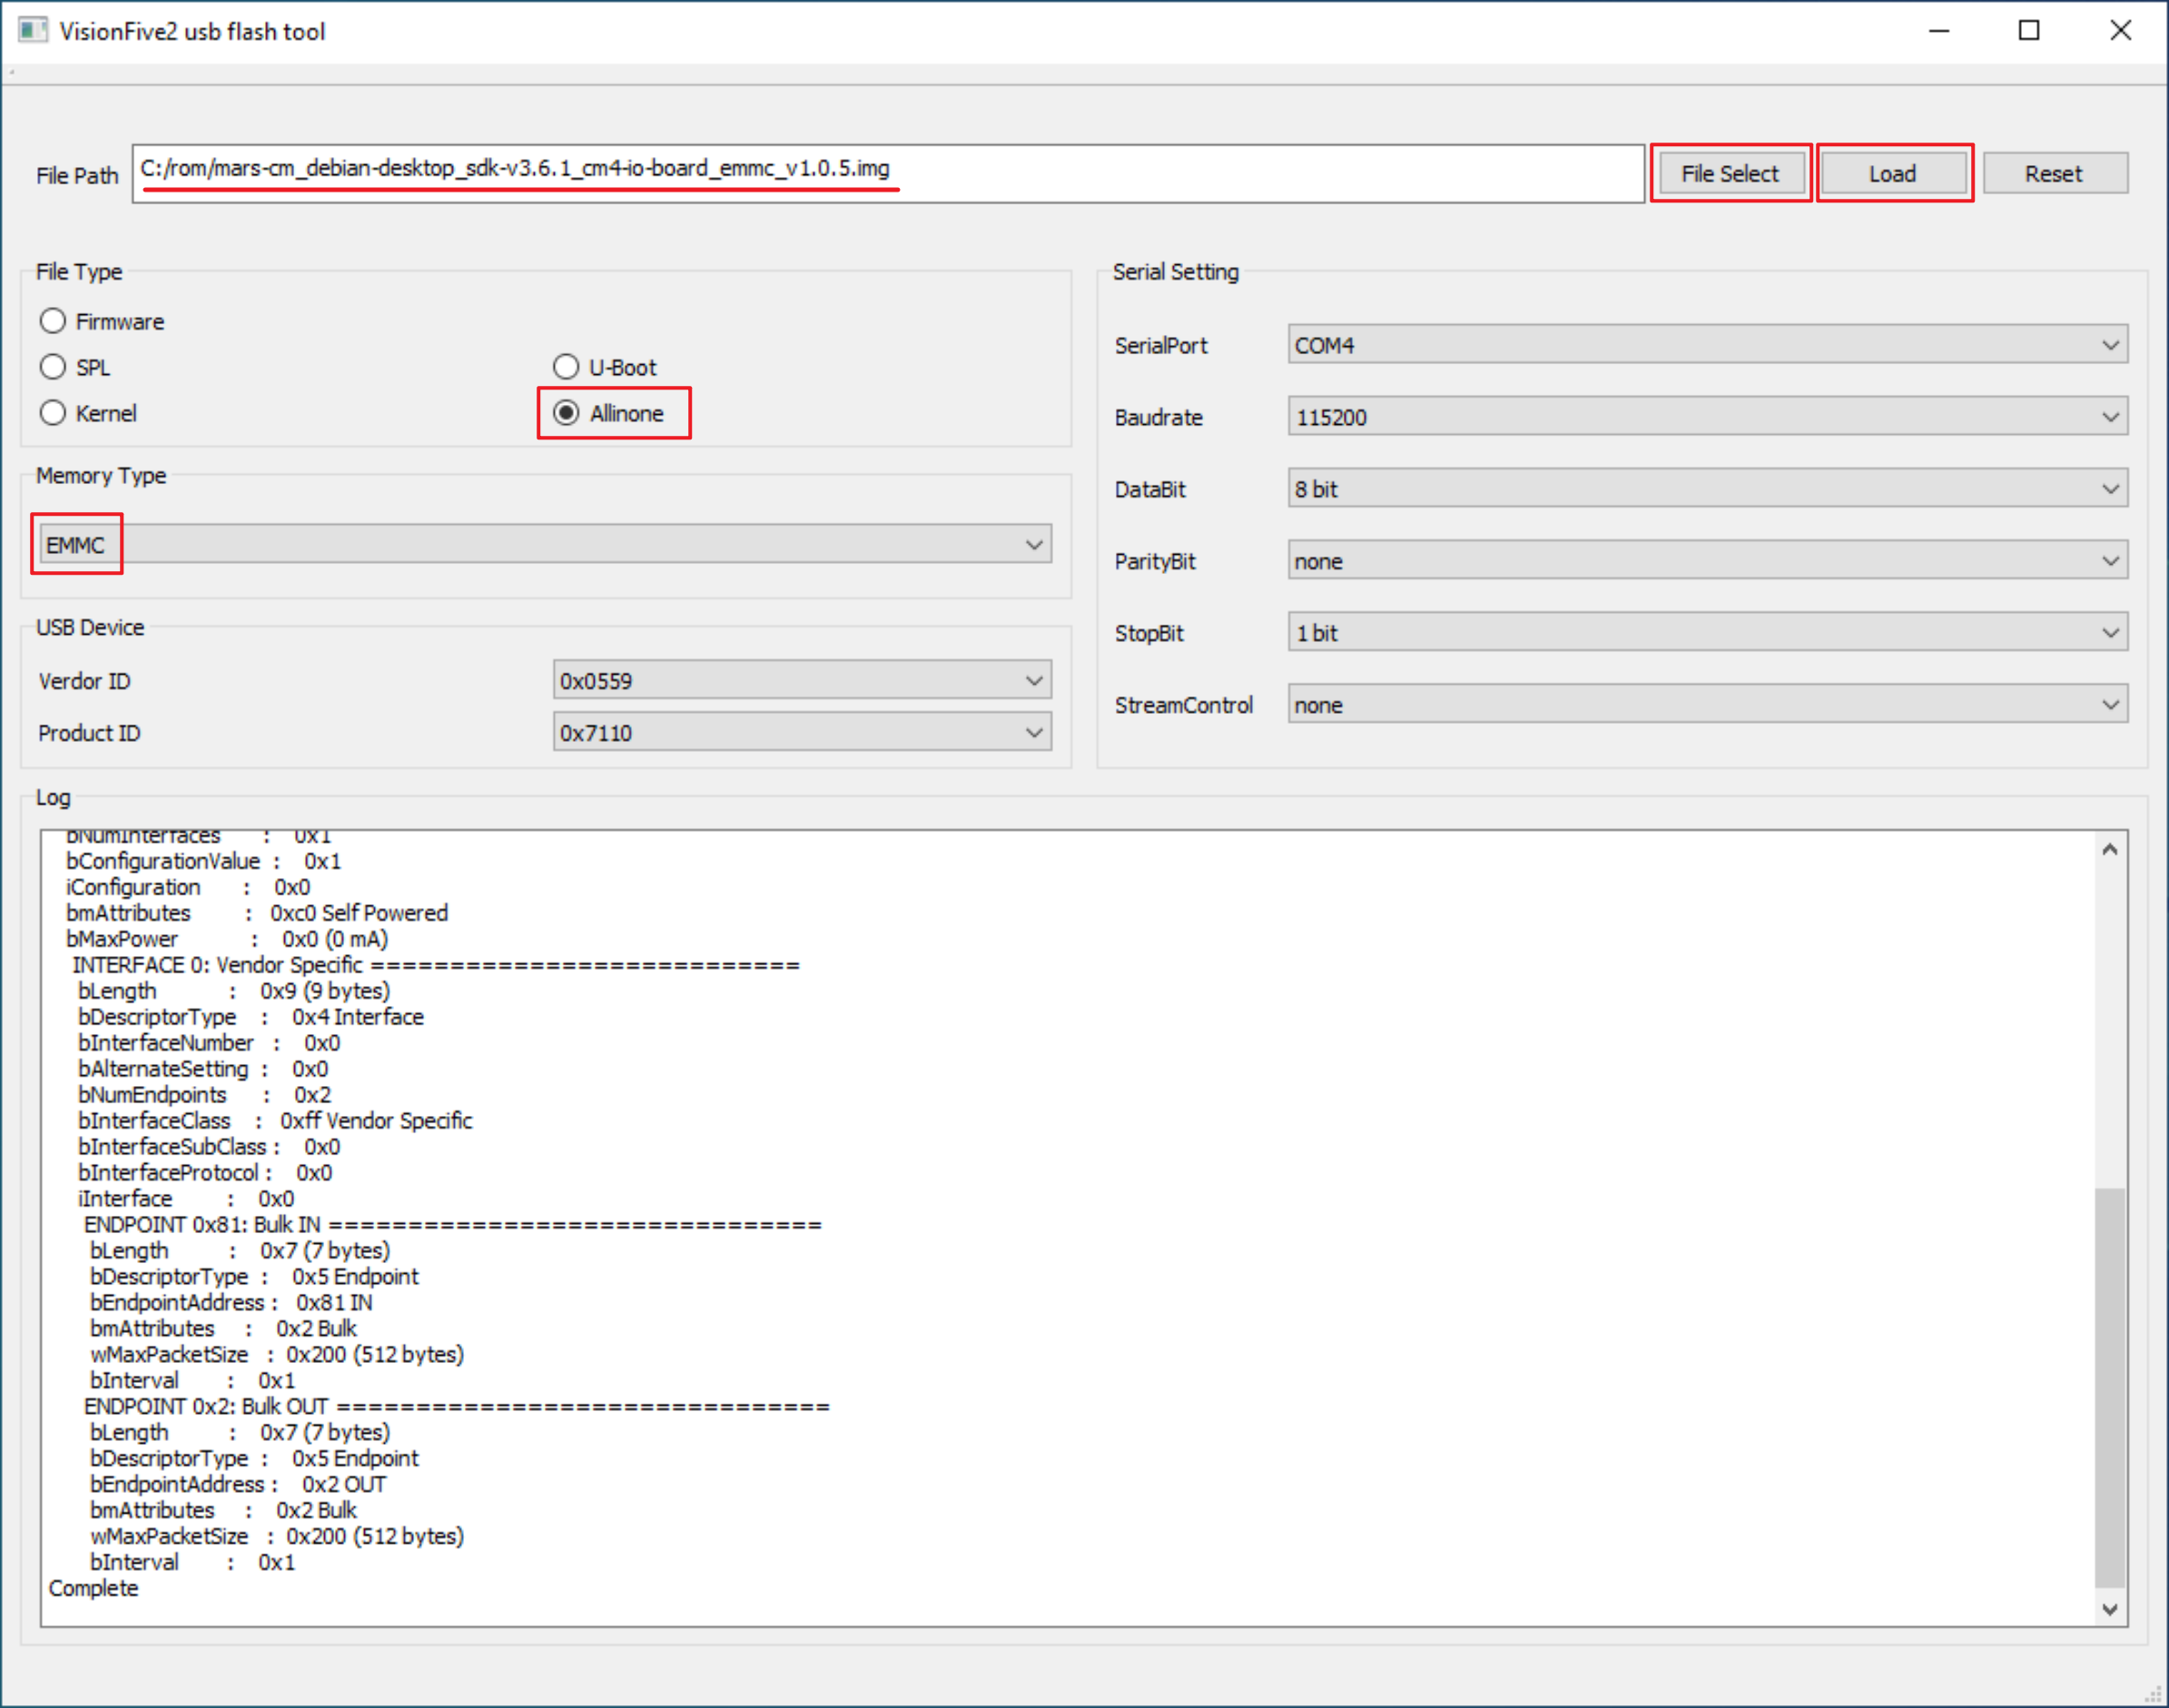
Note that this burning program uses segmented burning, so the progress bar does not scroll in real time. Please wait patiently for a while.
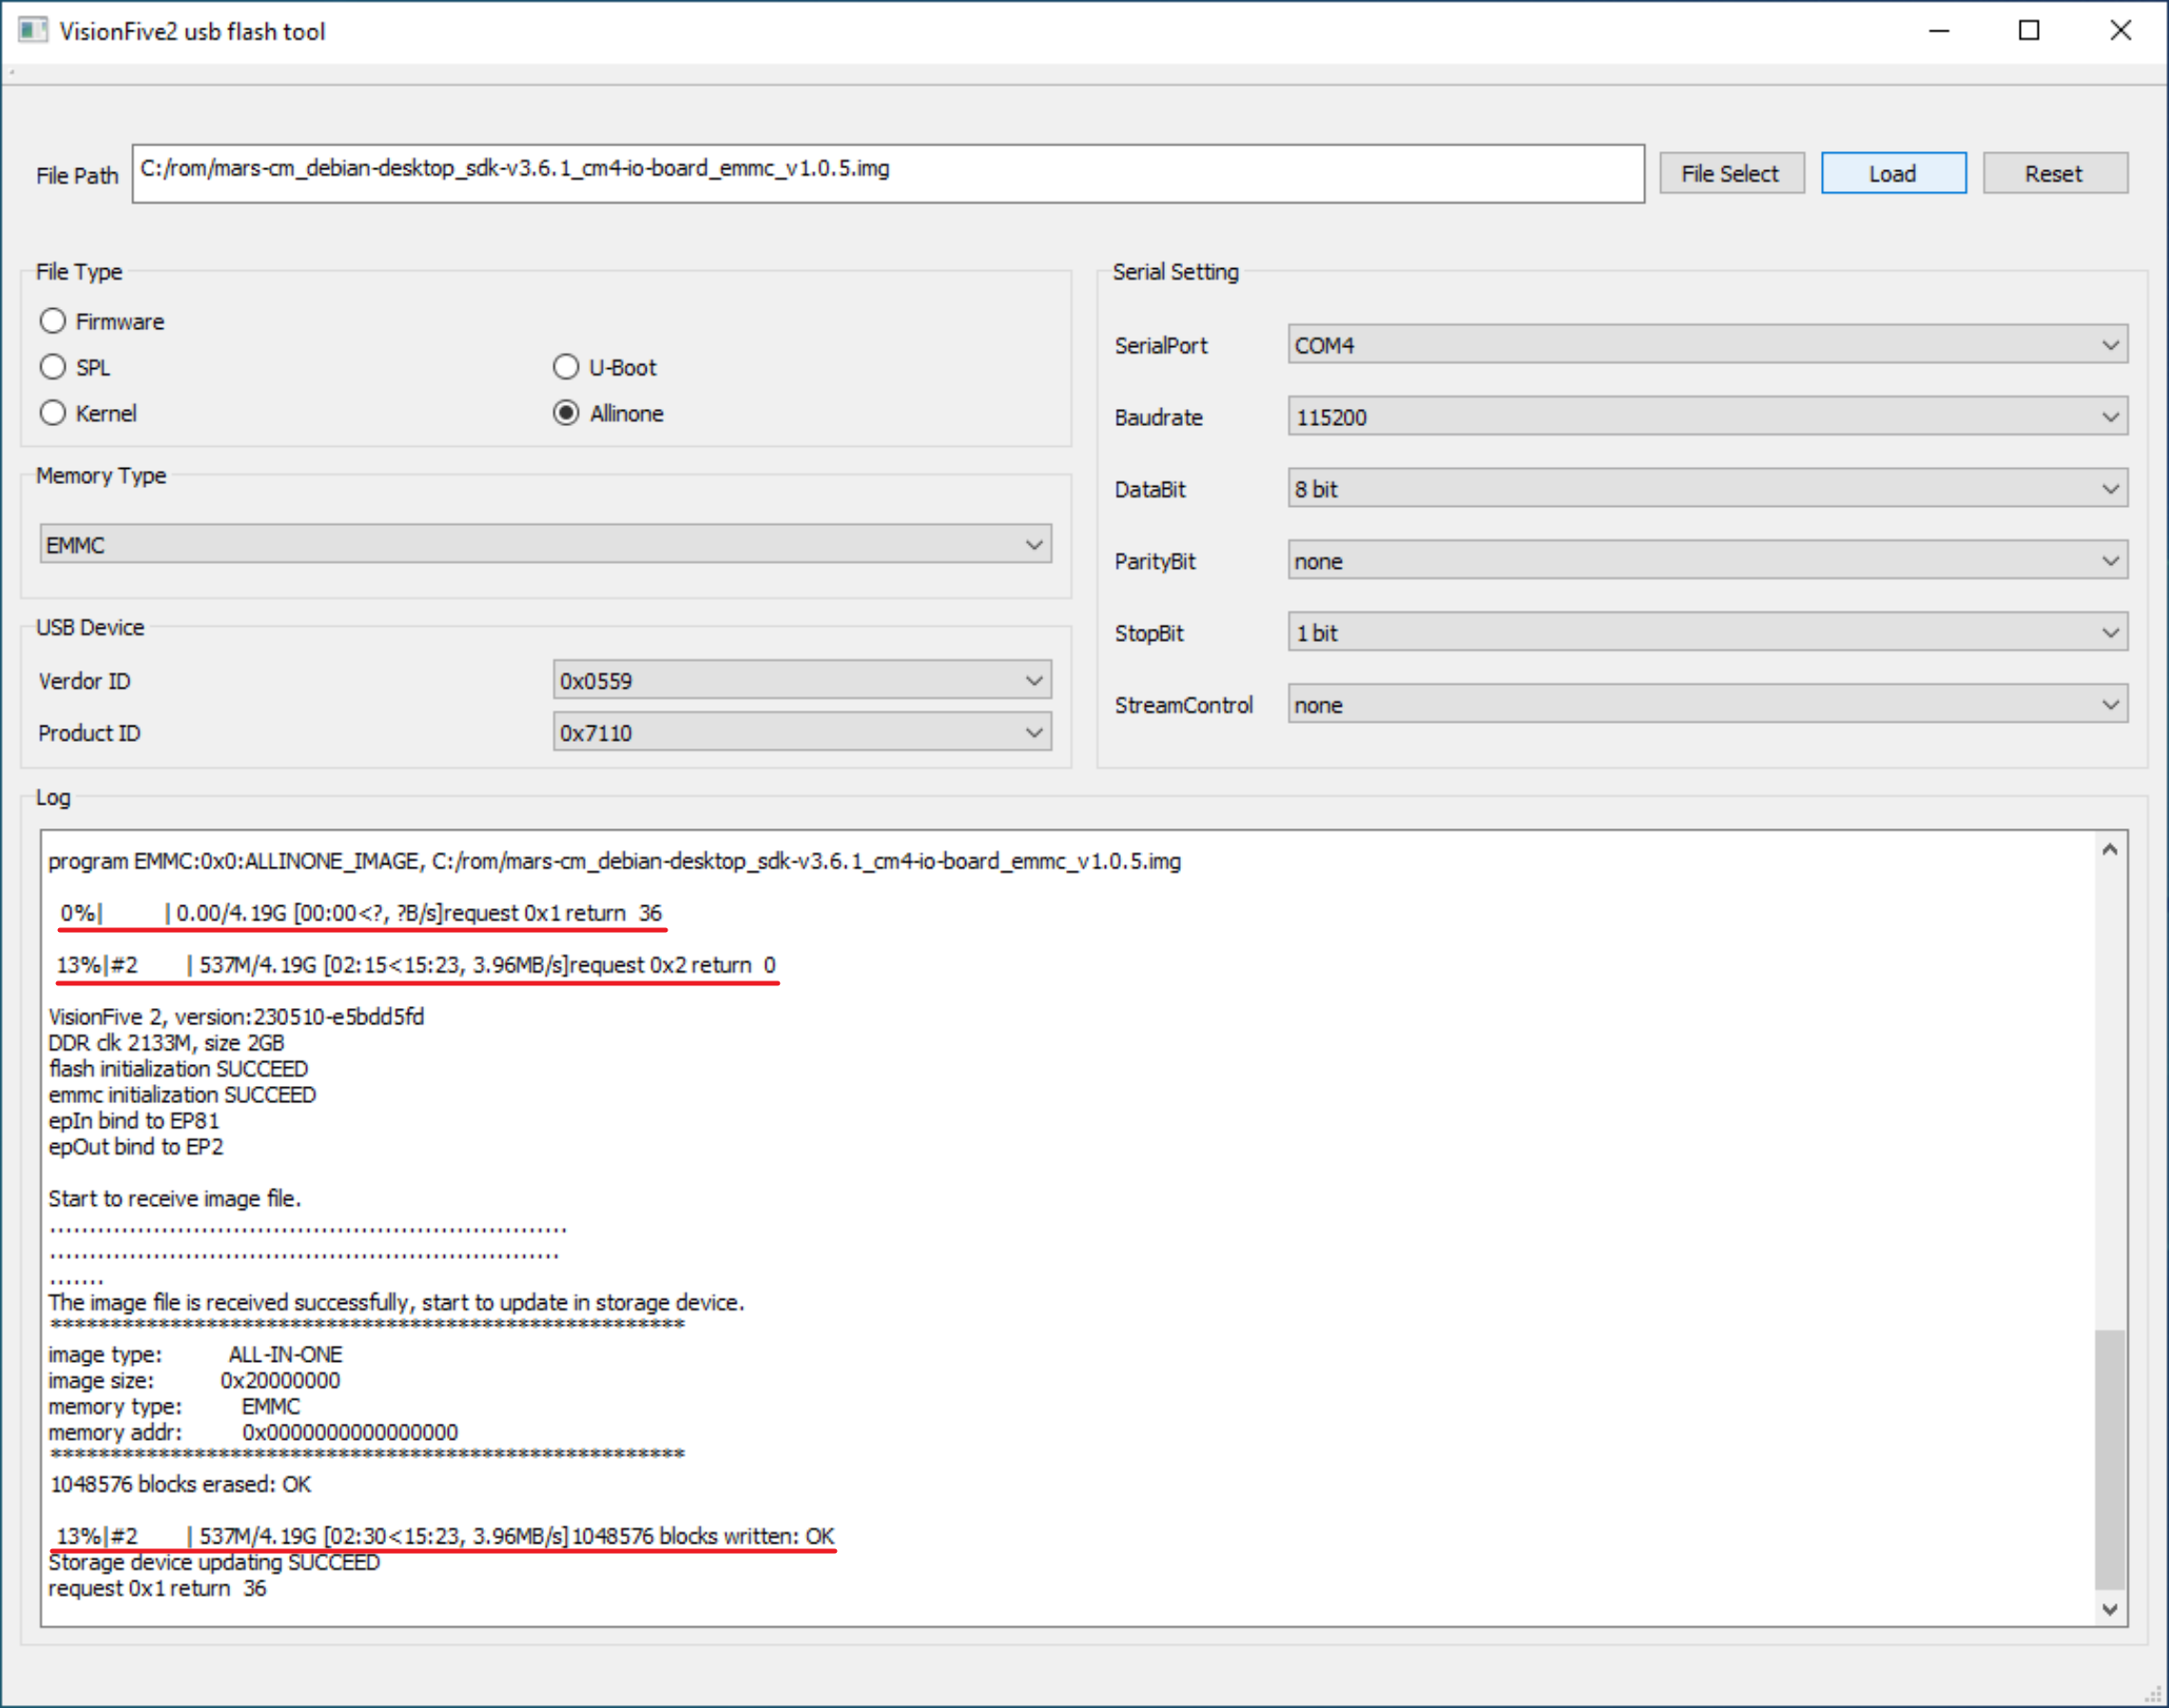
The burning process takes about 10 minutes. When the final prompt is 100% and there is no error message, the burning is complete.
-
After burning is completed, close the UsbFlashTool window, power off the base-board, and remove the jumper cap in step 2
Power on
Connect the base-board to the monitor with an HDMI cable. Note that Mars CM only has one HDMI signal, so the HDMI cable is connected to HDMI0 on the CM4 IO Board.
Power on the 12V DC interface of the base-board. After waiting for the system to start, the green LED on the Mars CM starts to flash, and the Debian login interface will be displayed on the monitor.
Mars CM Lite version image burning
The Lite version does not come with eMMC and needs to burn the firmware to the SD card. The burning method is the same as the image burning method for other development boards such as Raspberry Pi and Mars.
Prepare
- Necessary
- Mars CM Lite
- Raspberry Pi CM4 IO Board or other Raspberry Pi CM4 compatible base-board
- microSD card with a capacity of 8GB or above
- microSD card reader
- Optional
- USB to TTL serial cable
- HDMI cable
Download image and burning tools
- Download the Debian system image: Official Image
- Download the burning tool: balenaEtcher or Rufus
Burn image
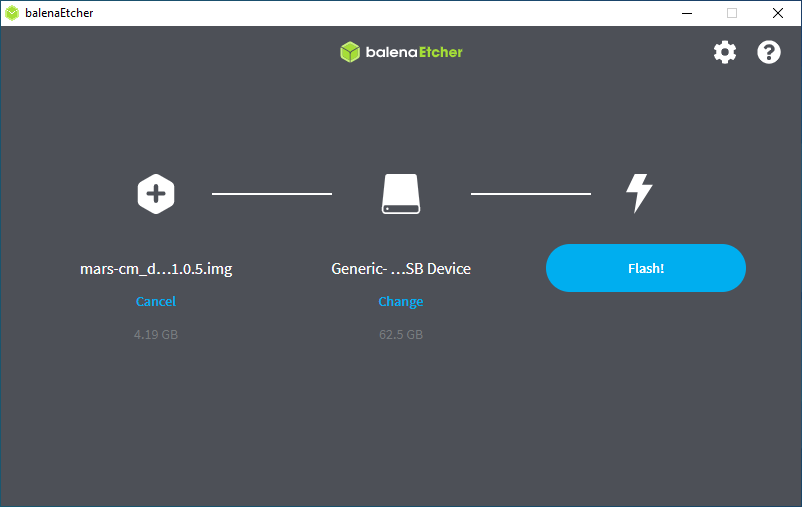
Take burning using the balenaEtcher tool as an example:
- Click Flash from file to select the system image
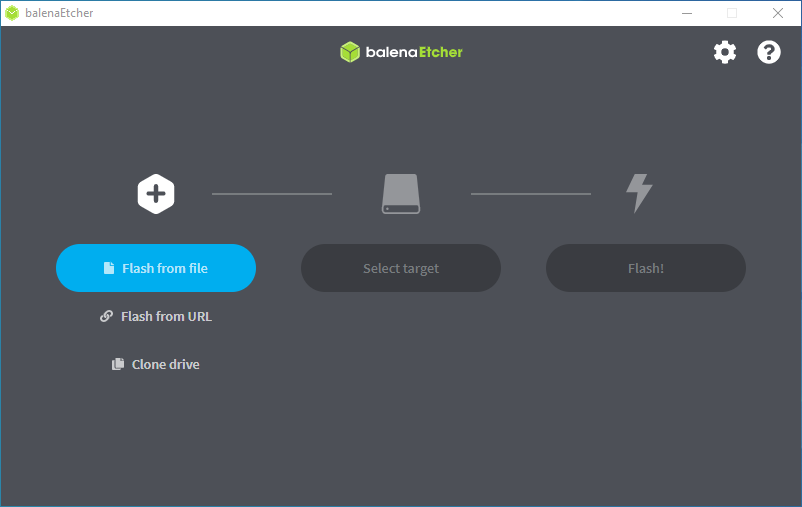
- Click Select target to select the target SD card
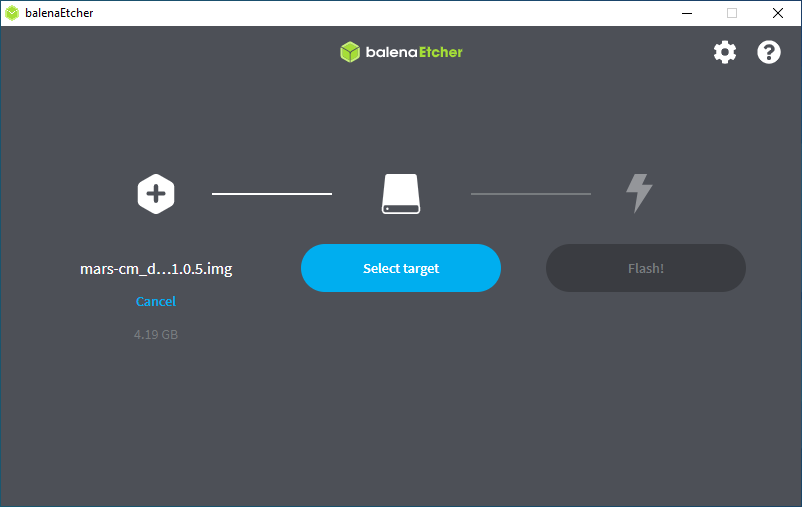
- Click Flash! to start burning
Power on
Install the Mars CM core board onto the base-board of the Raspberry Pi CM4 IO Board and connect the monitor with an HDMI cable. Note that Mars CM only has one HDMI signal, so the HDMI cable is connected to HDMI0 on the base board.
Insert the microSD card with the above burned image into the card slot of the base-board.
Power on the 12V DC interface of the base-board. After waiting for the system to start, the green LED on the Mars CM starts to flash, and the Debian login interface will be displayed on the monitor.
Troubleshooting
If you have a problem, go to our community and post to let us know.


