Set up the working environment
Milk-V Vega offers multiple connection and management methods:
- WEB (Backend administration interface)
- SSH/Telnet (Manual activation required)
- UART
- JTAG
This guide uses Milk-V Mars to demonstrate the setup of Milk-V Vega. You can also set up Milk-V Vega using a PC device with a network interface.
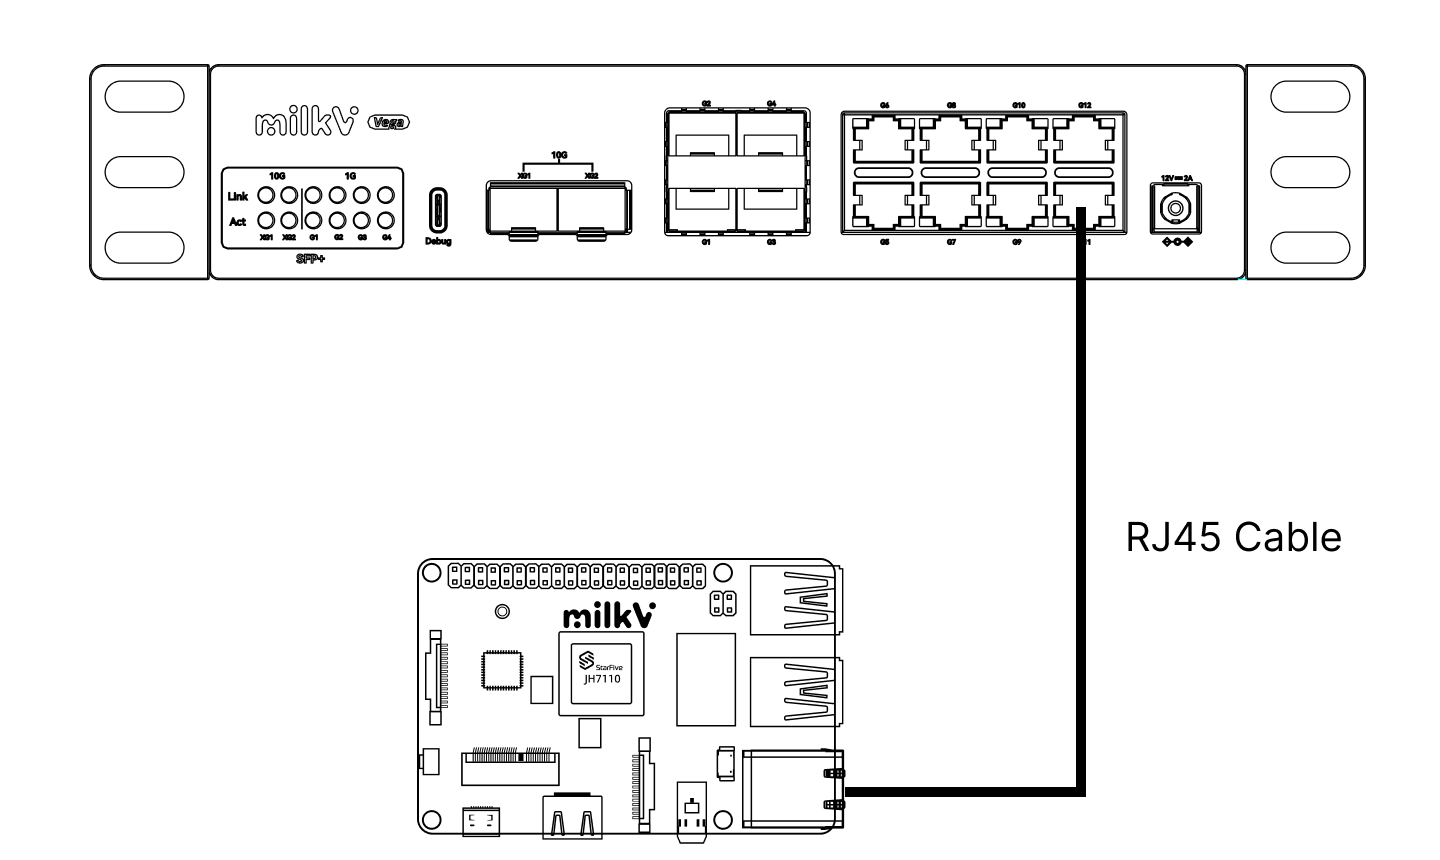
Connect Milk-V Vega
Please use an Ethernet cable to connect the host device (Milk-V Mars) directly to the Milk-V Vega (RJ45 is used here as an example)
WEB
To connect to the WEB management interface, place your device in the same network segment as Milk-V Vega.
After the connection, configure the host device's(Milk-V Mars) Ethernet as follows:
IP Address: 192.168.40.1
Subnet mask: 255.255.255.0
Default gateway:NULL
Milk-V Mars‘s (Host Device) IP Address must not be 192.168.40.253
After waiting for the settings to take effect, your host device(Milk-V Mars) will be able to connect to Milk-V Vega.
By default, you can check the connection to Milk-V Vega using the command(Host Device/Milk-V Mars) ping 192.168.40.253.
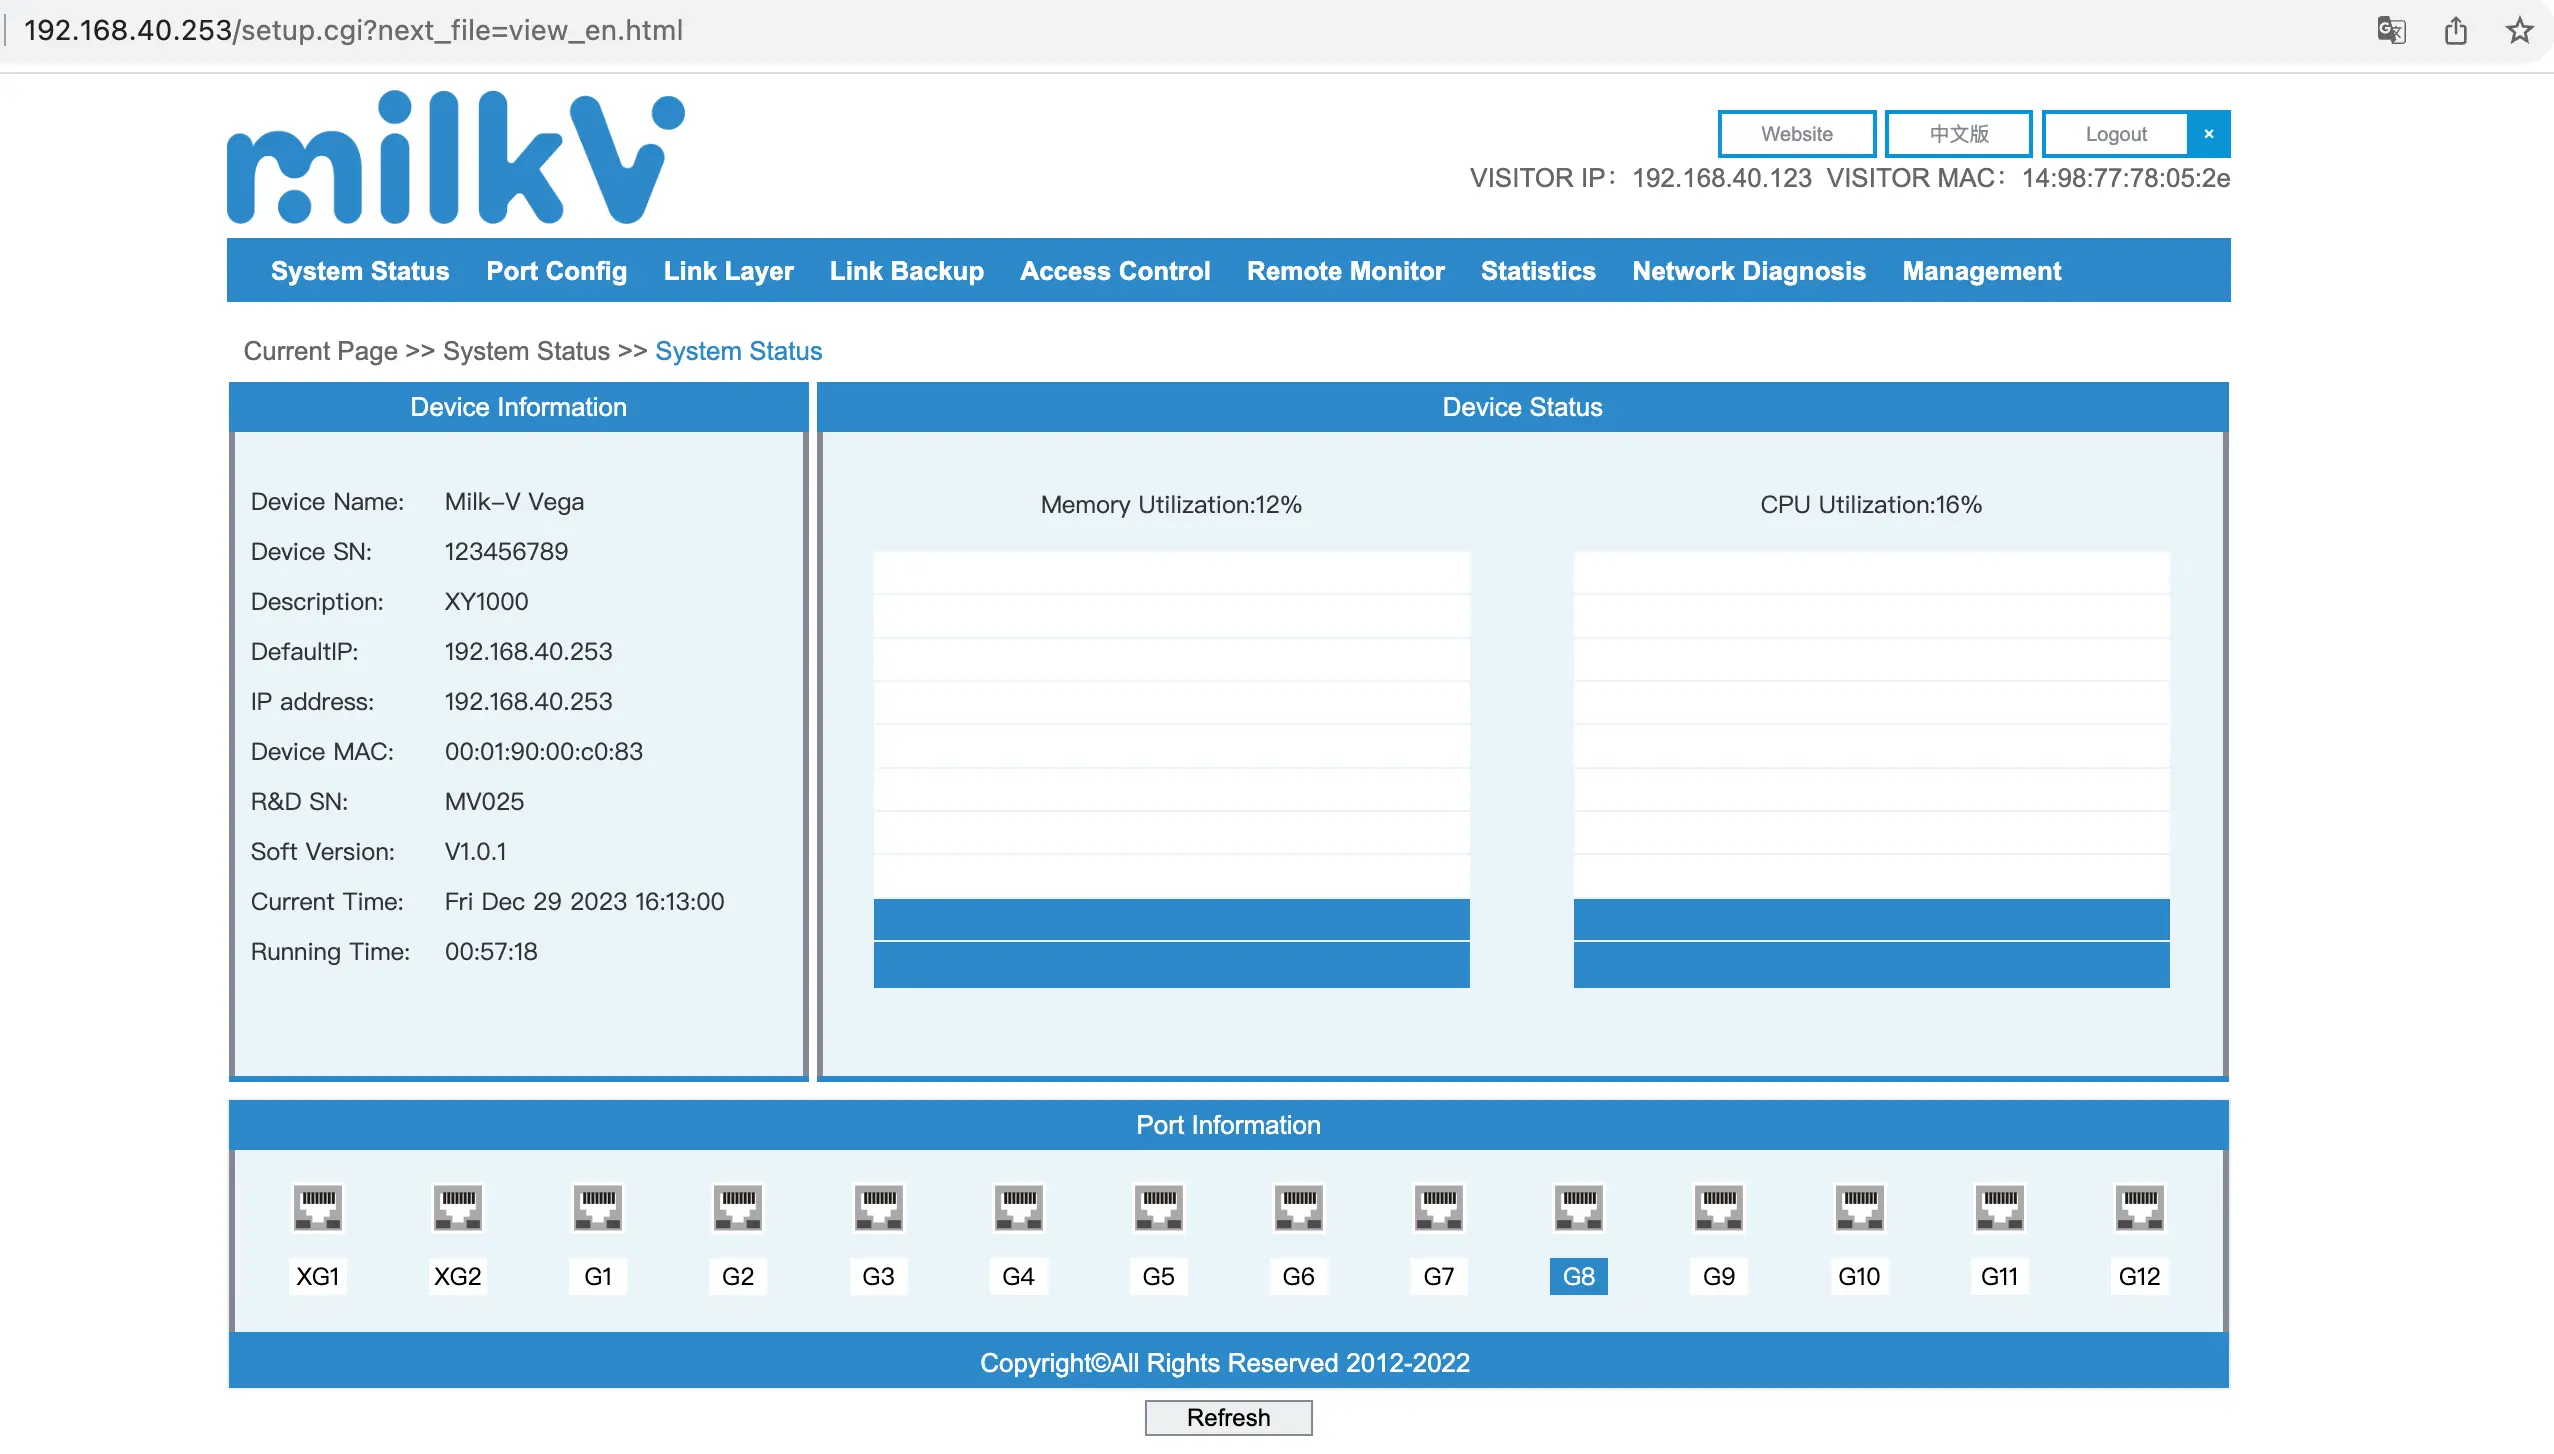
Once everything is ready, open your browser (on Host Device/Milk-V Mars) and go to 192.168.40.253, then enter the default username and password to access the WEB management interface.
Milk-V Vega WEB Management
USERNAME: admin
PASSWORD: admin
SSH/Telnet
Enabling SSH/Telnet may increase your network security risk. Please use it cautiously.
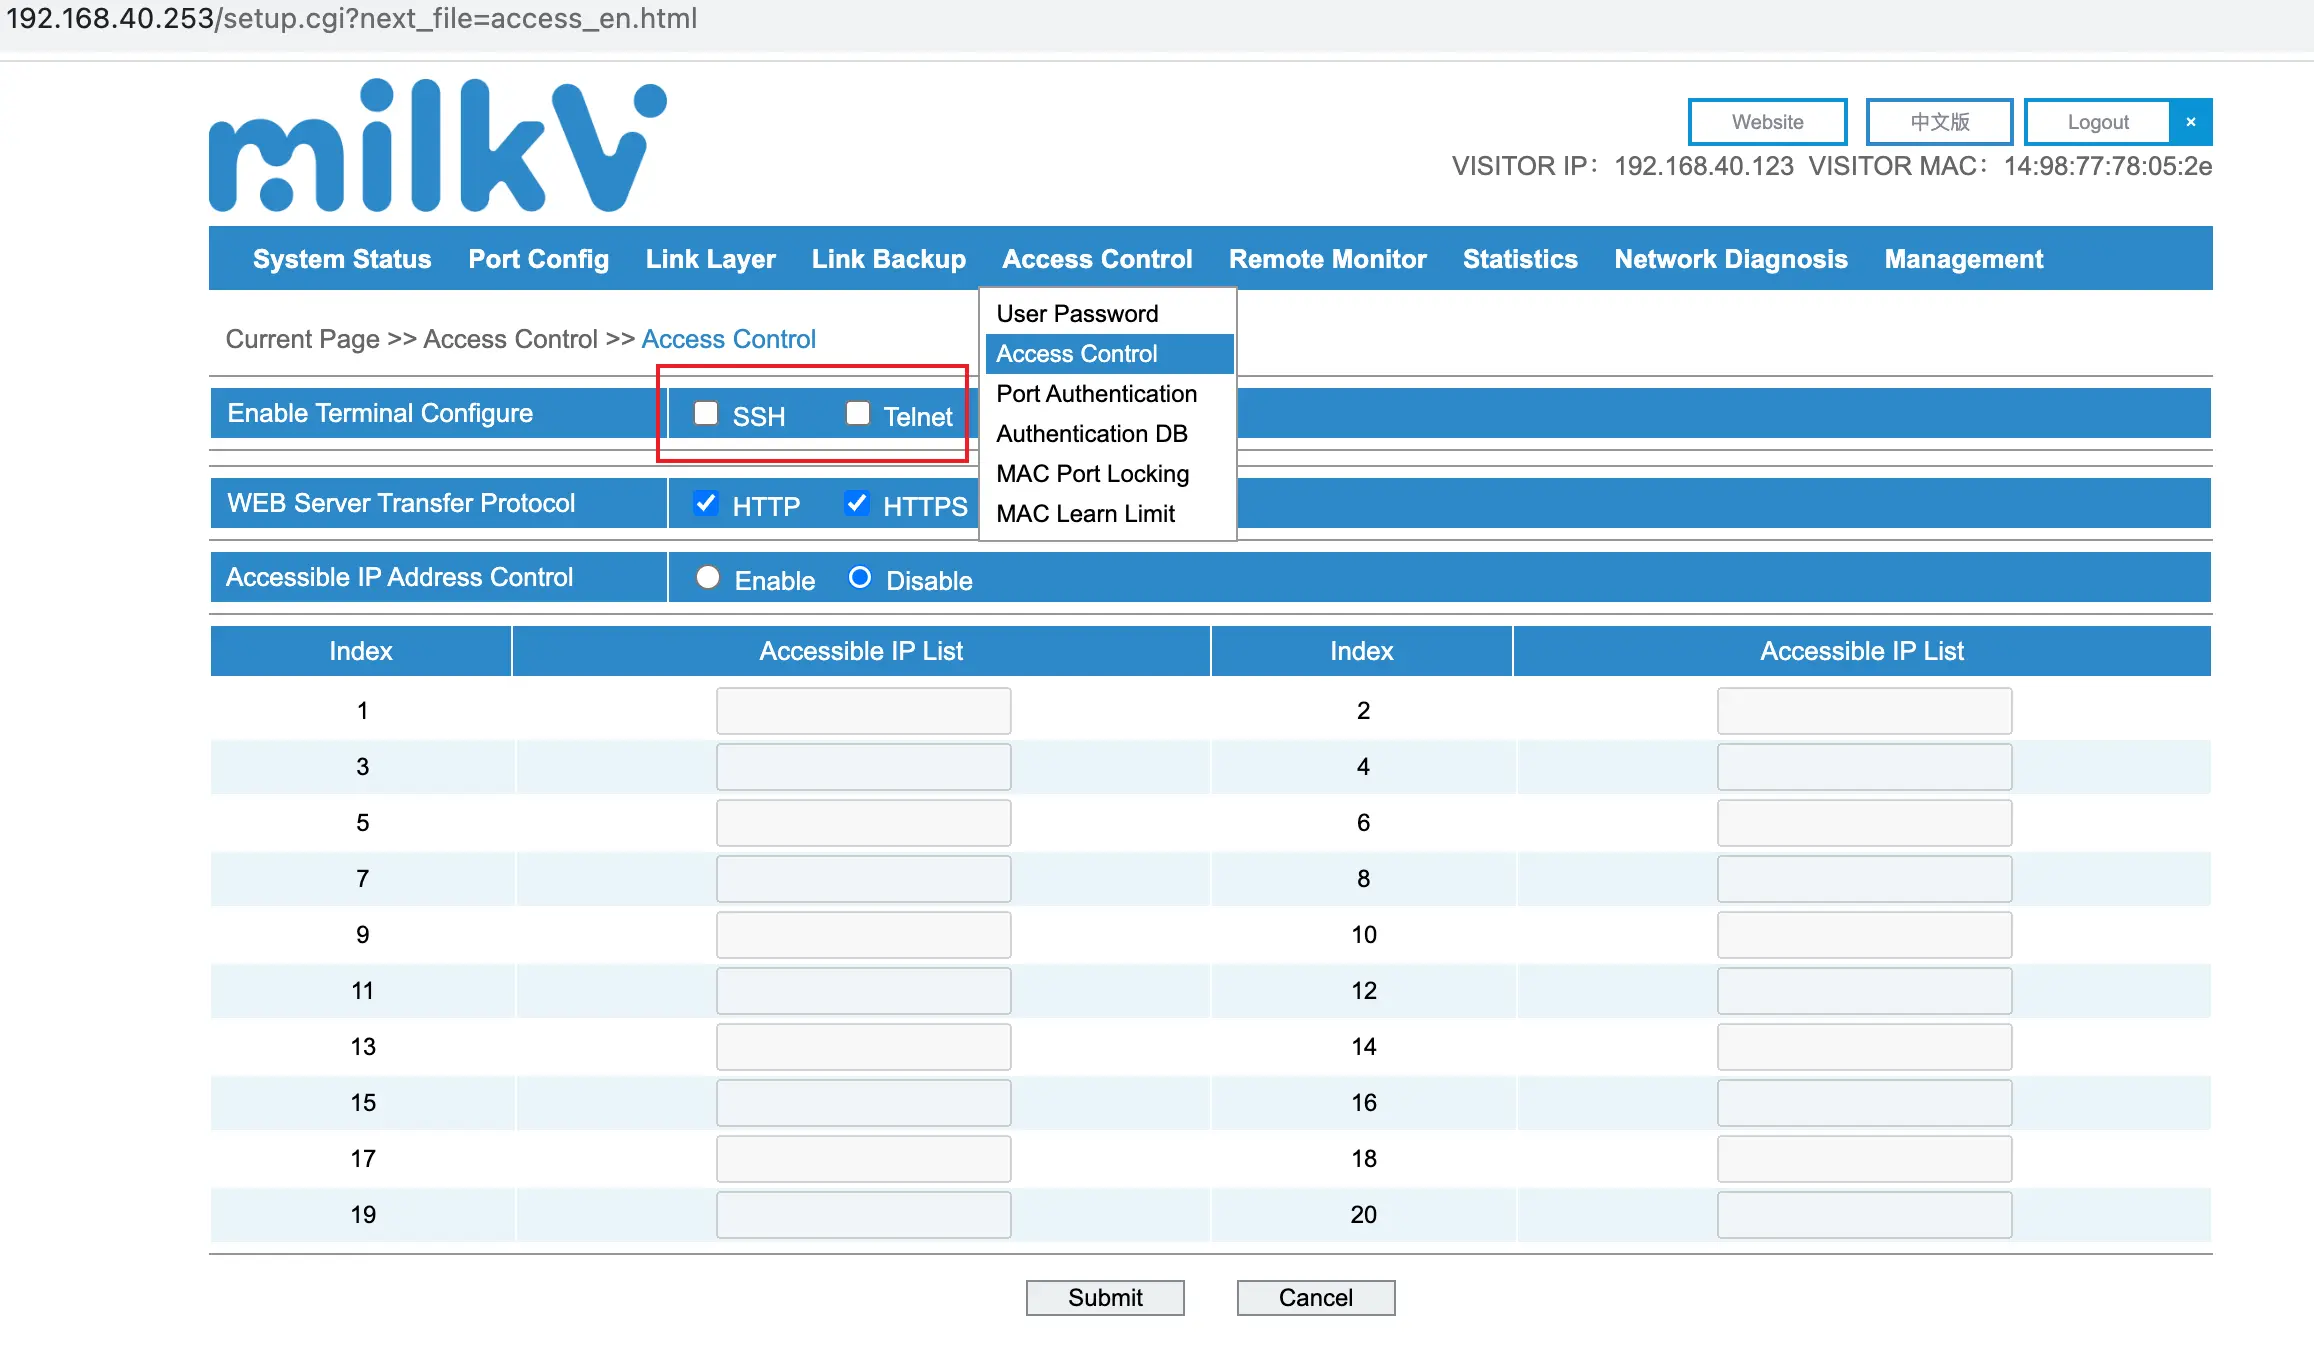
For the security of network devices, Milk-V Vega defaults to closing SSH and Telnet connections. To enable them, follow these steps:
Navigate to WEB management -> Access Control -> Enable Terminal Configure.
You can enable SSH and Telnet from there.
Once everything is ready, use a terminal(Milk-V Mars/Your Device) connection tool and enter the following command:
//Terminal on Host Device/Milk-V Mars
$ssh [email protected]
Log in using the default username and password:
Milk-V Vega
USERNAME: root
PASSWORD: milkv
Serial Console
The Vega integrates a USB to serial port chip. You only need to use a Type-C data cable to connect the Type-C interface of the computer and Vega.
You only need to connect the serial port when burning the system or debugging the device through the command line. You do not need to connect it when using Vega normally.
Using serial port in Linux
In a Linux environment such as Ubuntu system, you can use Vege's integrated serial port without installing a driver. You can use the lsusb command to check whether it has been recognized normally under Ubuntu:
$ lsusb
Bus 001 Device 013: ID 0403:6010 Future Technology Devices International, Ltd FT2232C/D/H Dual UART/FIFO IC
In addition, if you look under /dev/, two devices /dev/ttyUSB0 and /dev/ttyUSB1 will appear:
$ ls /dev/ttyUSB*
/dev/ttyUSB0  /dev/ttyUSB1
The ttyUSB0 is a serial port device, and you can configure the connection with tools such as minicom.
The default serial port parameters of Vega are as follows:
baudrate: 115200
data bit: 8
stop bit: 1
parity  : none
flow control: none
USERNAME: root
PASSWORD: milkv
JTAG
ttyUSB1 is the JTAG debugging interface.
TBD


