Milk-V Mars Bootloader Update Guide
Whether Mars starts the system through the SD card or the eMMC module, it must be started through the Bootloader boot program. This boot program is stored in an SPI Flash on the board and contains two parts: SPL and U-Boot.
The Bootloader in Mars can be understood as the BIOS in PC
When Mars is shipped, it already comes with a pre-installed initial Bootloader program. There is no need to upgrade this program during normal usage. Bootloader upgrade is only necessary in the following situations:
- When the bootloader program in SPI Flash is accidentally damaged, causing the system to fail to start normally.
- When upgrading the official system image (such as Debian), it must be matched with the new bootloader, otherwise it cannot be started.
- U-Boot has fixed some bugs or added new functions. When you need to use these new functions.
There are several ways to update the Bootloader in SPI Flash on Mars, such as Windows burning tools, TFTP, flashcp commands, etc. Here are the methods of using the flashcp command and using the UsbFlashTool burning tool in Windows systems.
Update Bootloader using flashcp command
If the current bootloader of your Mars can boot the Debian system normally, you can use the flashcp command in the Debian system to update the bootloader.
-
Install flashcp command
The
flashcpcommand in the Debian system is included in themtd-utilspackage. Execute the following command to install:sudo apt install mtd-utils -
Download Bootloader Firmware
The firmware contains two files,
SPLandU-Boot:SPL: mars_u-boot-spl.bin.normal.out
U-Boot: mars_visionfive2_fw_payload.imgYou can download it directly on Mars, or download it on PC and then transfer it to Mars through scp command or USB flash drive.
-
View SPI Flash partition information
cat /proc/mtdThe output is as follows:
user@milkv:~$ cat /proc/mtd
dev: size erasesize name
mtd0: 00040000 00001000 "spl"
mtd1: 00300000 00001000 "uboot"
mtd2: 00100000 00001000 "data"We need to update
SPLto themtd0partition andU-Bootto themtd1partition. -
Update Bootloader
Update SPL:
sudo flashcp -v mars_u-boot-spl.bin.normal.out /dev/mtd0Update U-Boot:
sudo flashcp -v mars_visionfive2_fw_payload.img /dev/mtd1The output of successful execution is as follows:
user@milkv:~$ sudo flashcp -v mars_u-boot-spl.bin.normal.out /dev/mtd0
Erasing blocks: 36/36 (100%)
Writing data: 143k/143k (100%)
Verifying data: 143k/143k (100%)
user@milkv:~$
user@milkv:~$ sudo flashcp -v mars_visionfive2_fw_payload.img /dev/mtd1
Erasing blocks: 723/723 (100%)
Writing data: 2890k/2890k (100%)
Verifying data: 2890k/2890k (100%)
After powering on again, you can determine whether the bootloader has been updated based on the timestamp in the UART serial port log:
U-Boot SPL 2021.10 (Nov 24 2023 - 10:21:39 +0800)
U-Boot 2021.10 (Nov 24 2023 - 10:21:39 +0800)
Use UsbFlashTool to upgrade bootloader under Windows
Download UsbFlashTool burning tool and Bootloader firmware
SPL:    mars_u-boot-spl.bin.normal.out
U-Boot: mars_visionfive2_fw_payload.img
Install driver for the burning tool
Driver installation is only required for the first use.
Extract the downloaded Mars-UsbFlashTool-*-Windows.zip into the Windows system.
-
Connect the USB to TTL serial port cable to the 40 pin header on Mars, connect the USB to the PC and note down the serial port number
How to connect USB to serial cable: Use Serial Console
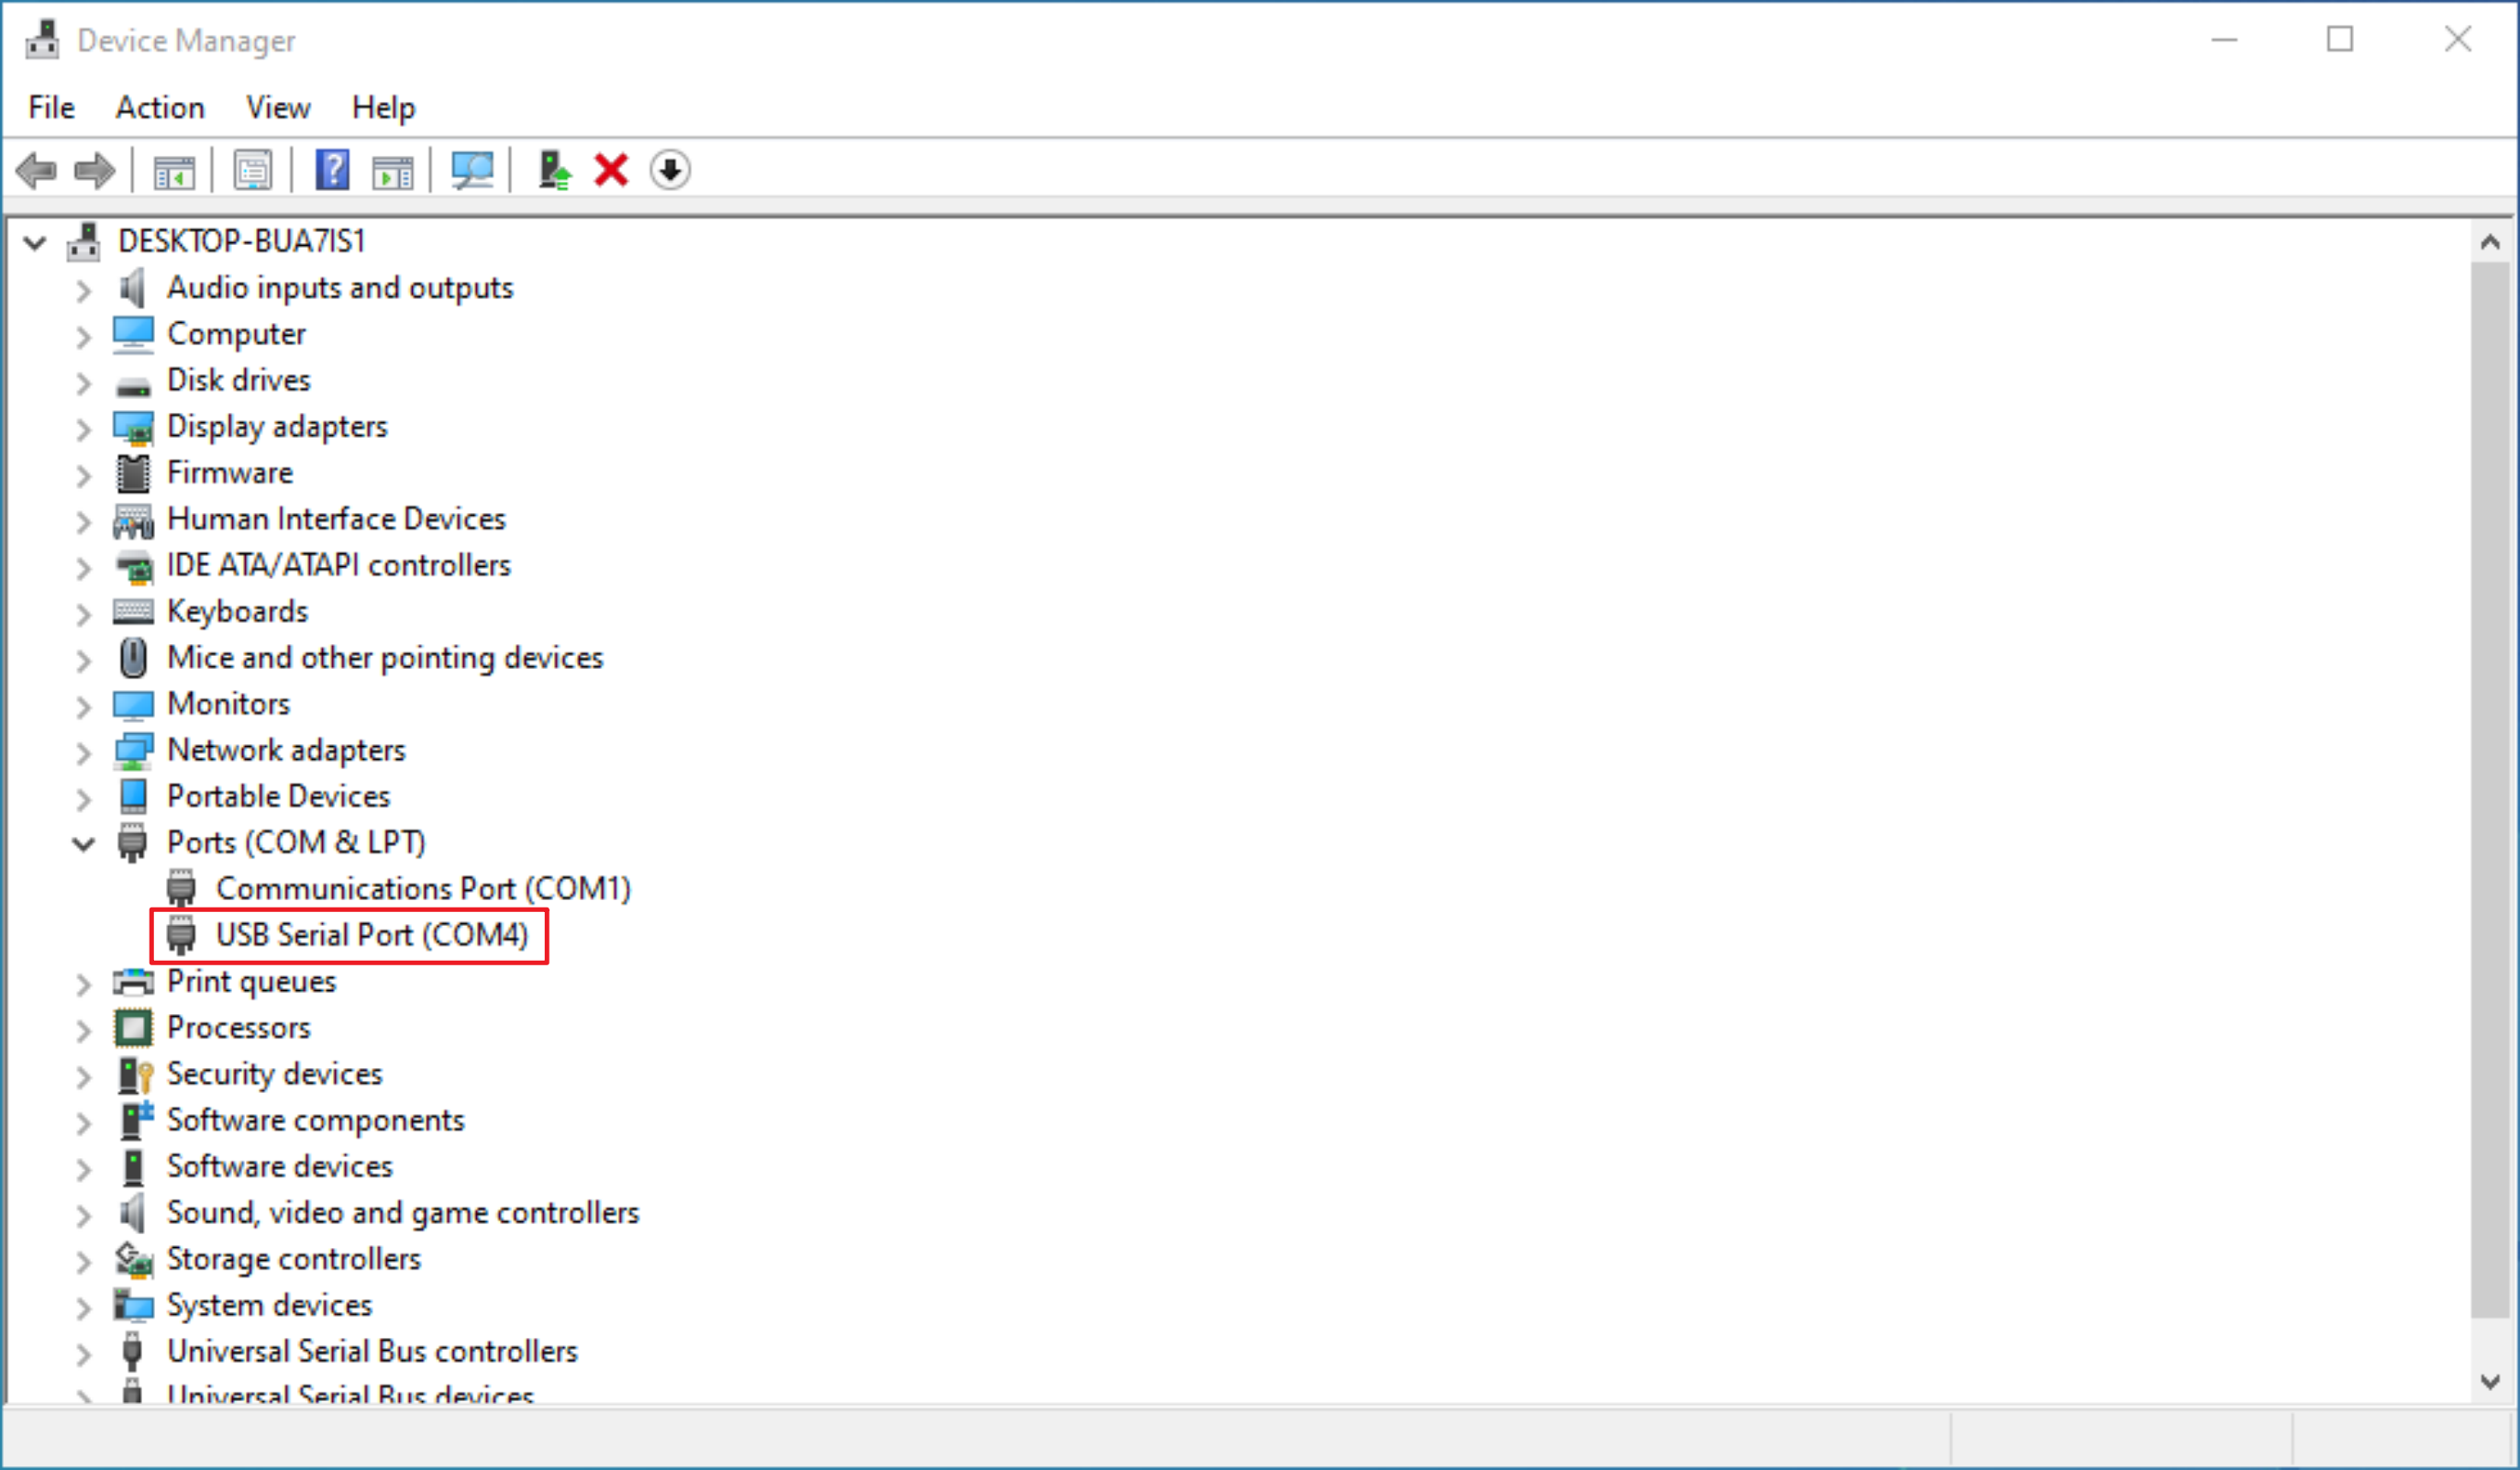
Note: If any other serial port program is open and using the serial port, please exit the program to release the port and avoid occupying it.
-
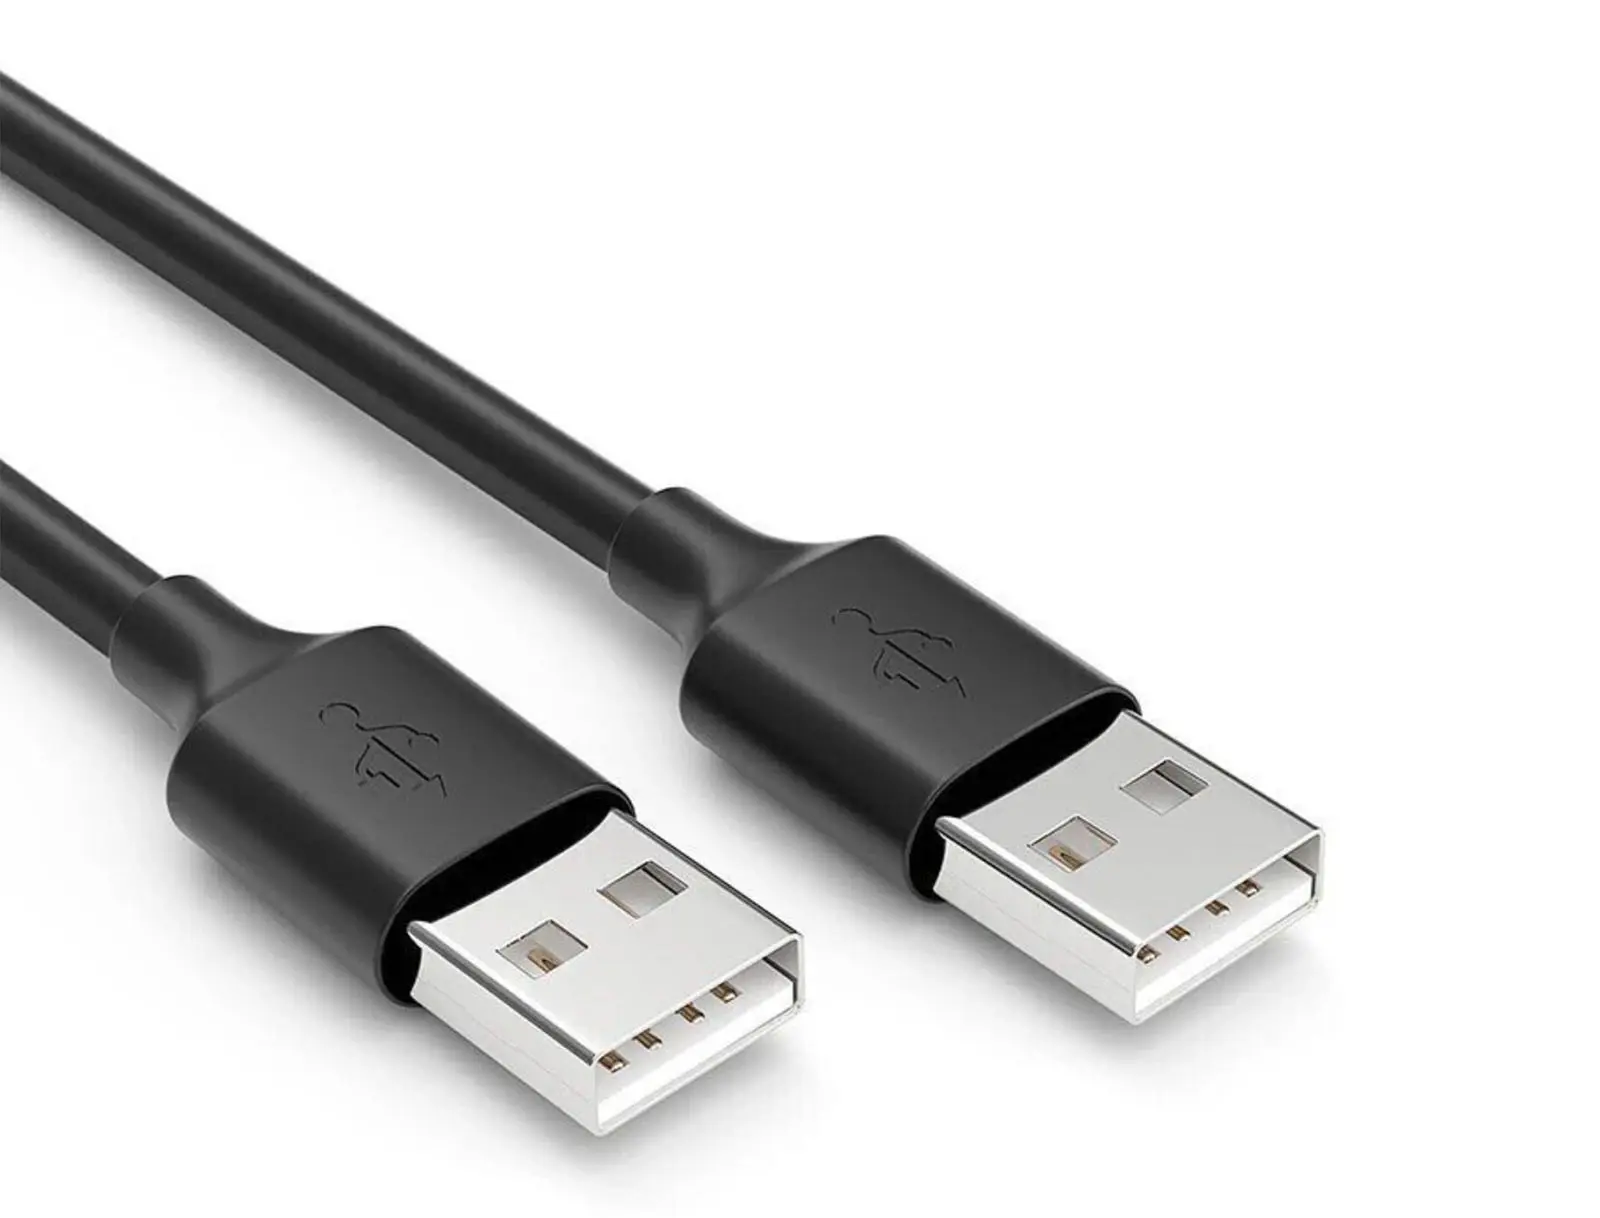
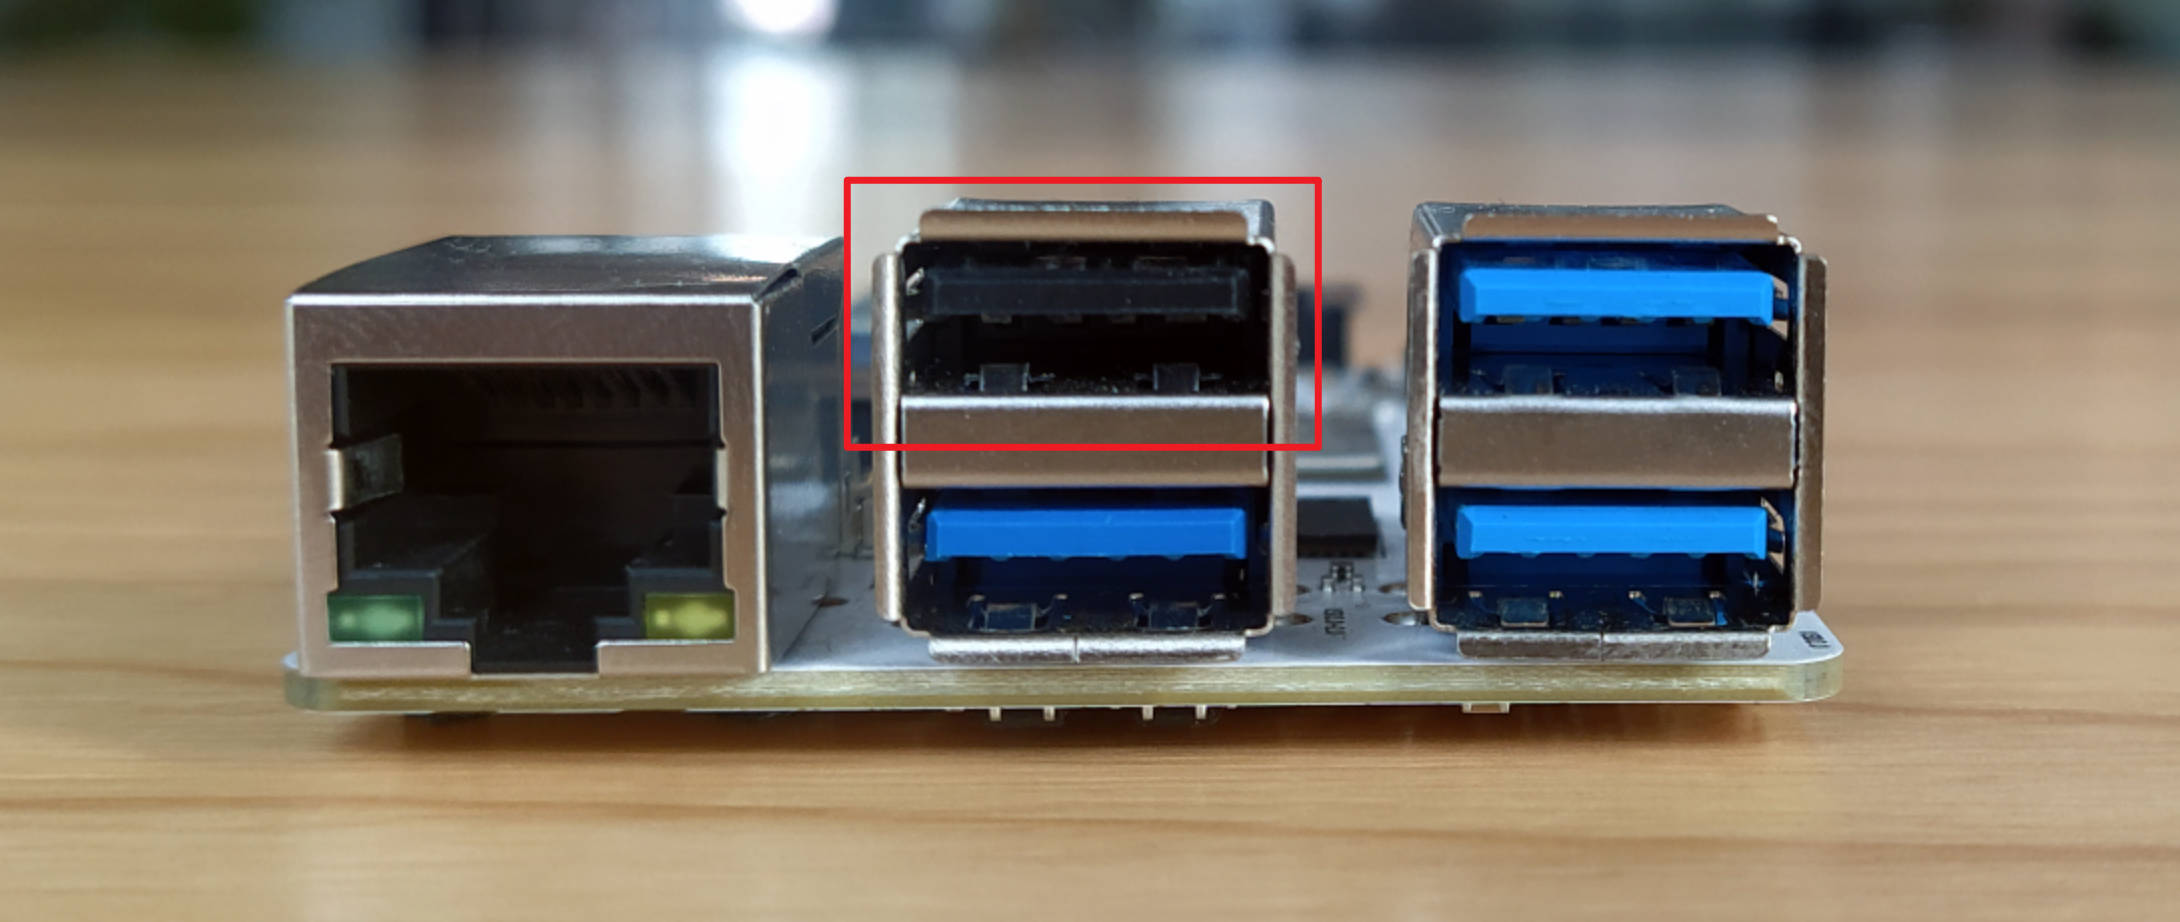
Connect the PC and Mars using a USB 2.0 interface with a type A Male to Male USB data cable
-
Press and hold the
upgrade buttonon Mars, and then power on Mars through the Type C interface. At this time, Mars will enter the upgrade mode. You can release theupgrade buttonto continue the operation.
-
Run the
UsbFlashTool-*-Windows.exeflashing program in the flashing tool directory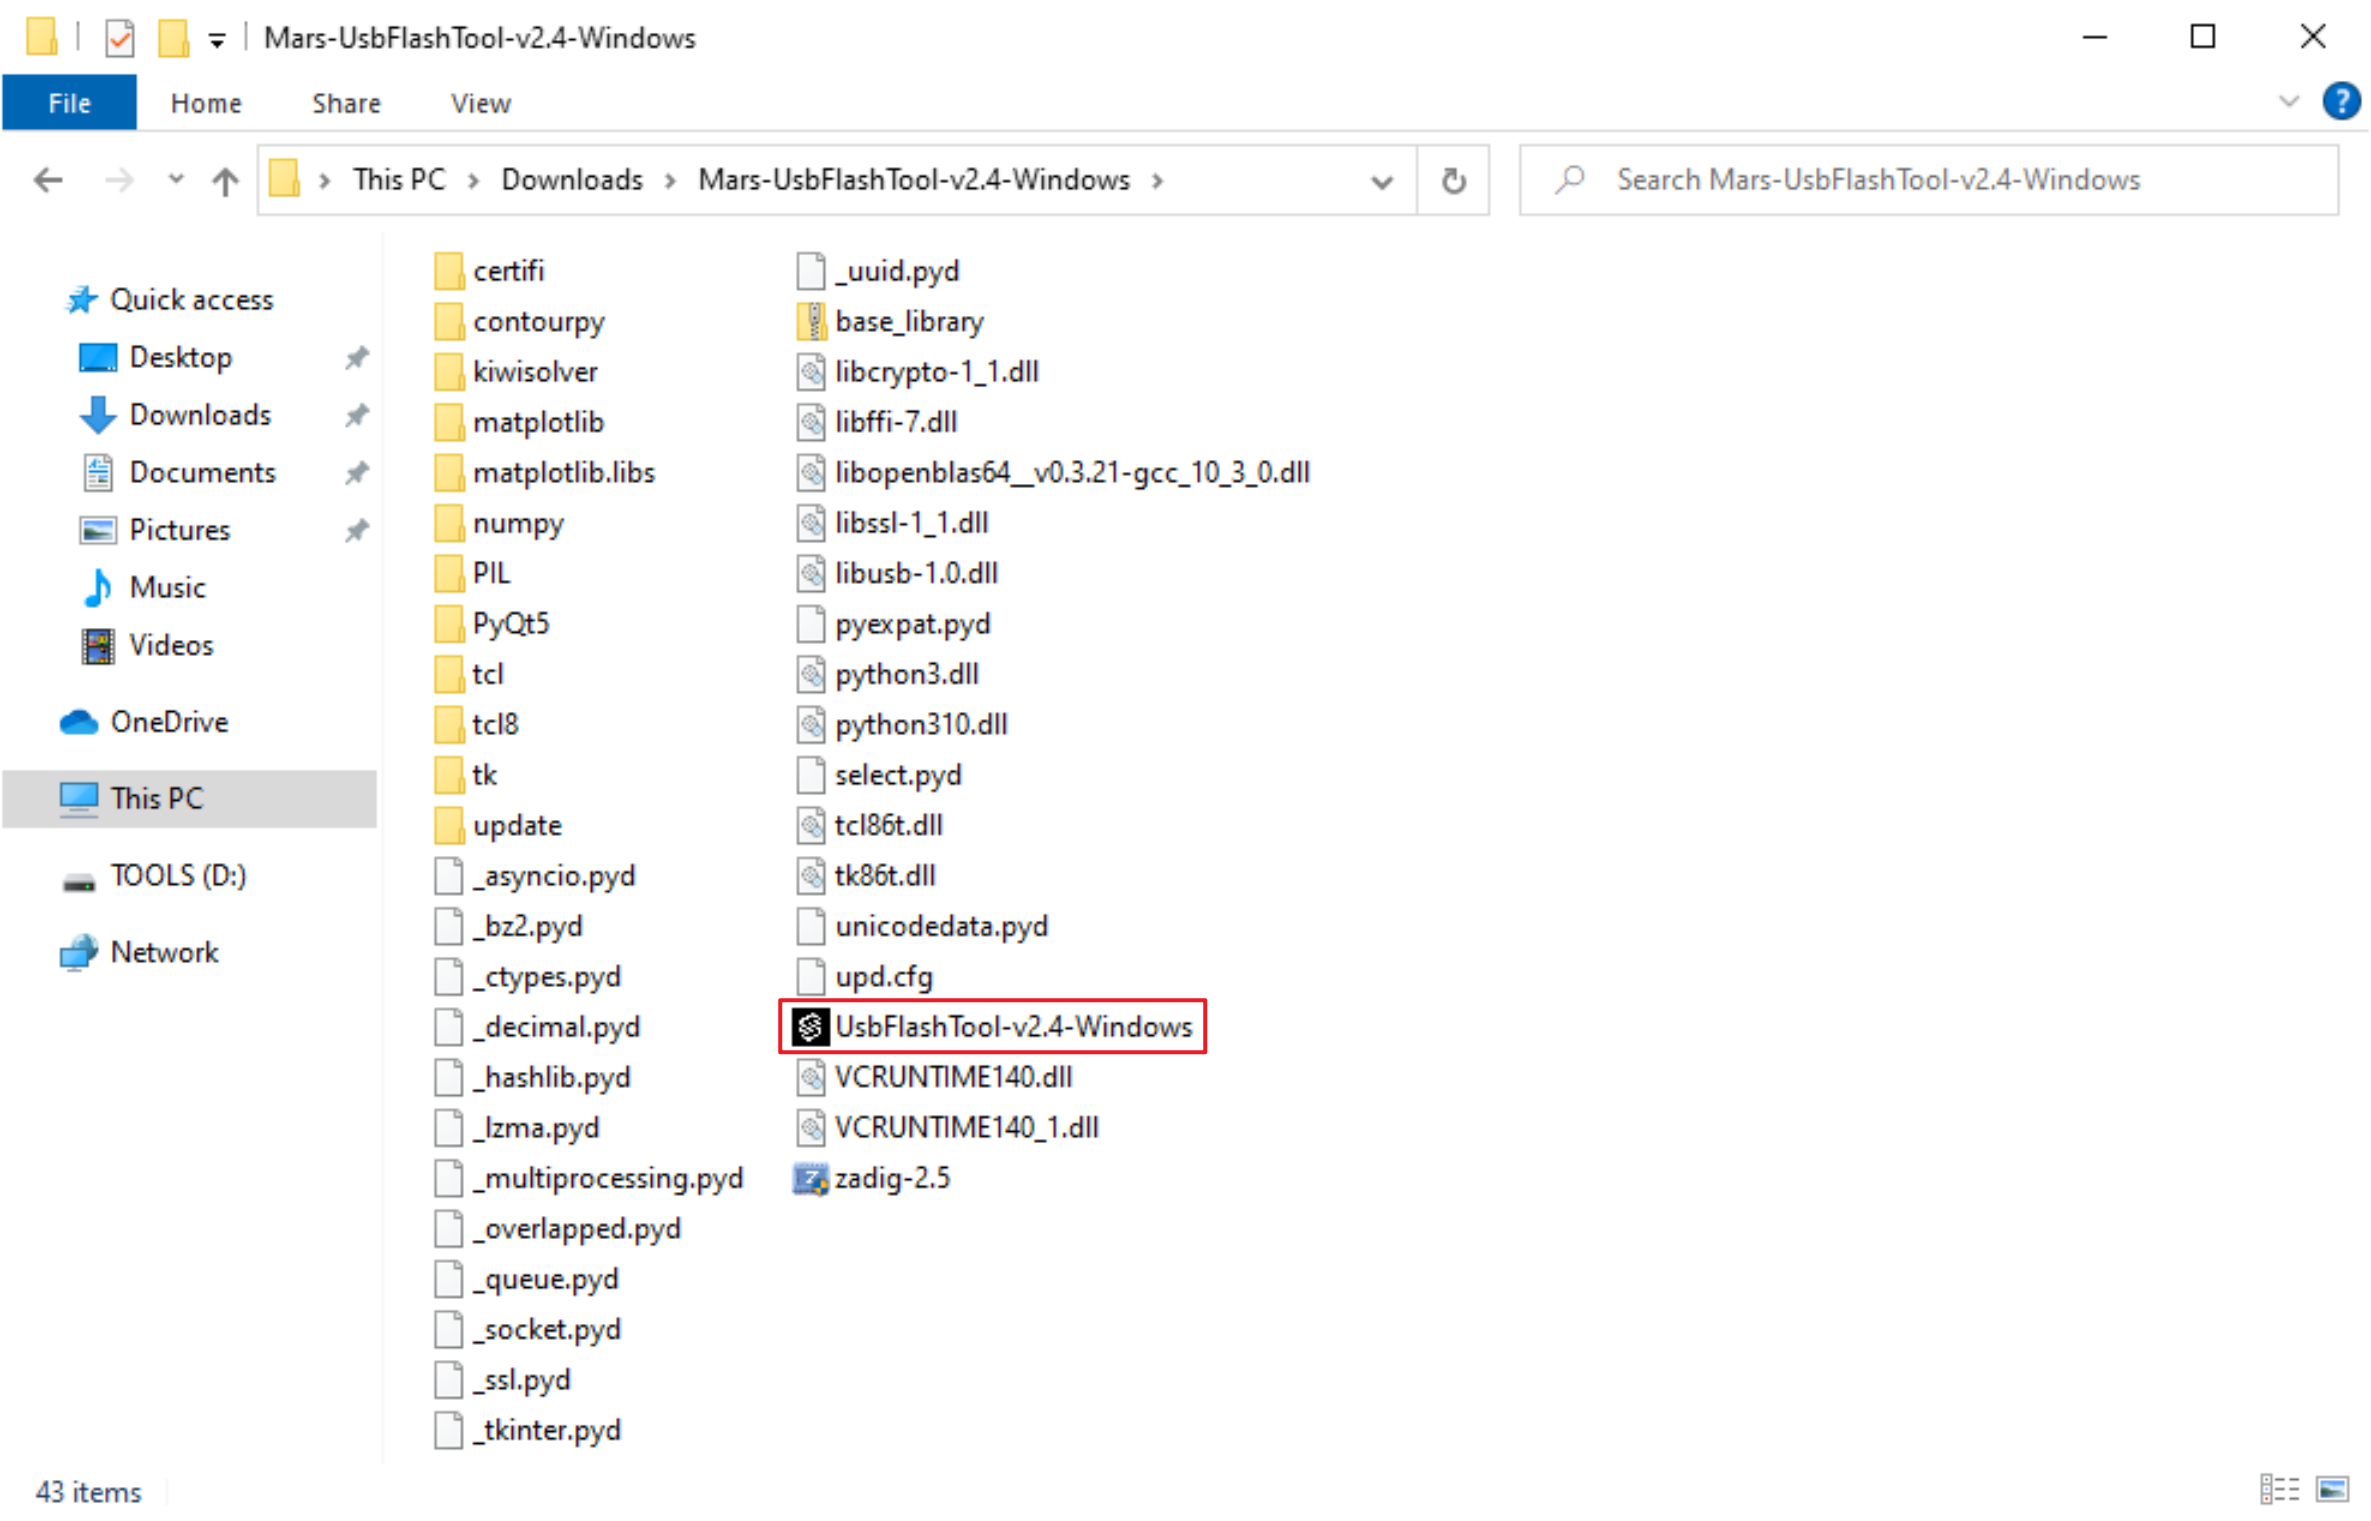
-
Set the serial port number in the
Serial Settingon the right side to the serial port number noted in step 1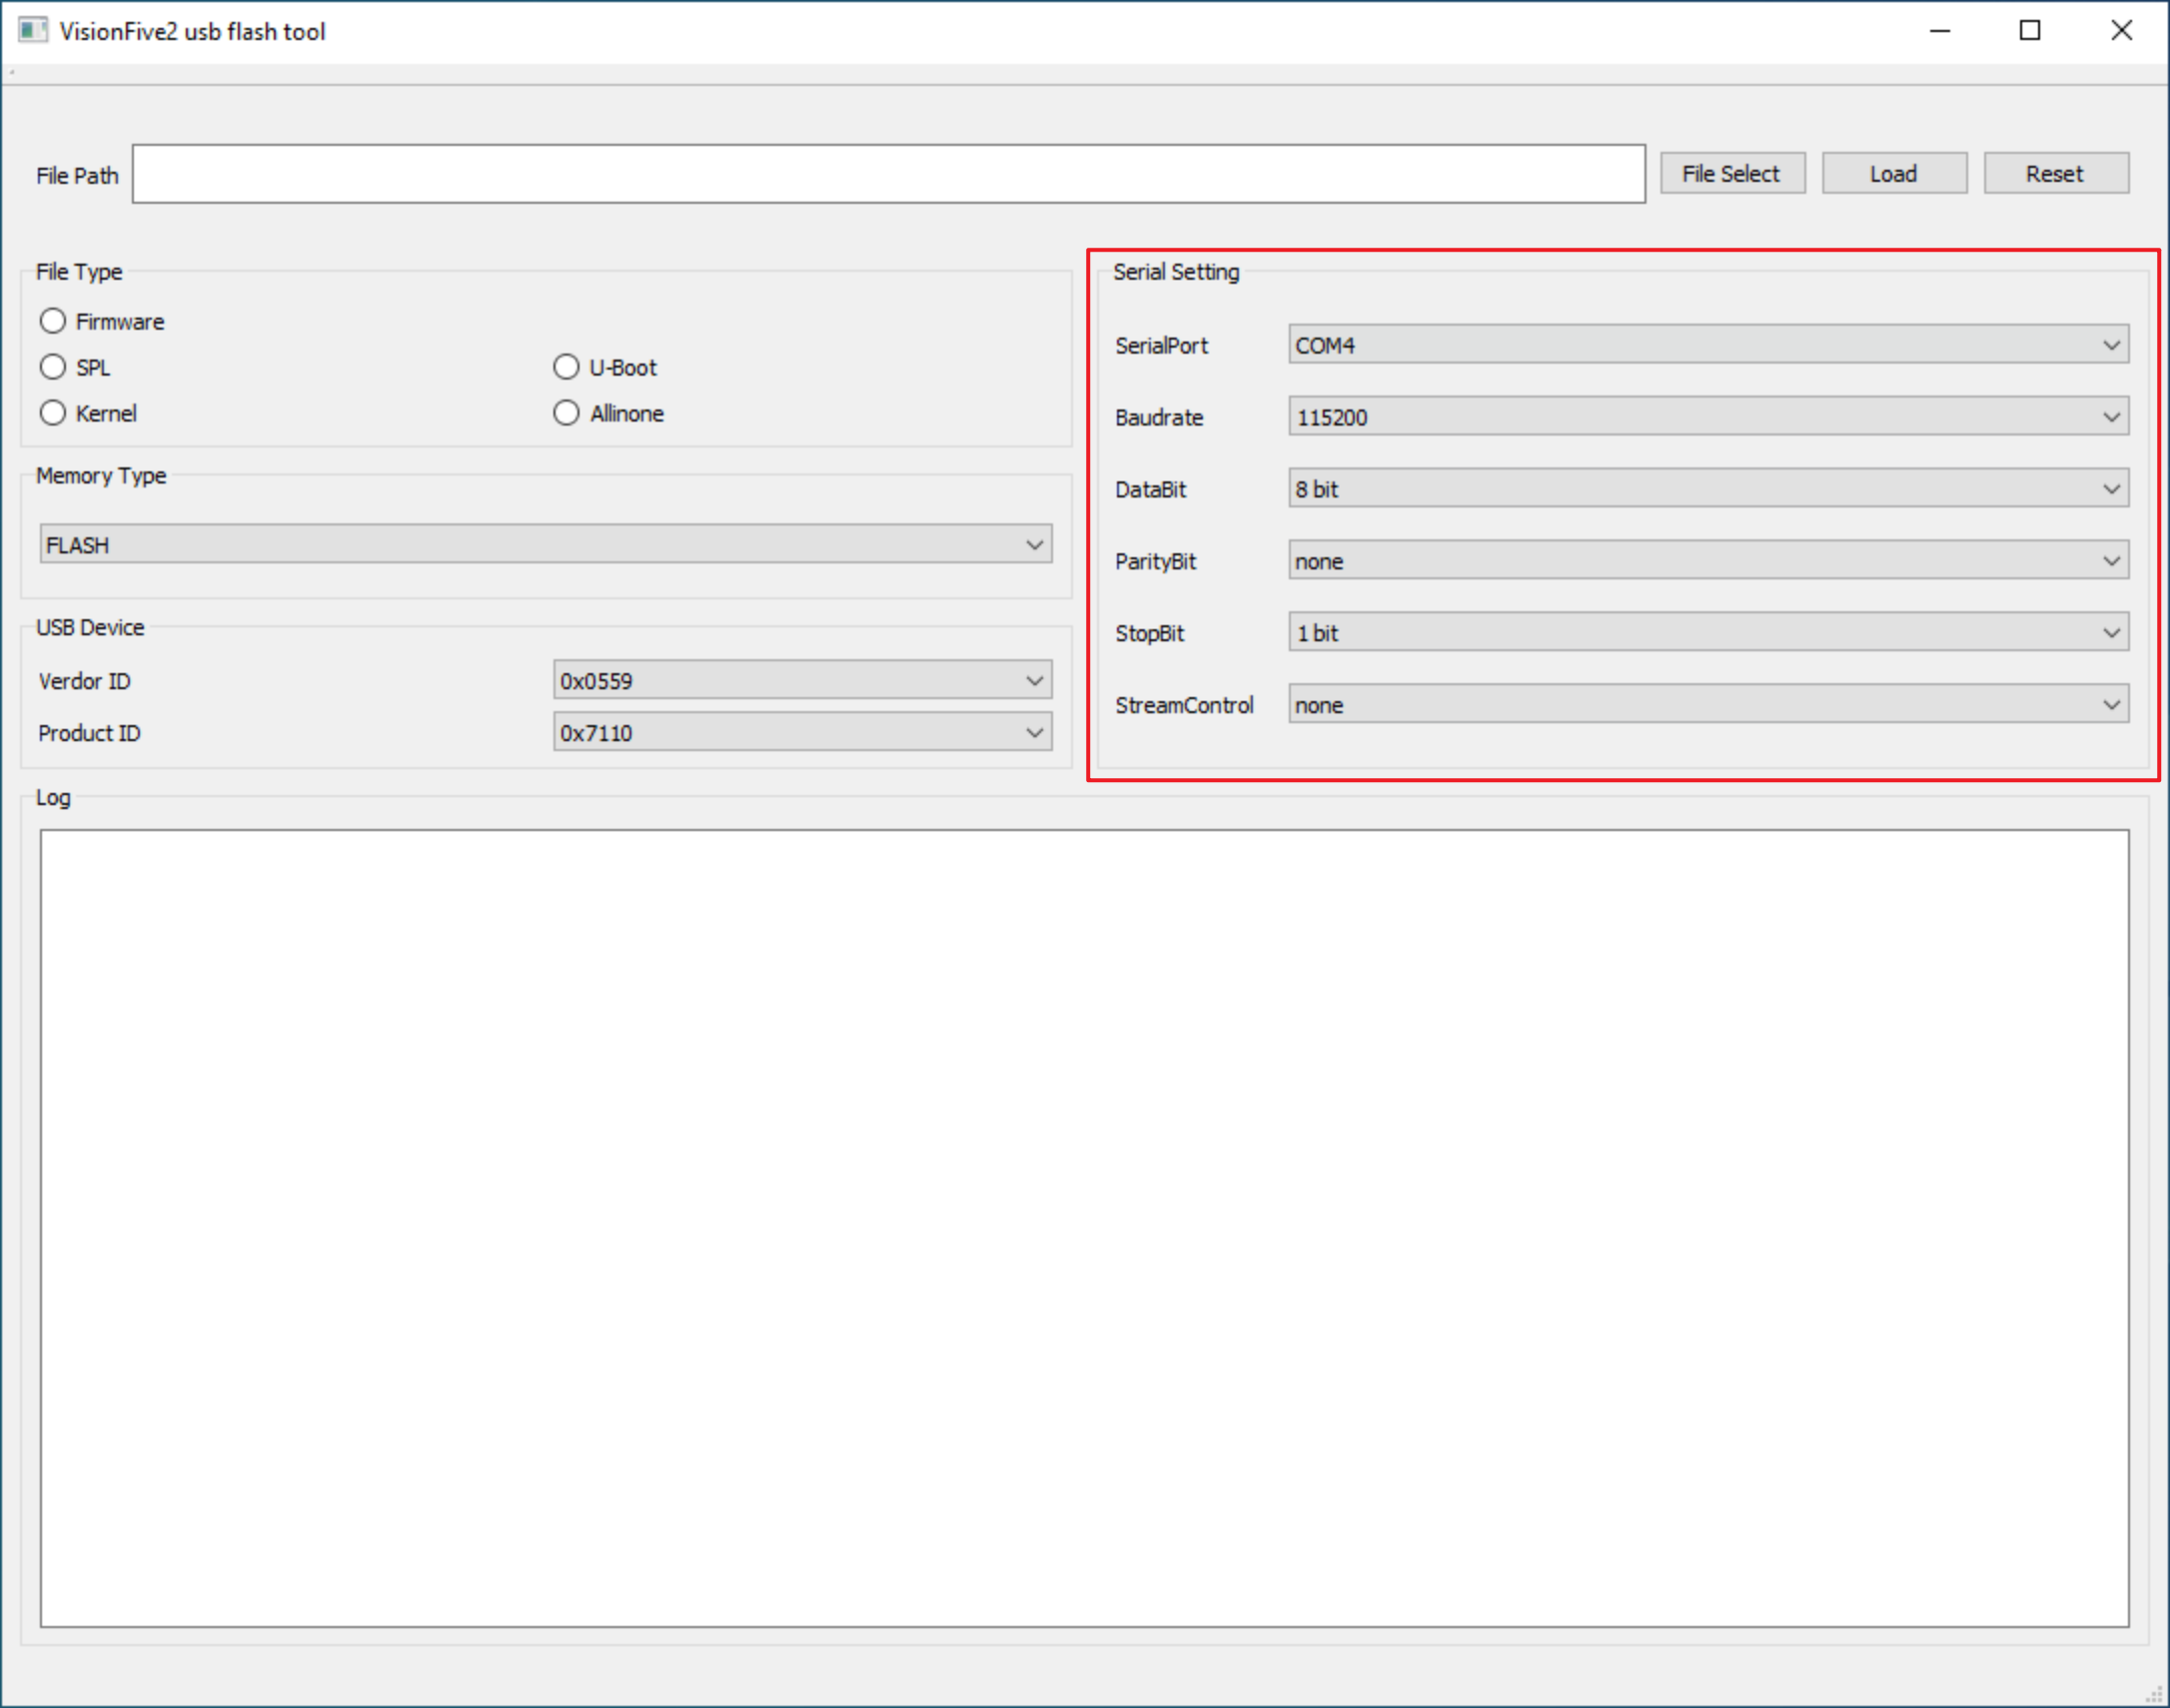
-
Select
FirmwareinFile Type, then clickFile Selectto select theusbprog-mars-230510.outin theupdatedirectory, then clickLoad, and wait for the messageLoadedto appear after loading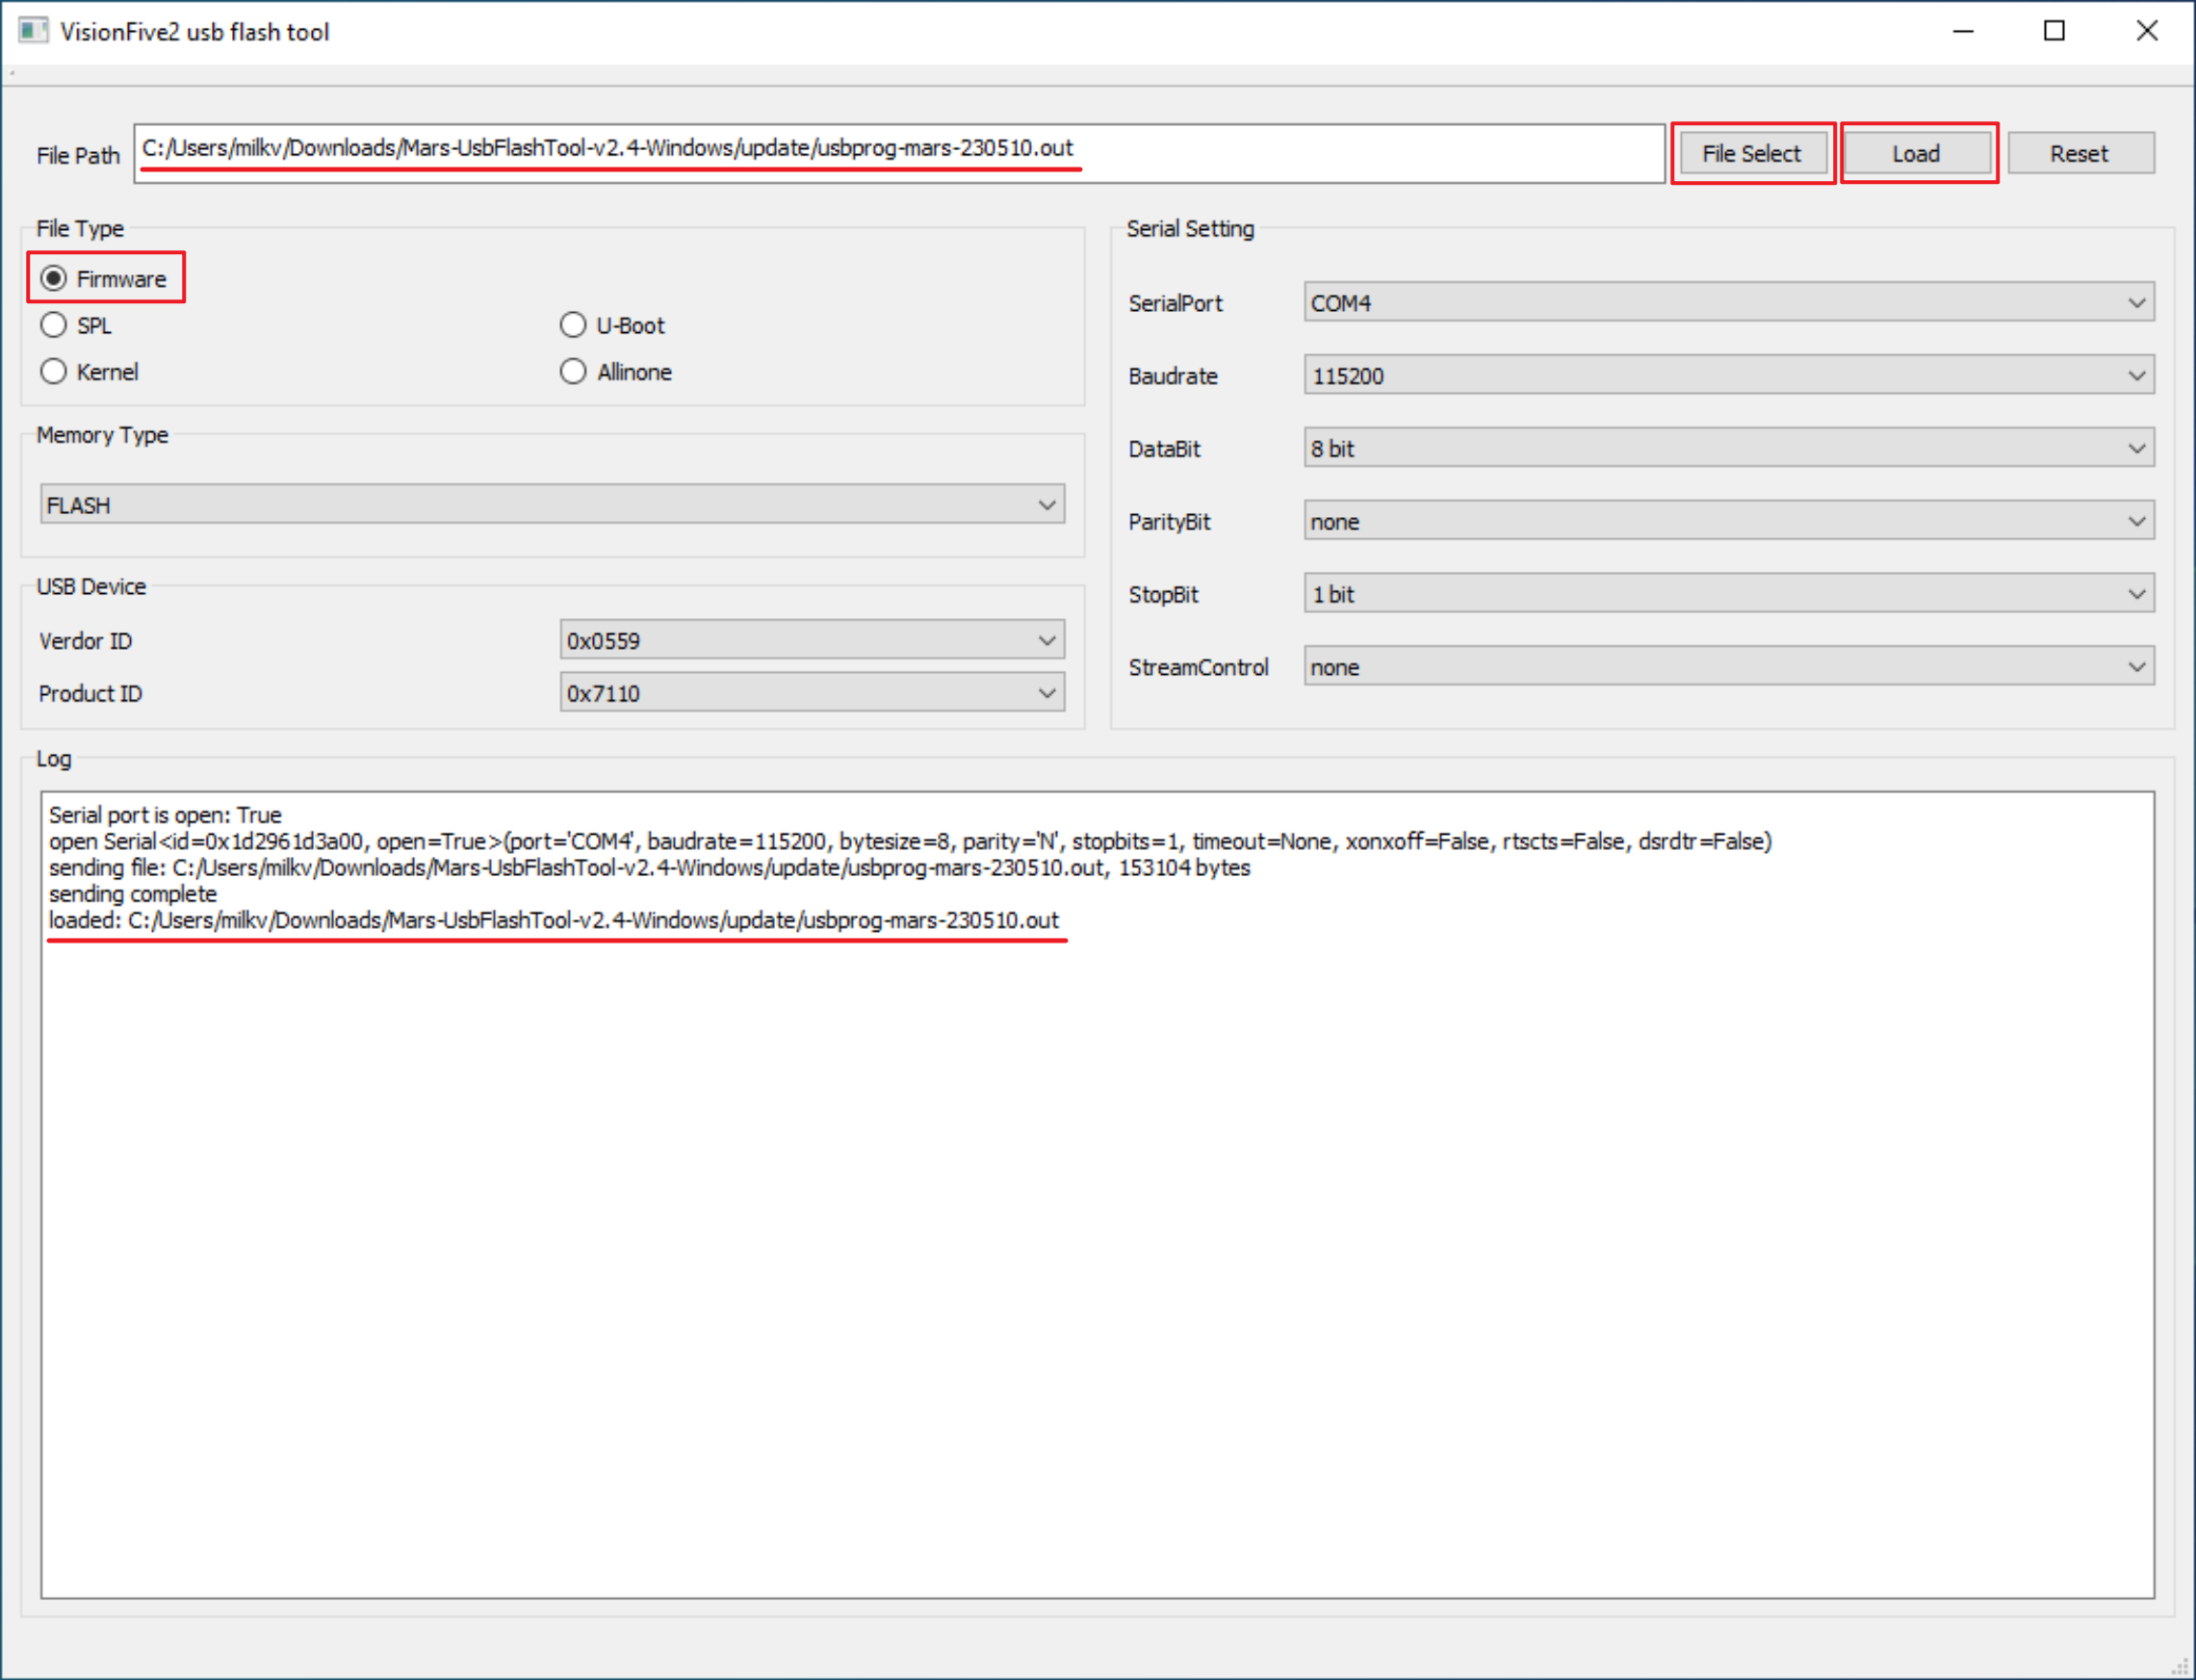
-
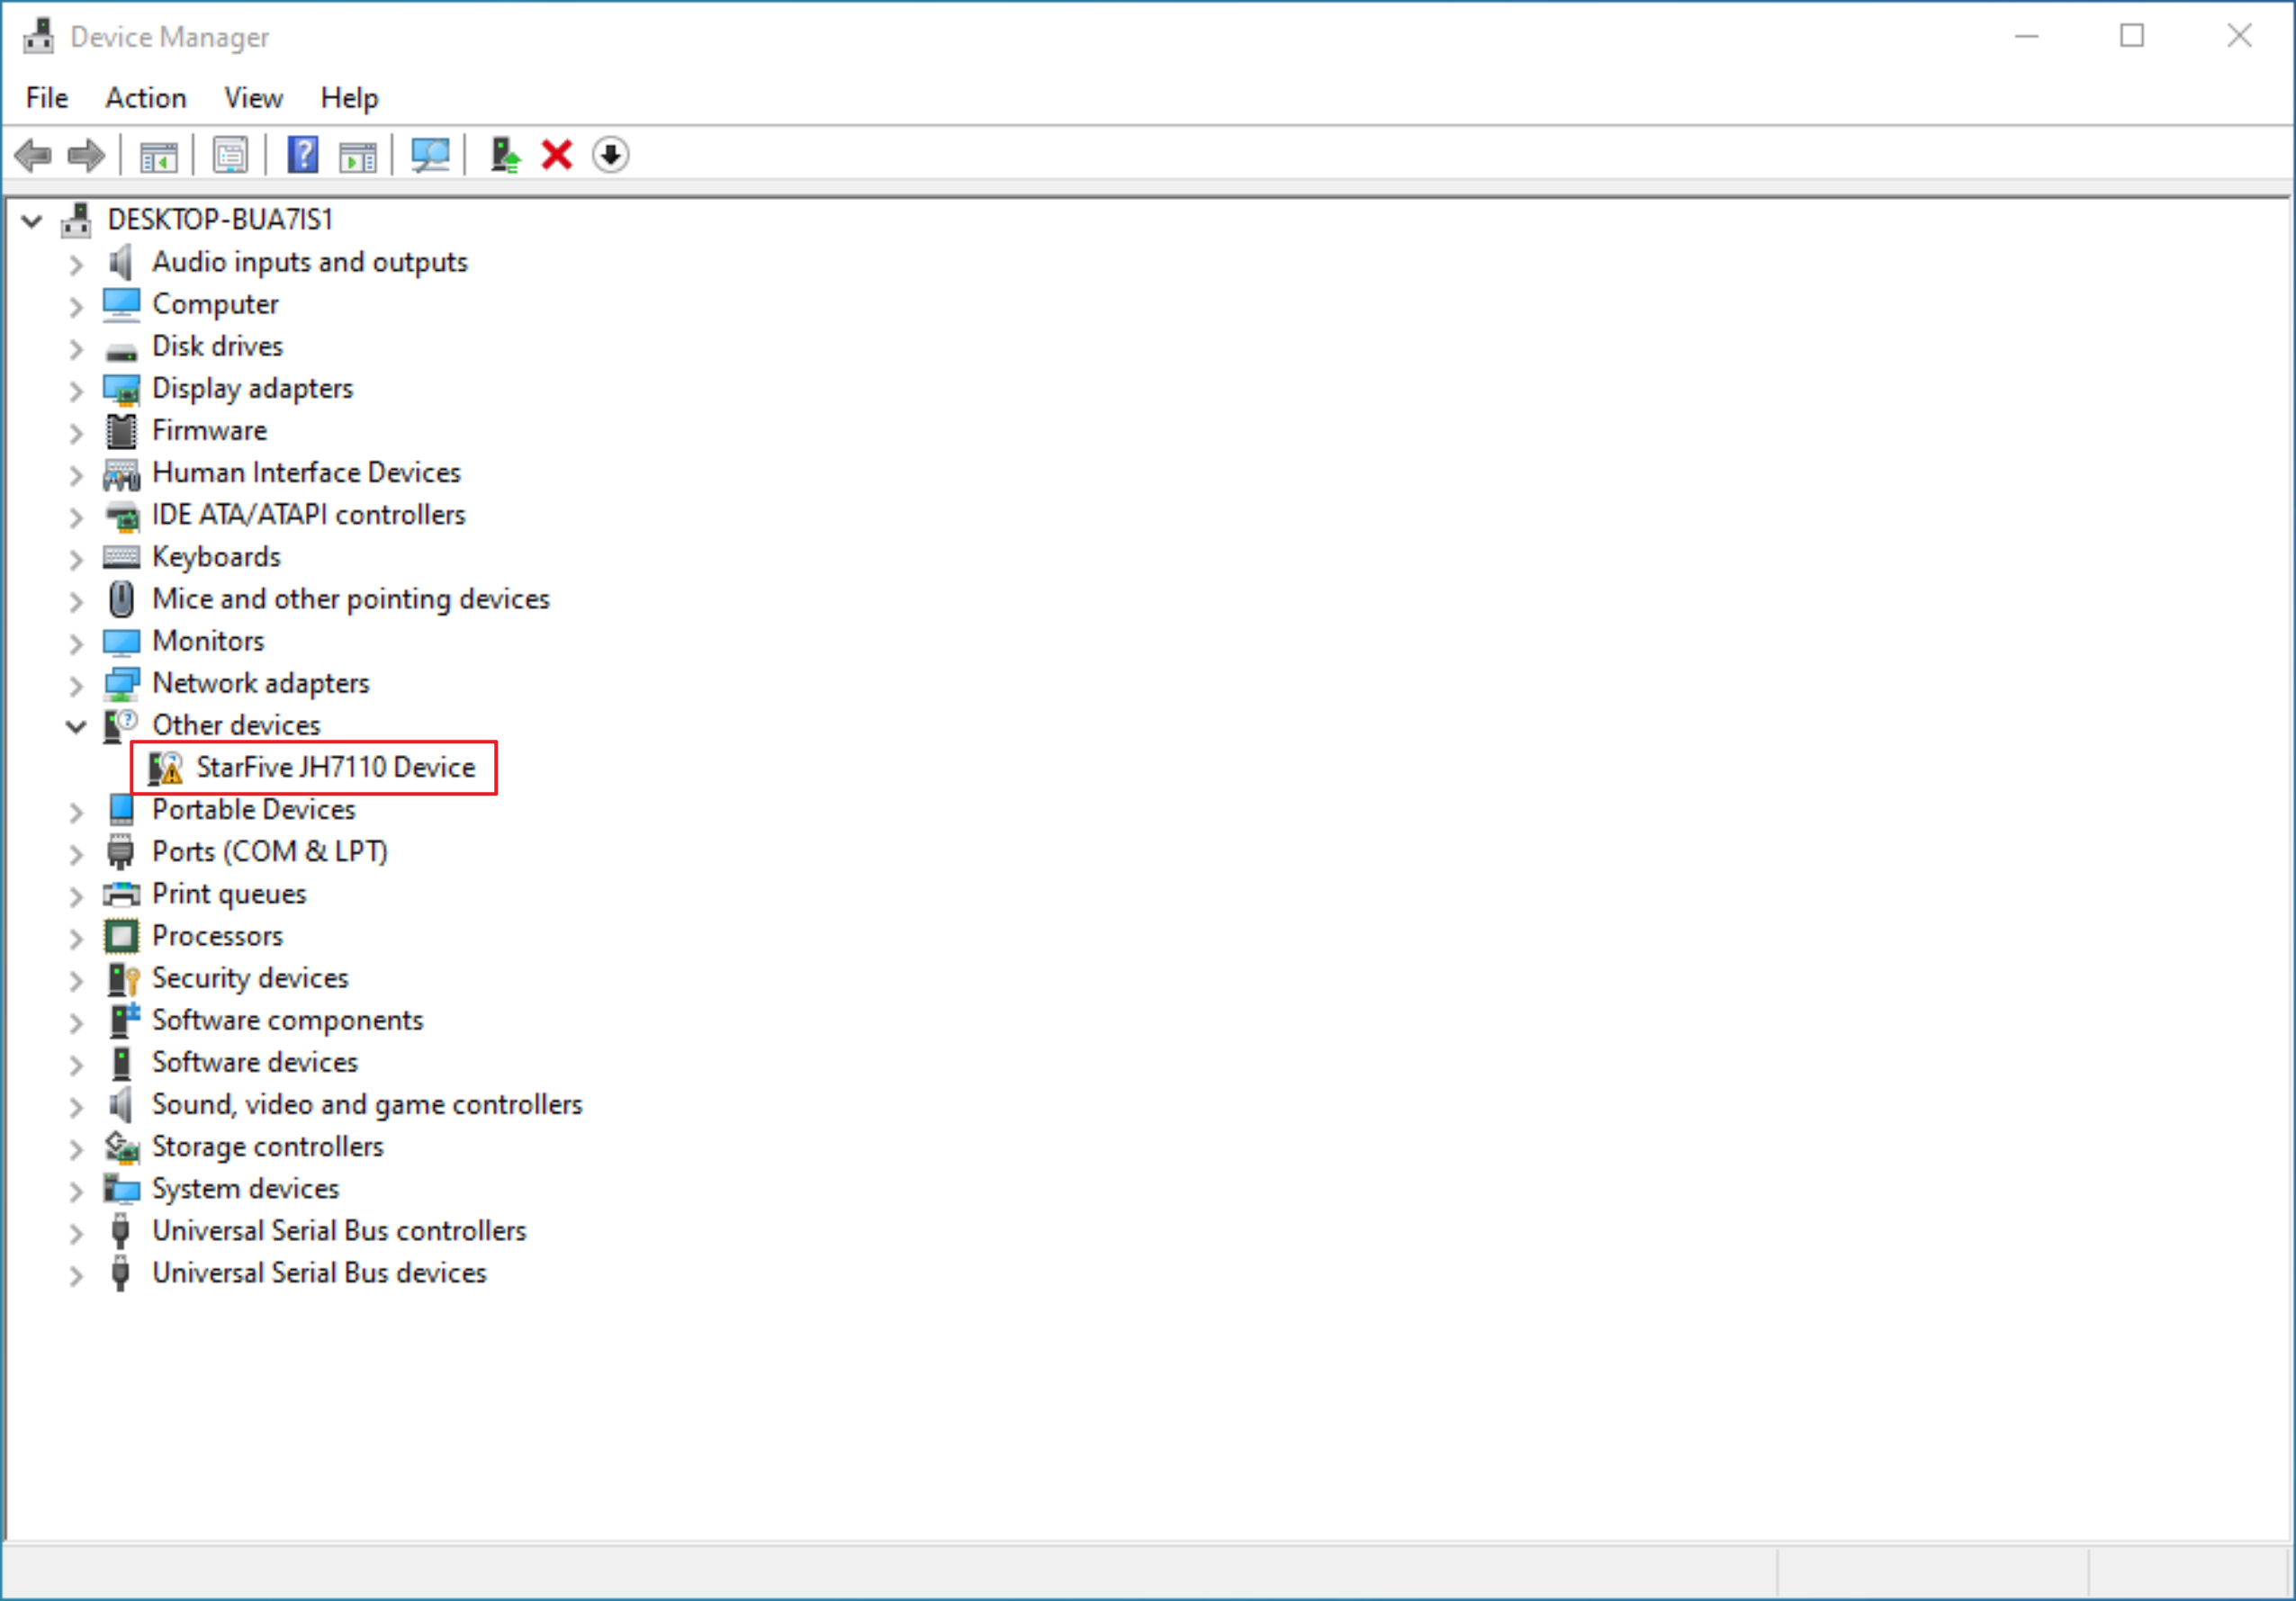
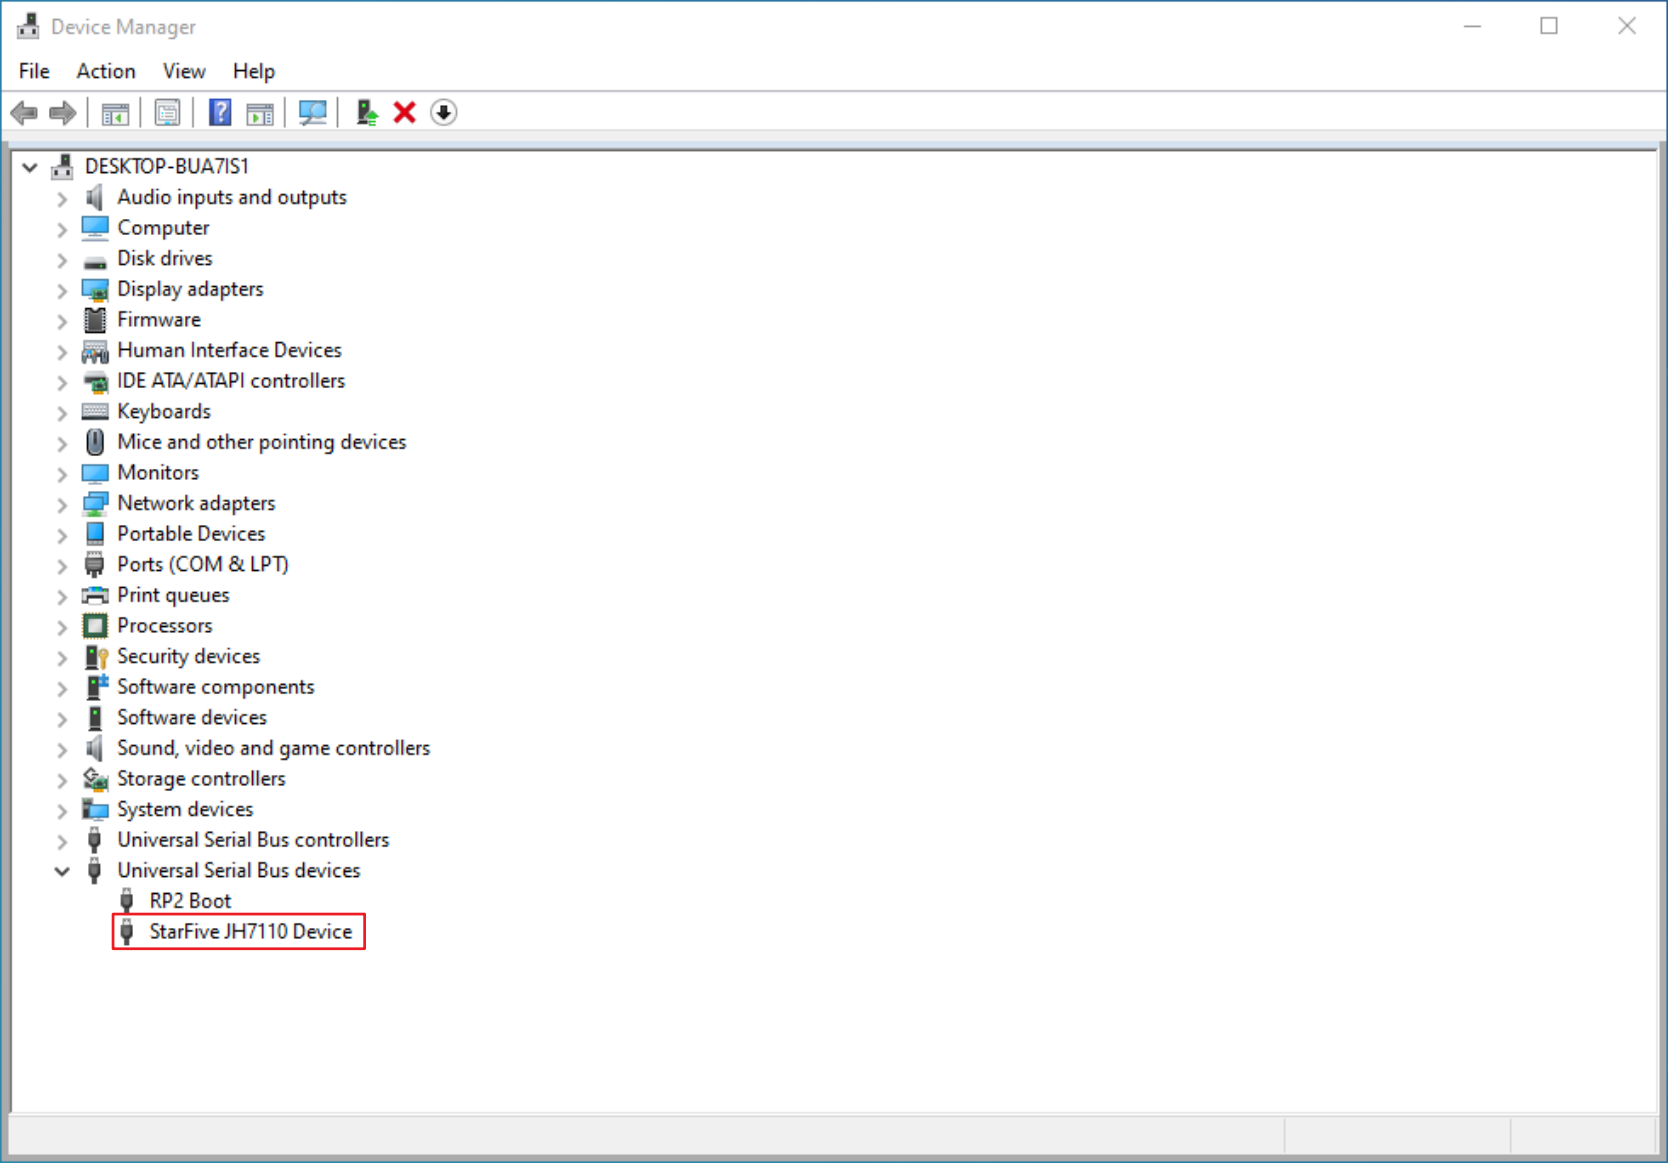
At this time, the JH7110 device has been identified in the Windows Device Manager and the driver needs to be installed
-
Run the
zadig-2.5program in the flashing tool directory, selectList All Devicesin the menuOptions, selectStarFive JH7110 Devicein the drop-down list, and then clickInstall Driverto complete the driver installation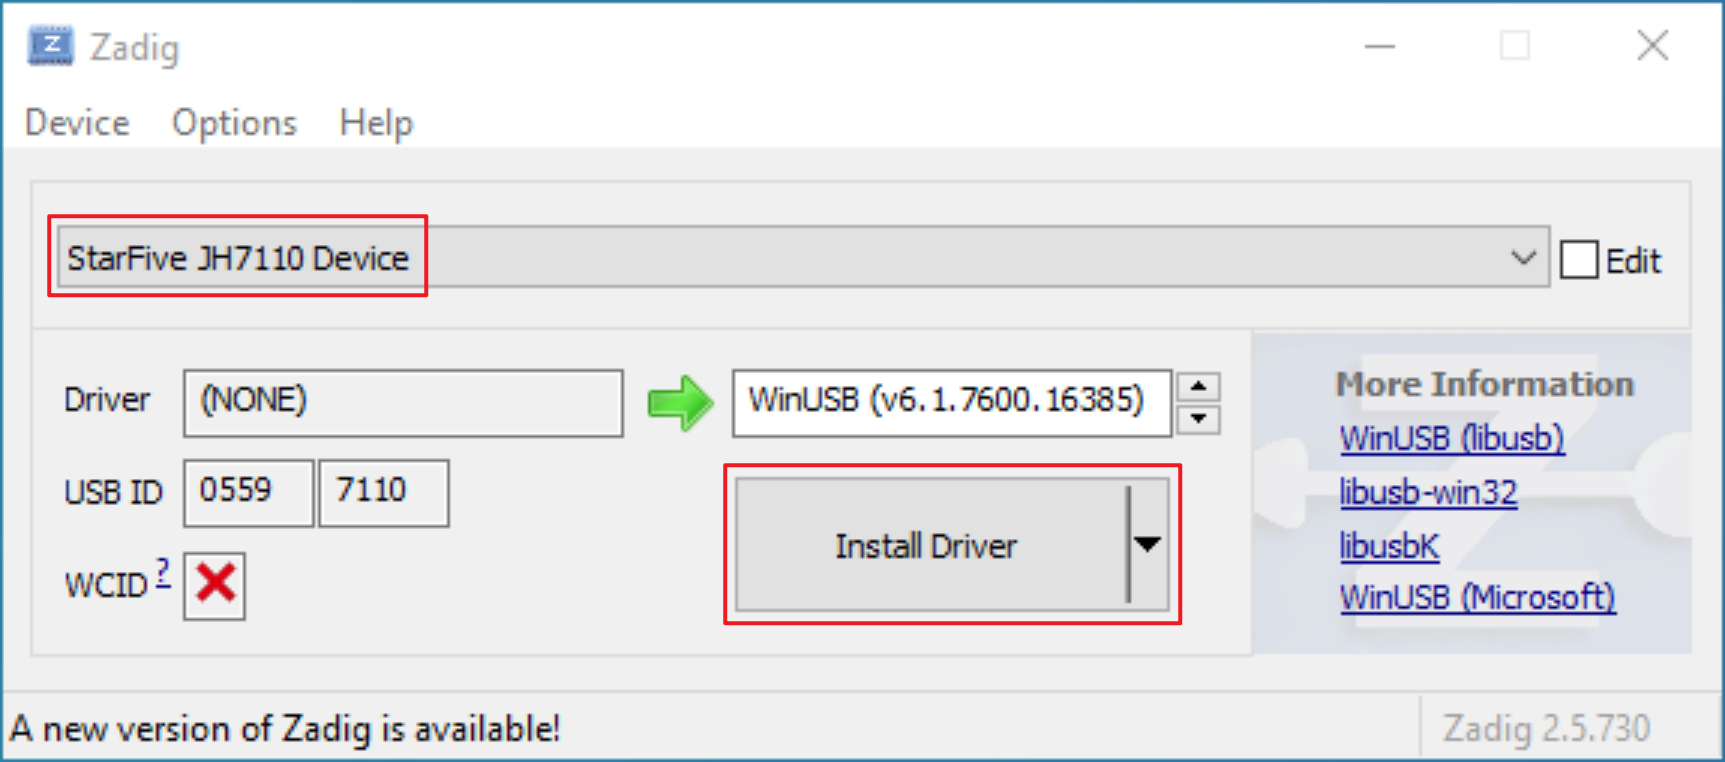
After the driver is successfully installed, check whether the status in the device manager has become a normal USB device
-
After the driver is successfully installed, close the UsbFlashTool window and power off Mars.
Upgrade Bootloader
The first 6 steps of burning the bootloader are the same as the first 5 steps of installing the driver above.
-
Flash the
SPLClick
File Select, select theSPLfirmwaremars_u-boot-spl.bin.normal.outto be burned, selectSPLinFile Type, selectFLASHinMemory Type, ClickLoadto start burning firmware.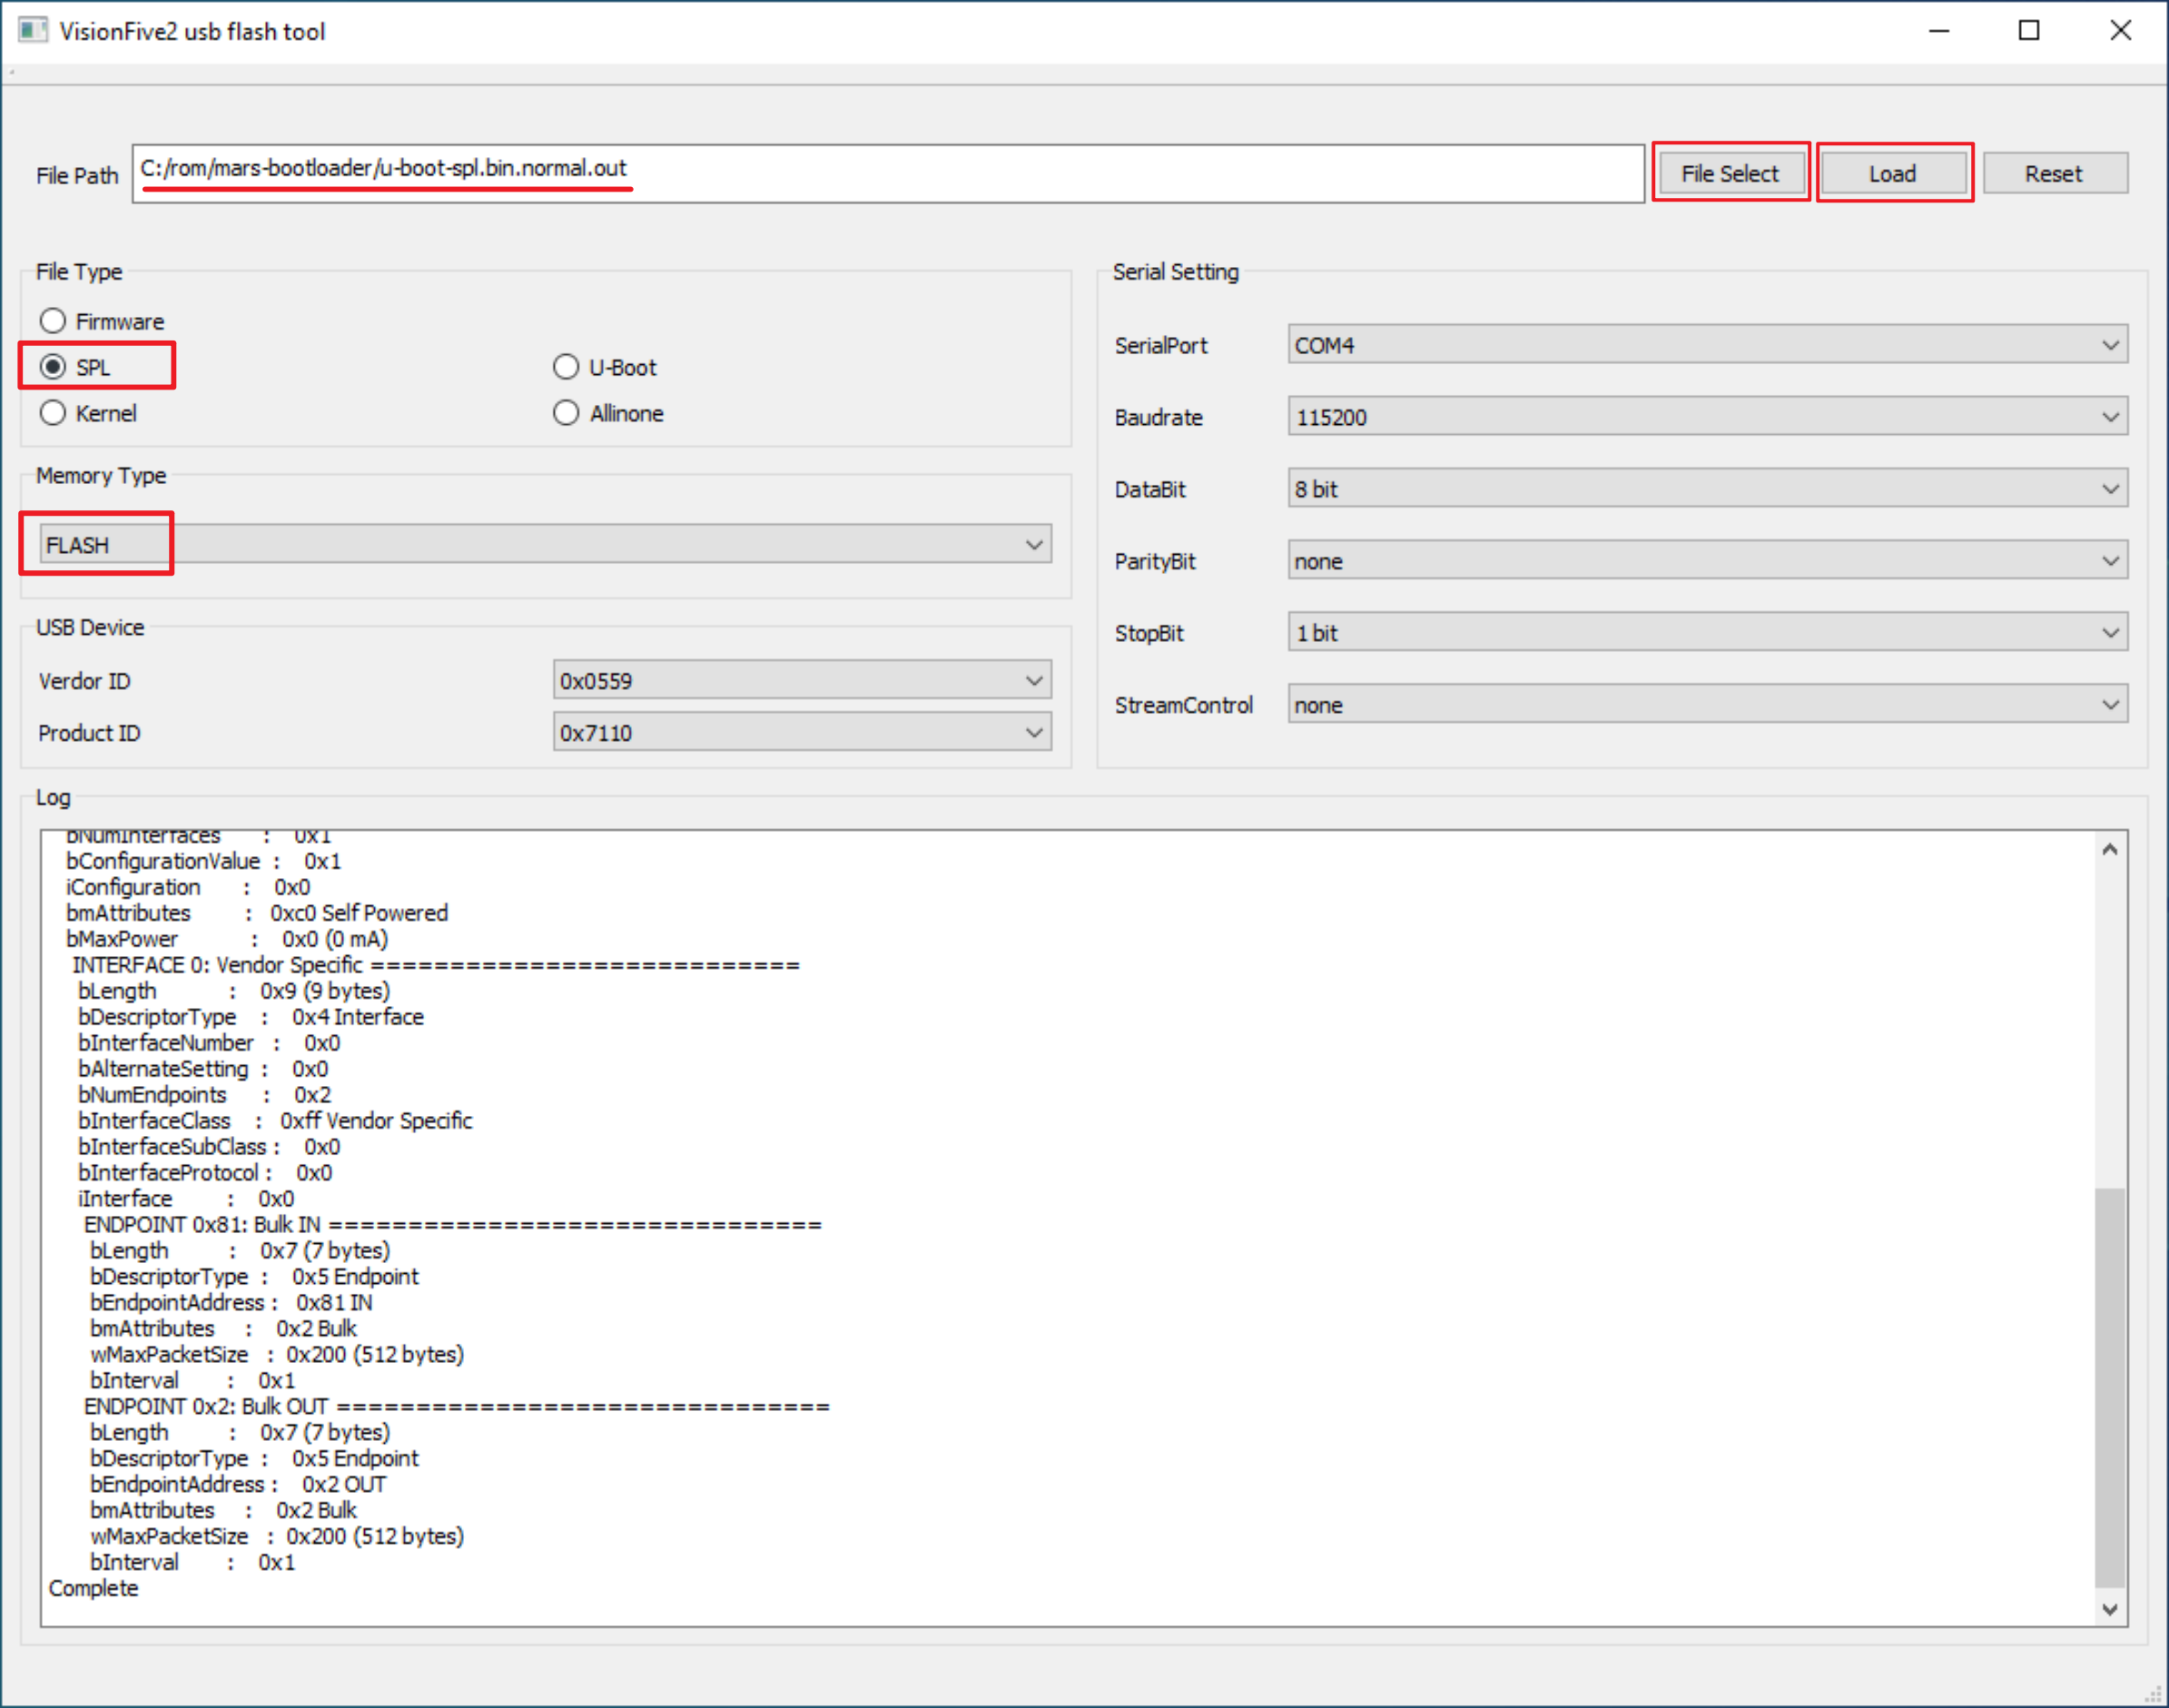
After successful burning,
SUCCEEDandCompletewill be displayed.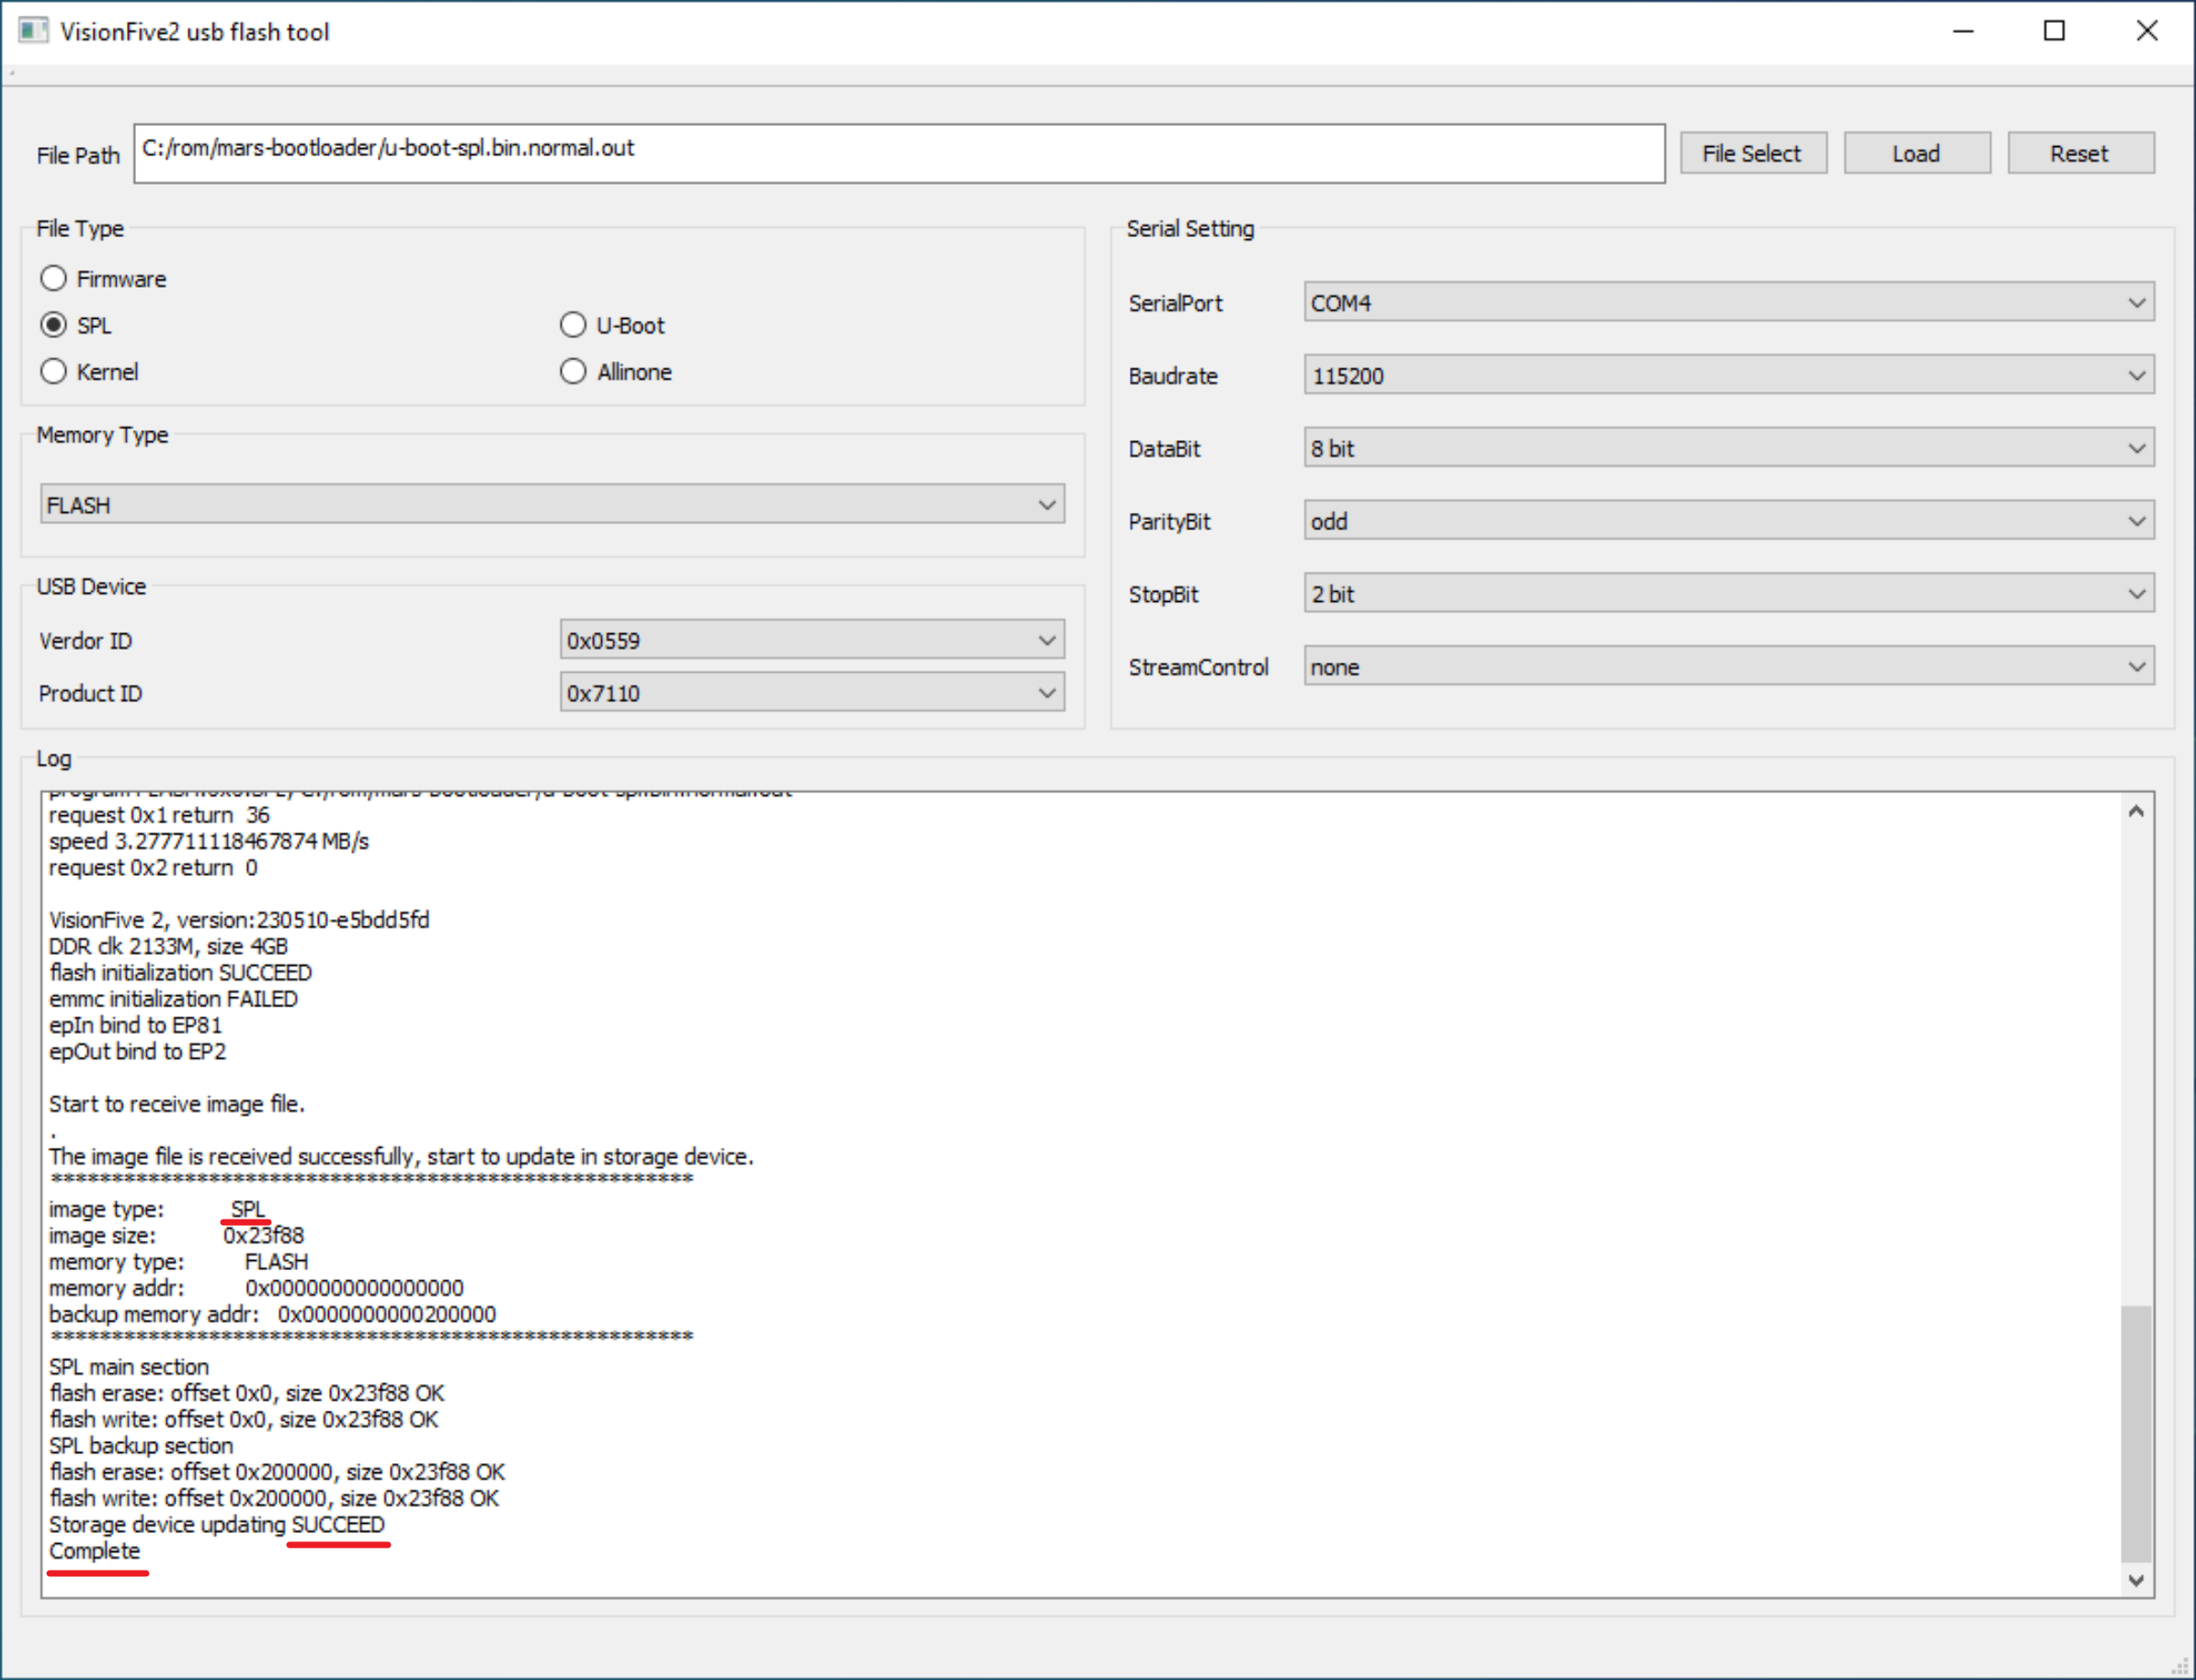
-
Flash the
U-BOOTClick
File Select, select theU-BOOTfirmwaremars_visionfive2_fw_payload.imgto be burned, selectU-BootinFile Type, selectFLASHinMemory Type, and then clickLoadto start burning firmware.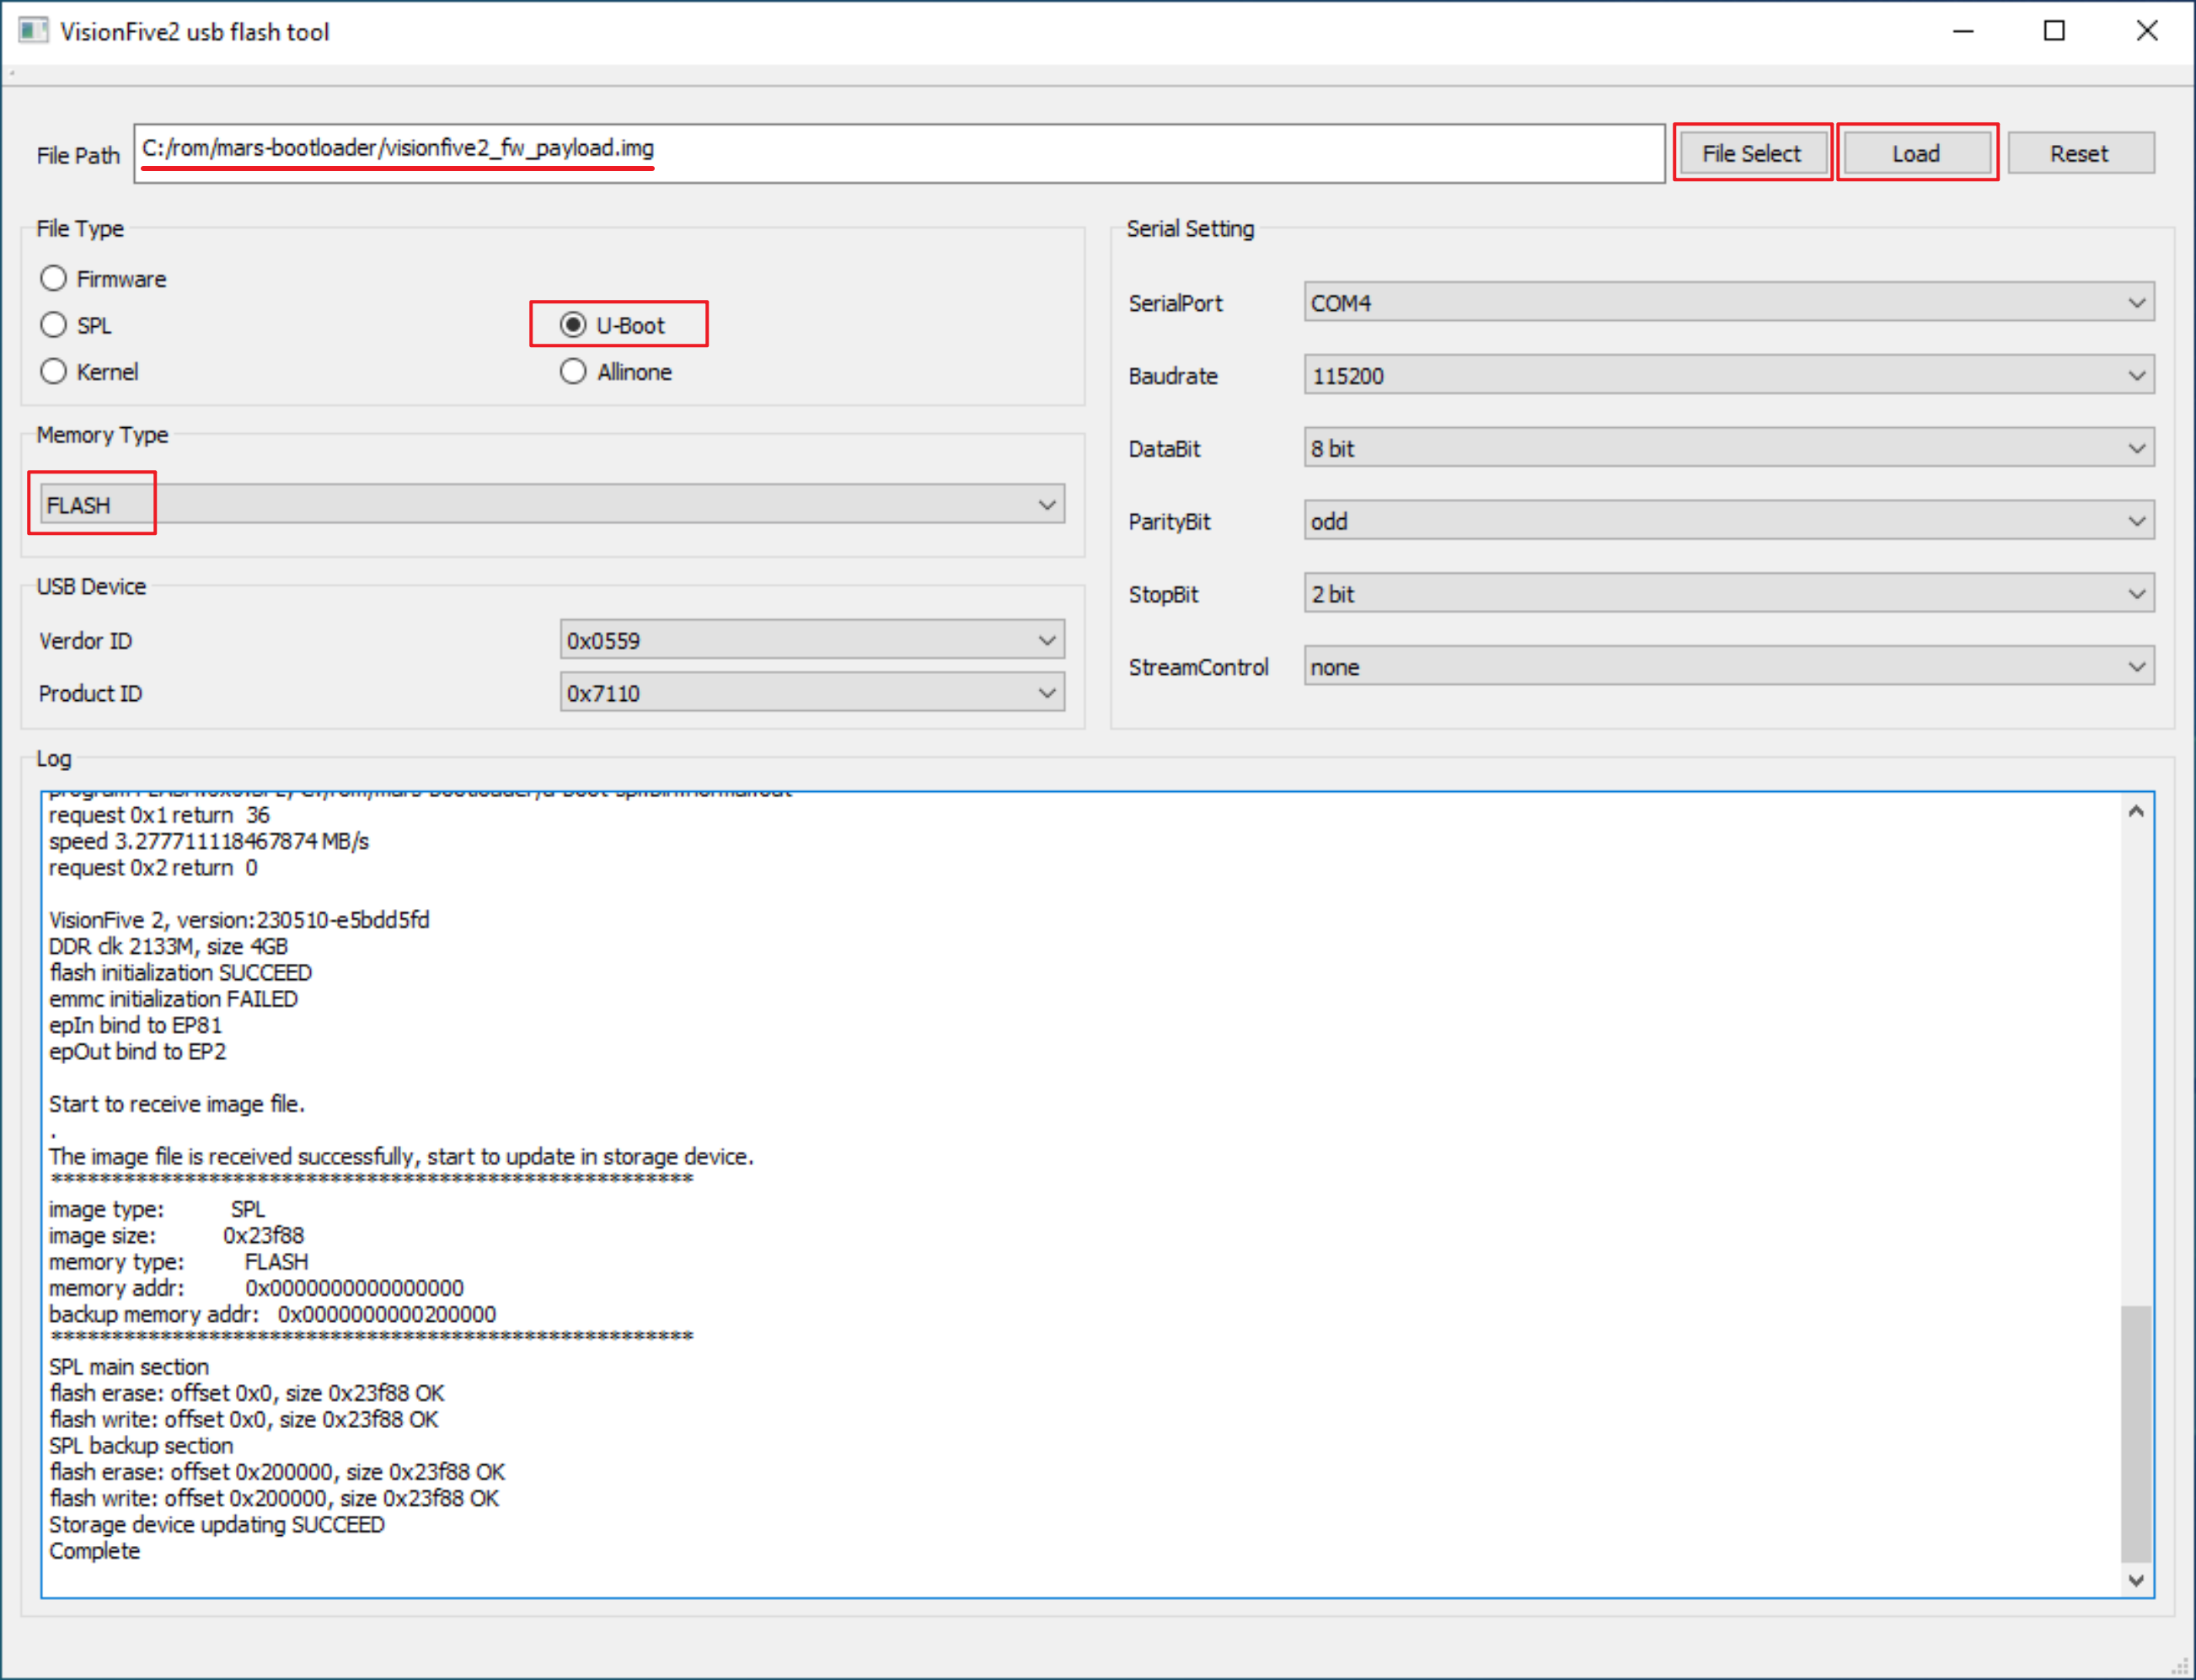
After successful burning,
SUCCEEDandCompletewill be displayed.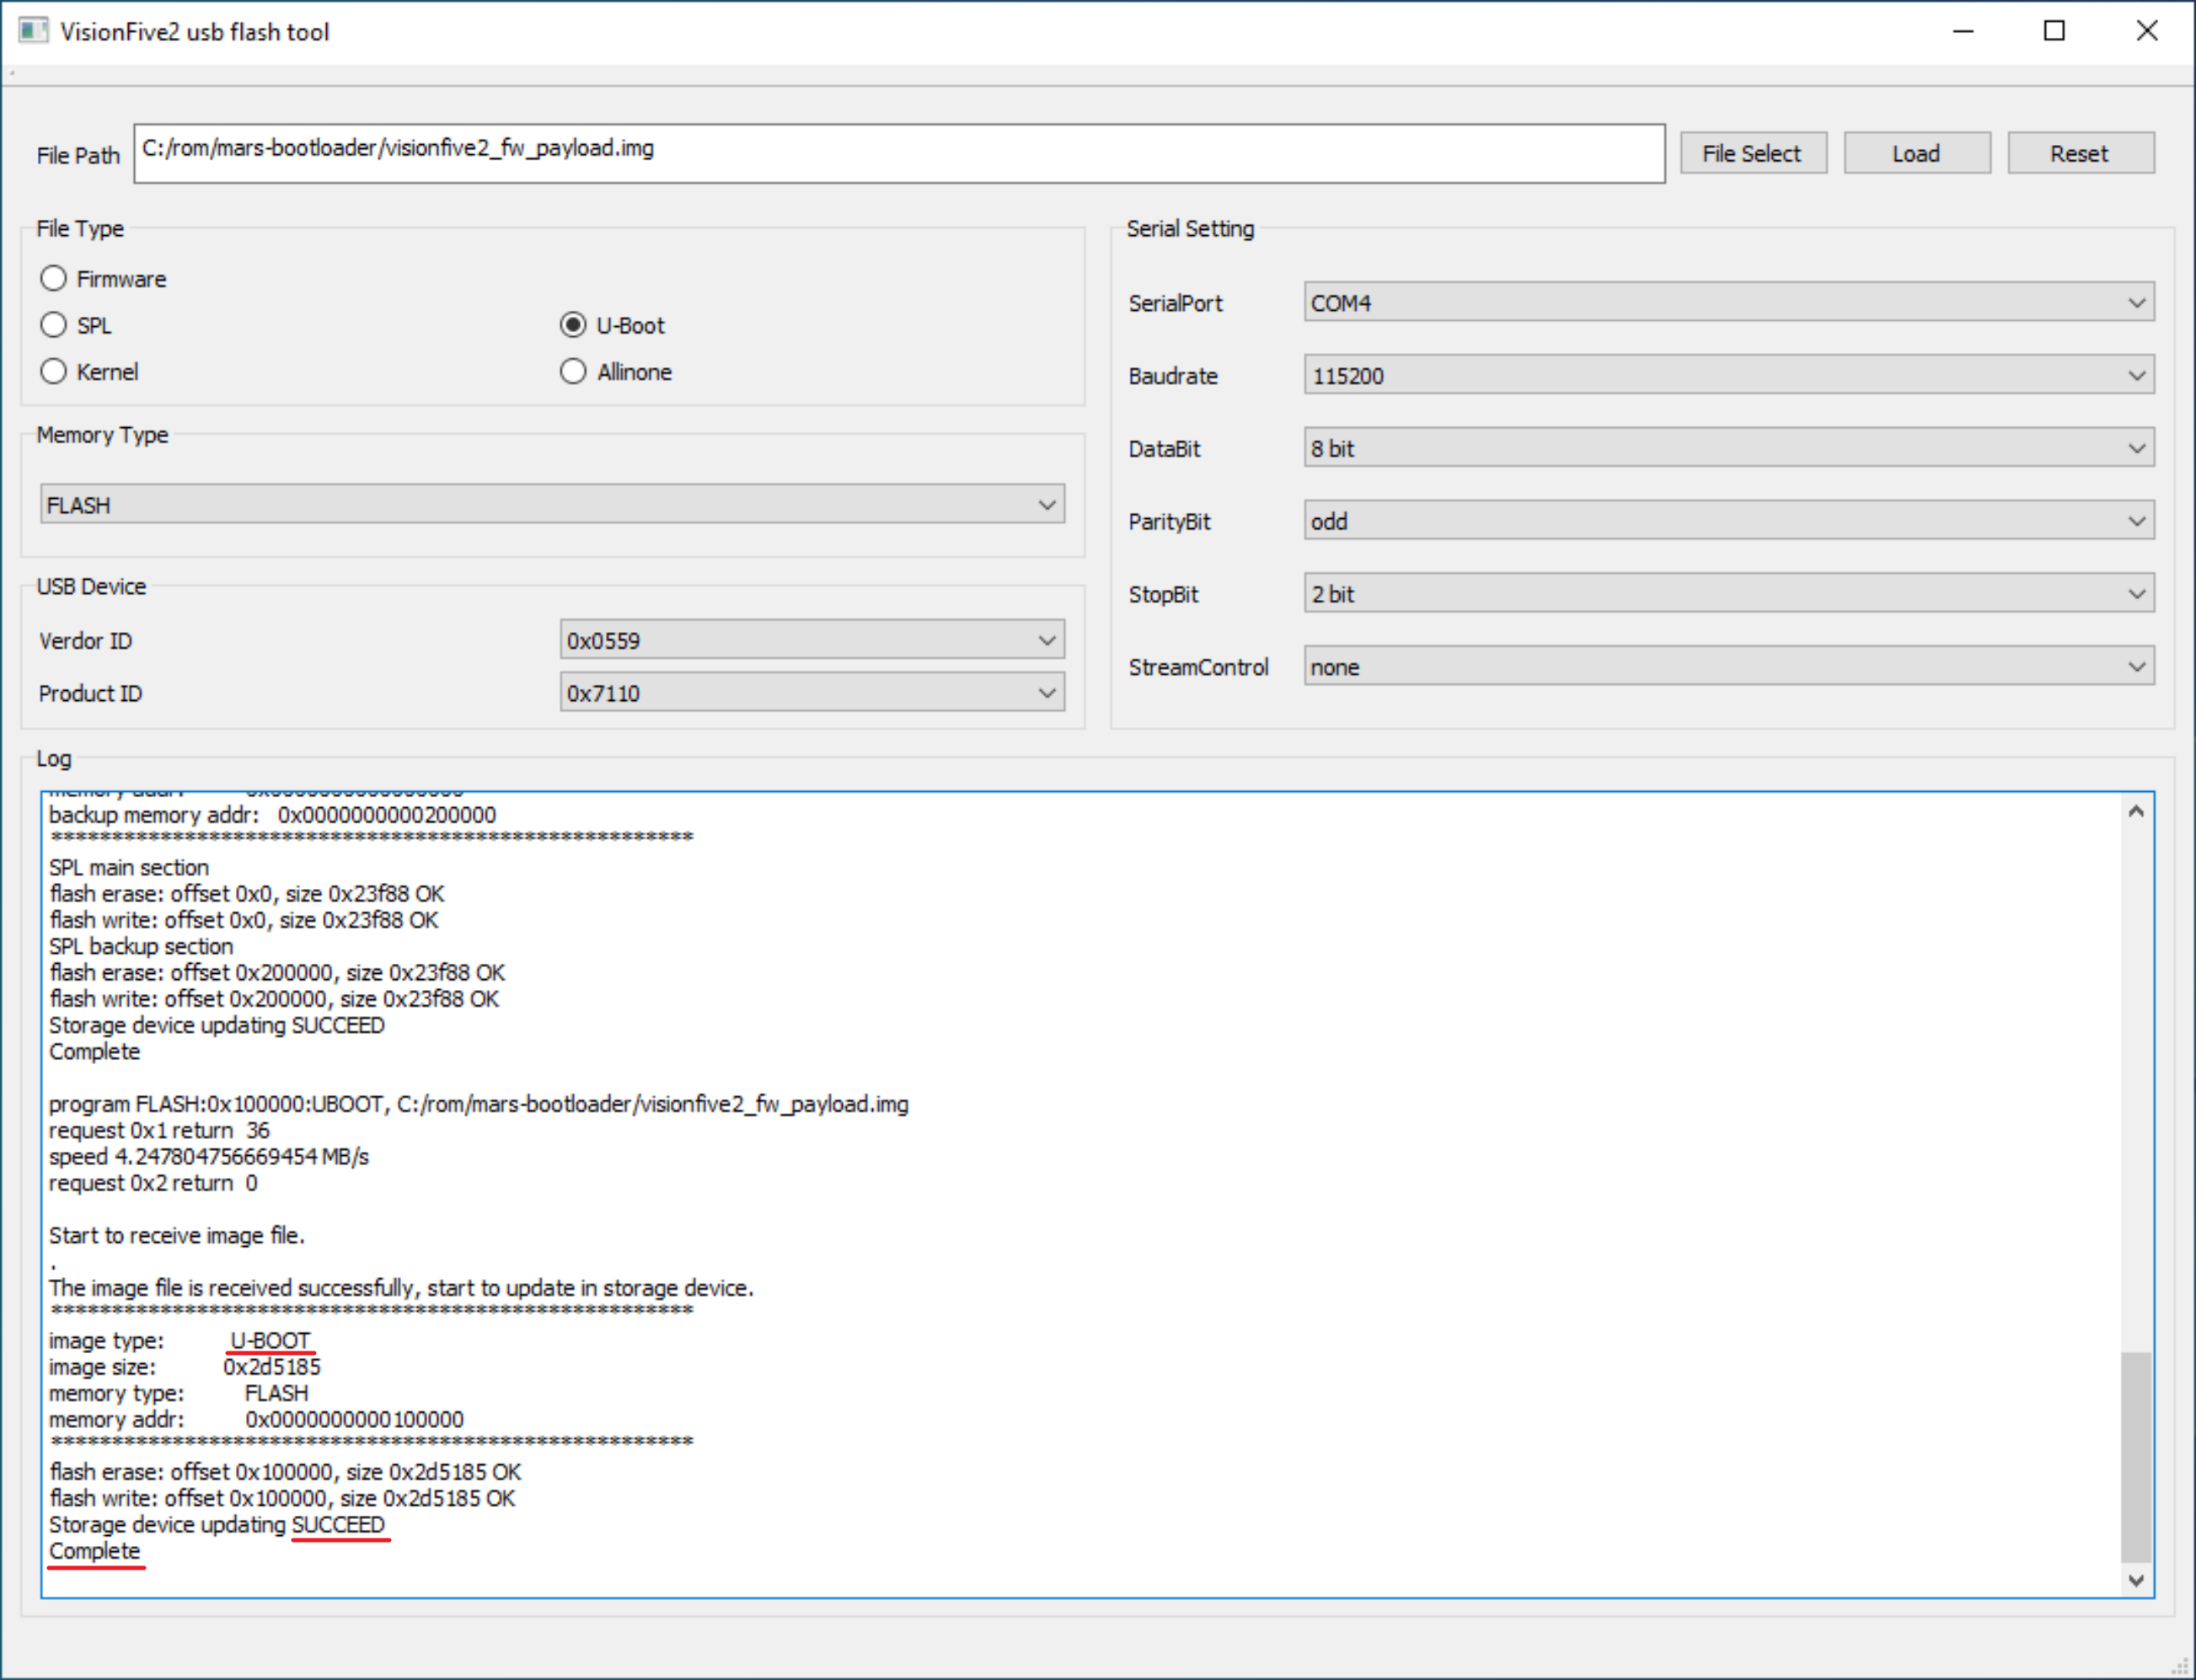
-
After burning is completed, close the UsbFlashTool window and power off Mars.
After powering on again, you can determine whether the bootloader has been updated based on the time information in the serial port log.
U-Boot SPL 2021.10 (Aug 31 2023 - 12:55:45 +0800)
U-Boot 2021.10 (Aug 31 2023 - 12:55:45 +0800), Build: jenkins-github_visionfive2-17
Flash the new version of U-Boot
Download Bootloader Firmware
SPL:    mars_u-boot-spl.bin.normal.out
U-Boot: mars_visionfive2_fw_payload.img
SD Card Partition
The following takes /dev/sdc as an example:
Run the command sudo fdisk /dev/sdc to start fdisk.
milkv@milkv-desktop:~$ sudo fdisk /dev/sdc
Welcome to fdisk (util-linux 2.37.2).
Changes will remain in memory only, until you decide to write them.
Be careful before using the write command.
Command (m for help):
Enter n as prompted to create a new partition.
Command (m for help): n
Partition number (1-128, default 1):
First sector (34-122131422, default 2048):
Last sector, +/-sectors or +/-size{K,M,G,T,P} (2048-122131422, default 122131422):
Created a new partition 1 of type 'Linux filesystem' and of size 58.2 GiB.
Enter as prompted, or press enter directly.
Note: If Do you want to remove the signature? [Y]es/[N]o appears, select N.
After creation, enter w to save and exit.
Enter the command sudo mkfs.vfat -I /dev/sdc1 to format the partition as FAT32.
Run the command lsdlk -f to check whether the formatting is successful.
milkv@milkv-desktop:~$ sudo mkfs.vfat -I /dev/sdc1
mkfs.fat 4.2 (2021-01-31)
milkv@milkv-desktop:~$ lsblk -f
NAME FSTYPE FSVER LABEL UUID FSAVAIL FSUSE% MOUNTPOINTS
loop0
squash 4.0 0 100% /snap/bare/5
loop1
squash 4.0 0 100% /snap/core18/2846
loop2
squash 4.0 0 100% /snap/core20/2379
...
sda
sdc
└─sdc1
vfat FAT32 6A8E-8C2A
nvme0n1
│
├─nvme0n1p1
│ vfat FAT32 0BA1-44C9 504.9M 1% /boot/efi
└─nvme0n1p2
ext4 1.0 1ad0a4fe-c1e1-4dbe-a6cb-8488144bd6b7 49G 84% /var/snap/firefox/common/host-hunspell
/
Run the command sudo mount /dev/sdc1 /mnt to mount it to the /mnt directory. You can decide which directory to mount to based on the actual situation.
Copy the downloaded mars_u-boot-spl.bin.normal.out and mars_visionfive2_fw_payload.img to the mnt directory.
Refresh u-boot
Assuming your new U-Boot version is on the 1st partition of the SD card, you can install it to the SPI flash using the following commands
sf probe
load mmc 0:1 $kernel_addr_r mars_u-boot-spl.bin.normal.out
sf update $kernel_addr_r 0 $filesize
load mmc 0:1 $kernel_addr_r mars_visionfive2_fw_payload.img
sf update $kernel_addr_r 0x100000 $filesize
Note: load mmc may be 0:1 or 1:1.
You can run the commands ls mmc 0:1 and ls mmc 1:1 to see if the files exist.
StarFive # ls mmc 1:1
147336 mars_u-boot-spl.bin.normal.out
2959557 mars_visionfive2_fw_payload.img
2 file(s), 0 dir(s)
After updating U-Boot, you may need to reboot and reset the environment to defaults.
env default -f -a
env save
Use Uart to start U-BOOT under Linux
When U-BOOT in SPI is damaged and SD card cannot be started, you can use uart to start.
Download Bootloader Firmware
SPL: mars_u-boot-spl.bin.normal.out
U-Boot: mars_visionfive2_fw_payload.img
Download tio
For reference: https://github.com/tio/tio
Note that you need to download the latest version. The version downloaded by directly running the command sudo apt-get install tio does not meet the requirements.
Boot from UART
Press and hold the upgrade button on Mars, power the board and upload mars_u-boot-spl.bin.normal.out via XMODEM.
Run the command tio -b 115200 --databits 8 --flow none --stopbits 1 /dev/ttyUSB0
$ tio -b 115200 --databits 8 --flow none --stopbits 1 /dev/ttyUSB0
[08:14:54.700] tio v2.7
[08:14:54.700] Press ctrl-t q to quit
[08:14:54.701] Connected

(C)StarFive
CCC
(C)StarFive
CCCCCCCC
Press ctrl-t x to start XMODEM-1K transmission, and enter according to the prompts.
LPDDR4: 1G version: g8ad50857.
Trying to boot from SPI
Note: Sending file '/path/to/mars_u-boot-spl.bin.normal.out' , after entering the file to be sent, wait for the | that appears after ..., which means the sending is complete.


