Milk-V Mars CM Bootloader Update Guide
Whether Mars CM starts the system through the SD card or the eMMC module, it must be started through the Bootloader boot program. This boot program is stored in an SPI Flash on the board and contains two parts: SPL and U-Boot.
The Bootloader in Mars CM can be understood as the BIOS in PC
When Mars CM is shipped, it already comes with a pre-installed initial Bootloader program. There is no need to upgrade this program during normal usage. Bootloader upgrade is only necessary in the following situations:
- When the bootloader program in SPI Flash is accidentally damaged, causing the system to fail to start normally.
- When upgrading the official system image (such as Debian), it must be matched with the new bootloader, otherwise it cannot be started.
- U-Boot has fixed some bugs or added new functions. When you need to use these new functions.
There are several ways to update the Bootloader in SPI Flash on Mars CM, such as Windows burning tools, TFTP, flashcp commands, etc. Here we first introduce how to use the UsbFlashTool burning tool in Windows systems.
Mars CM can be used with different base-boards. Here we take the Raspberry Pi CM4 IO Board base board as an example.
Upgrade Bootloader using UsbFlashTool Windows tool
Download UsbFlashTool burning tool and Bootloader firmware
SPL:    u-boot-spl.bin.normal.out
U-BOOT: visionfive2_fw_payload.img
Install driver for the burning tool
Driver installation is only required for the first use.
Please refer to Install driver for the burning tool .
After installing the driver, return here to continue the operation.
Upgrade Bootloader
The first 6 steps of burning the bootloader are the same as the first 6 steps of installing the driver above.
-
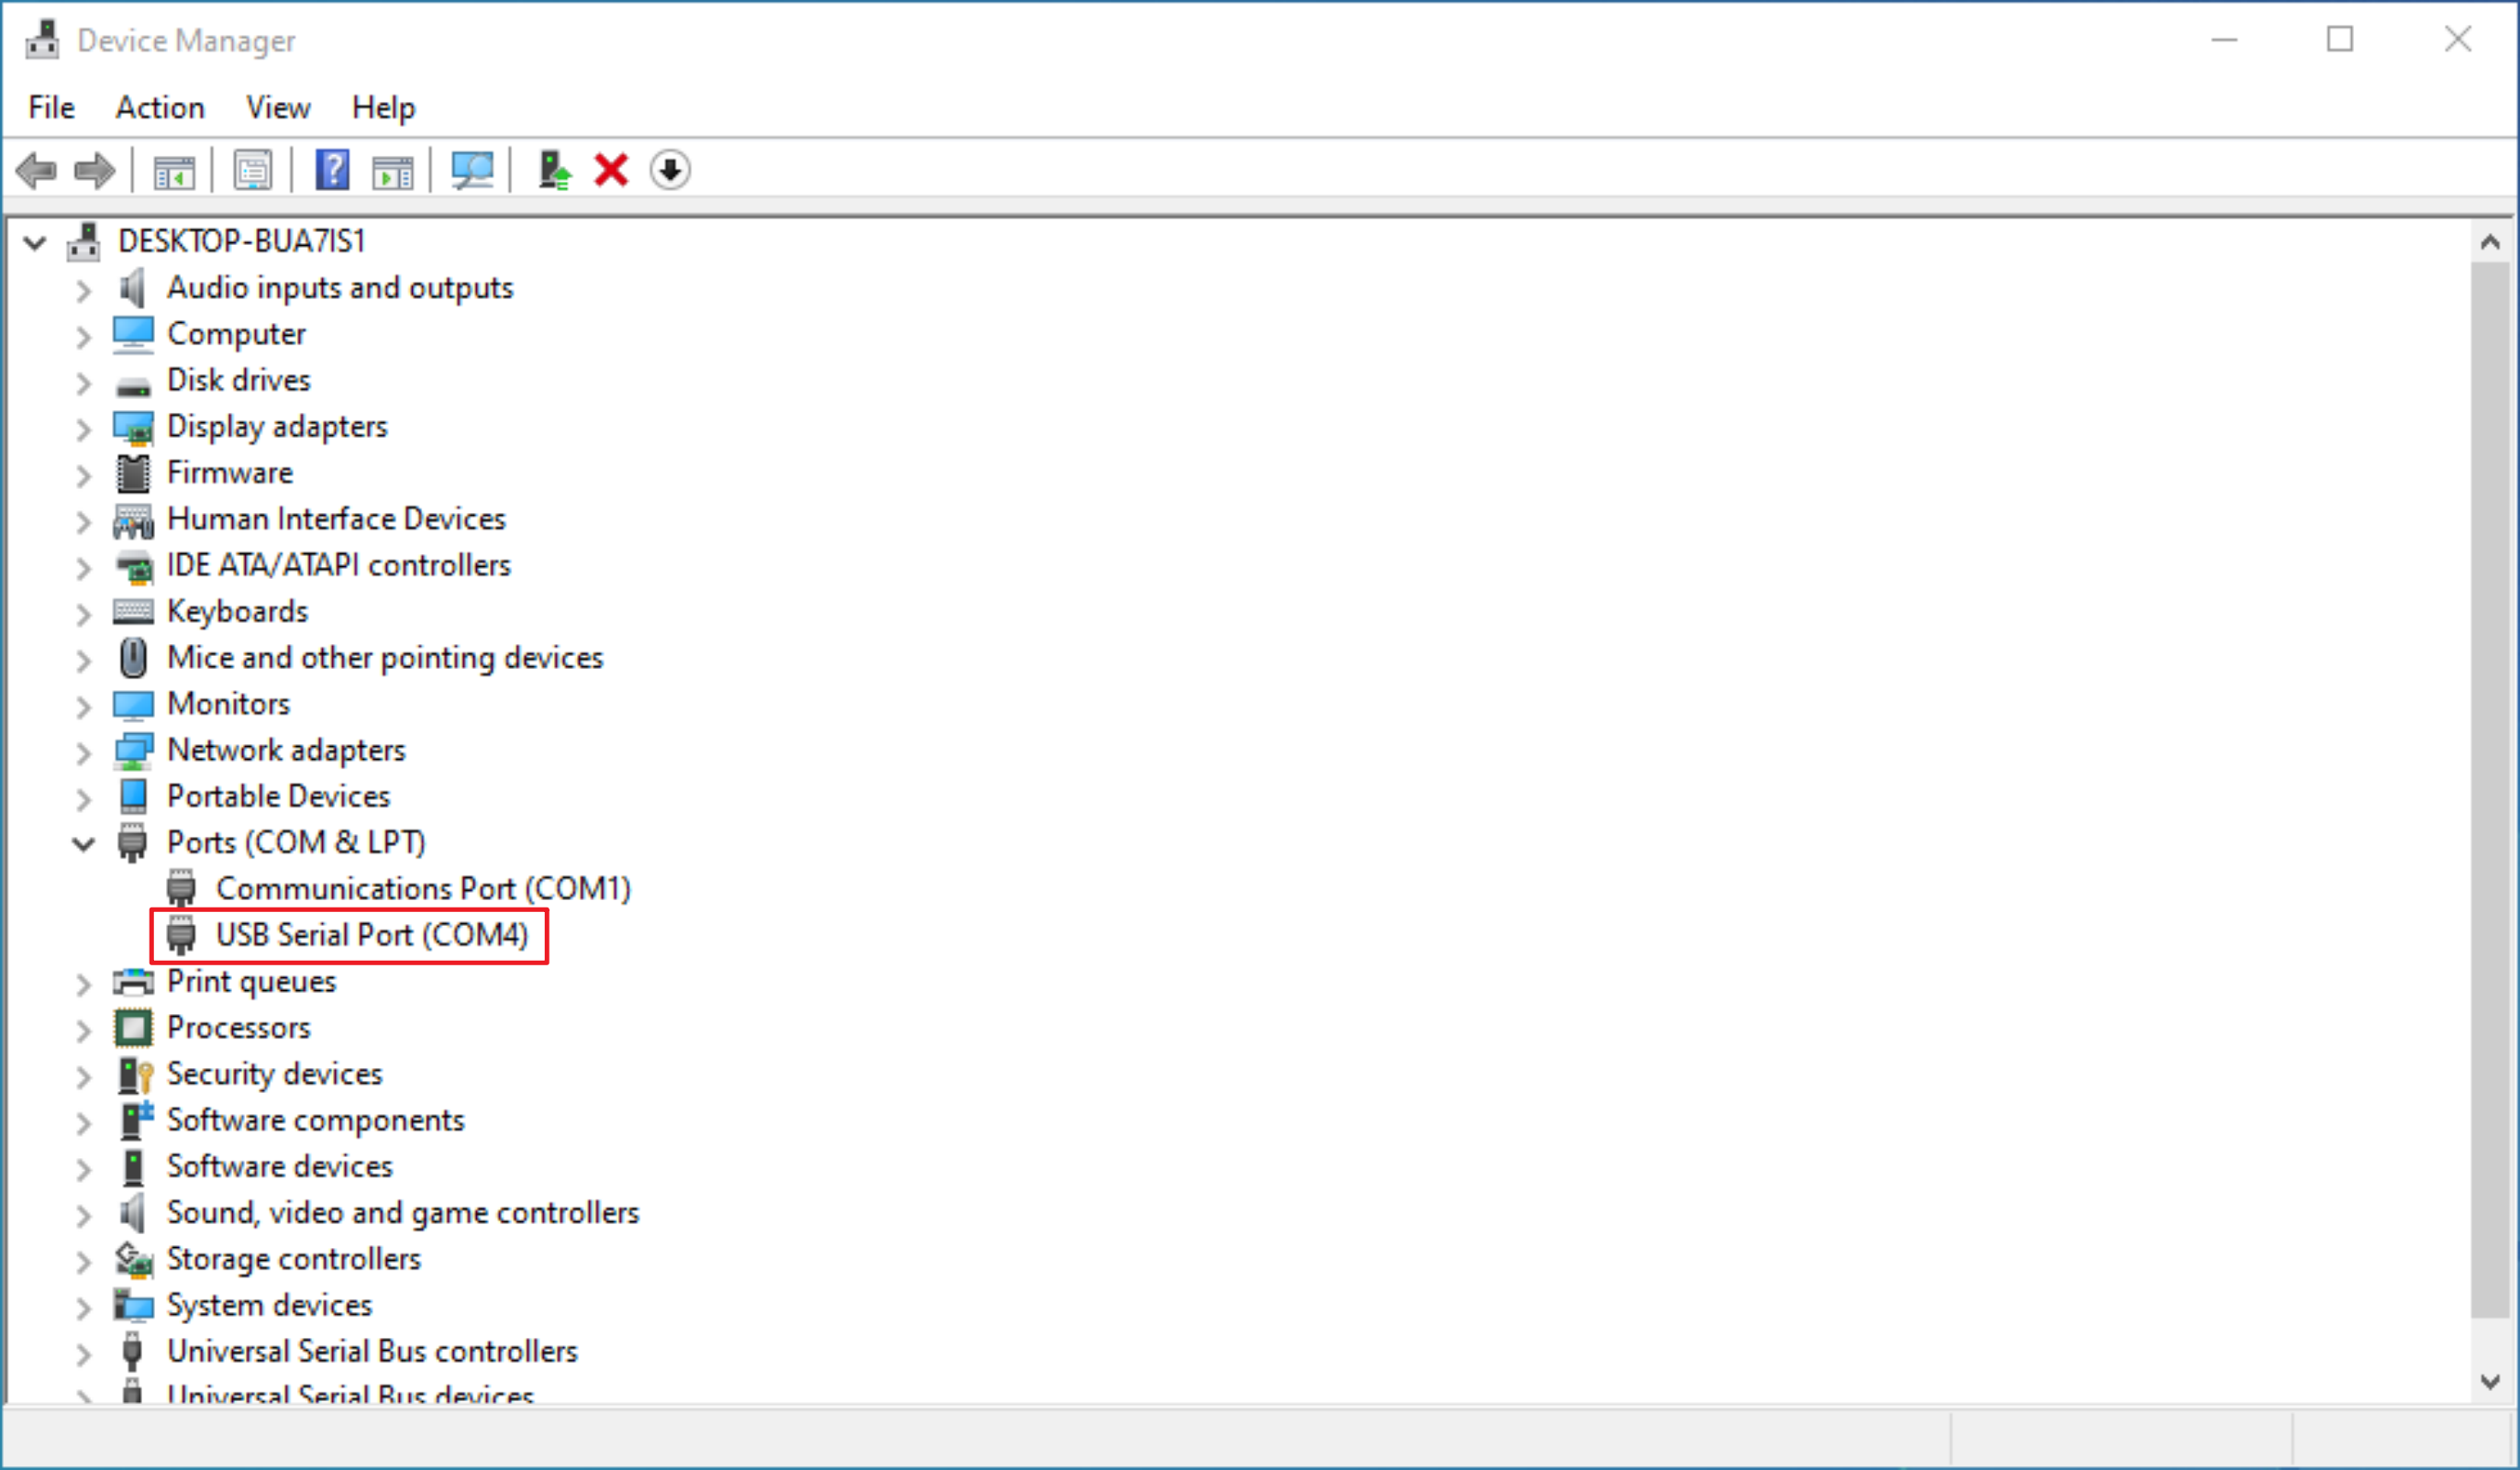
Connect the USB to TTL serial port cable to the 40 pin header on the base-board, connect the USB to the PC and note down the serial port number
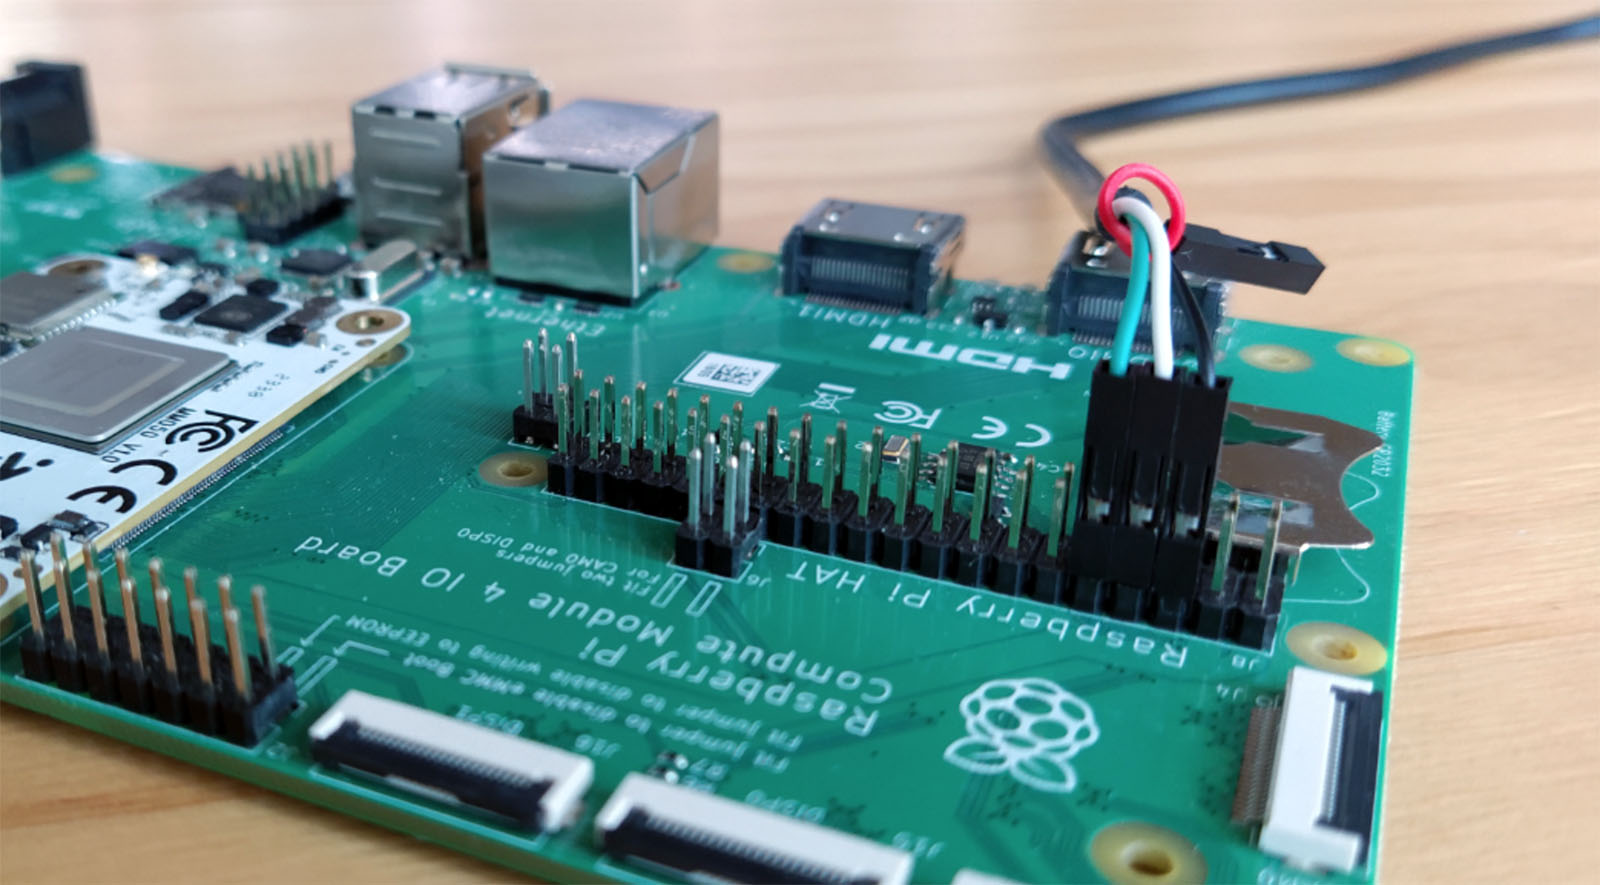
Note: If any other serial port program is open and using the serial port, please exit the program to release the port and avoid occupying it.
-
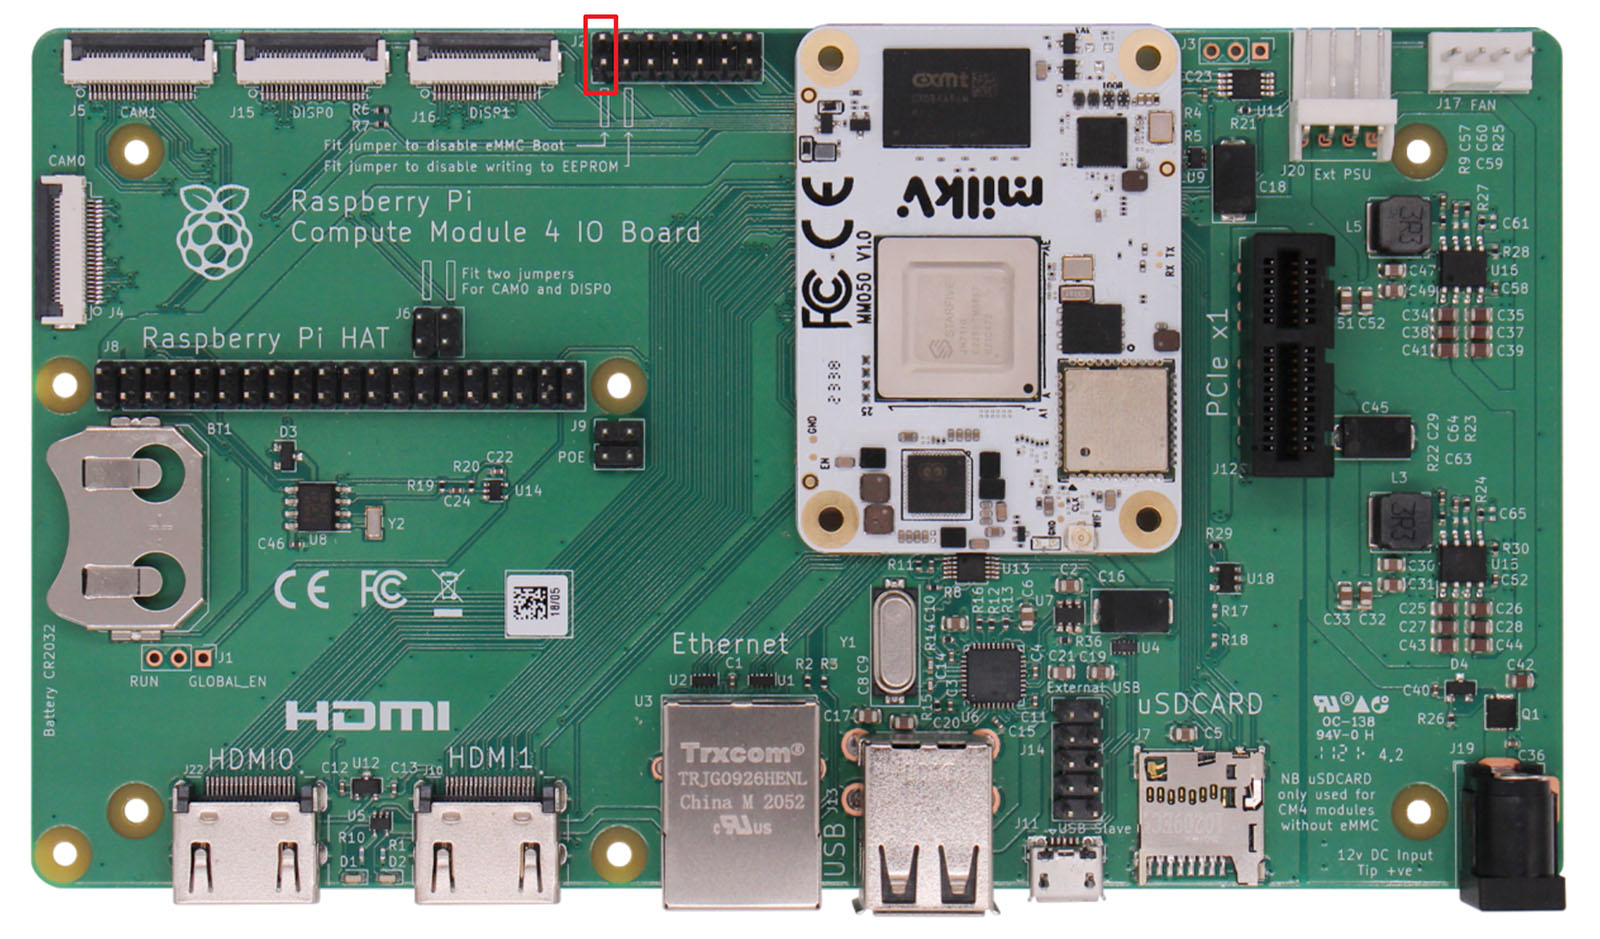
Short-circuit pins 1 and 2 of the J12 header on the CM4 IO Board using a jumper cap (USB flashing mode)
-
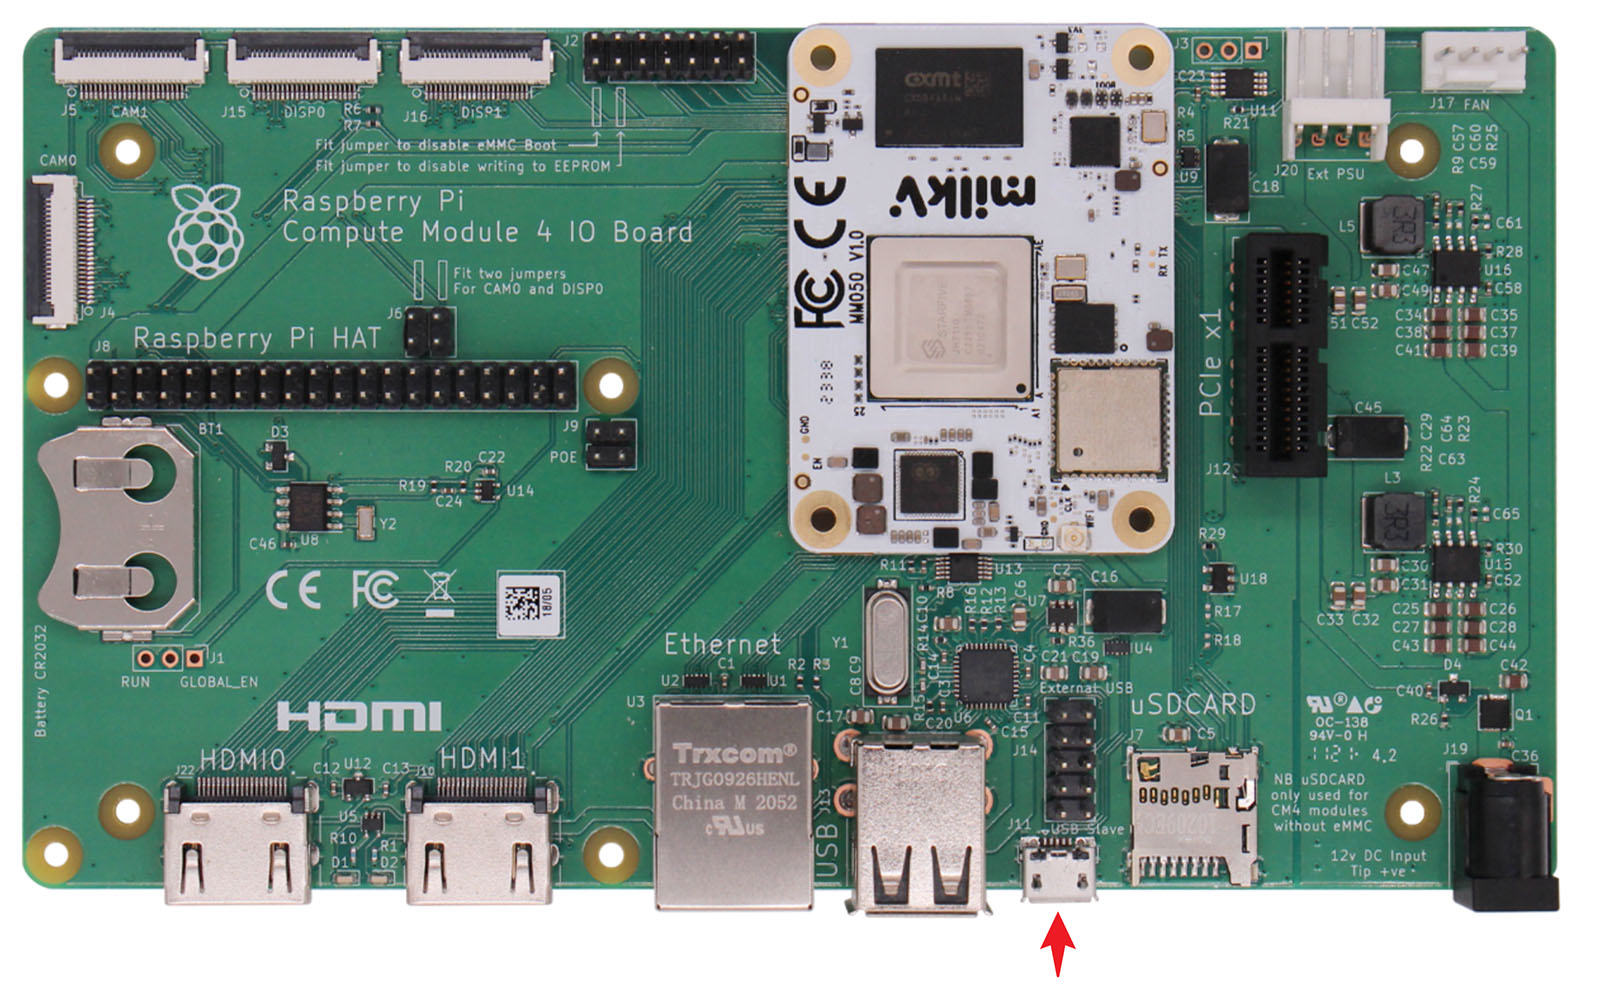
Connect the PC and the base-board's J11 USB Slave interface using a Micro USB data cable
-
Run the
UsbFlashTool-*-Windows.exeflashing program in the flashing tool directory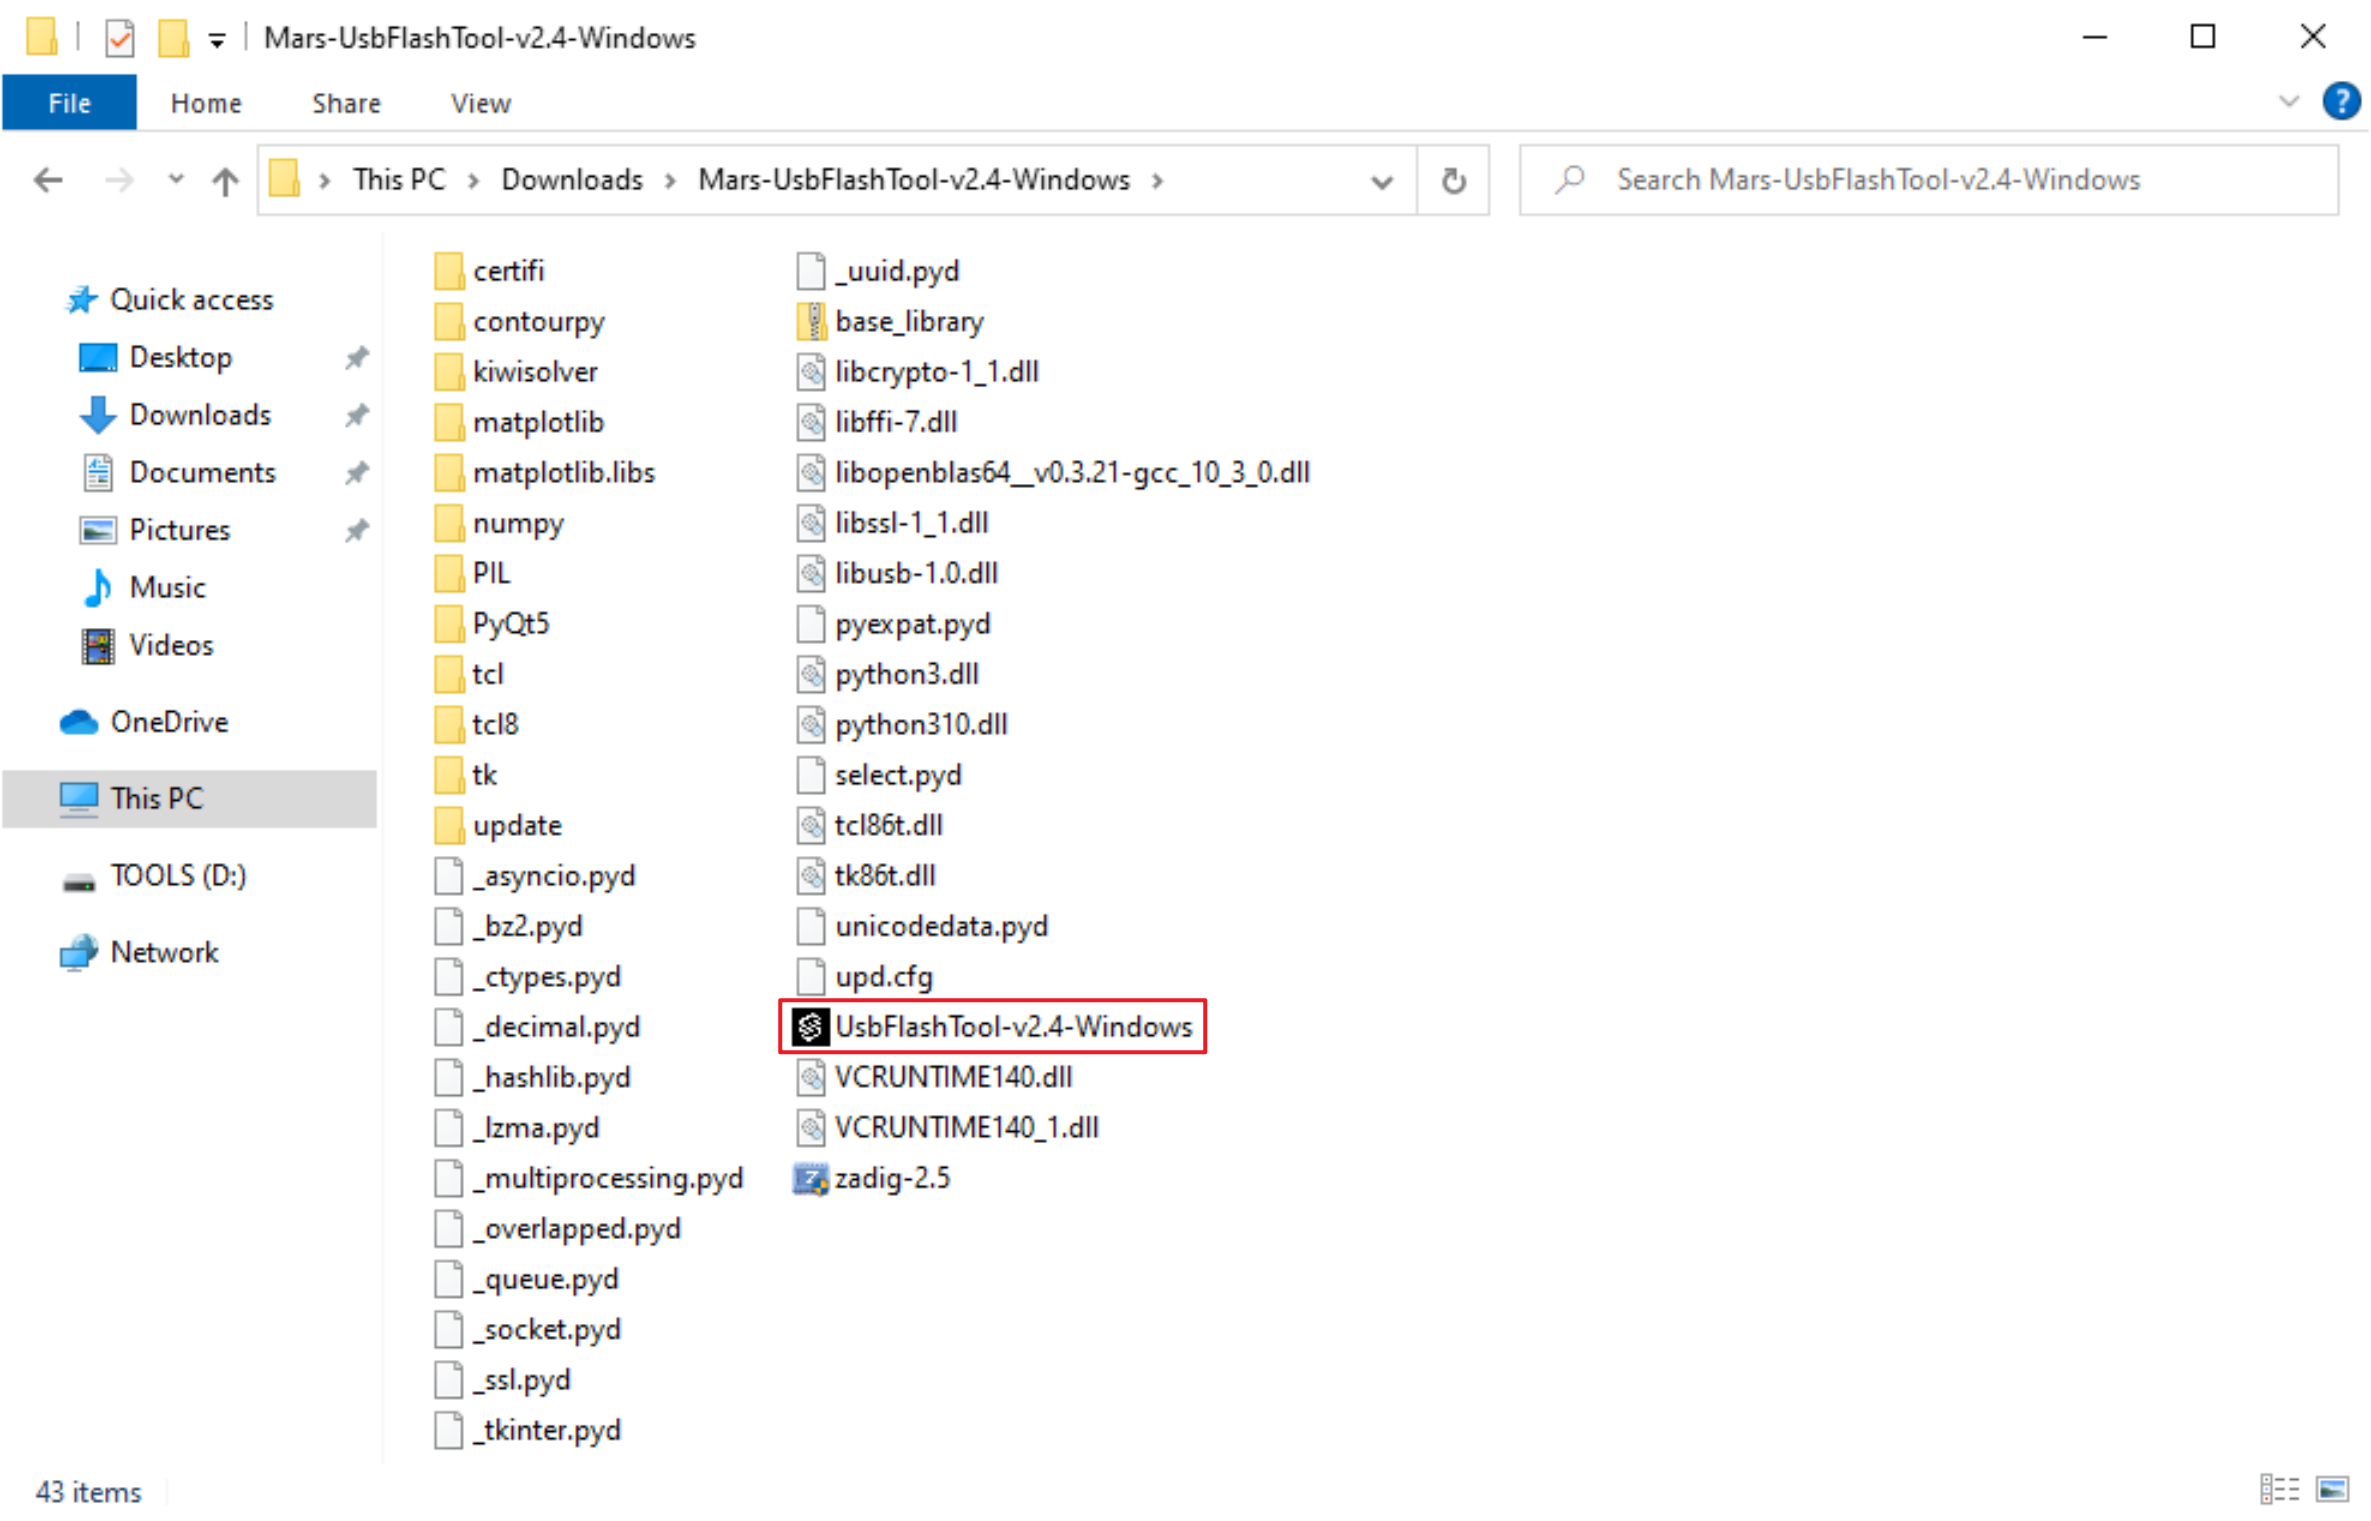
-
Set the serial port number in the
Serial Settingon the right side to the serial port number noted in step 1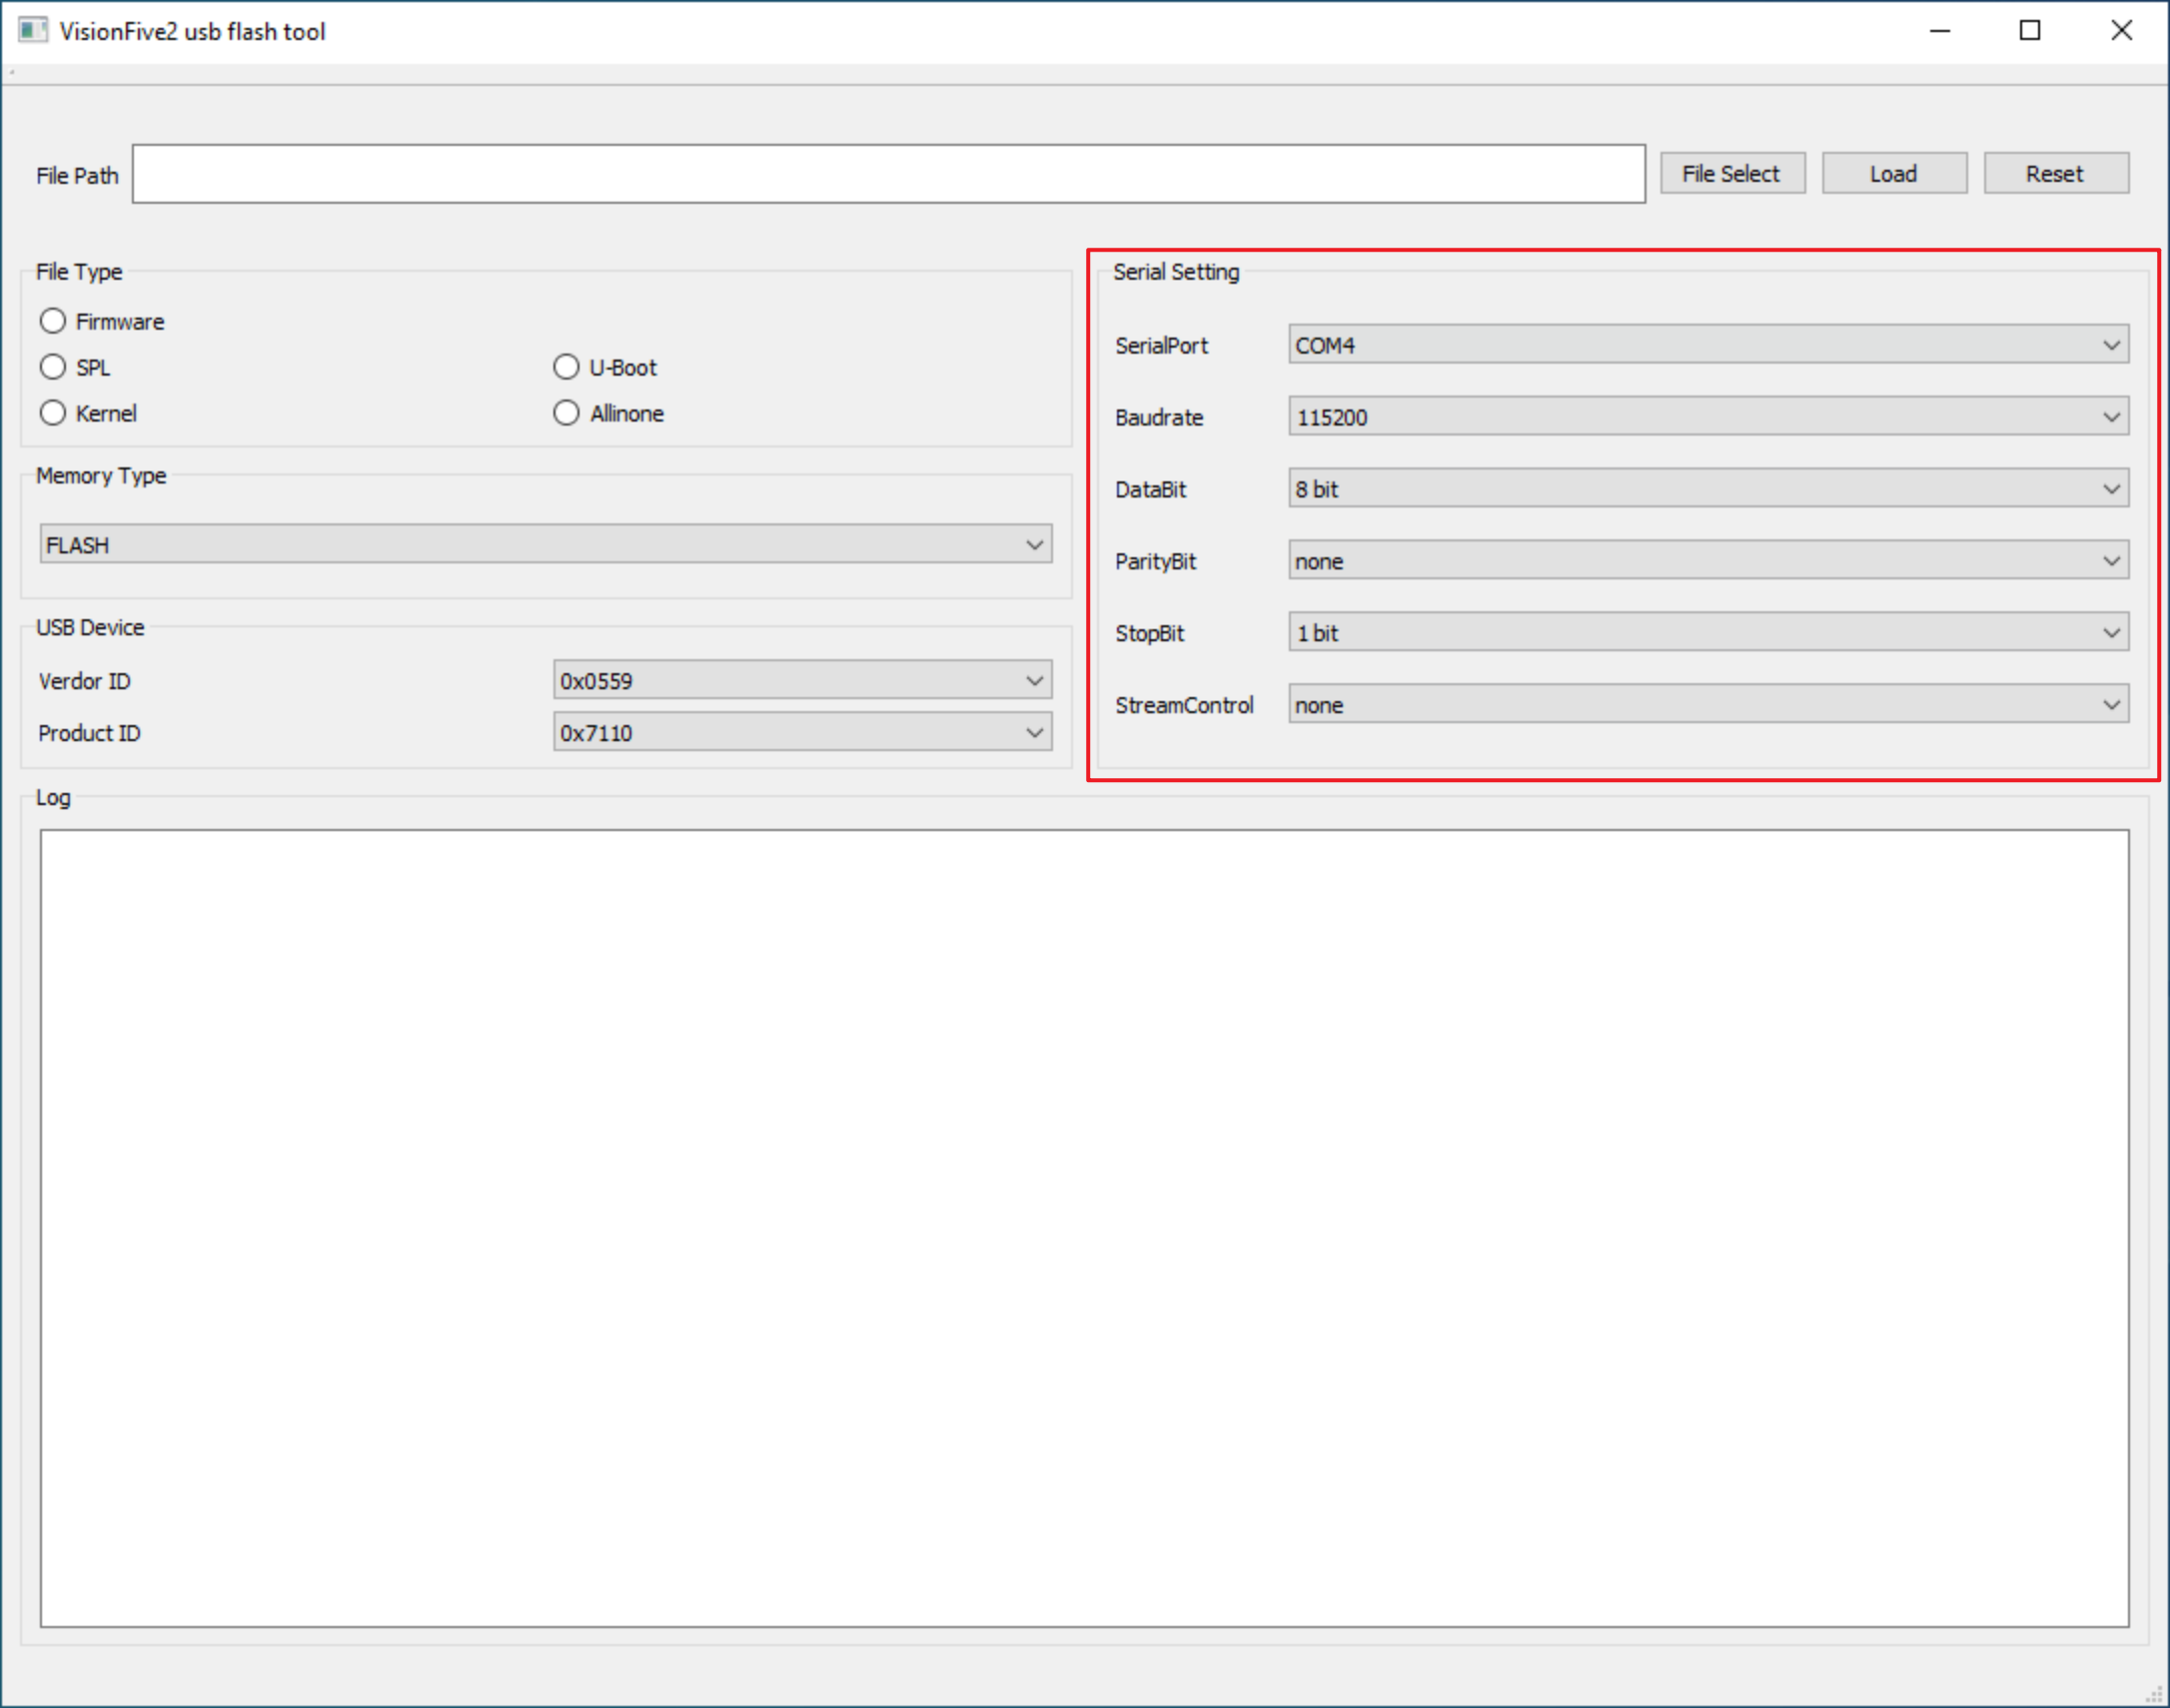
-
Power on the base-board through the 12V DC interface
-
Flash the
SPLClick
File Select, select theSPLfirmwareu-boot-spl.bin.normal.outto be burned, selectSPLinFile Type, selectFLASHinMemory Type, ClickLoadto start burning firmware.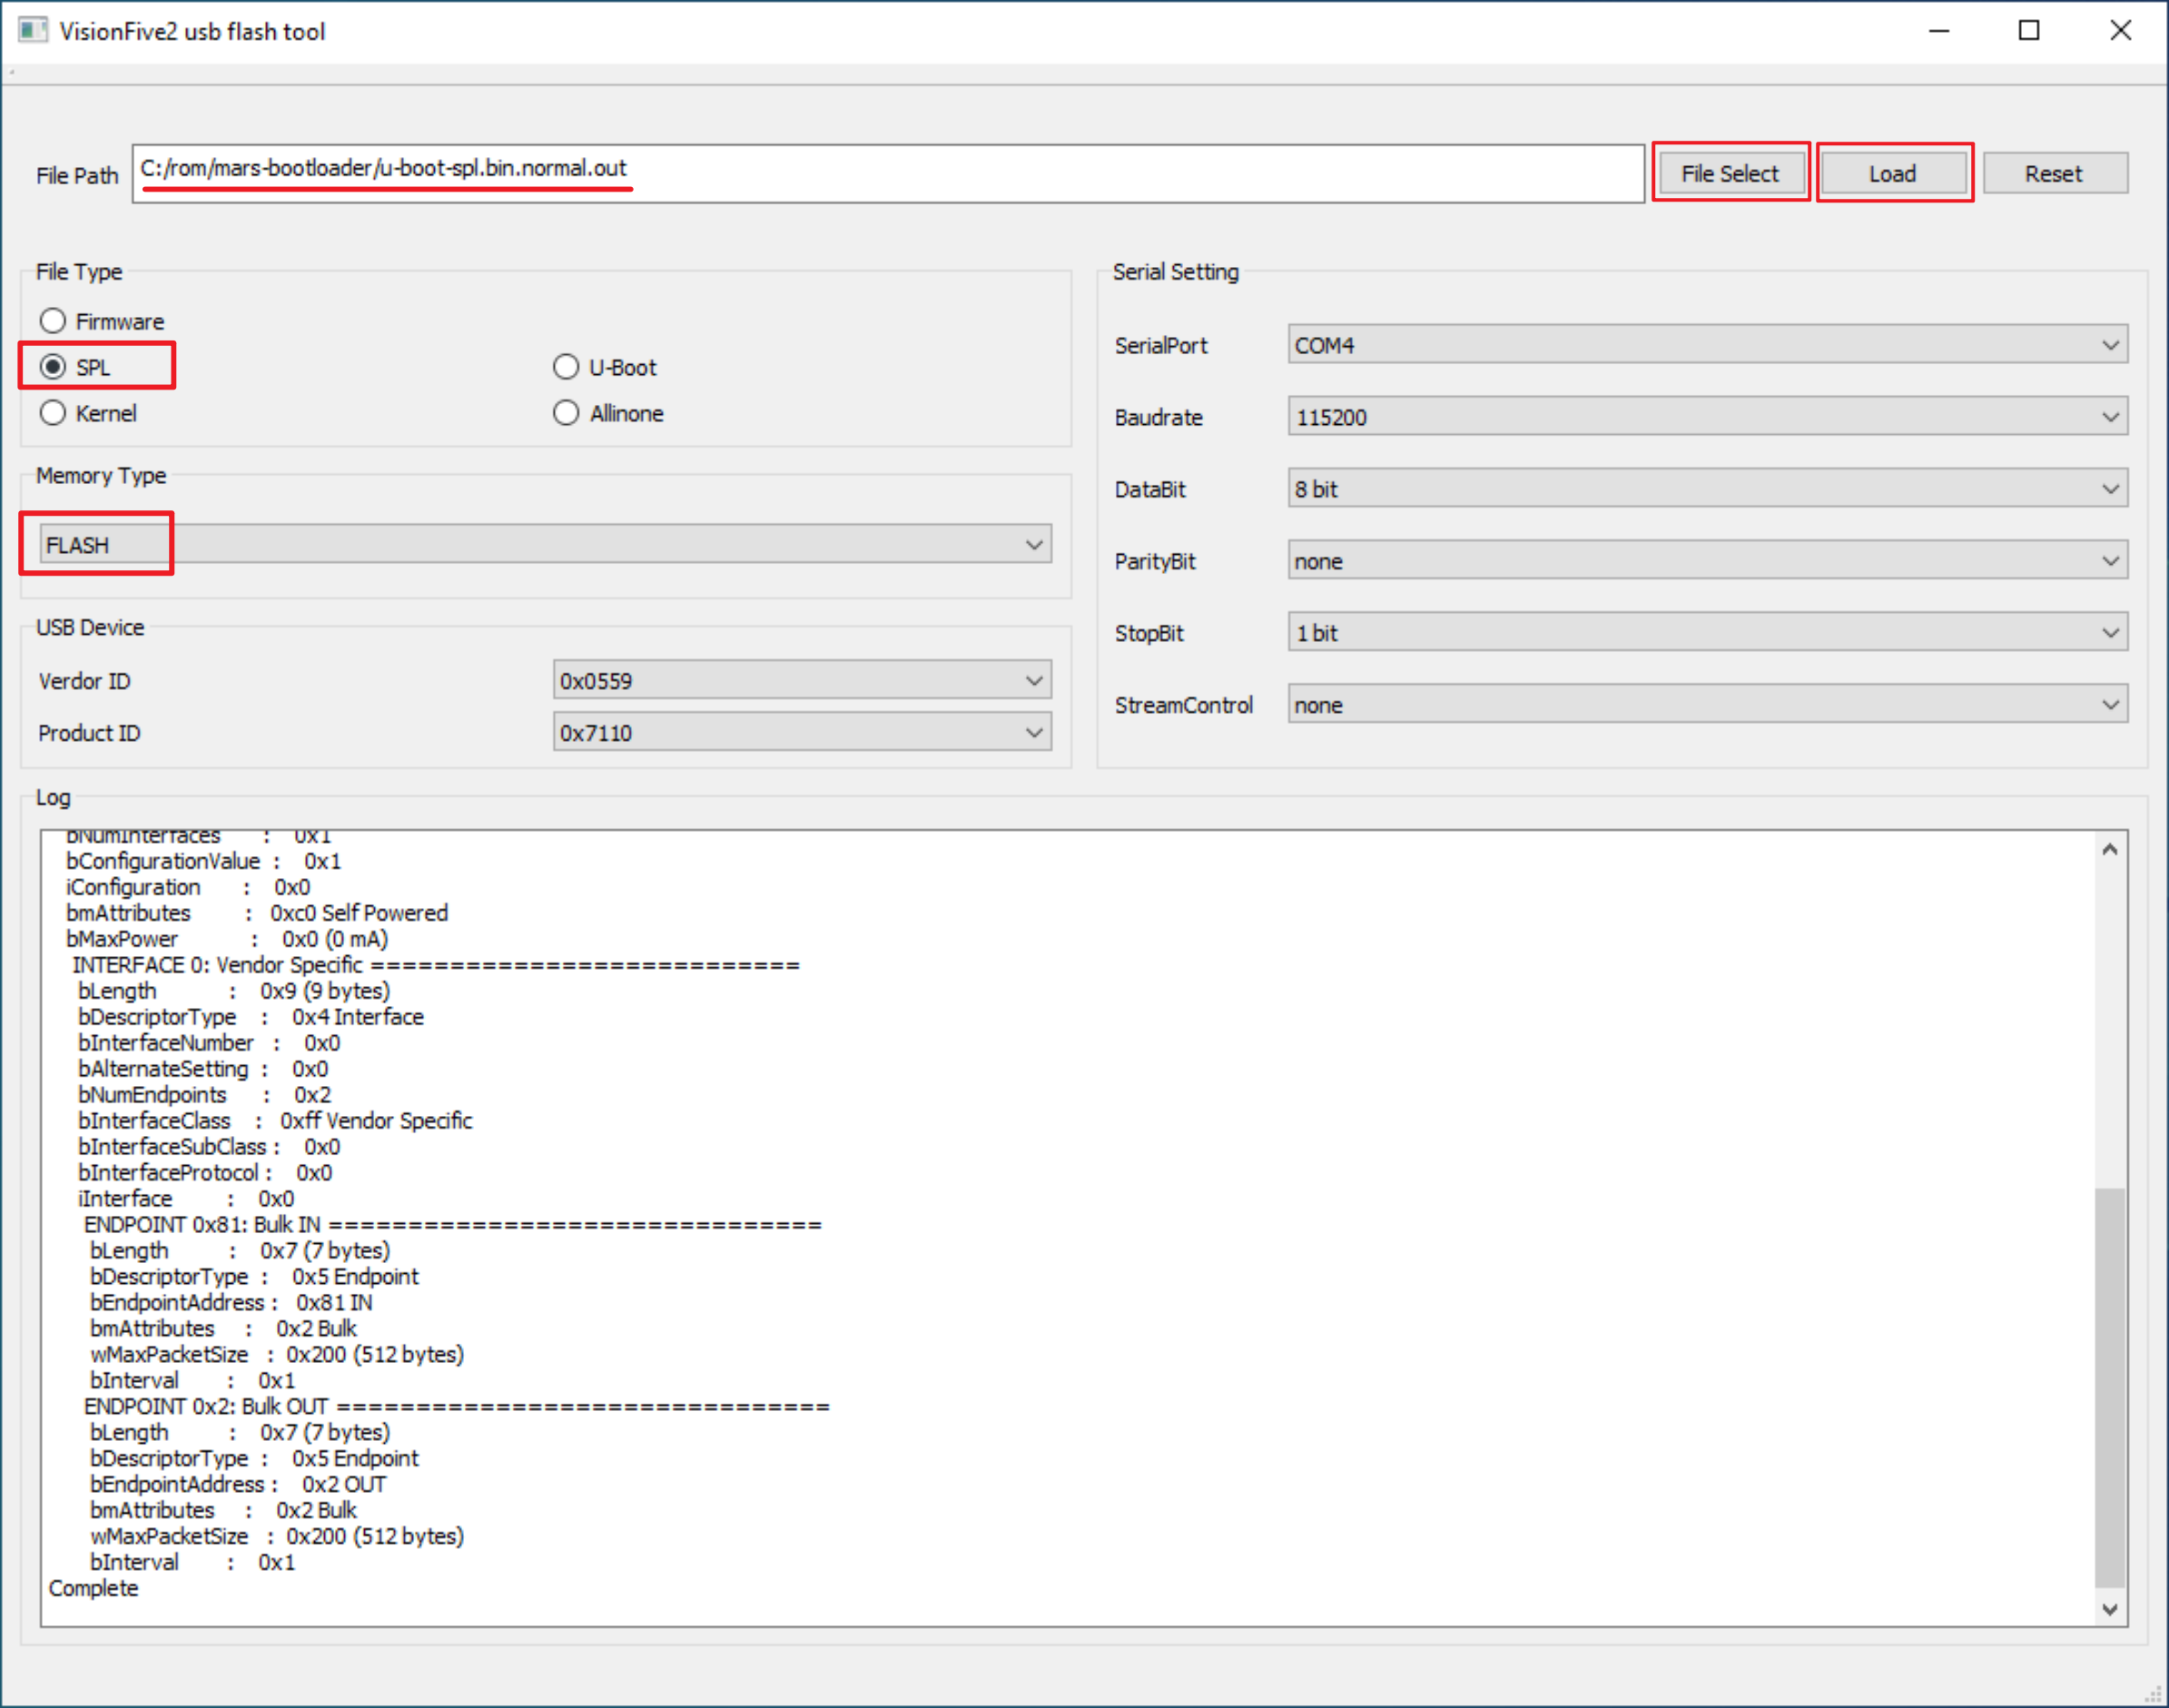
After successful burning,
SUCCEEDandCompletewill be displayed.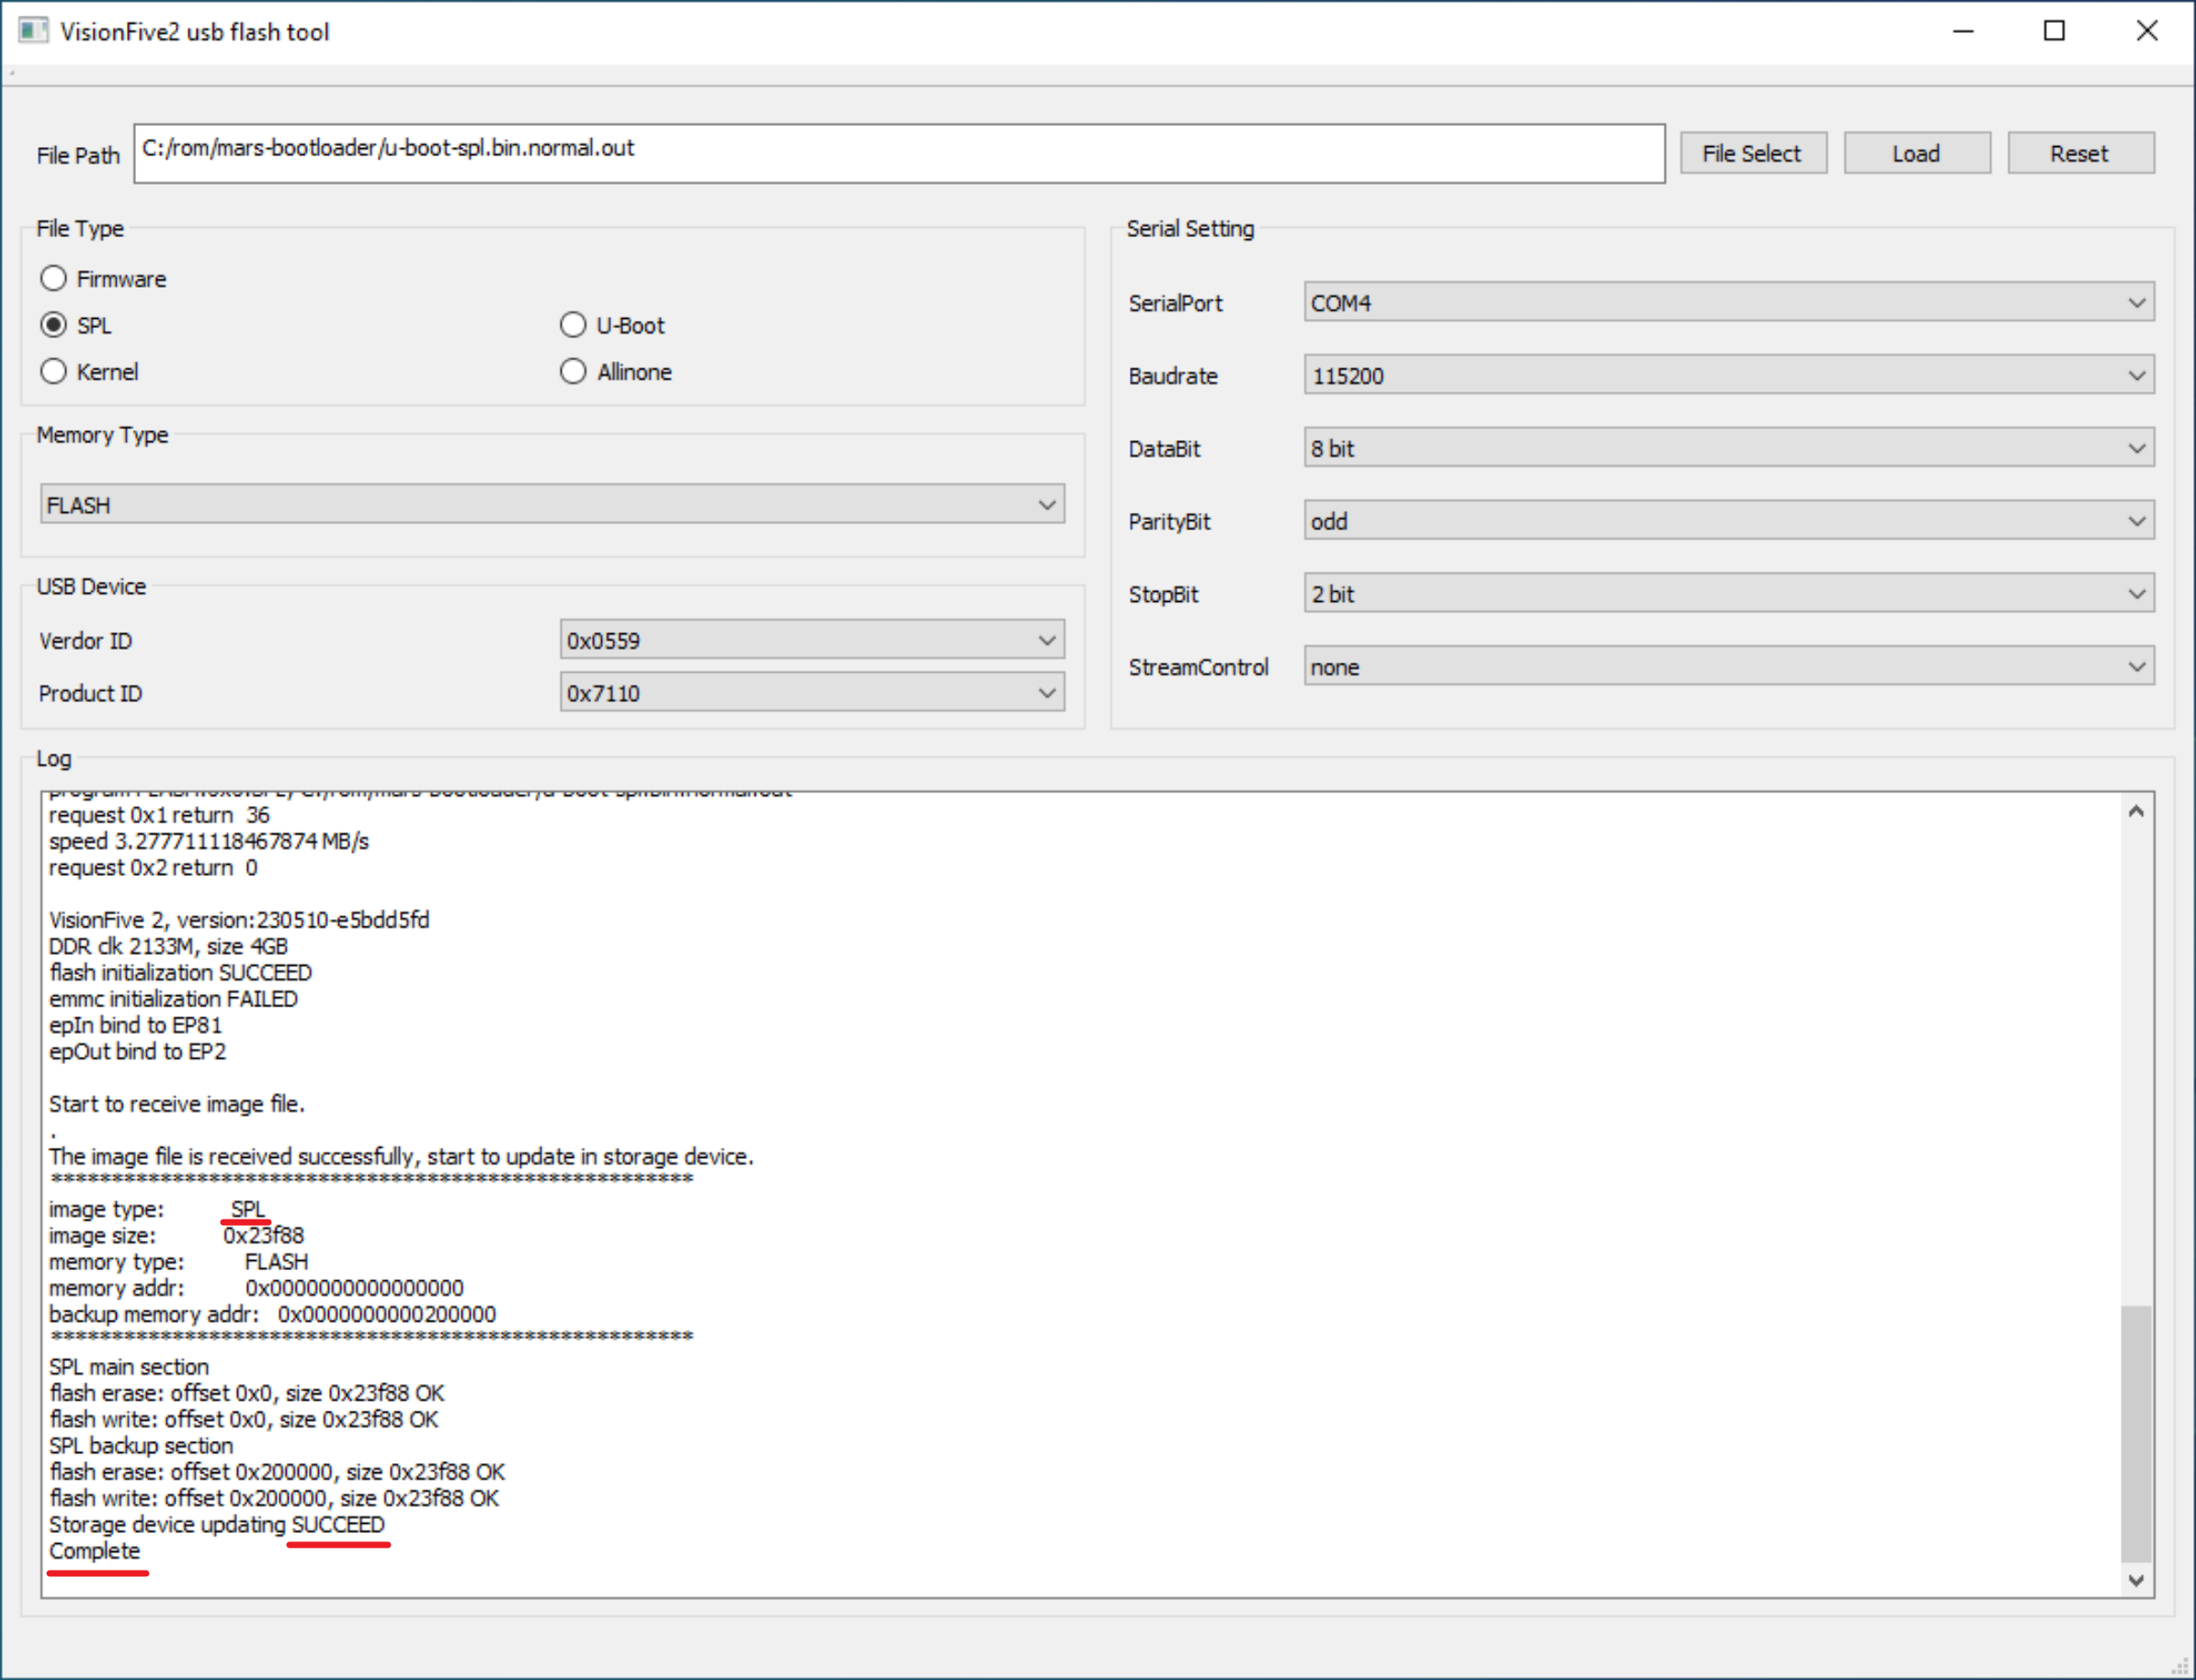
-
Flash the
U-BOOTClick
File Select, select theU-BOOTfirmwarevisionfive2_fw_payload.imgto be burned, selectU-BootinFile Type, selectFLASHinMemory Type, and then clickLoadto start burning firmware.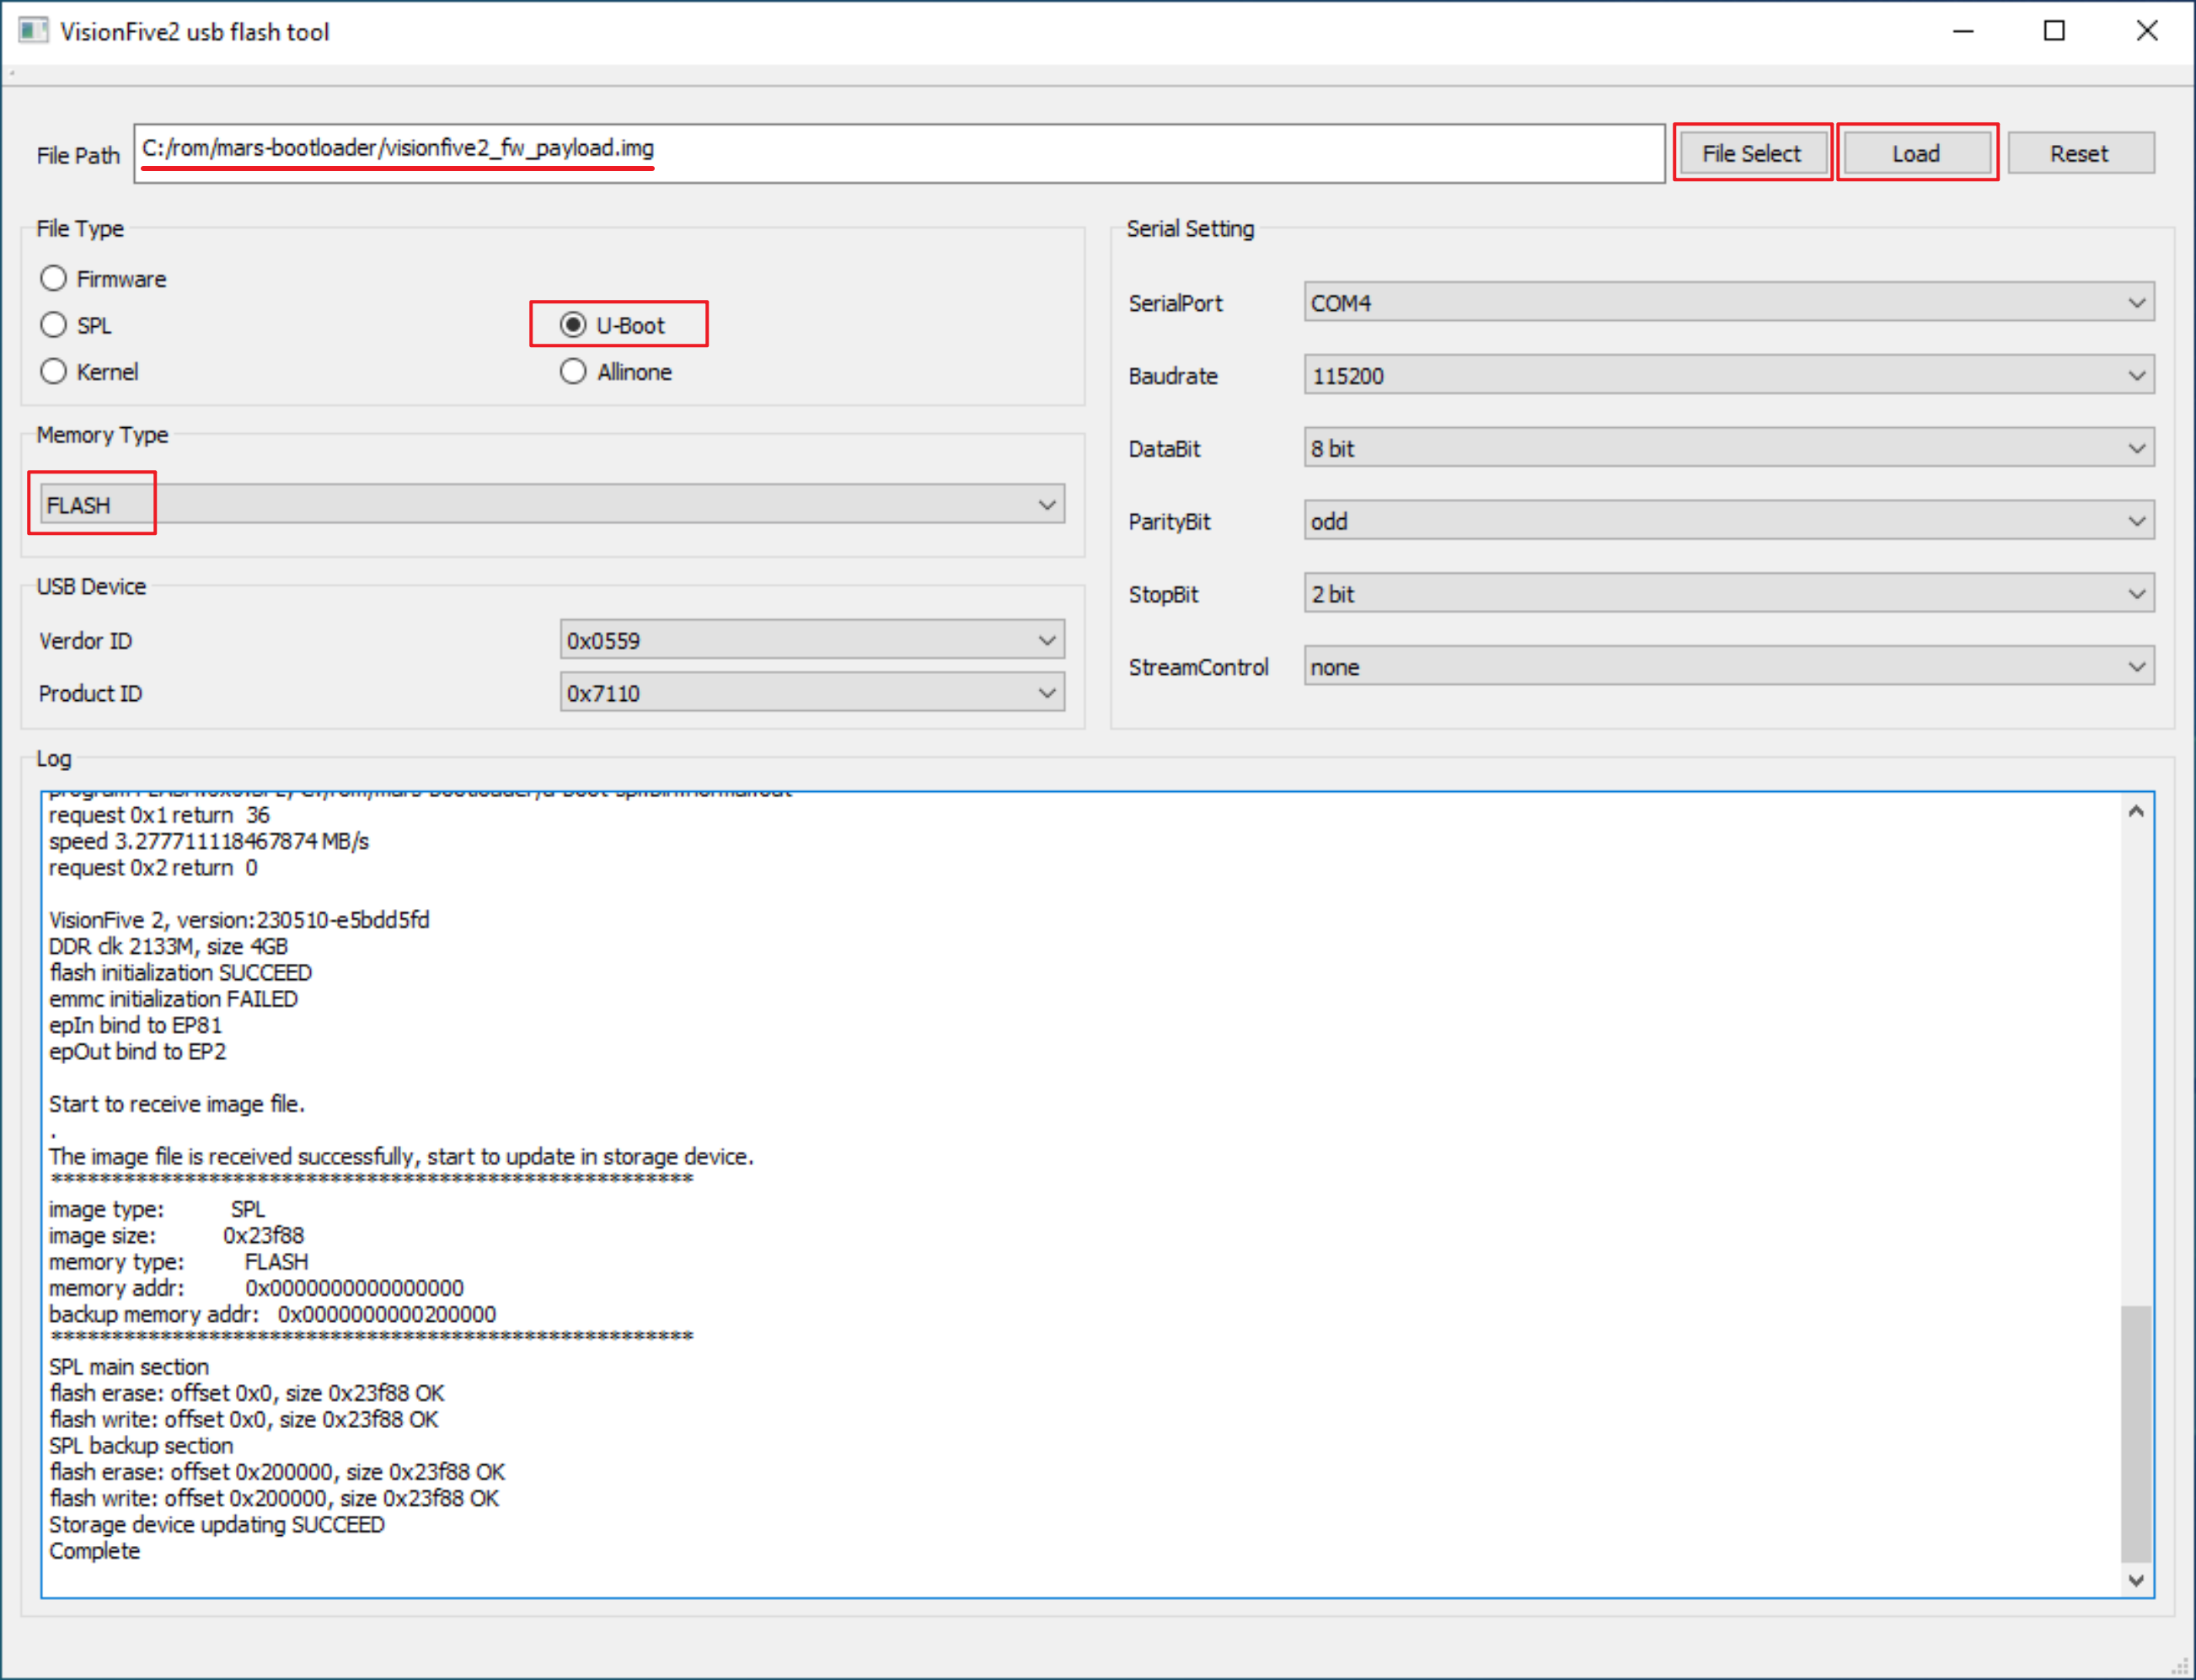
After successful burning,
SUCCEEDandCompletewill be displayed.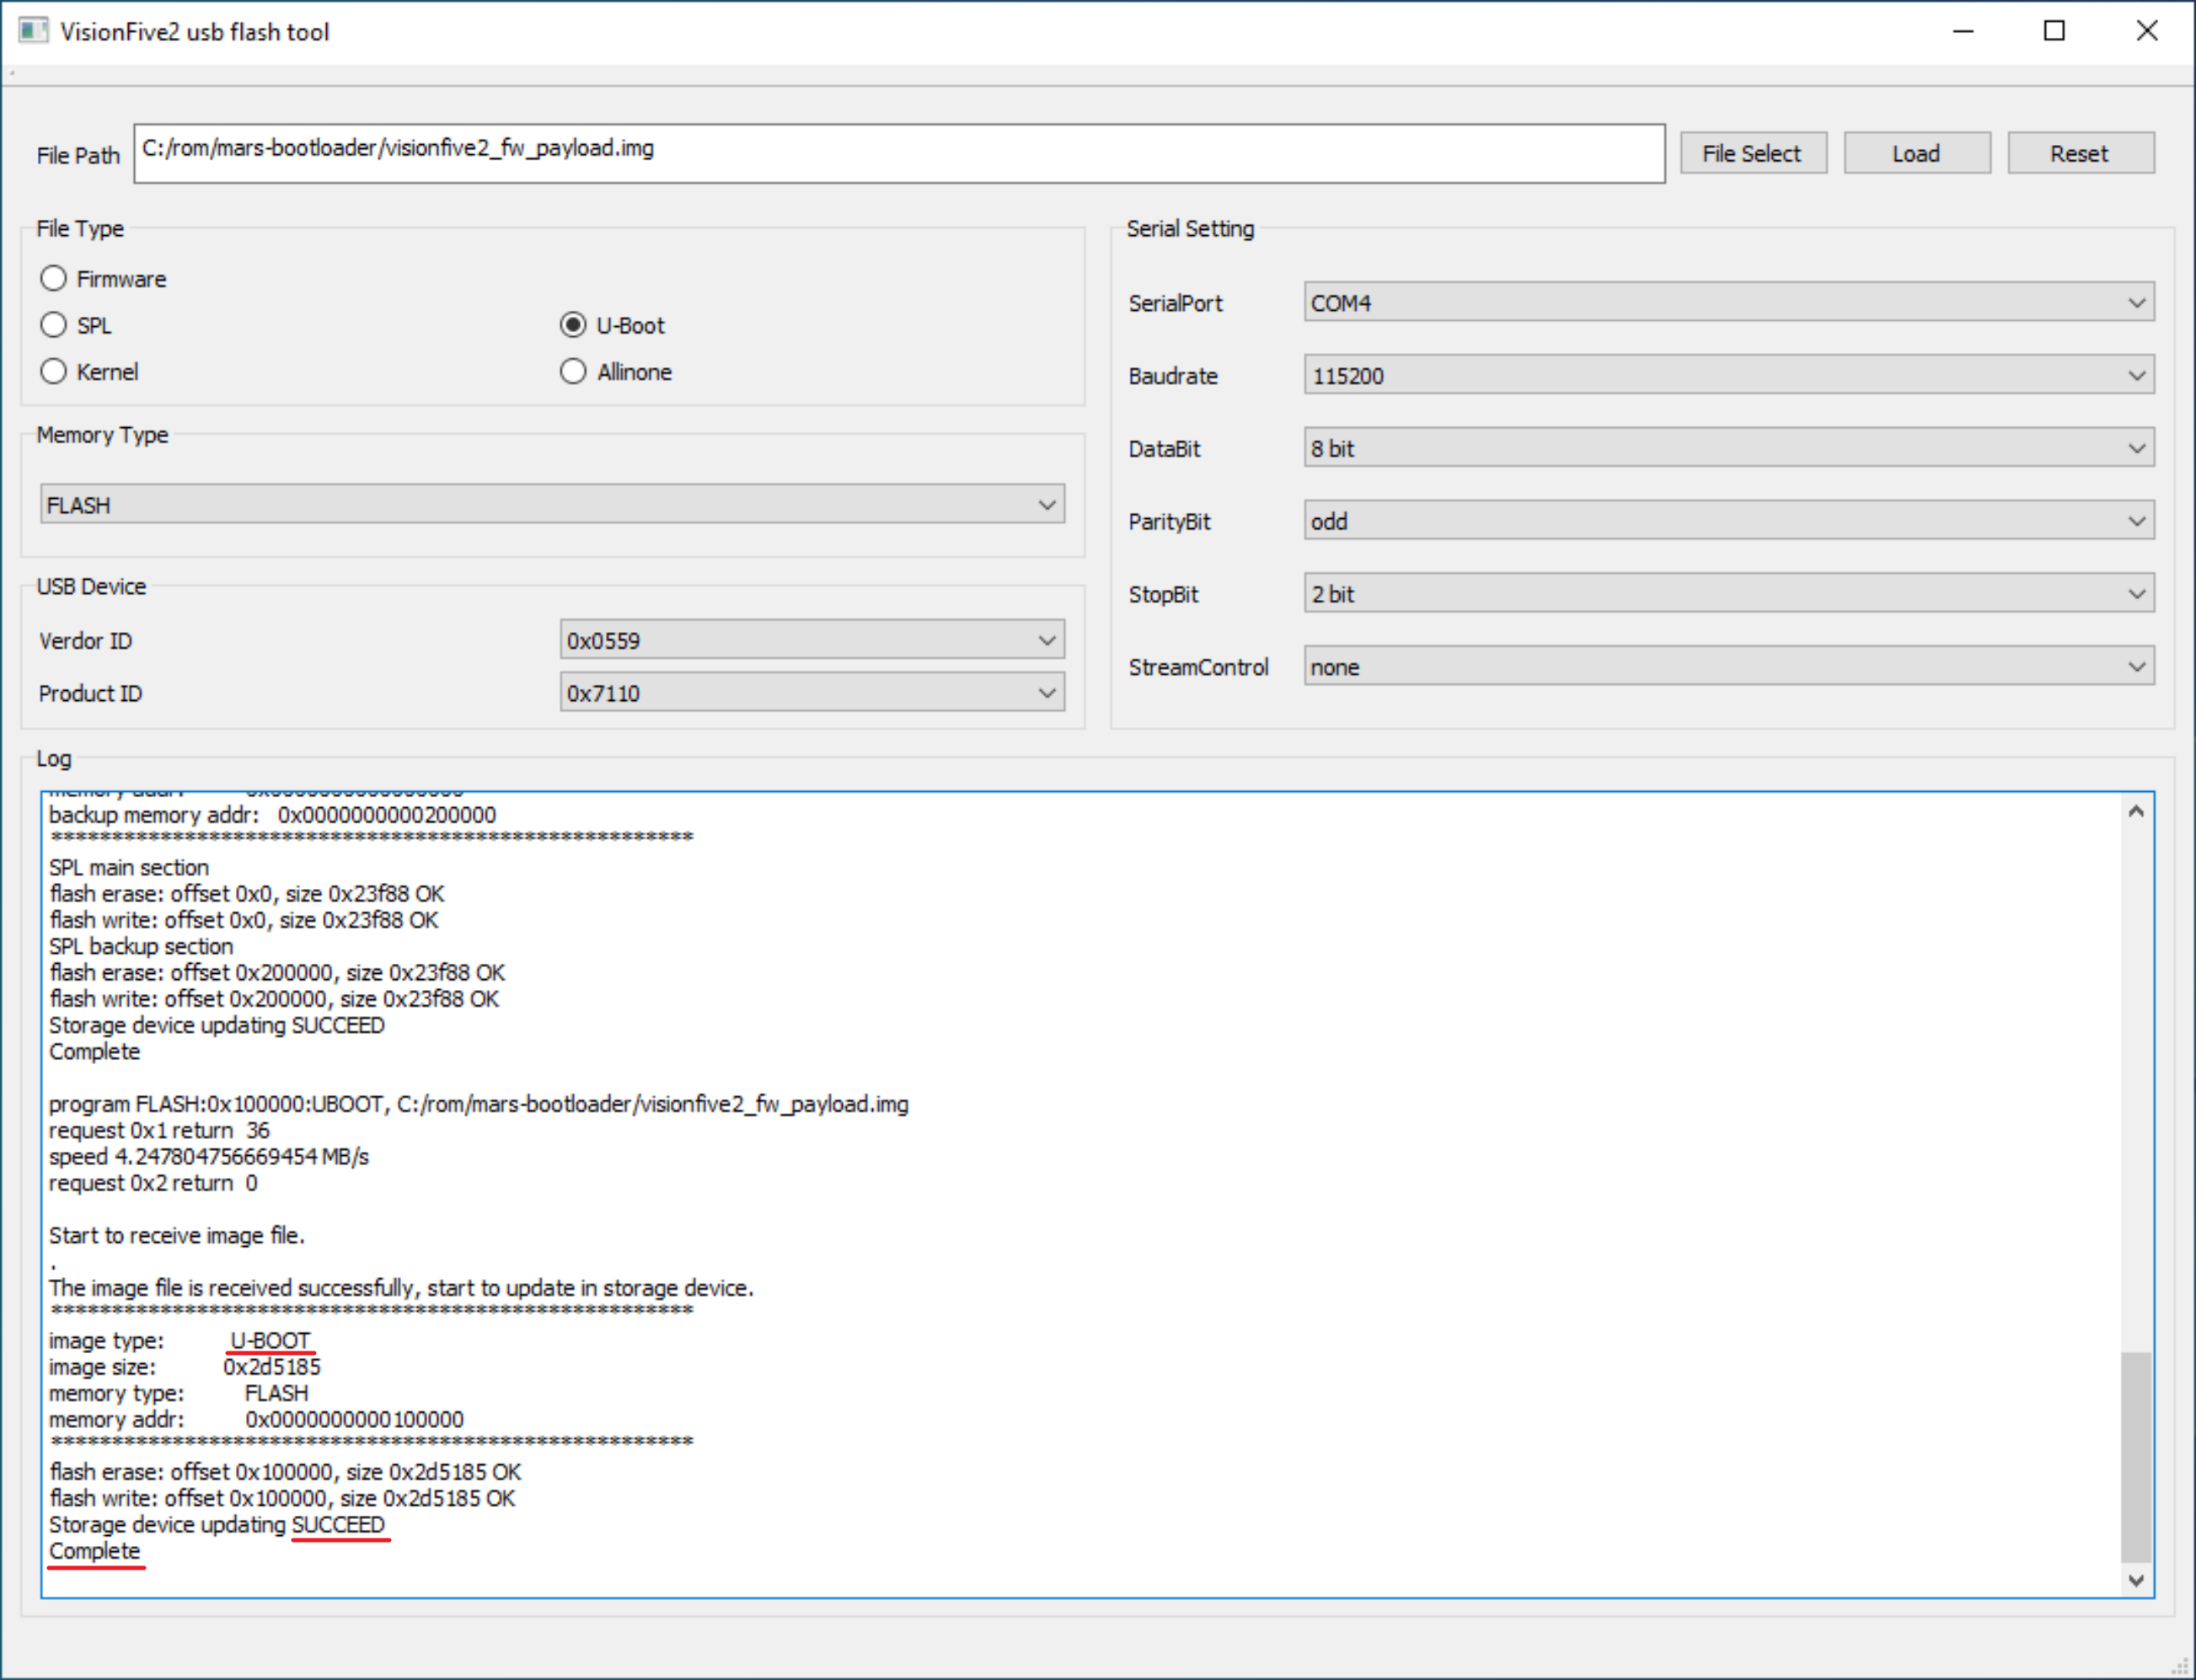
-
After burning is completed, close the UsbFlashTool window, power off the base-board, and remove the jumper cap in step 2
After powering on again, you can determine whether the bootloader has been updated based on the time information in the serial port log.
U-Boot SPL 2021.10 (Aug 31 2023 - 12:55:45 +0800)
U-Boot 2021.10 (Aug 31 2023 - 12:55:45 +0800), Build: jenkins-github_visionfive2-17


