Milk-V Megrez Install OS
Boot Instructions
The Megrez mainboard supports booting the system from four types of media: SD card, eMMC module, SSD (M.2 SATA), and SATA hard drive.
The onboard SPI Flash is used to store boot programs like u-boot, which then loads the operating system from eMMC or SSD based on the boot priority.
System Image Information
Currently, the Megrez image package format is img.zip.
- System image packages with the
.img.zipsuffix:- Can be flashed using tools like
balenaEtcher,Rufus, orWin32DiskImager. On Linux, theddcommand can be used. Some tools support flashing directly from the zip file, while others require extracting it to an.imgfile first. Please try accordingly.
- Can be flashed using tools like
(Recommended) Using BalenaEtcher to Install the System onto SD Card/M.2 SATA SSD/SATA Hard Drive/eMMC Module
Preparation
- A MicroSD card (greater than 16GB), M.2 SATA SSD, SATA hard drive, or eMMC module.
- An SD card reader, M.2 SATA enclosure, SATA hard drive enclosure, or eMMC module reader.
Using balenaEtcher as an example, the flashing process is as follows:
First, connect the storage media to your PC via the appropriate reader. Installing the system on the target drive will erase all existing data on the storage media, so back up any important files beforehand.
Download the appropriate system image package (suffix .img.zip) from the resource download page: Resource Download Overview.
You can either extract it to an .img file before flashing or flash it directly without extracting, as balenaEtcher supports loading zip files.
- Download and install the flashing tool balenaEtcher.
- Click
Flash from fileand select the downloaded image.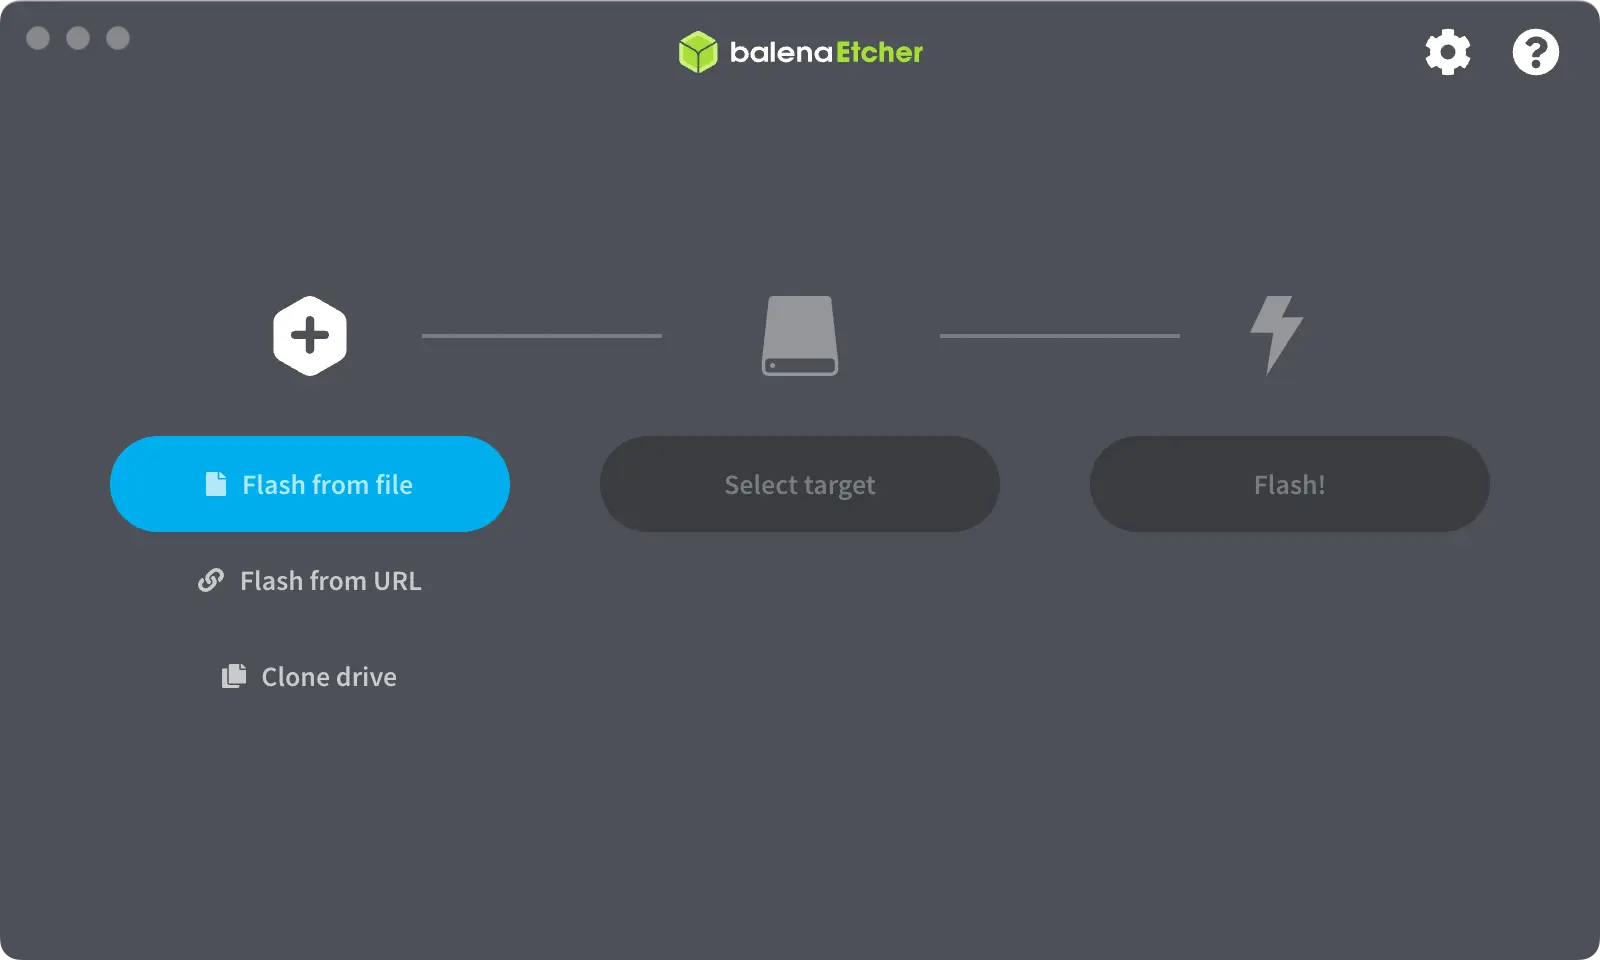
- Click
Select targetand choose the storage media.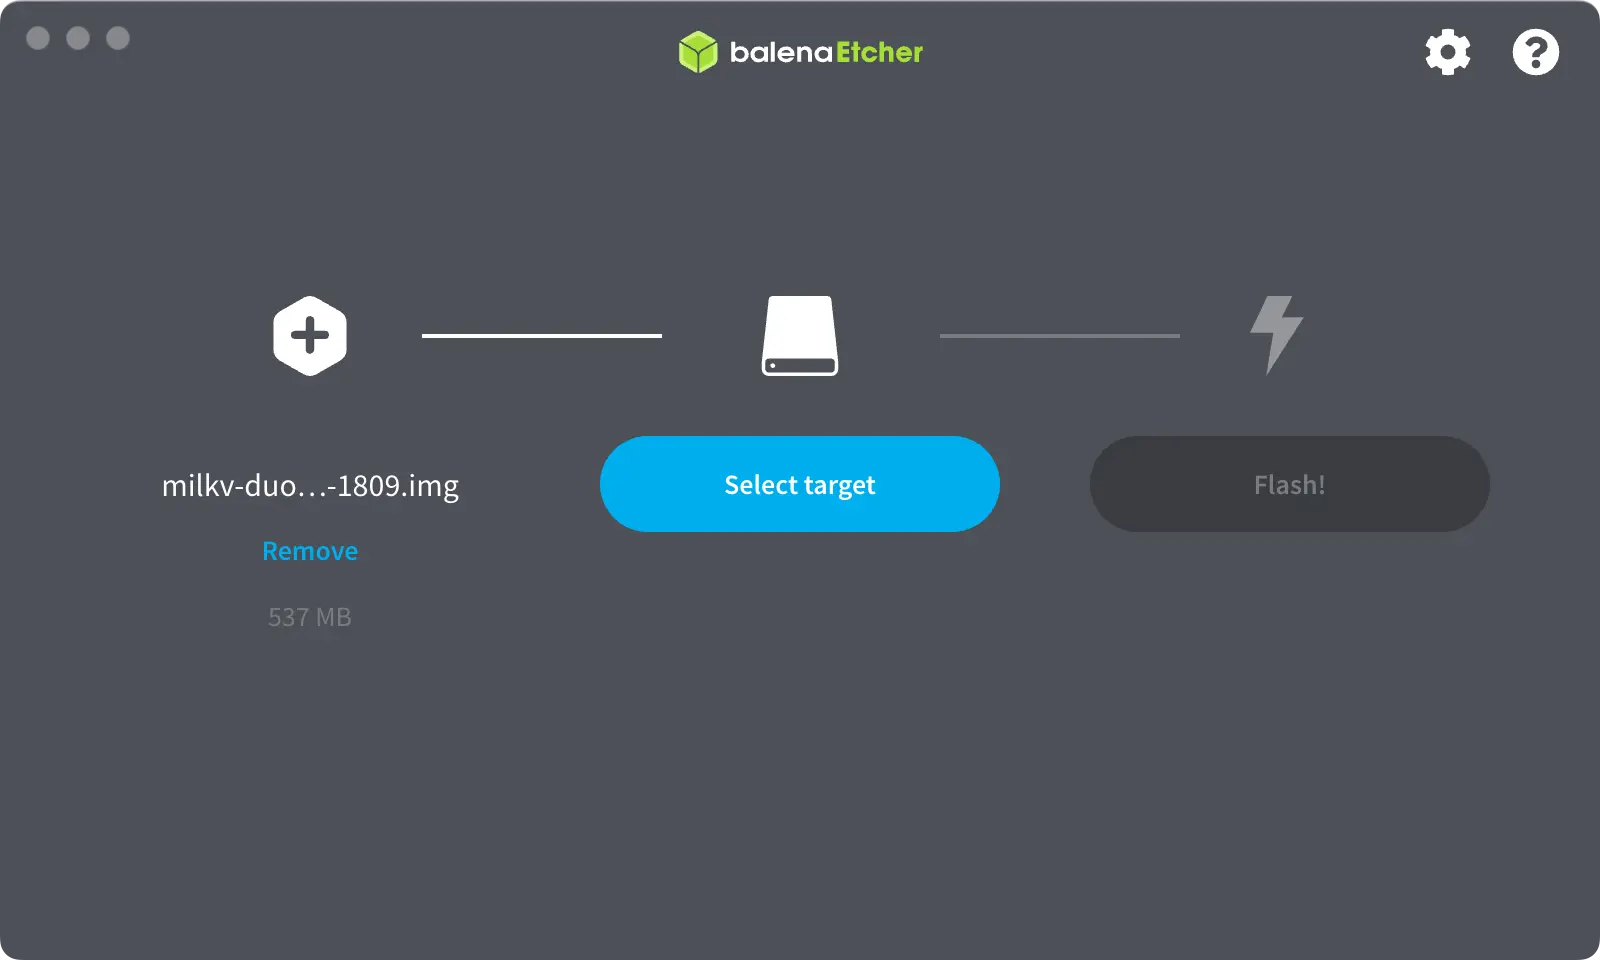
- Click
Flash!to start the flashing process.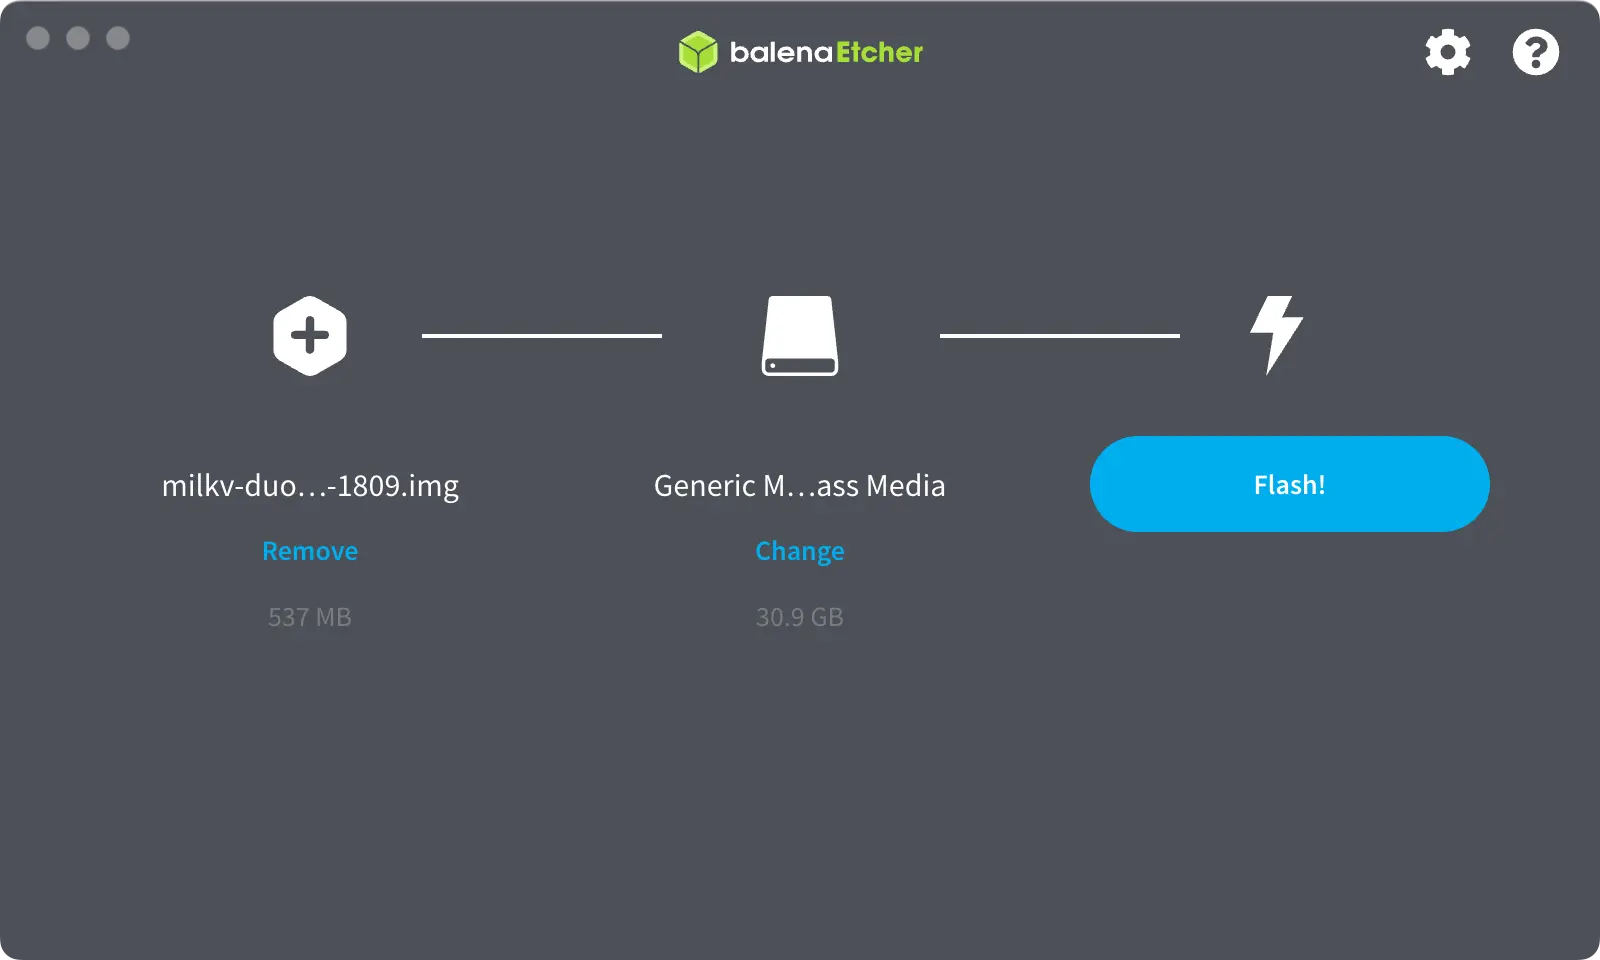
After flashing is complete, insert the storage media into the Megrez mainboard and power it on. Since the system does not currently support automatic partition resizing on first boot, please manually resize the system partition as described in the "System Partition Resizing" section.
Using Fastboot to Install the System onto SD Card/M.2 SATA SSD/eMMC Module
Coming soon.
System Partition Resizing
The system does not currently support automatic partition resizing after boot. Please resize manually after the first boot to avoid running out of space or being unable to access the desktop after a reboot.
The following instructions use the gparted tool as an example for resizing. You may also use other tools you are familiar with to accomplish the task.
-
Install the
gpartedtool.sudo apt update
sudo apt install gparted -
Launch the gparted program from the command line or by selecting it from the application menu.
sudo gparted -
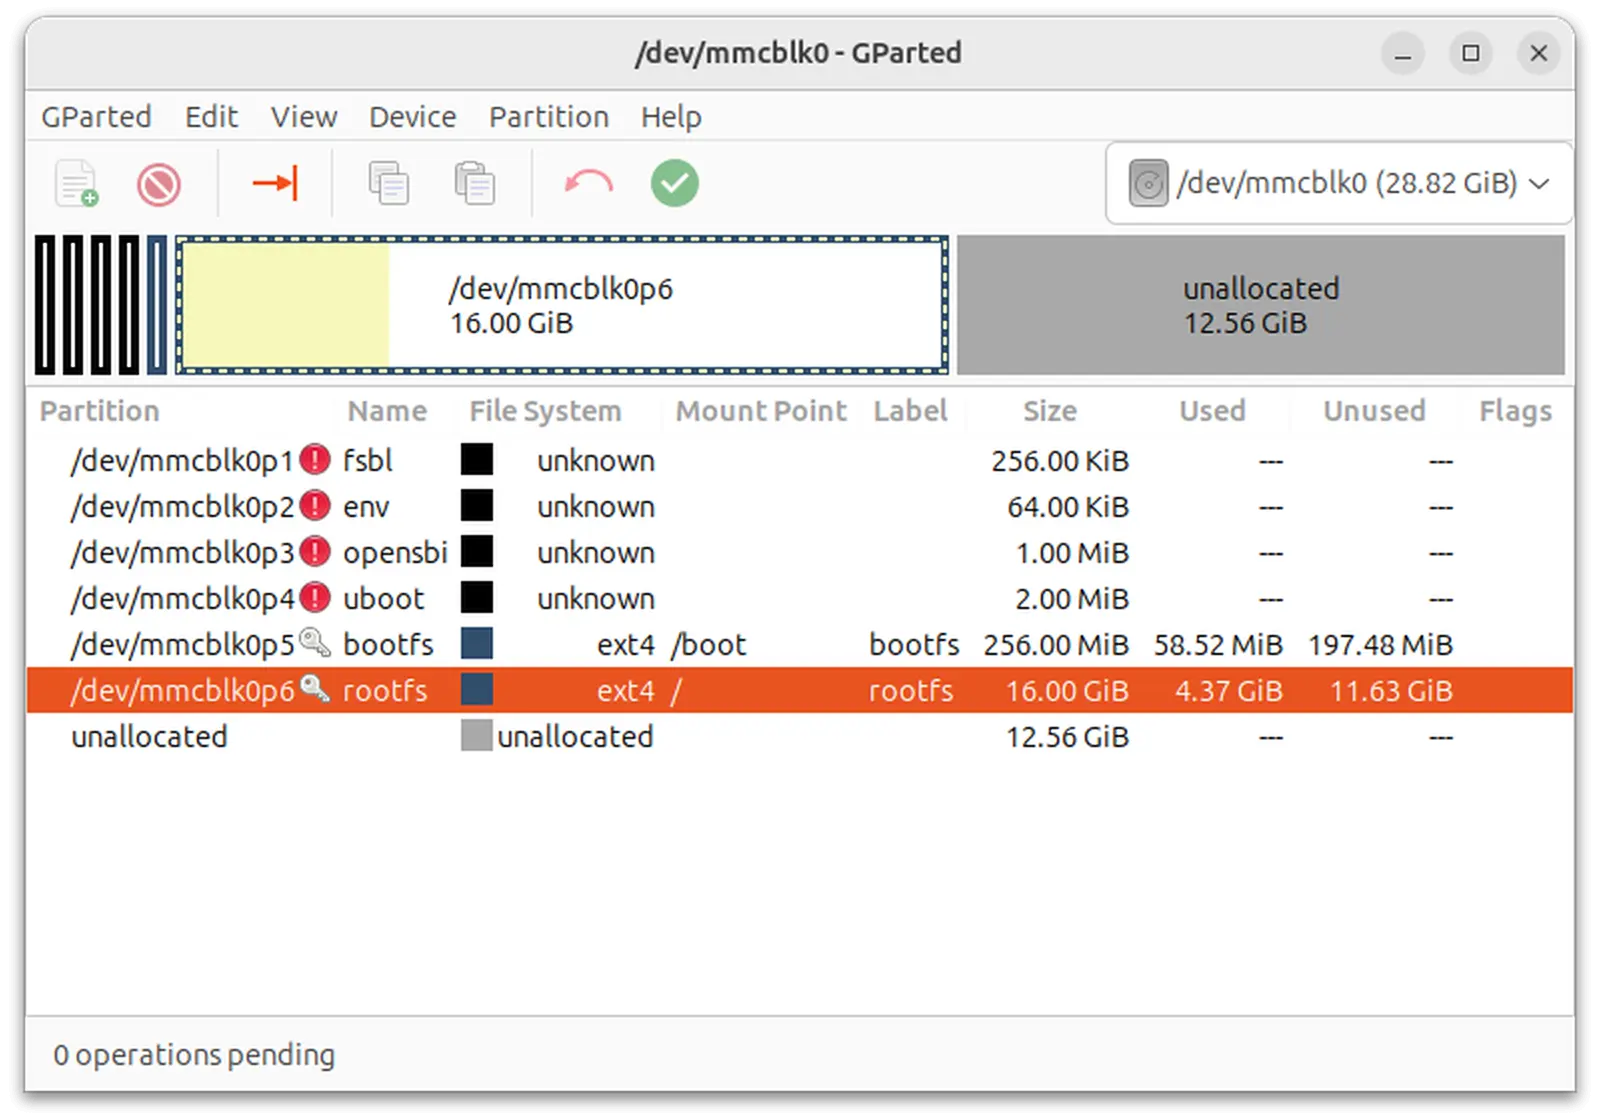
In the top-right corner, select the SD card device. You should see the unallocated space (22GB) and the root filesystem rootfs
/(6GB).
-
Select the rootfs
/partition, right-click, and chooseResize/Moveto expand the partition.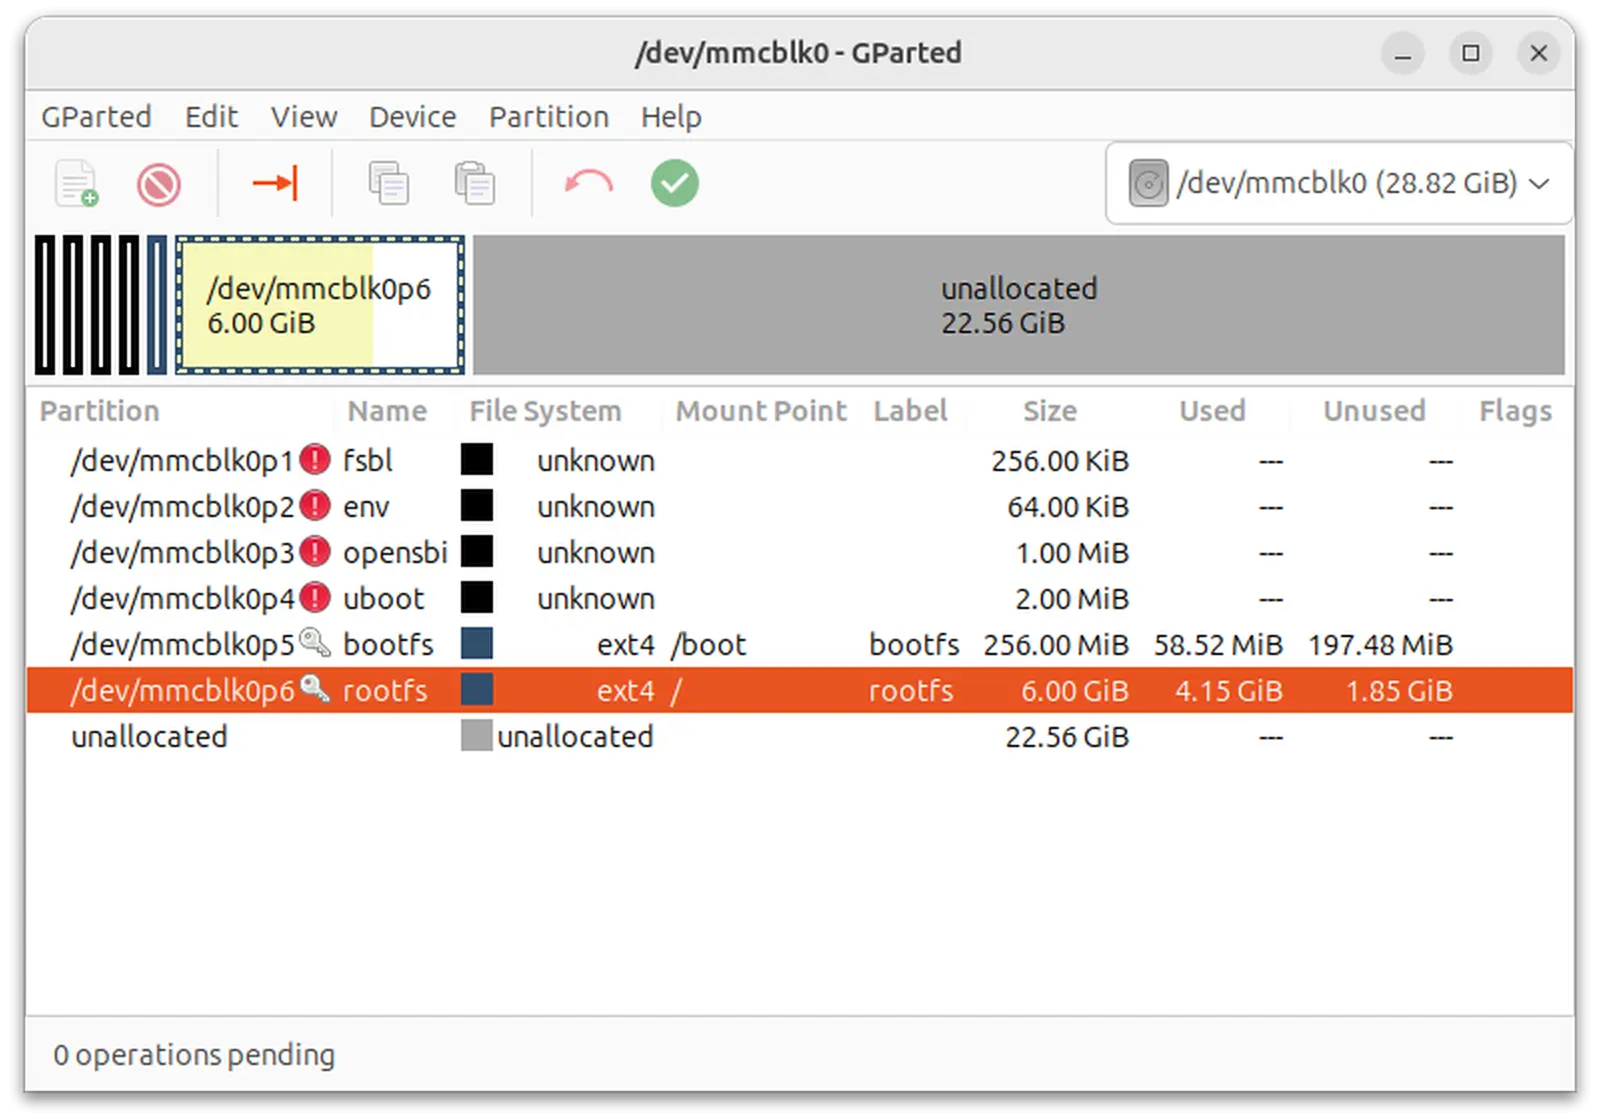
-
In the
New sizefield, specify the size of the root filesystem. It is recommended to set at least 16GB (enter16384). You can also adjust the size by dragging the top slider. Alternatively, setFree space followingto0to allocate all remaining space to the root filesystem.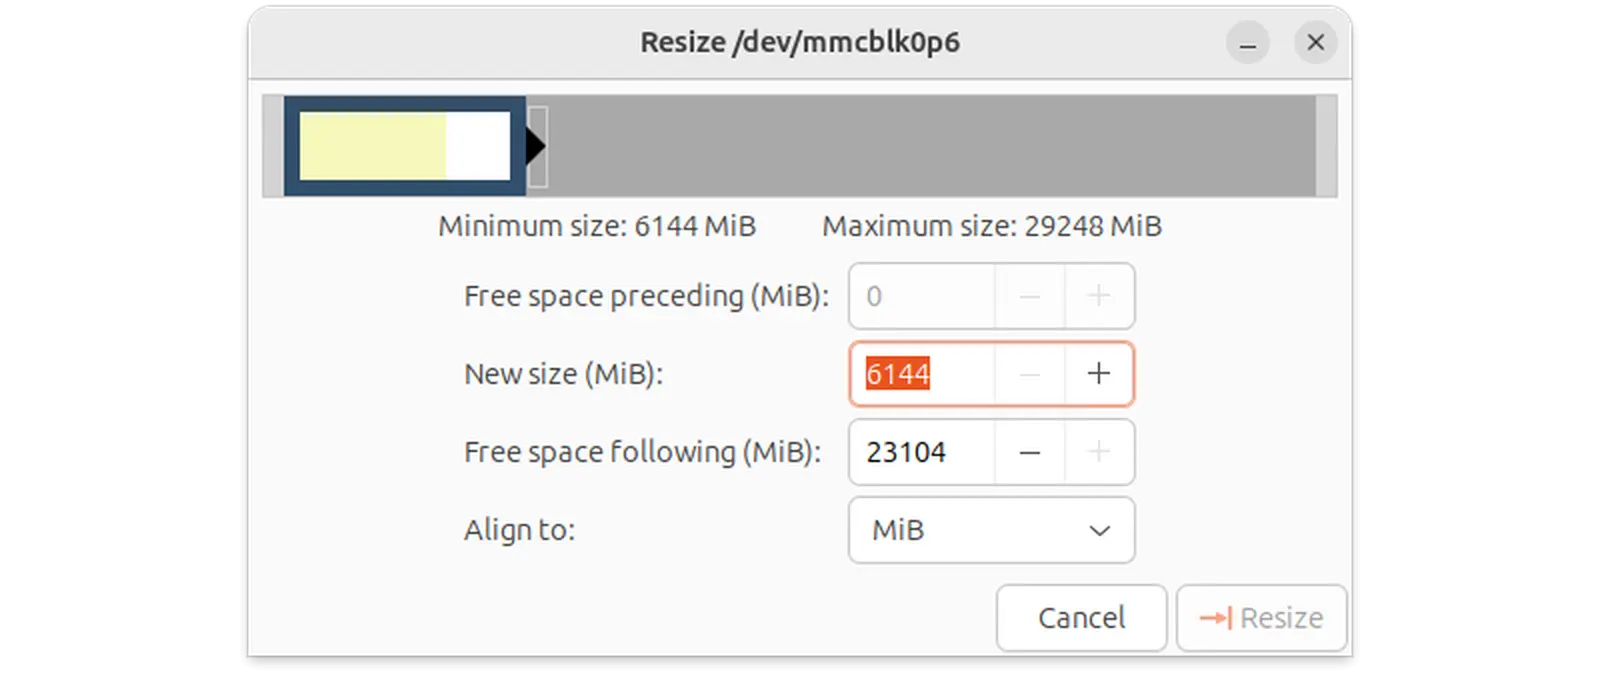
-
After making the changes, click
Resize.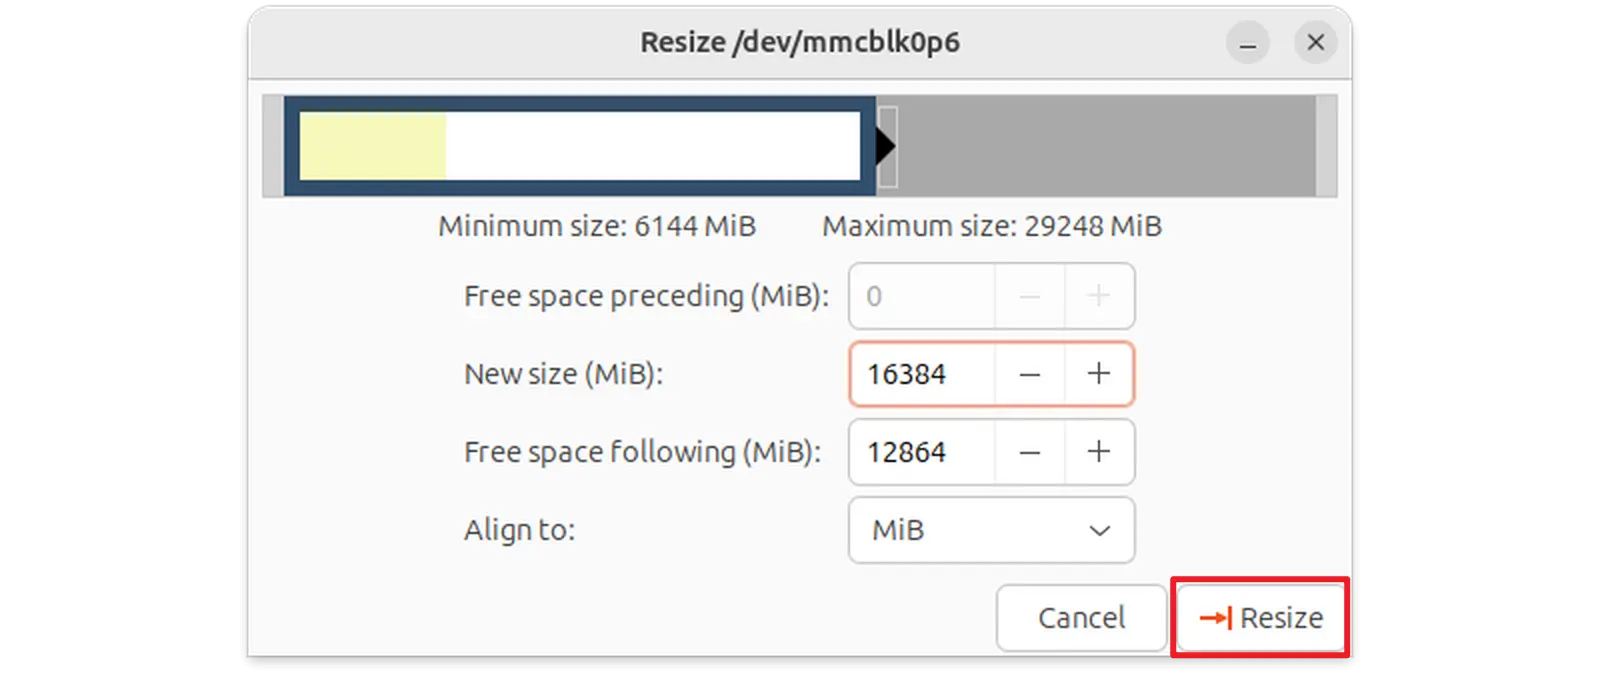
-
You will now see that the rootfs
/partition has been resized to 16GB. Click thecheckmarkicon in the menu to apply the changes.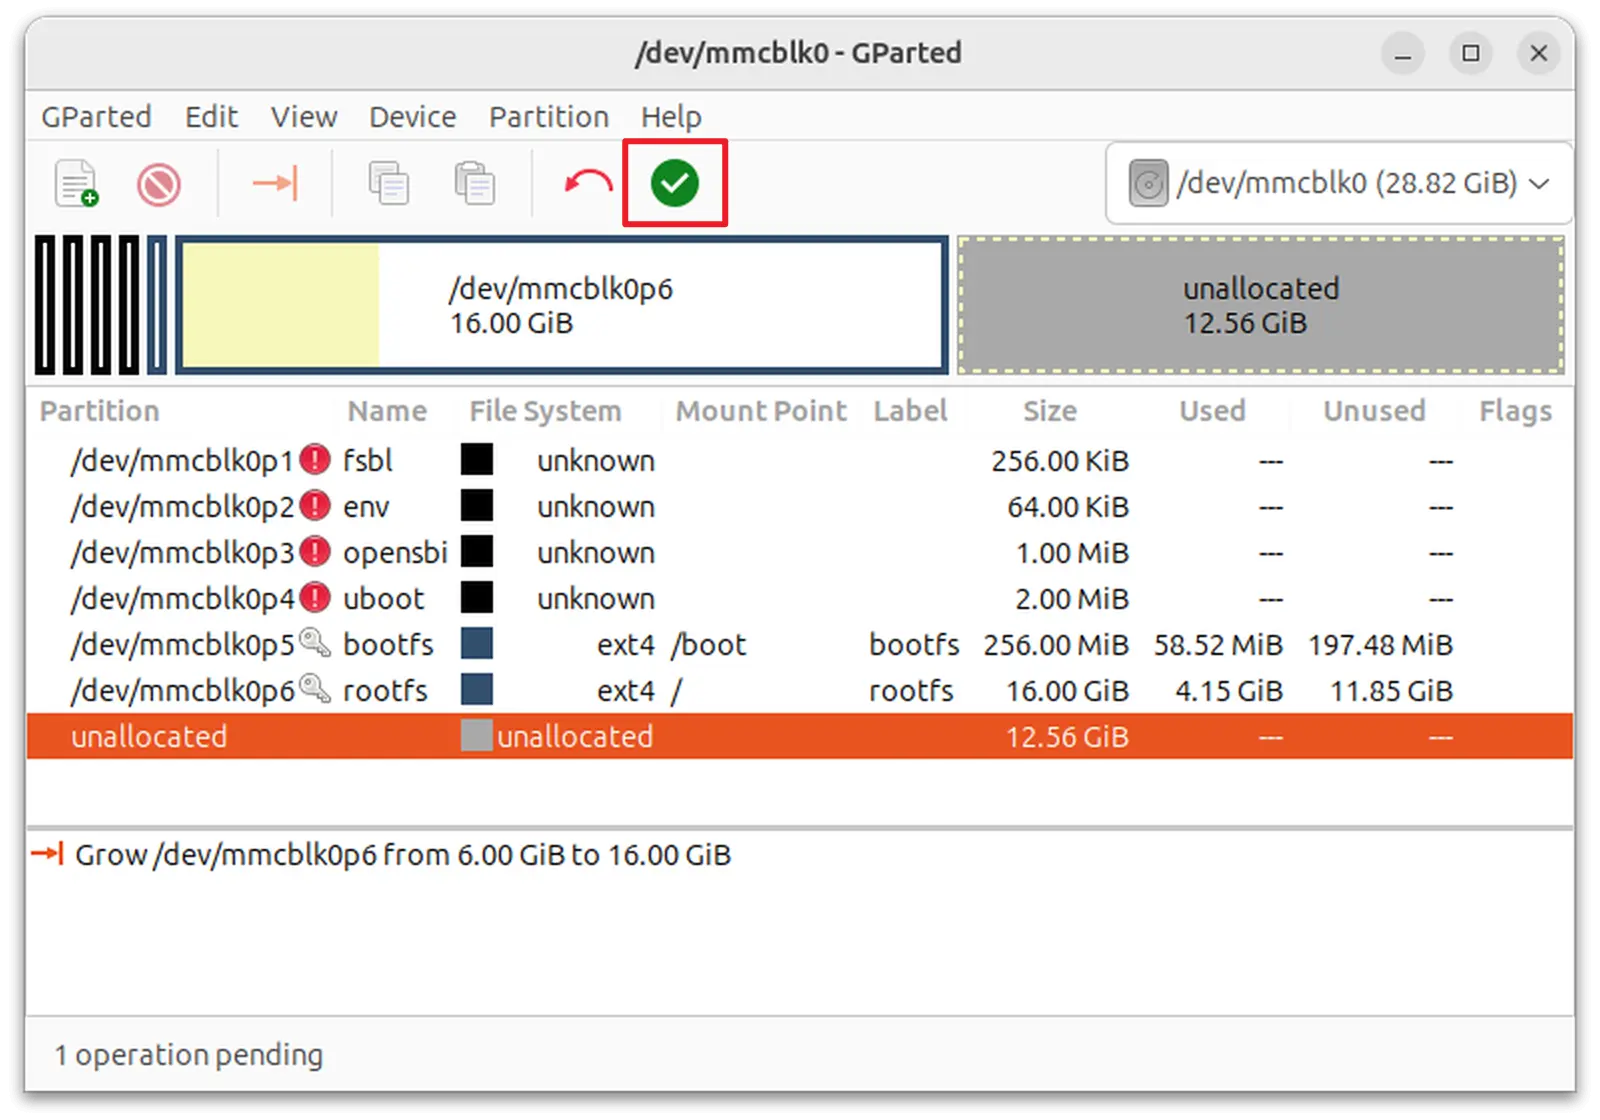
A prompt will appear. Select
Apply.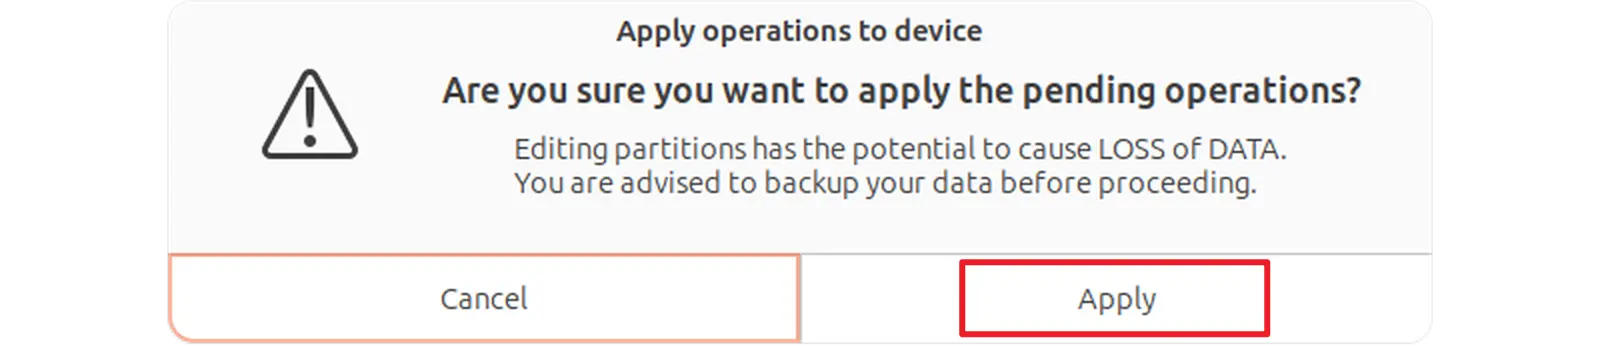
-
After the changes are applied, the final partition layout will appear as follows:
Updating/Re-Flashing U-Boot
When U-Boot is Available
Please prepare a USB drive and format it to EXT4 format. Store the bootloader file on the USB drive. If there are multiple partitions, place it in the first partition.
While the device is powered off, use a Type-C cable or TTL-USB cable to connect the Milk-V Megrez to the PC. Refer to the UART Serial Console for more details.
Switch the Recovery/Normal Boot Toggle Switch to Normal.
Power on the device, observe the output from the UART serial console, and press s to interrupt the automatic boot process.
Use the command ls usb 0 to check if the files on the USB drive are correctly recognized. If recognition fails, try using another USB port or drive, and ensure it is formatted to EXT4.
Use the following command to load the bootloader_milkv-megrez-2025-0102.bin file from the USB drive to the memory address starting at 0x90000000.
ext4load usb 0 0x90000000 bootloader_milkv-megrez-2025-0102.bin
Use the following command to burn the file just loaded into the SPI flash.
es_burn write 0x90000000 flash
When U-Boot is Unavailable
Please prepare a USB drive and format it to EXT4 format. Store the bootloader file on the USB drive. If there are multiple partitions, place it in the first partition.
Switch the Recovery/Normal Boot Toggle Switch to Recovery.
Use a Type-C cable to connect the Type-C port of the Milk-V Megrez to the PC while the device is powered off.
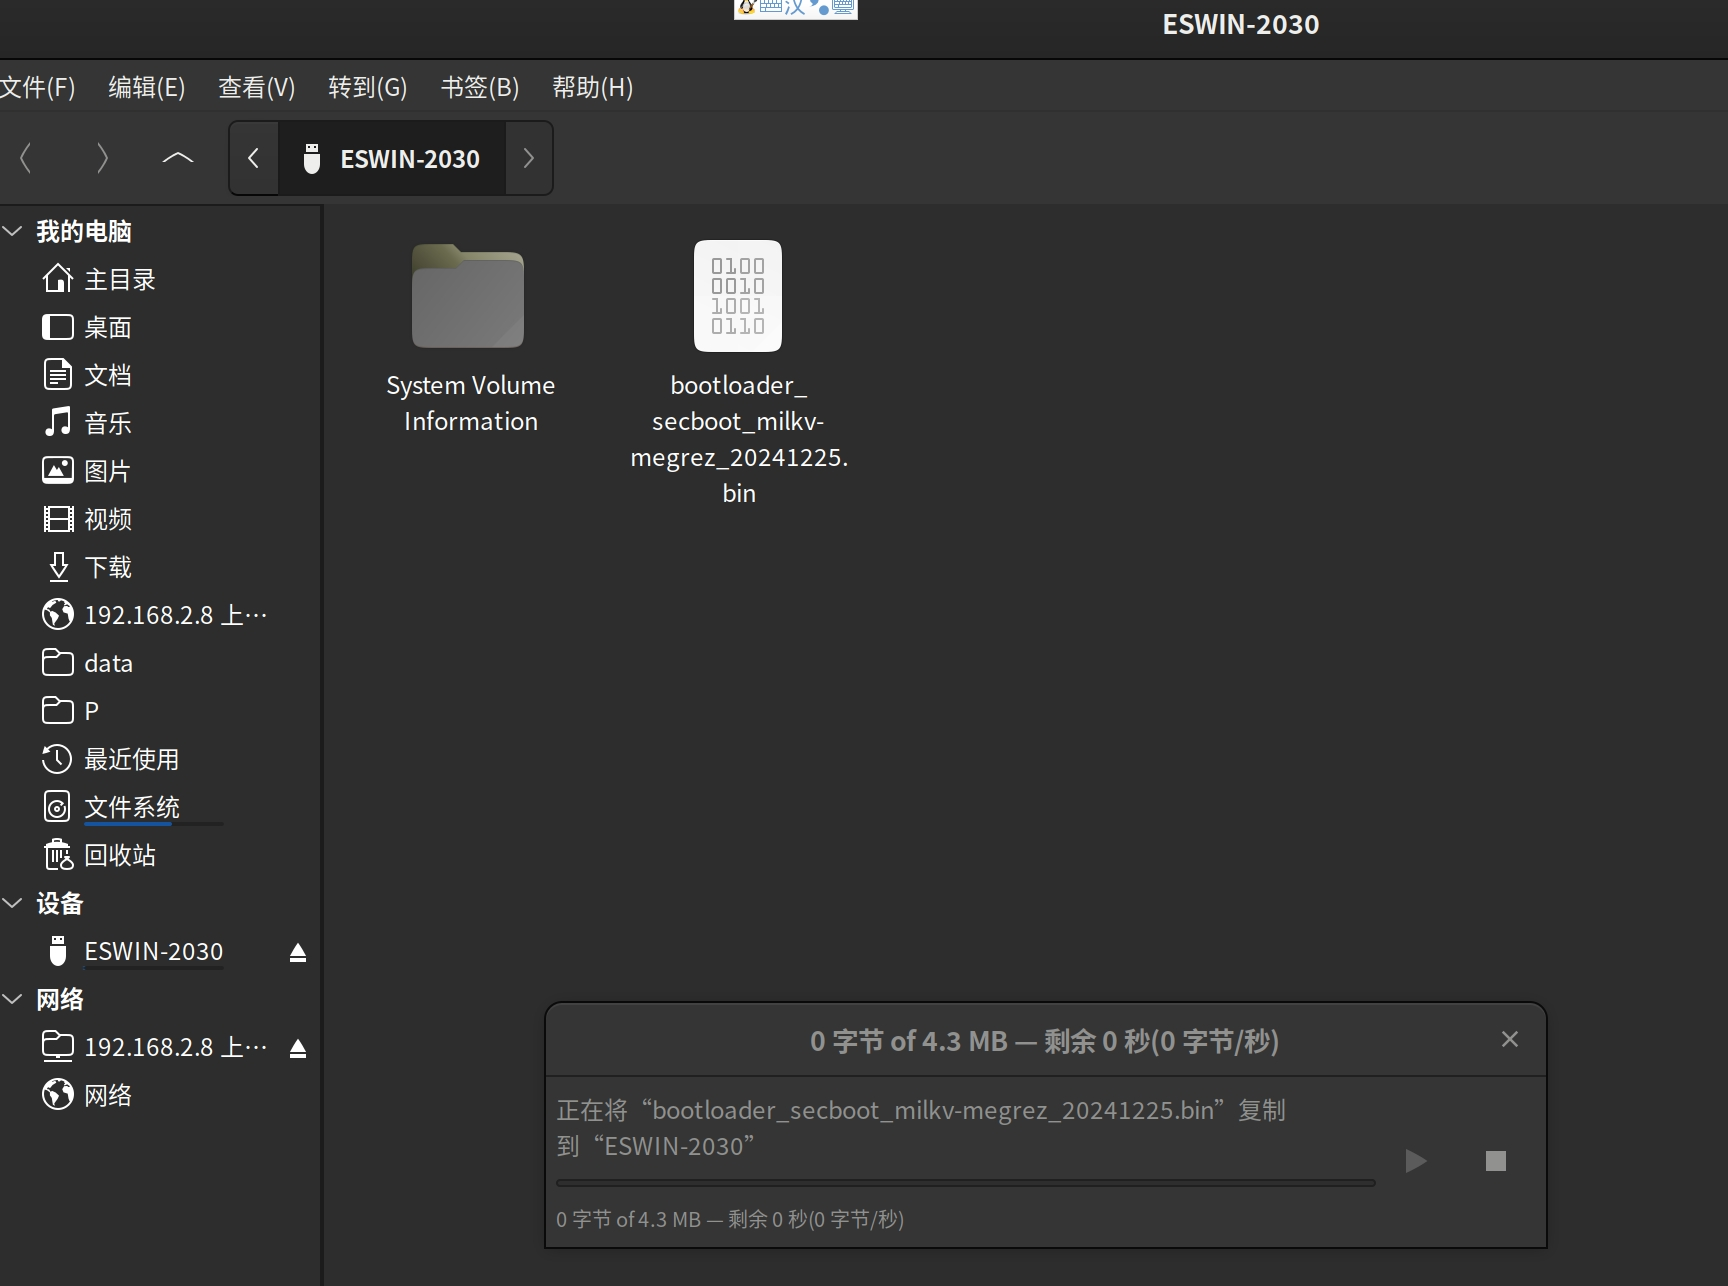
Power on the device, and the PC will detect a USB storage device named ESWIN-2030.
Copy the bootloader file to ESWIN-2030. The UART serial console will start printing, and the system will use the uboot file from ESWIN-2030 as a temporary bootloader.
Press s to interrupt the automatic boot process.
Use the command ls usb 0 to check if the files on the USB drive are correctly recognized. If recognition fails, try using another USB port or drive, and ensure it is formatted to EXT4.
Use the following command to load the bootloader_milkv-megrez-2025-0102.bin file from the USB drive to the memory address starting at 0x90000000.
ext4load usb 0 0x90000000 bootloader_milkv-megrez-2025-0102.bin
Use the following command to burn the file just loaded into the SPI flash.
es_burn write 0x90000000 flash
Wait for the process to complete, then reboot the device to finish the update.


