Milk-V Jupiter Install OS Image
Startup Introduction
Jupiter board supports booting the system from three media: SD card, eMMC, and SSD (M.2 NVMe). The boot priority is: SD card > SSD > eMMC.
The onboard SPI Flash can also boot the system, but due to its small capacity, it is currently only used to store boot programs such as u-boot, and then load the operating system in the eMMC or SSD according to the boot priority. The SD card system does not go through the SPI Flash.
System Image Description
Currently, Jupiter's image package formats mainly have the following two formats, with the suffixes of .img.zip and .zip respectively. Pay attention to the difference when installing the system.
-
The system image package with the suffix
.img.zipis a dedicated image package for SD cards.-
Supports burning with tools such as
balenaEtcher,Rufus,Win32DiskImager, etc. In Linux, you can use theddcommand to burn. Some of these tools support burning zip packages directly, while some need to be decompressed into.imgfiles before burning. Please try it yourself. -
The SD card must be inserted into the PC through a card reader for burning.
-
-
The system image package with the suffix
.zipcan be burned to SSD or eMMC.-
It is recommended to use Spacemit official flashing tool
titanflasherto flash. -
When burning to SSD or eMMC, you must connect to the PC via a Type-C cable for burning.
-
The following describes the methods for burning to SD card, SSD and eMMC respectively.
Install OS to the SD card
The SD card OS has the highest startup priority. All boot programs required for startup, including u-boot, kernel, and system, are stored in the SD card.
Taking the balenaEtcher tool as an example, the burning method is as follows.
First, go to the resource download page to download the system image package for the SD card (the suffix is .img.zip):Resource Download Summary。
After downloading, you can decompress it into a .img file and then burn it. You can also use it without unzipping, balenaEtcher supports loading zip packages.
Insert the SD card into the PC through the card reader. Installing the system to the SD card will clear the original data in the SD card, so note to back up important files in the card in advance.
- Download the image burning tool balenaEtcher and install it.
- Click
Flash from fileand select the downloaded SD card image.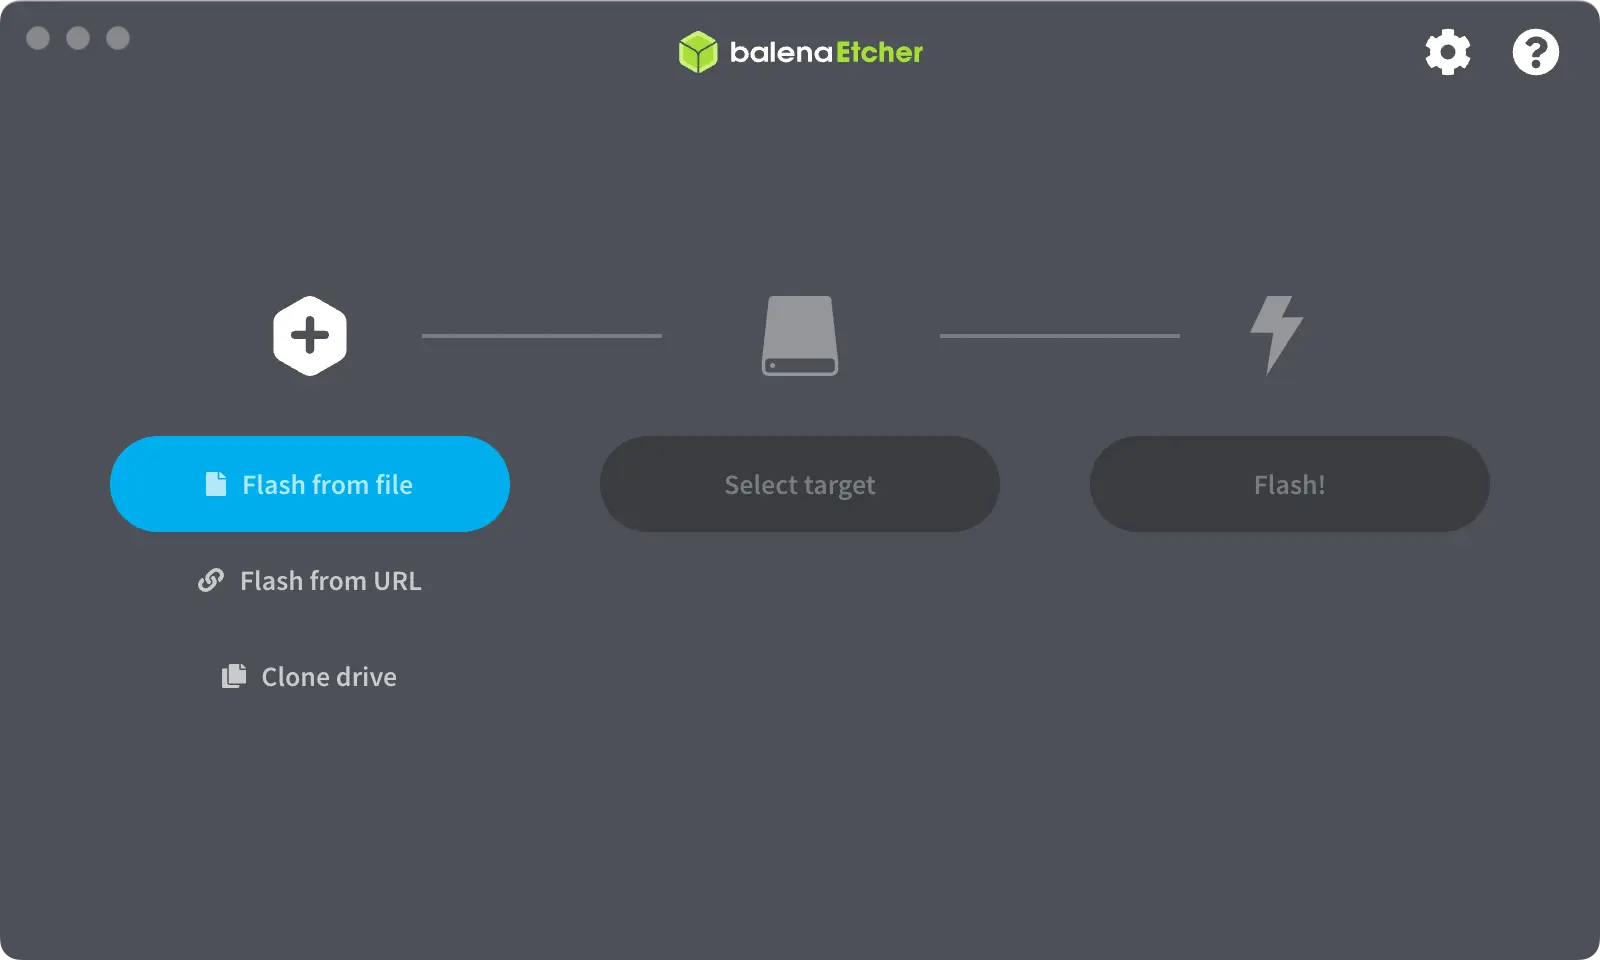
- Click
Select targetto select the SD card.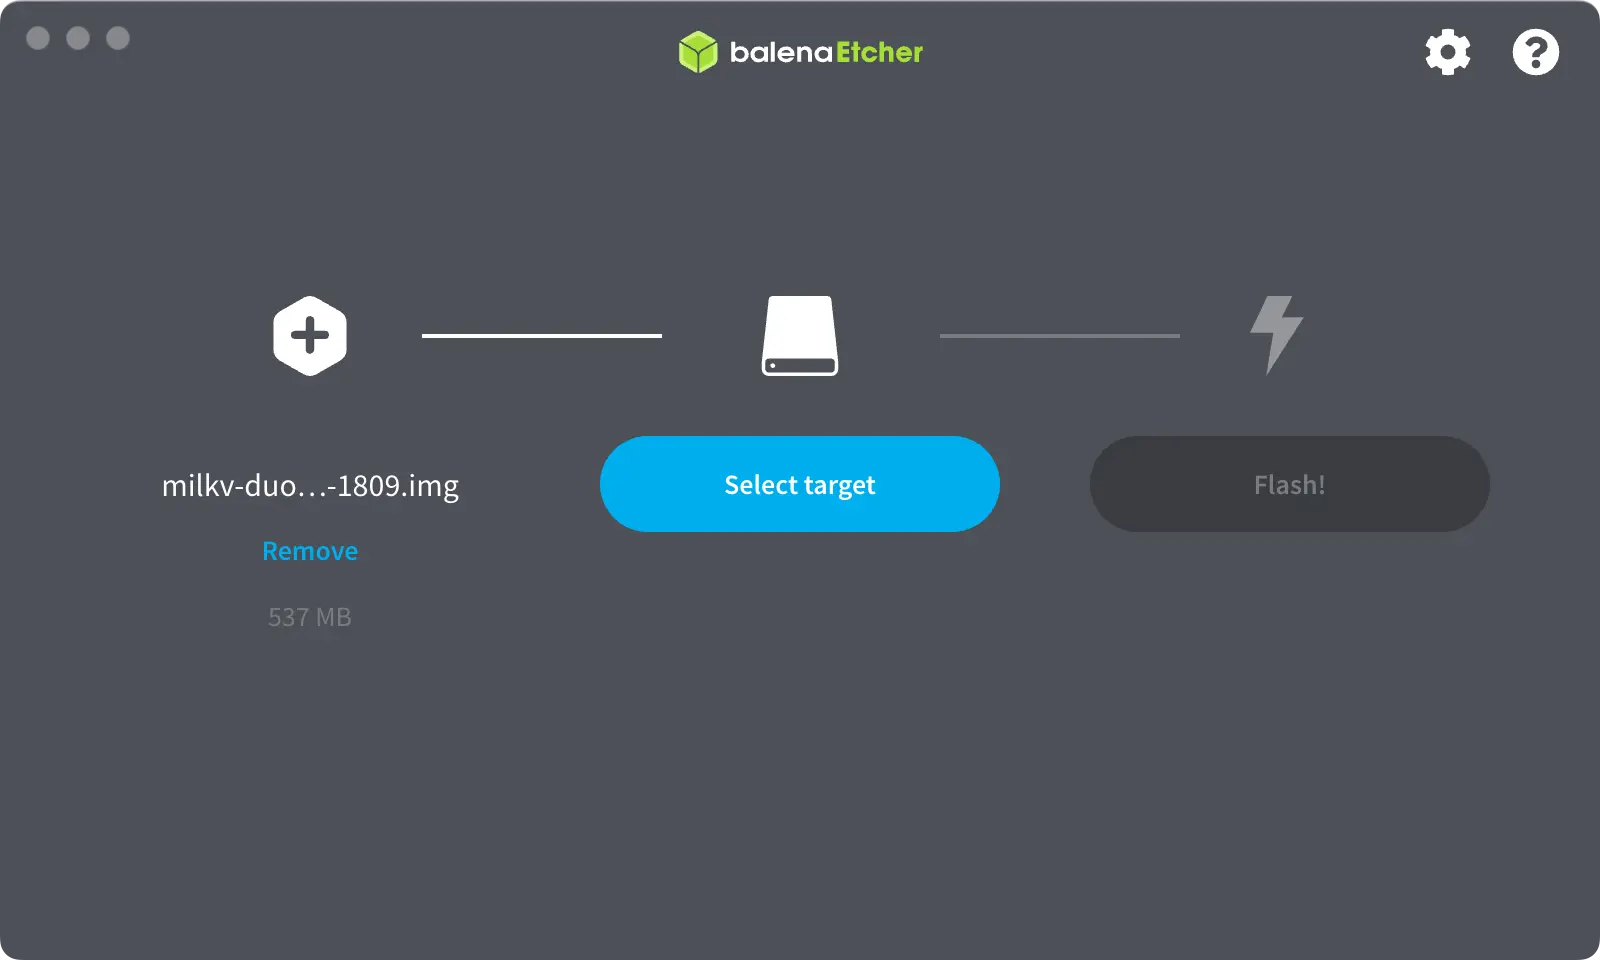
- Click
Flash!to start flashing.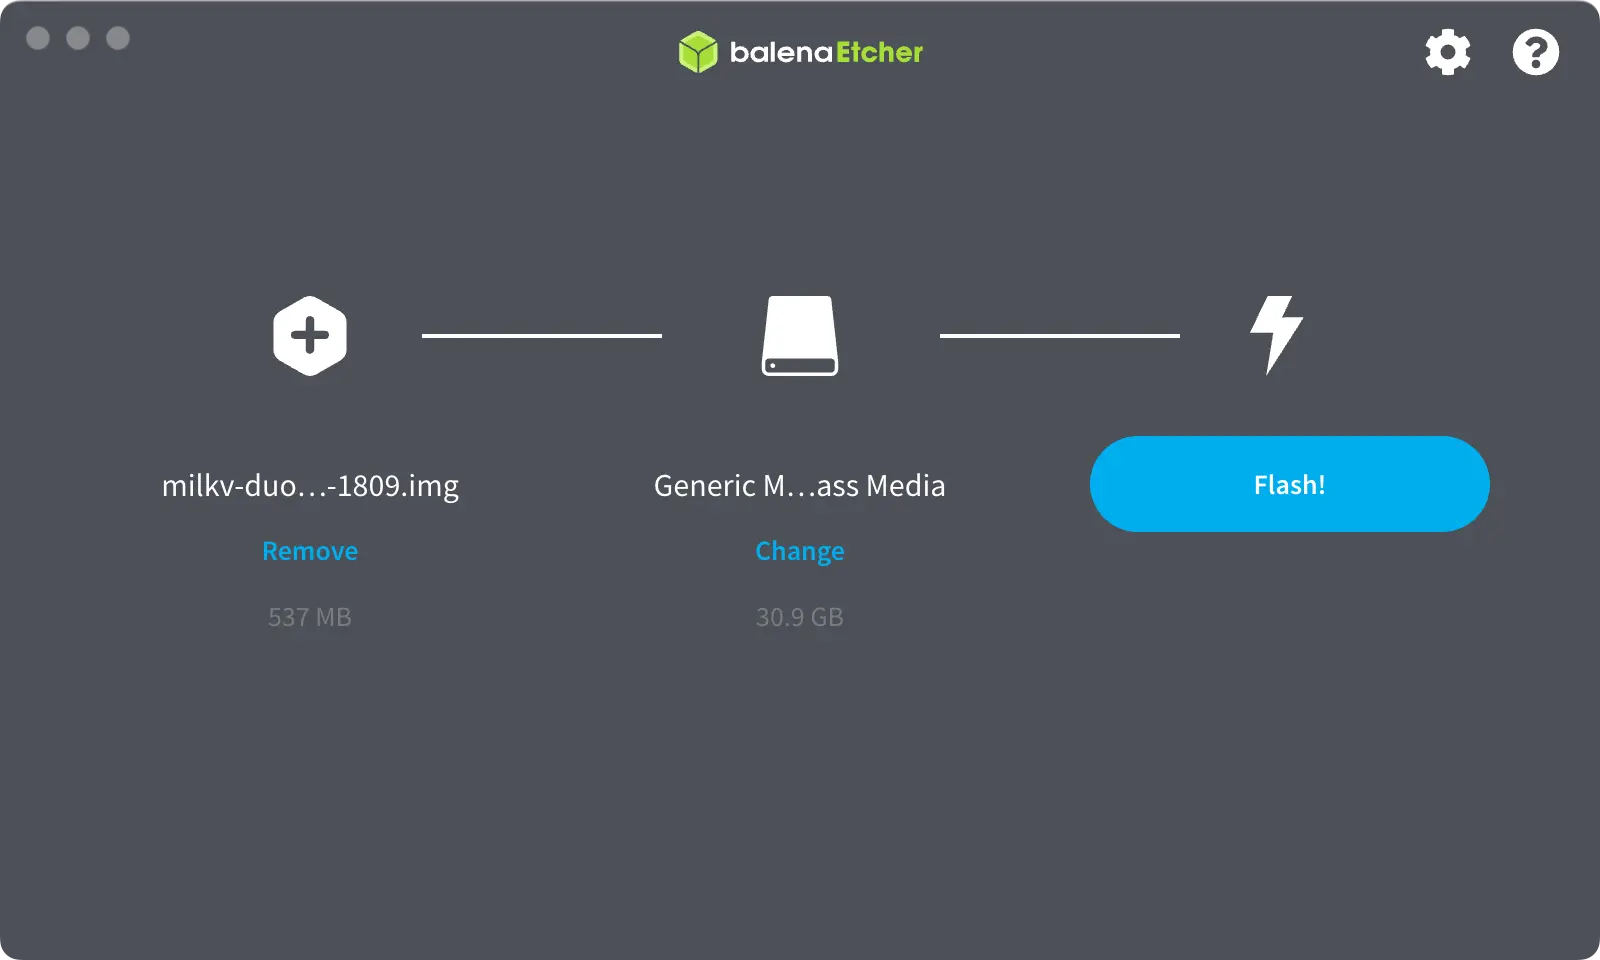
After the burning is complete, insert the SD card into the Jupiter board and start the system. The SD card system currently does not have the function of automatically expanding the capacity after startup. After the first startup, please expand the system partition according to the method in the previous section.
System partition expansion
The SD card system currently does not have the function of automatically expanding the capacity after booting. Please manually expand the capacity after booting, otherwise the system will report insufficient space and even fail to enter the desktop after restarting. The SSD and eMMC systems will automatically expand the capacity and do not require this step.
The following uses the gparted tool as an example to explain how to expand the capacity. You can also use other tools that you are familiar with to complete the expansion.
-
Install the
gpartedtool.sudo apt update
sudo apt install gparted -
Start the
gpartedprogram from the command line or click on thegpartedapplication from the application list in the menu.sudo gparted -
Select the SD card device in the upper right corner, and you can see that the current unallocated space of the SD card is 22G, and the root file system rootfs
/is 6G.
-
Select the rootfs
/partition, right-click and selectResize/Moveto expand the partition.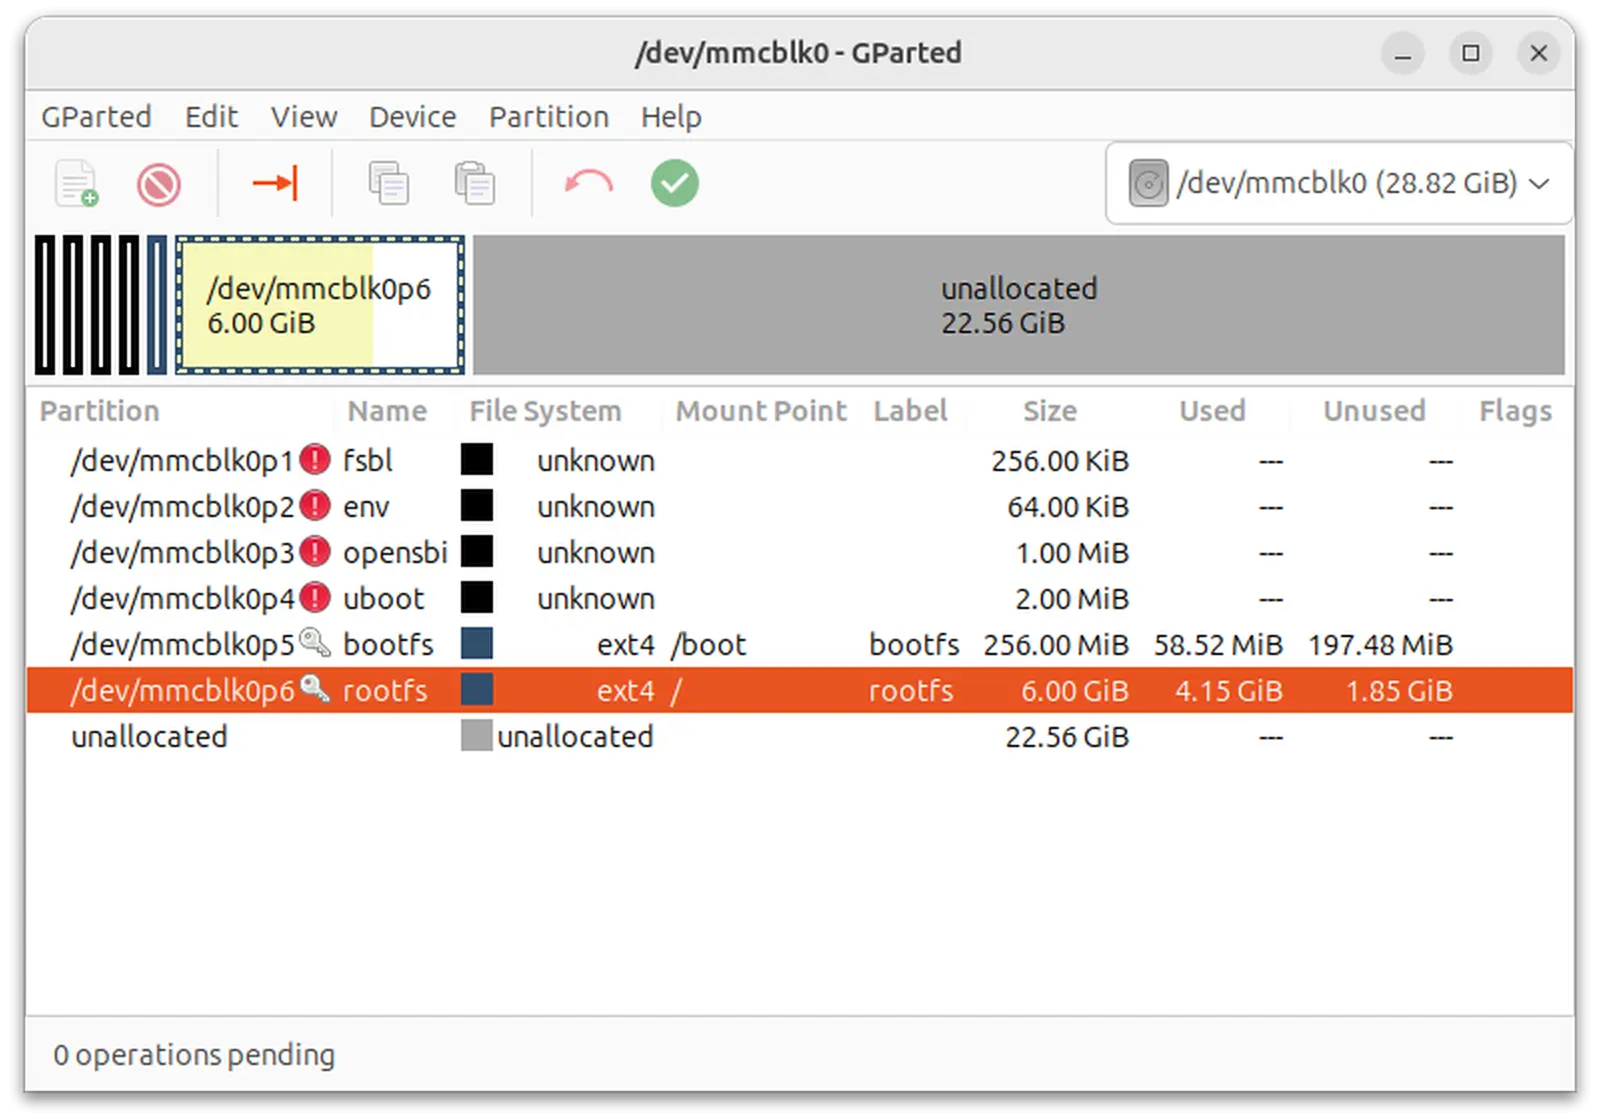
-
In
New size, specify the size of the root file system. It is recommended to set it to at least 16G. Enter16384. You can also drag the top slider to adjust the size. You can also setFree space followingto0to allocate all the remaining space on the SD card to the root file system.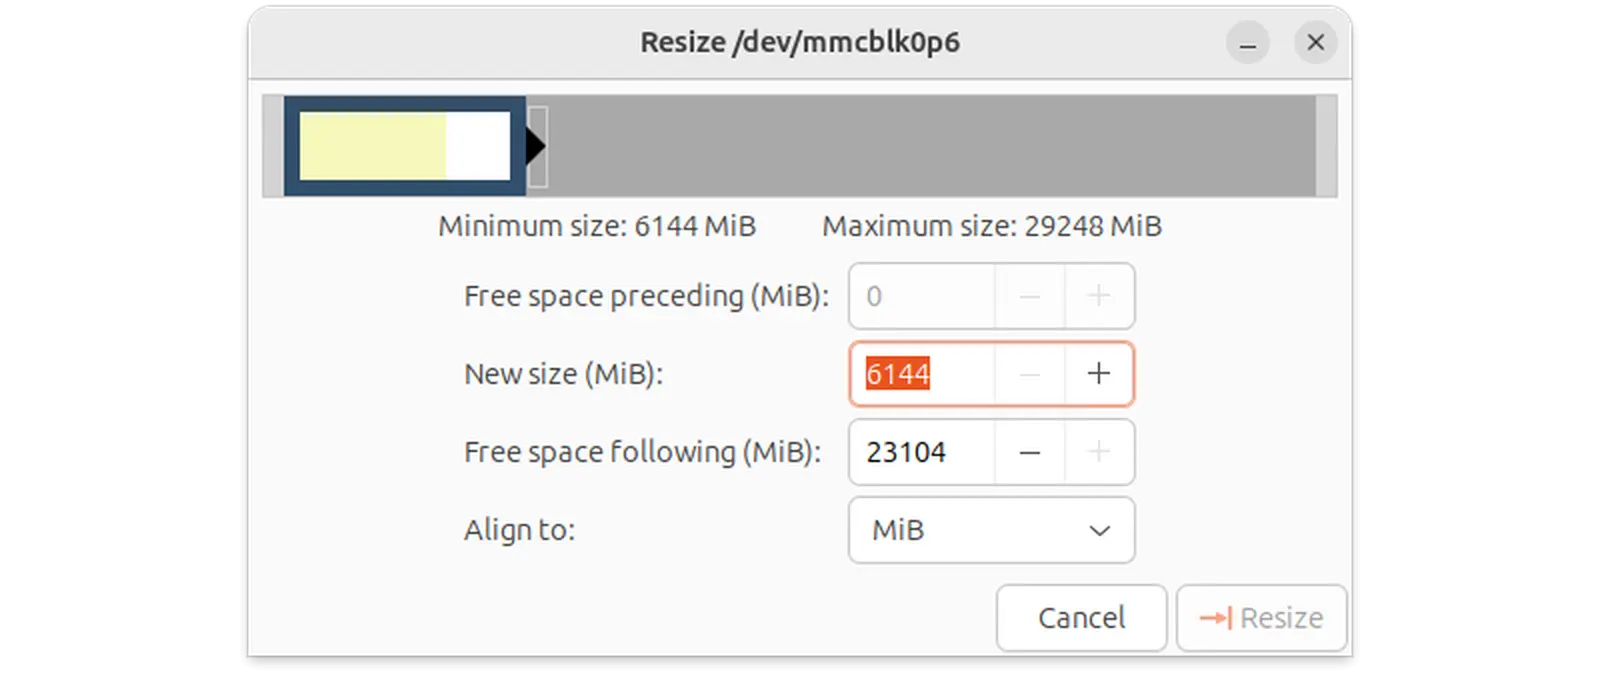
-
After modifying, click
Resize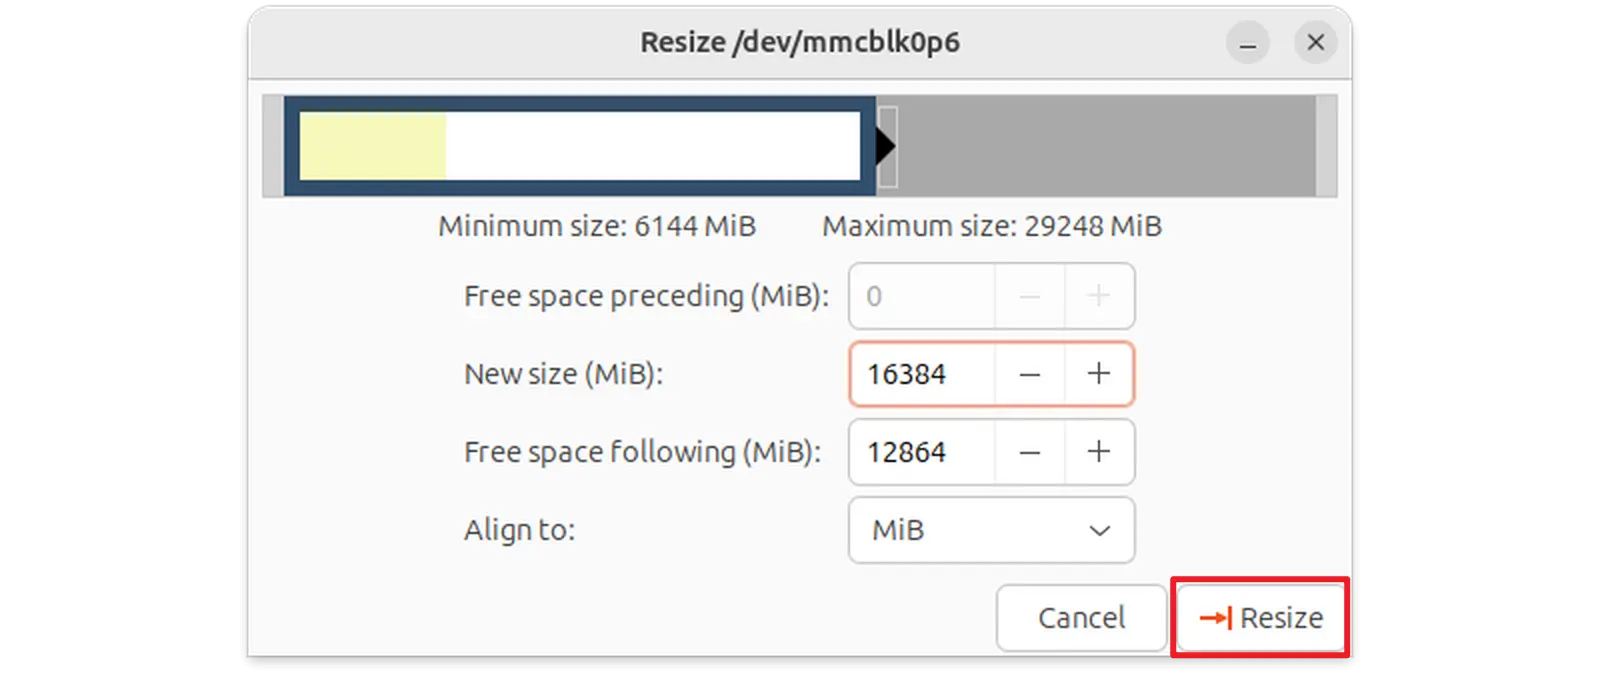
-
You can see that the current rootfs
/has been changed to 16G. Click theCheck Markbutton in the menu to start the change.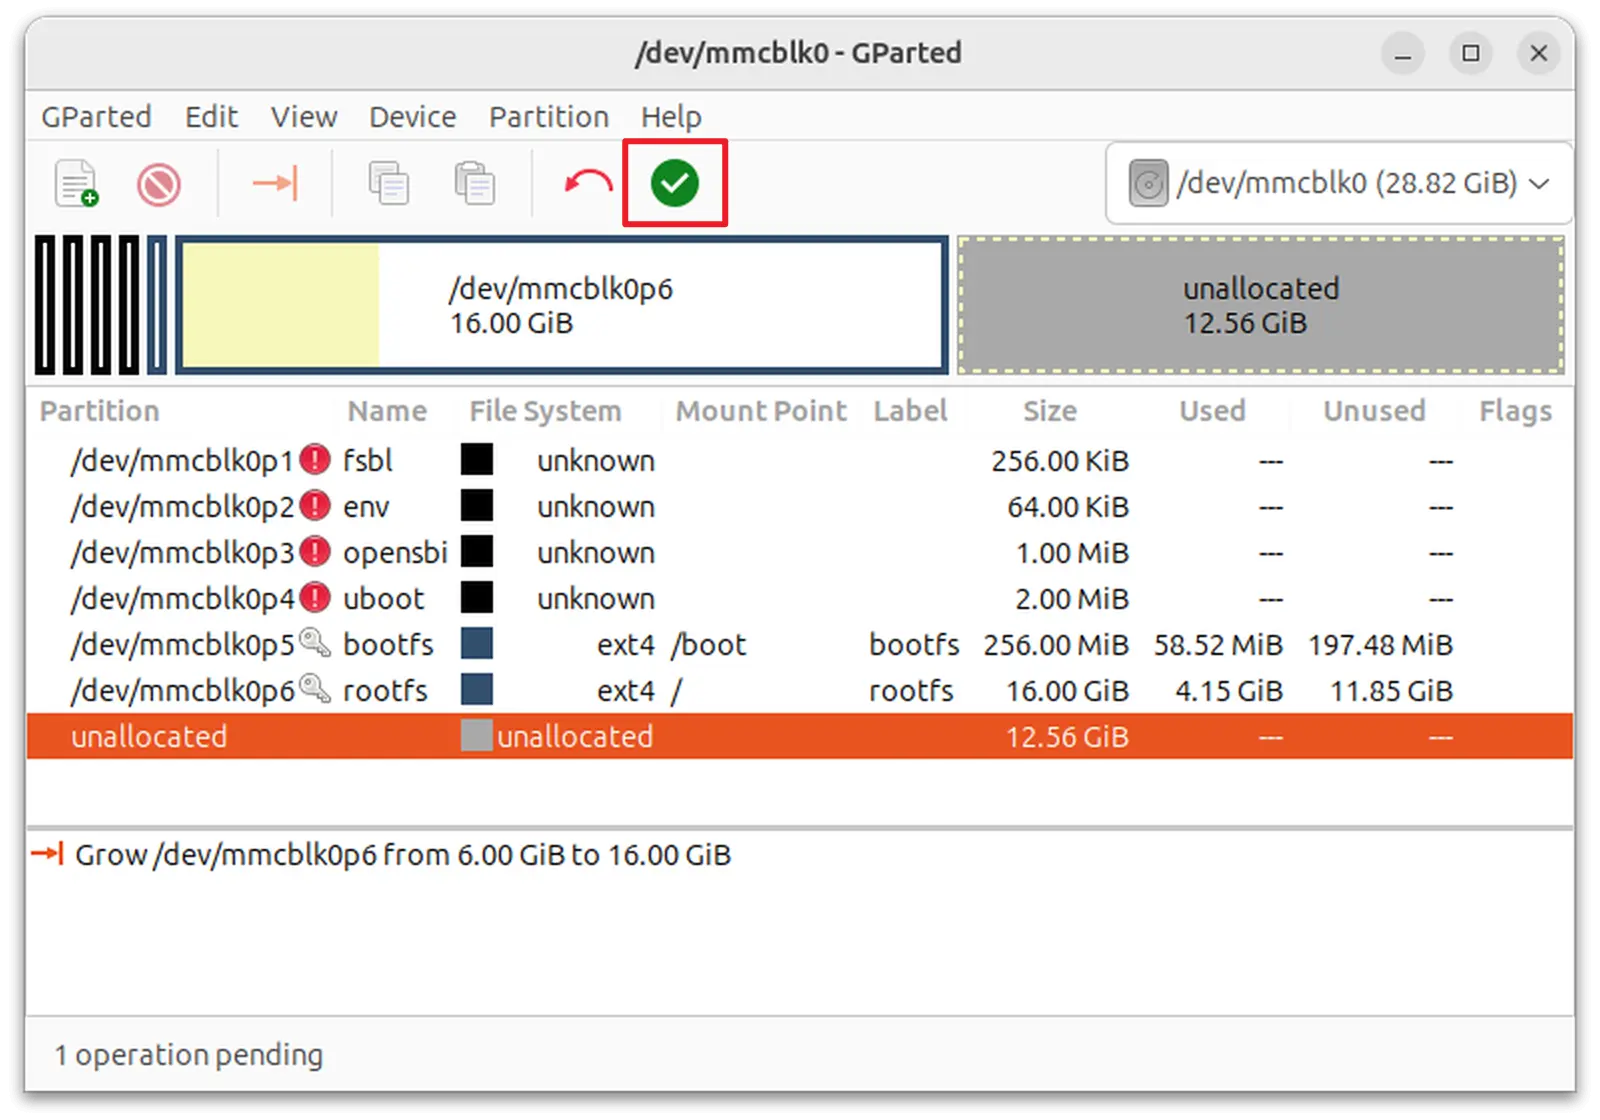
When a prompt pops up, select
Apply.
-
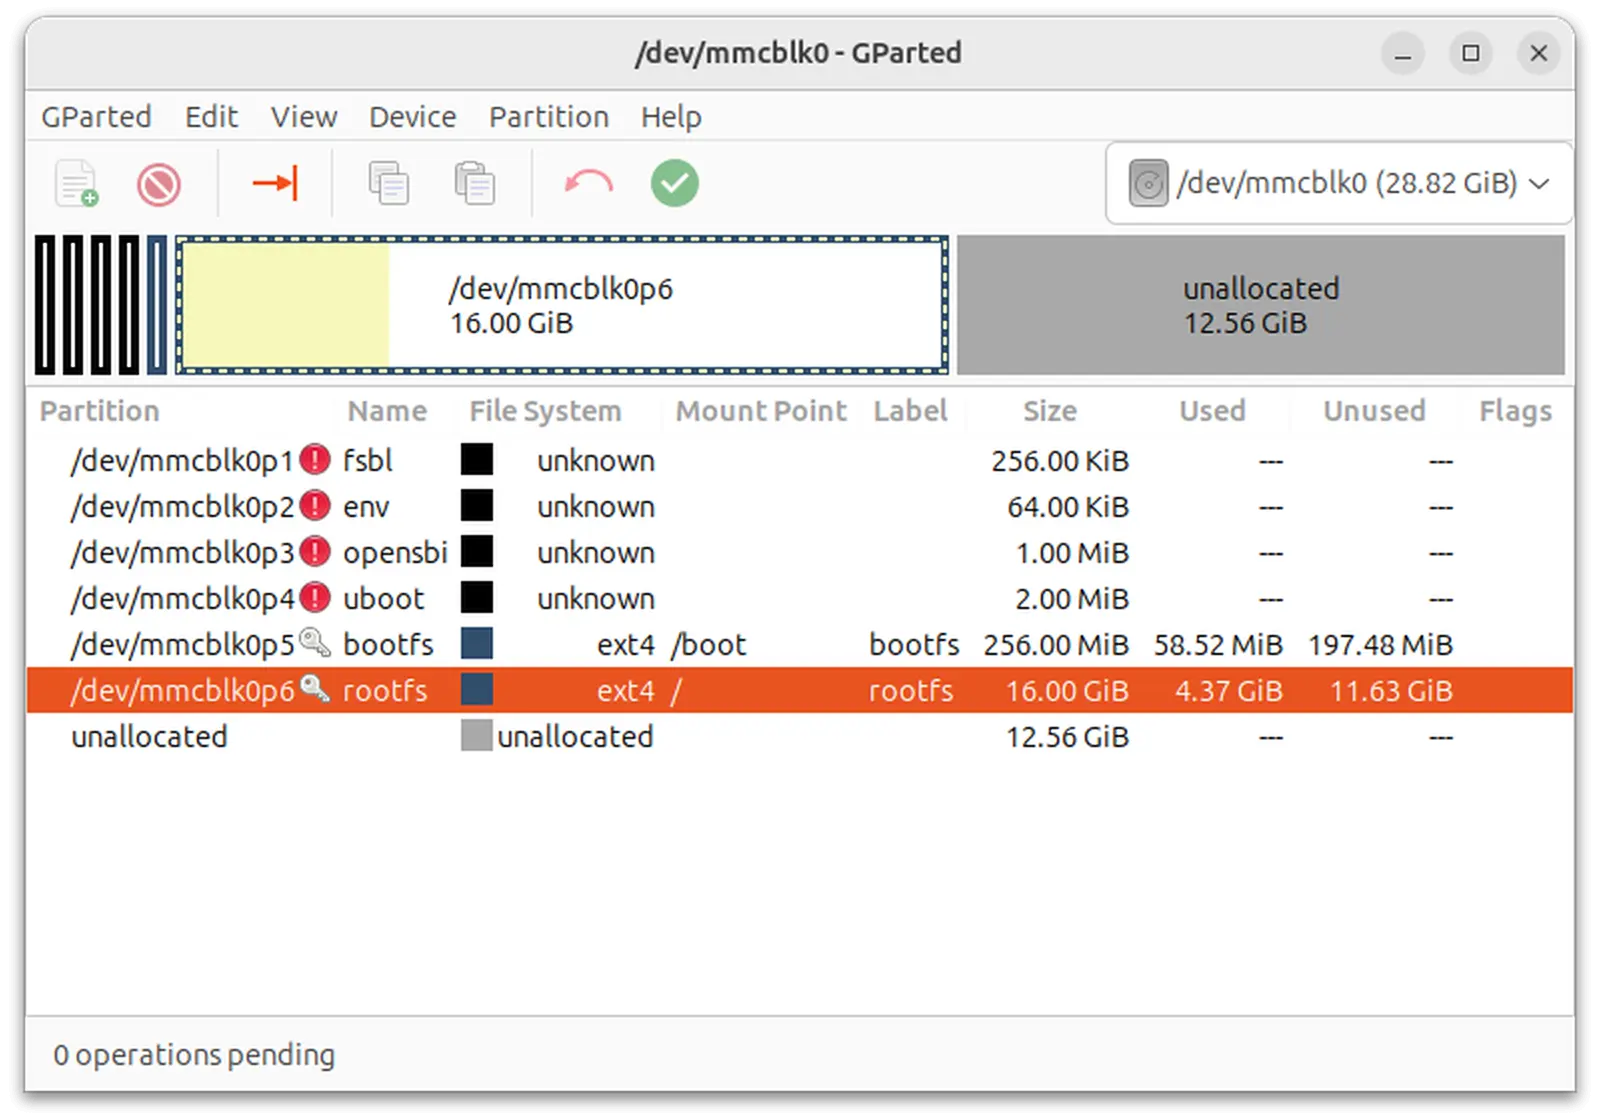
After the change is completed, the final partition situation is as follows.
Install OS to eMMC or SSD
When burning the system image to SSD or eMMC, it must be connected to a PC via a Type-C cable for burning.
The priority of burning is the same as the priority of booting. If both SSD and eMMC exist, the image will be burned to SSD. When neither SSD nor eMMC exists, the titanflasher tool will only burn u-boot to SPI Flash.
First, go to the resource download page to download the system image package with the suffix .zip (not .img.zip): Resource Download Summary。
Note that you do not need to unzip the zip package after downloading it.
Download and install the titanflasher tool
To burn the system to SSD or eMMC, it is recommended to use the official tool titanflasher from Titan. Currently, versions for both X86 (X64) and Linux platforms are provided.
Sorry, the Linux version does not support English interface yet.
download link: https://github.com/milkv-jupiter/jupiter-tools/releases/tag/titanflasher
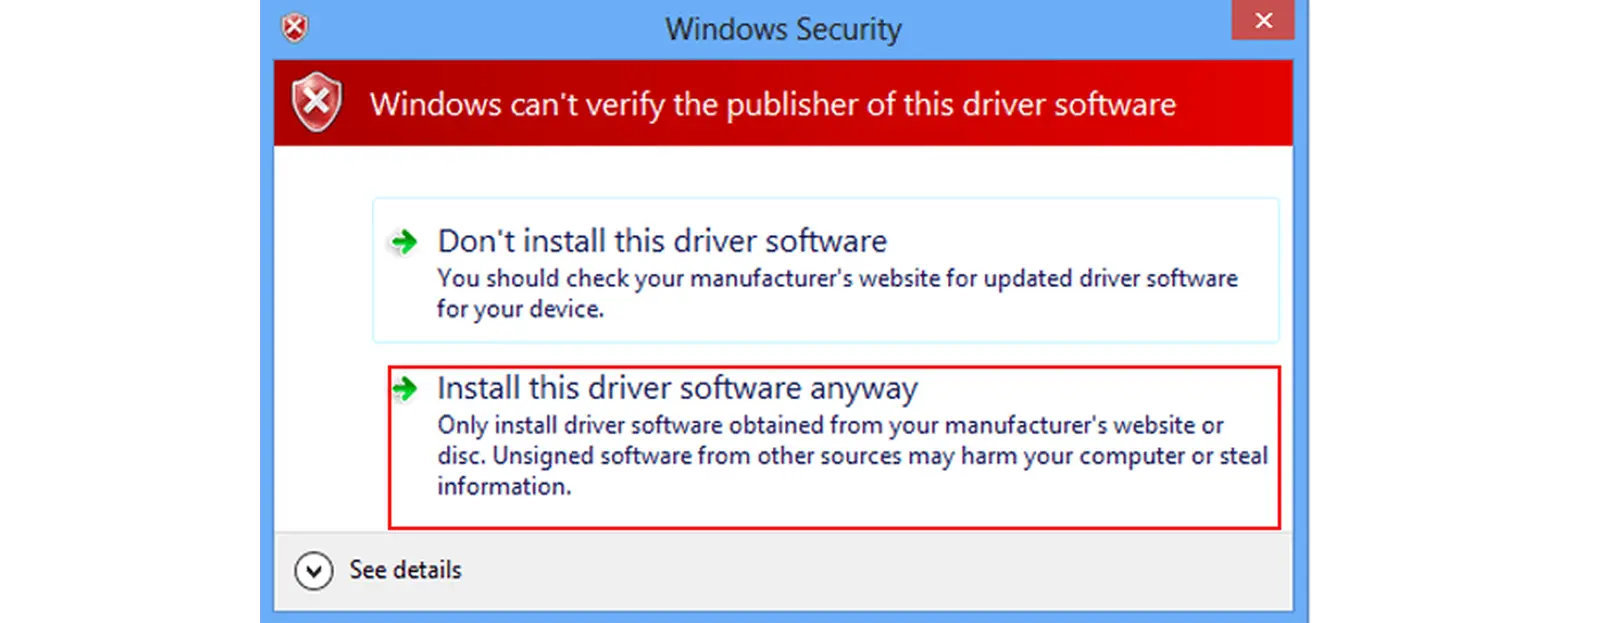
If prompted during Windows installation, select Install this driver software anyway.
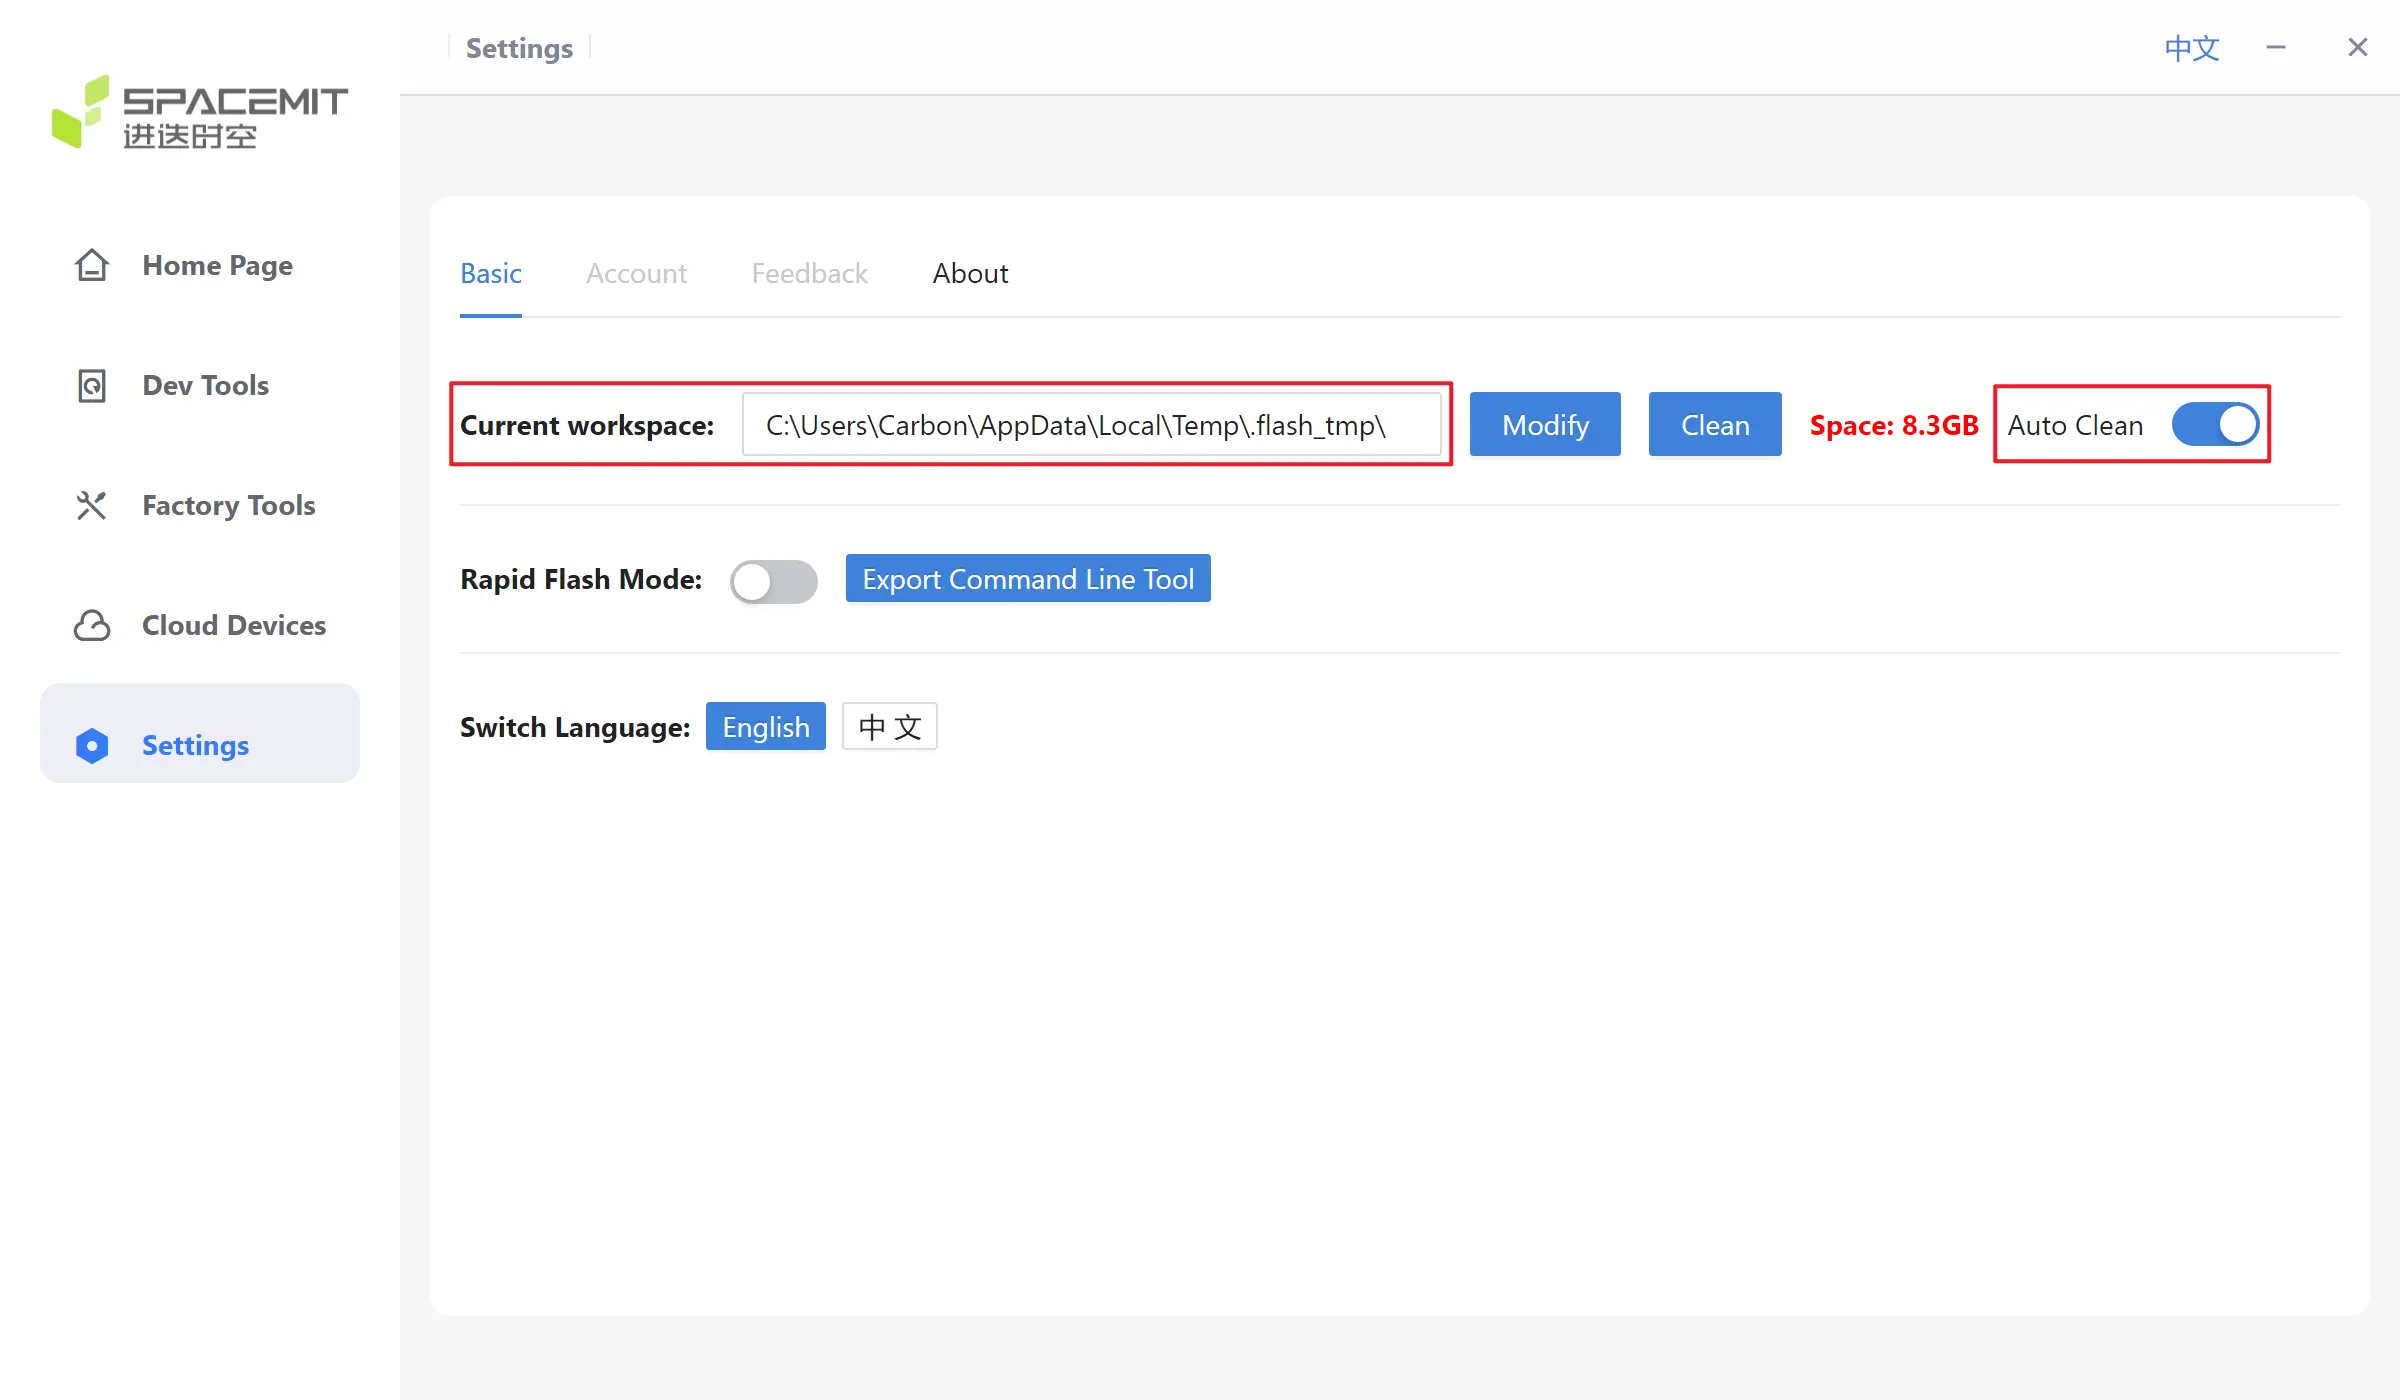
When using the titanflasher tool to flash the firmware, the firmware will be unzipped to its workspace. Please check Auto Clean in Settings, or manually delete unused files in the workspace directory to avoid cache files taking up too much system space after multiple flashes.
Use titanflasher flash tool
-
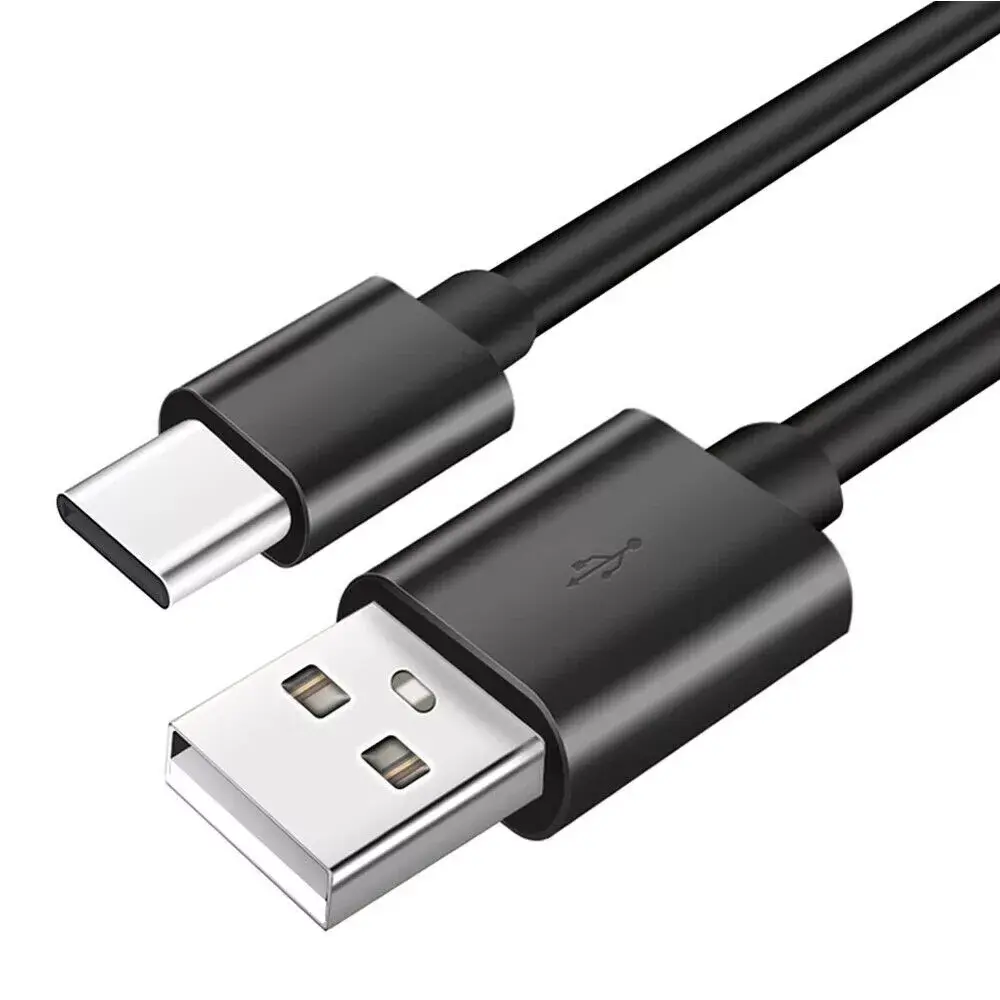
Use a Type-C cable to connect the Type-C port of Jupiter to the PC.
-
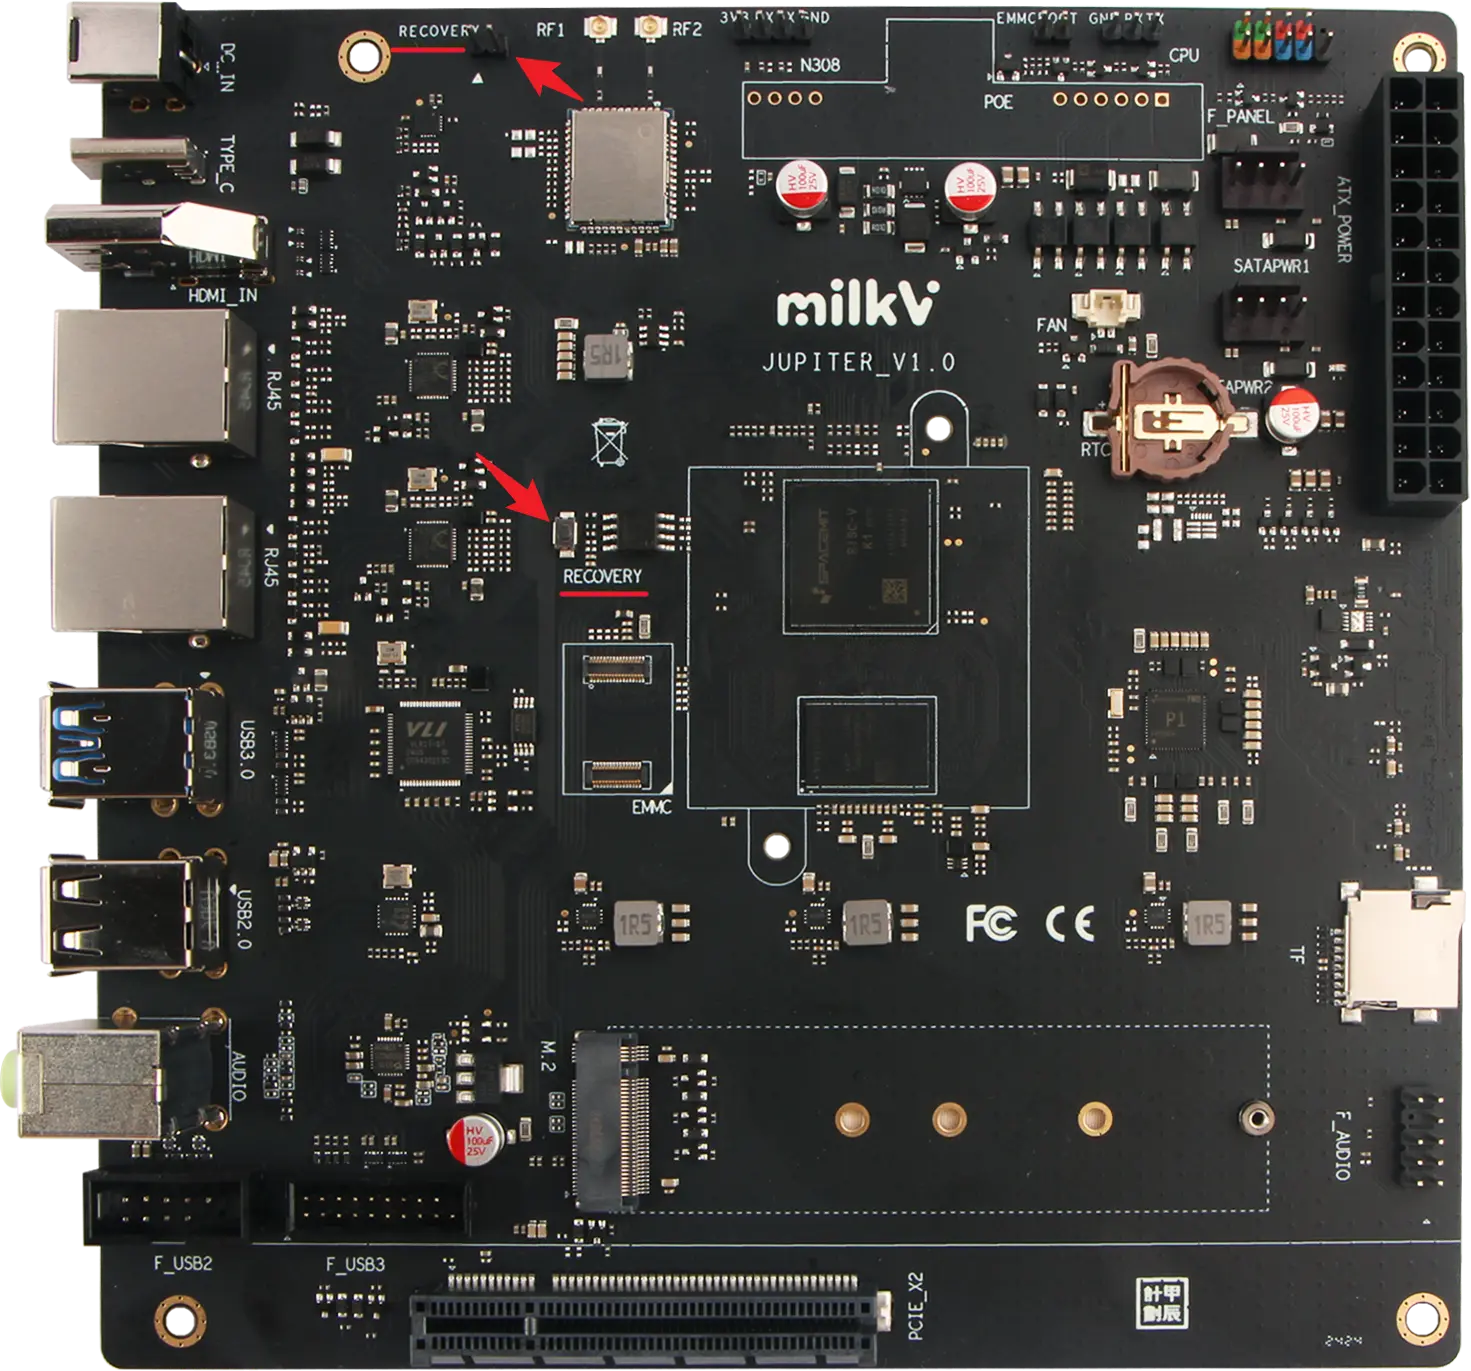
Press and hold the RECOVERY button on the board or short the RECOVERY pins, then power on Jupiter to enter USB burning mode.
-
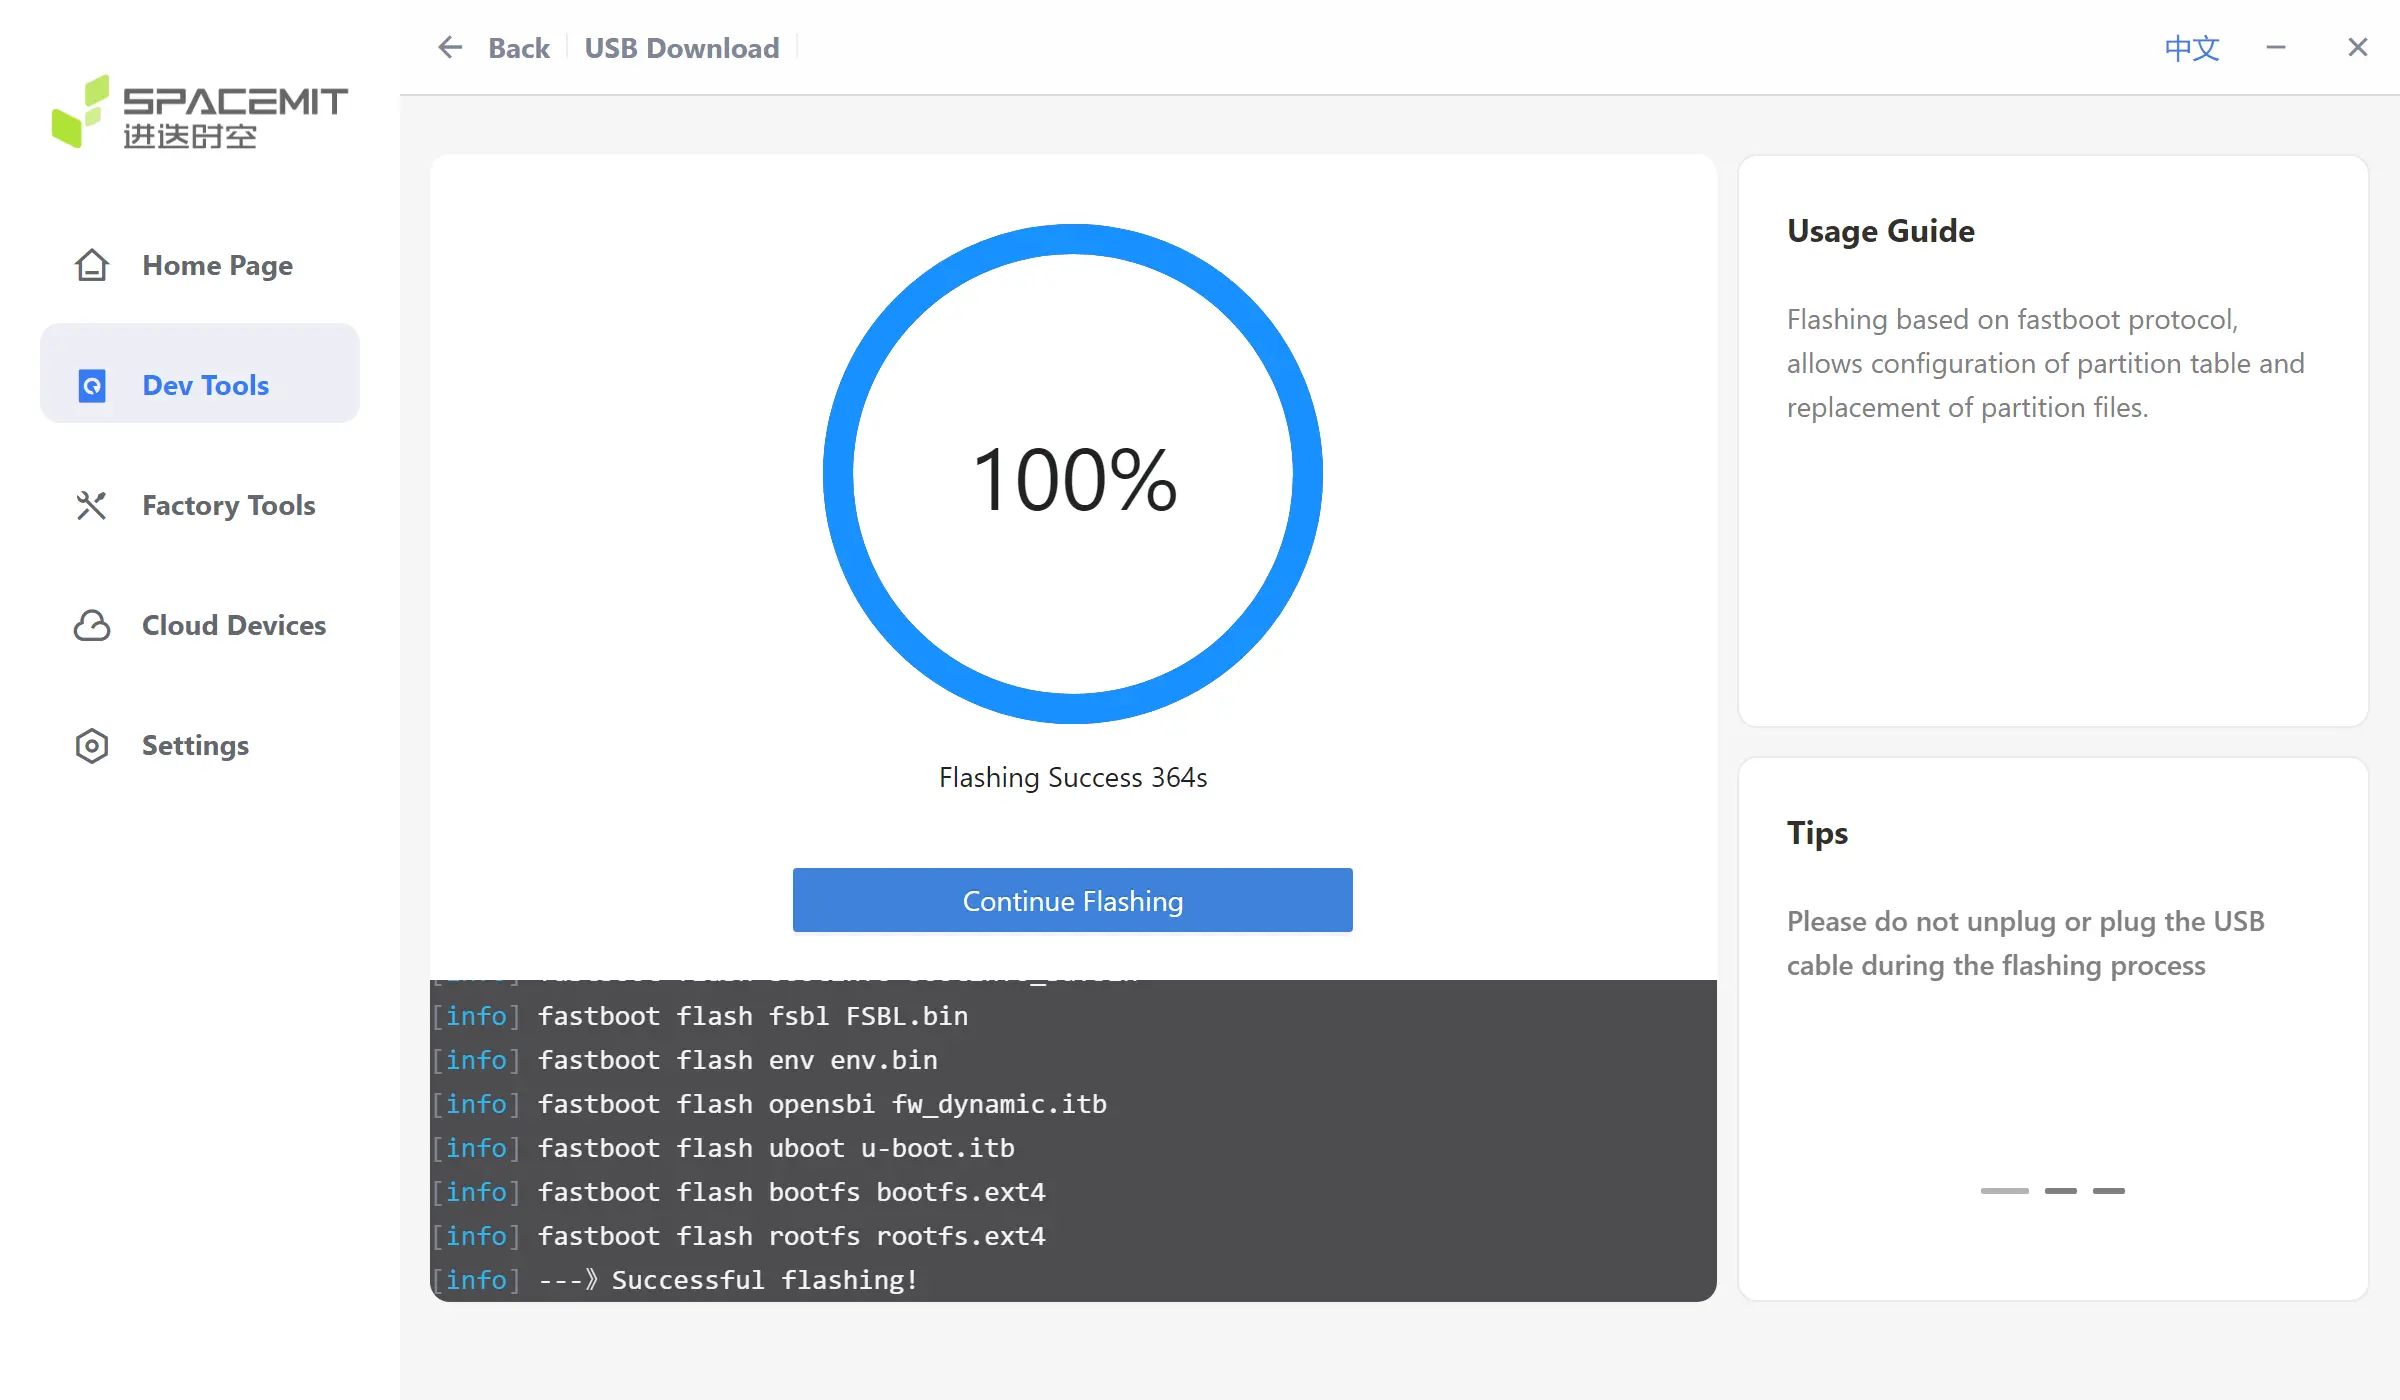
Open the titanflasher tool, select
Dev Tools, and then selectUSB Download.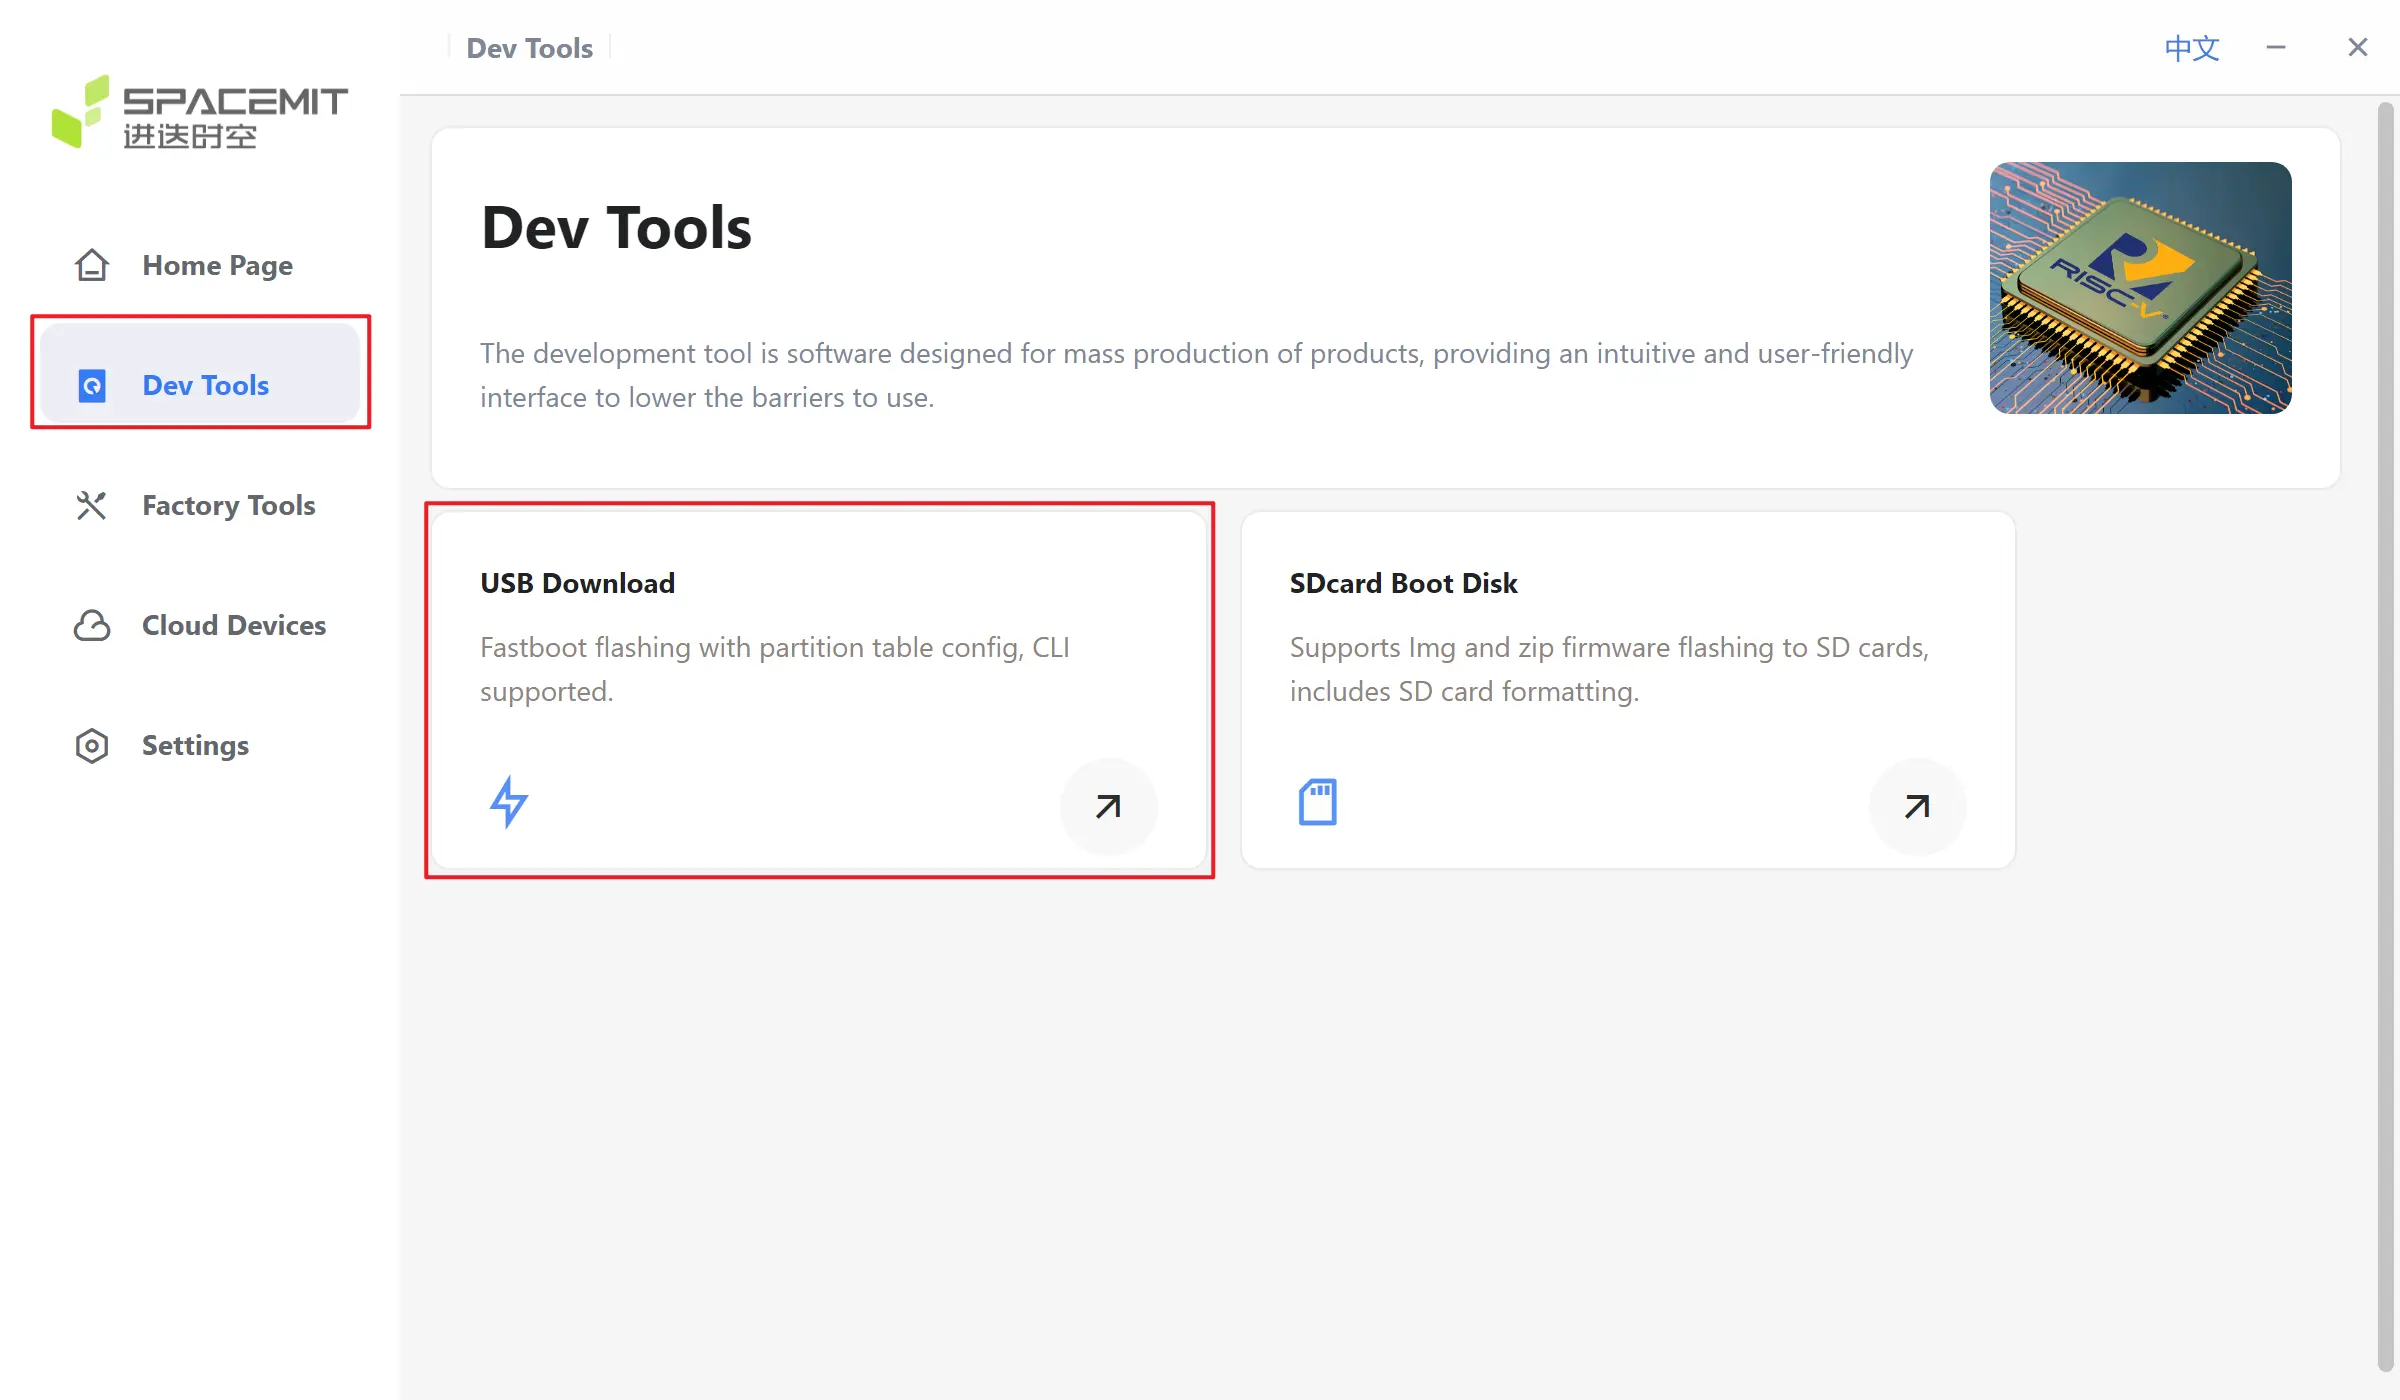
-
Click
Scan Devicesand select the identifieddfu-device.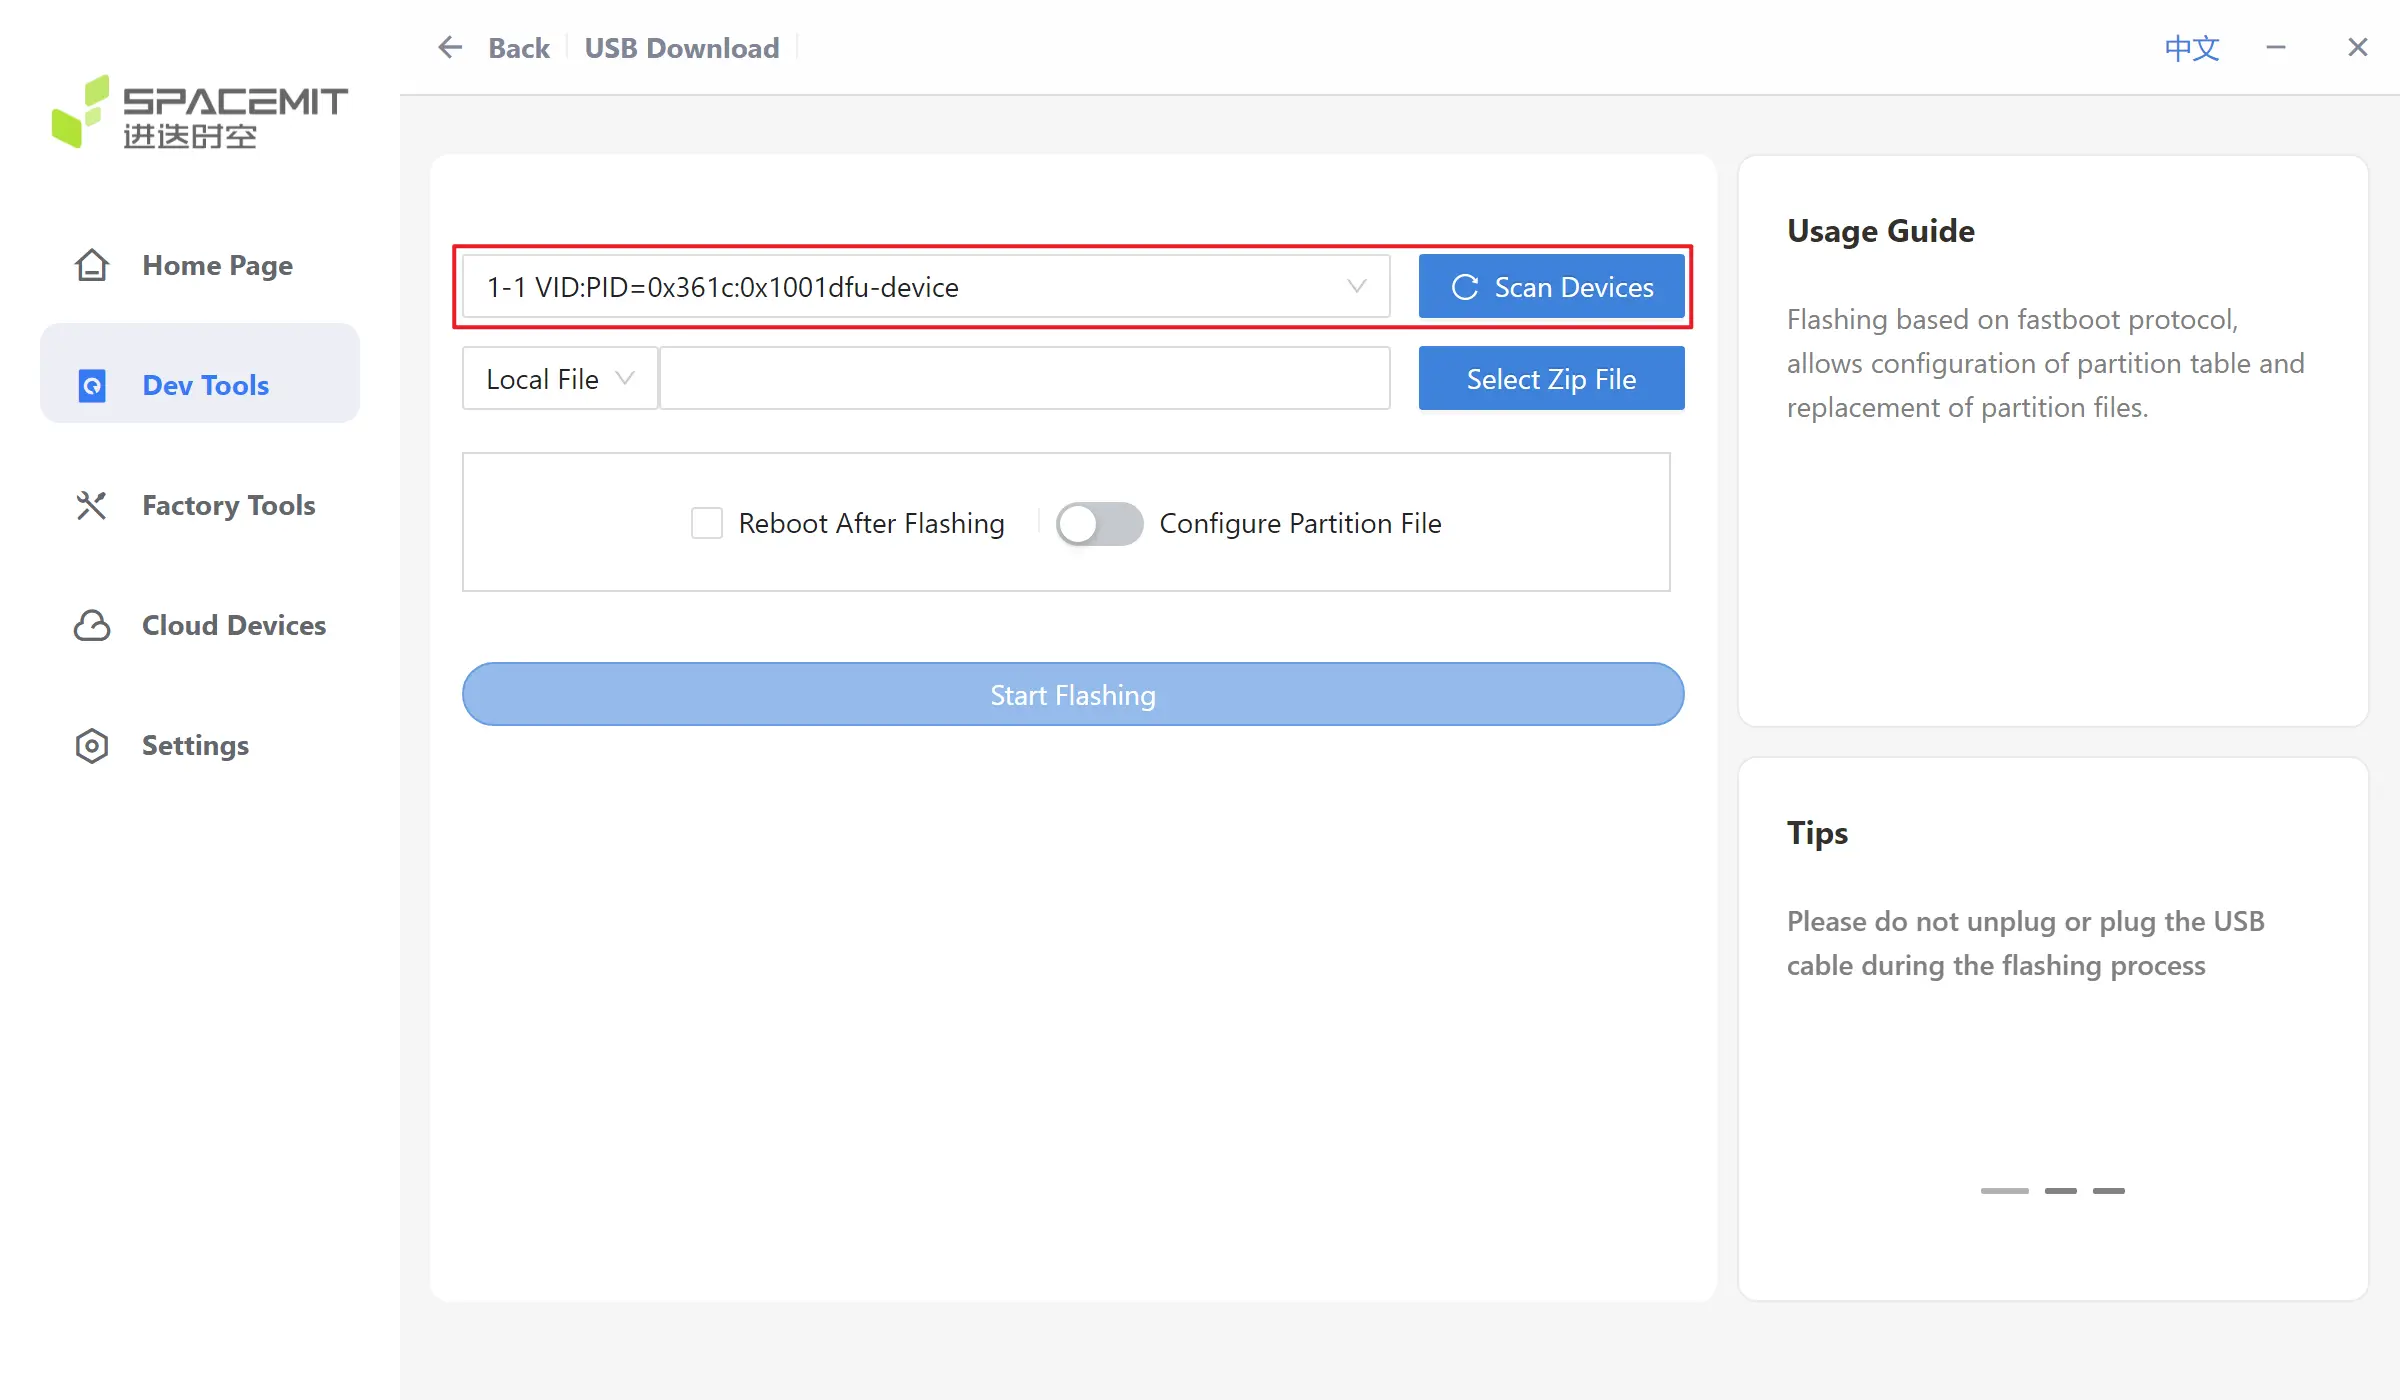
-
Click
Select Zip File, select the zip system image, the tool will decompress it first, please wait for a while. If you need to restart automatically after the flash is completed, you can checkReboot After Flashing.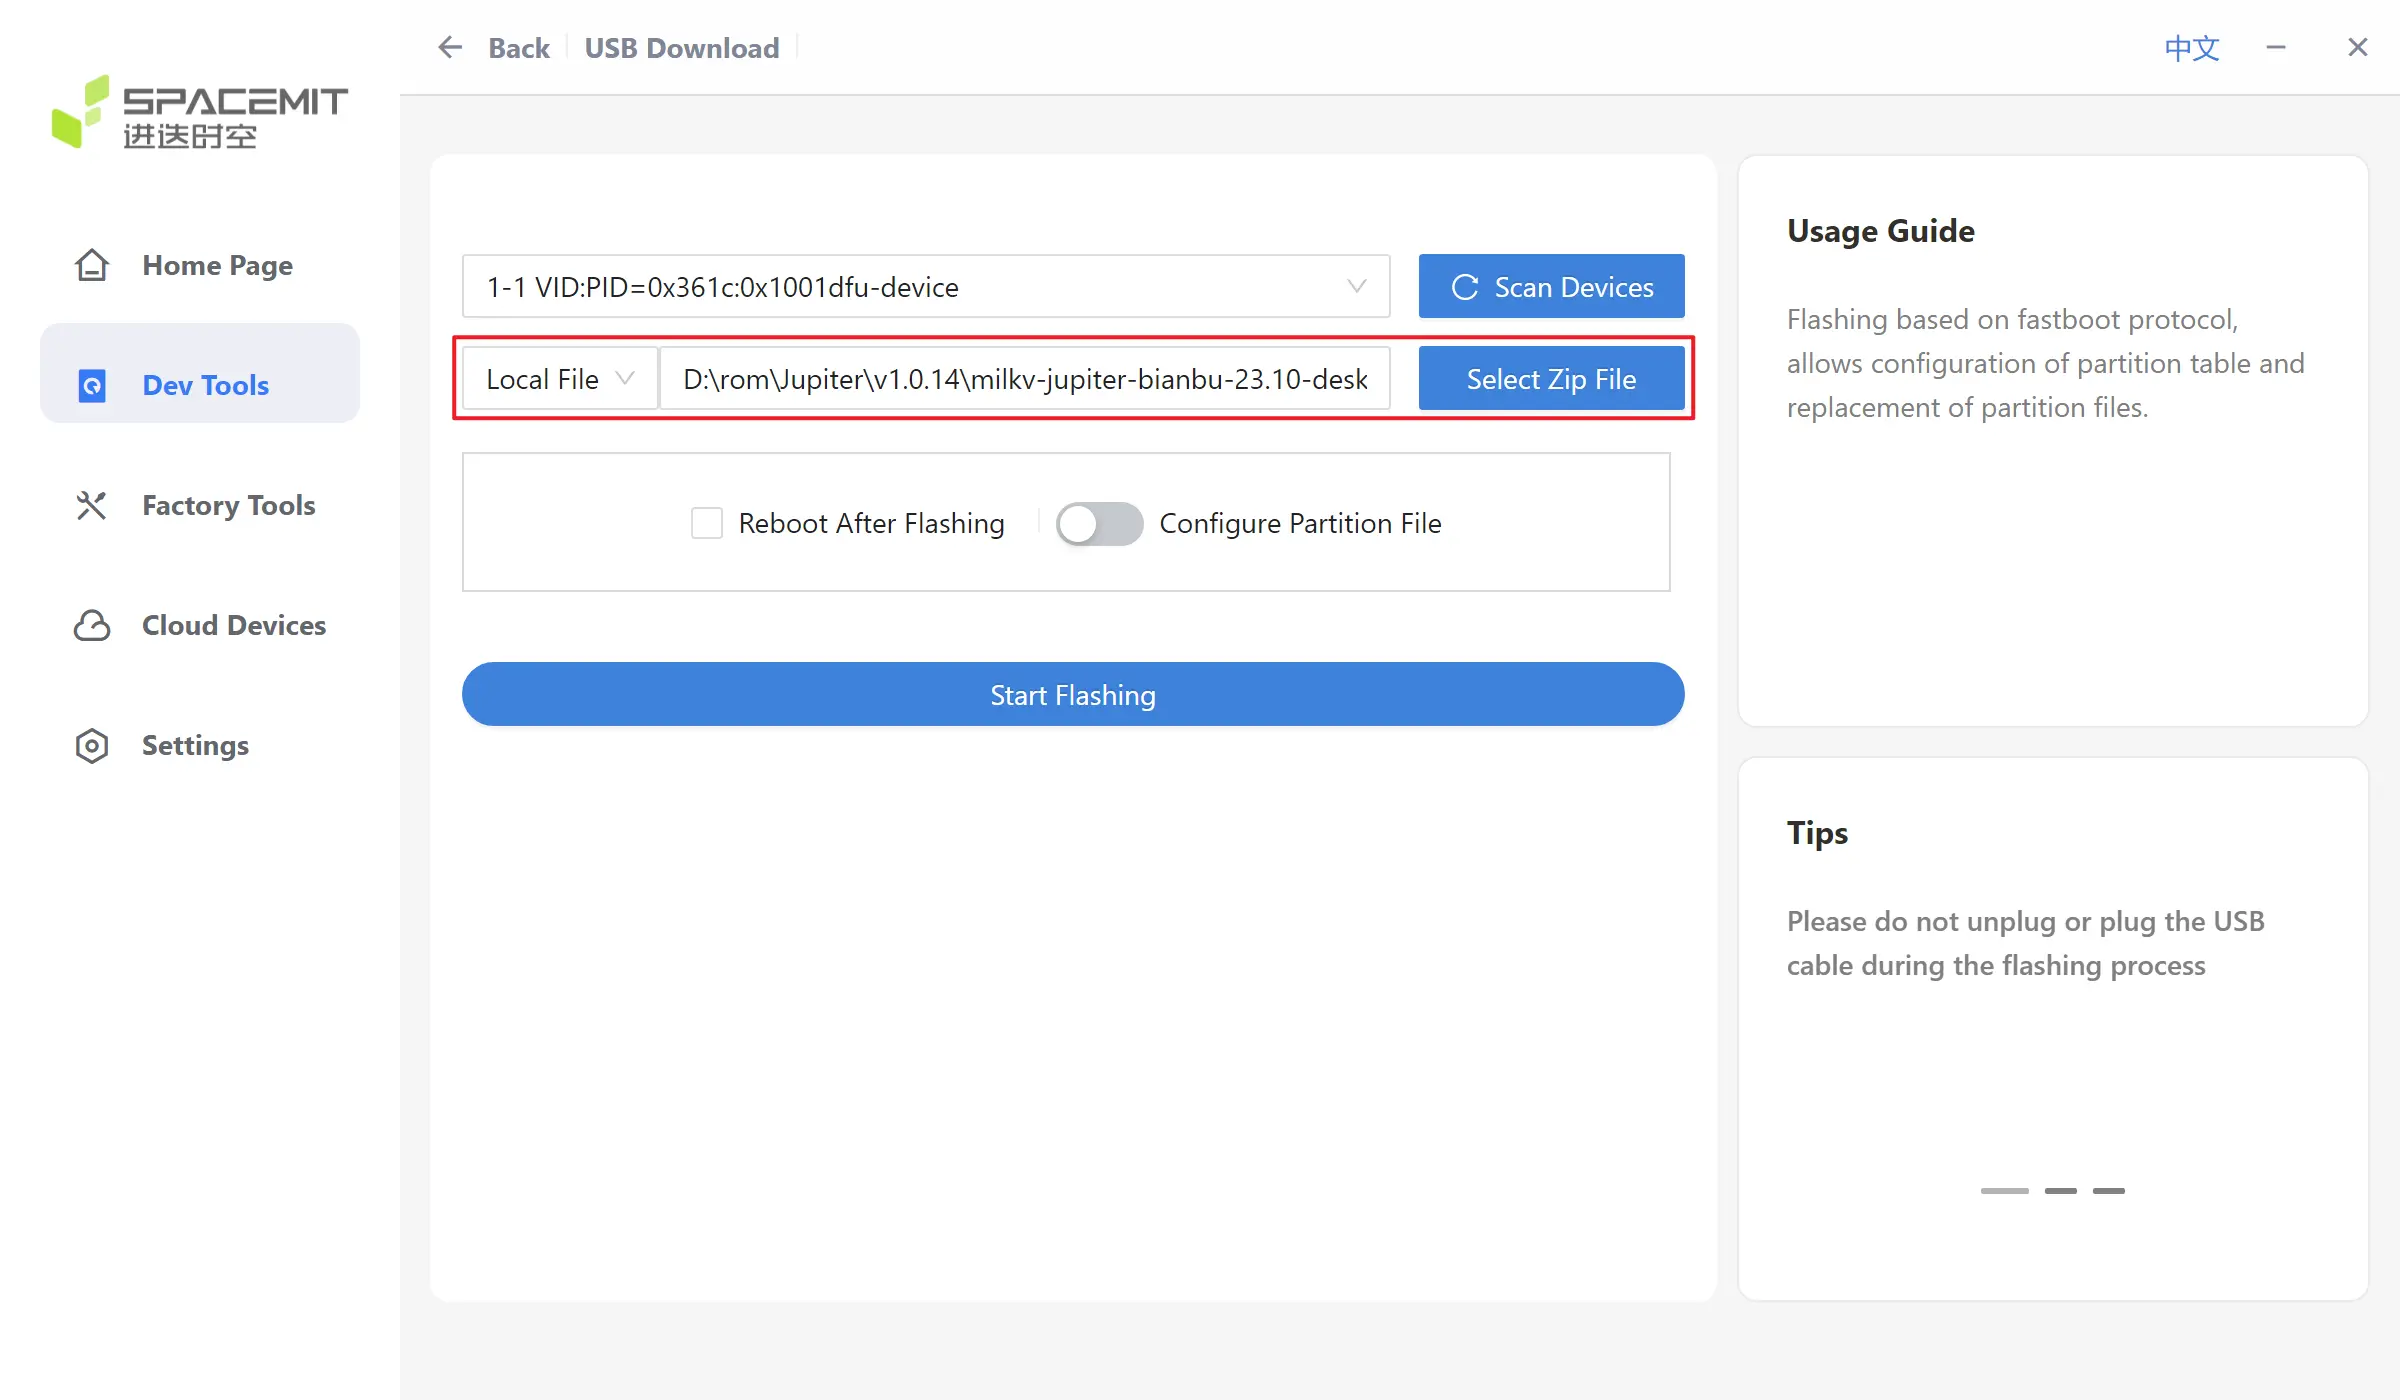
-
Click
Start Flashingto start burning.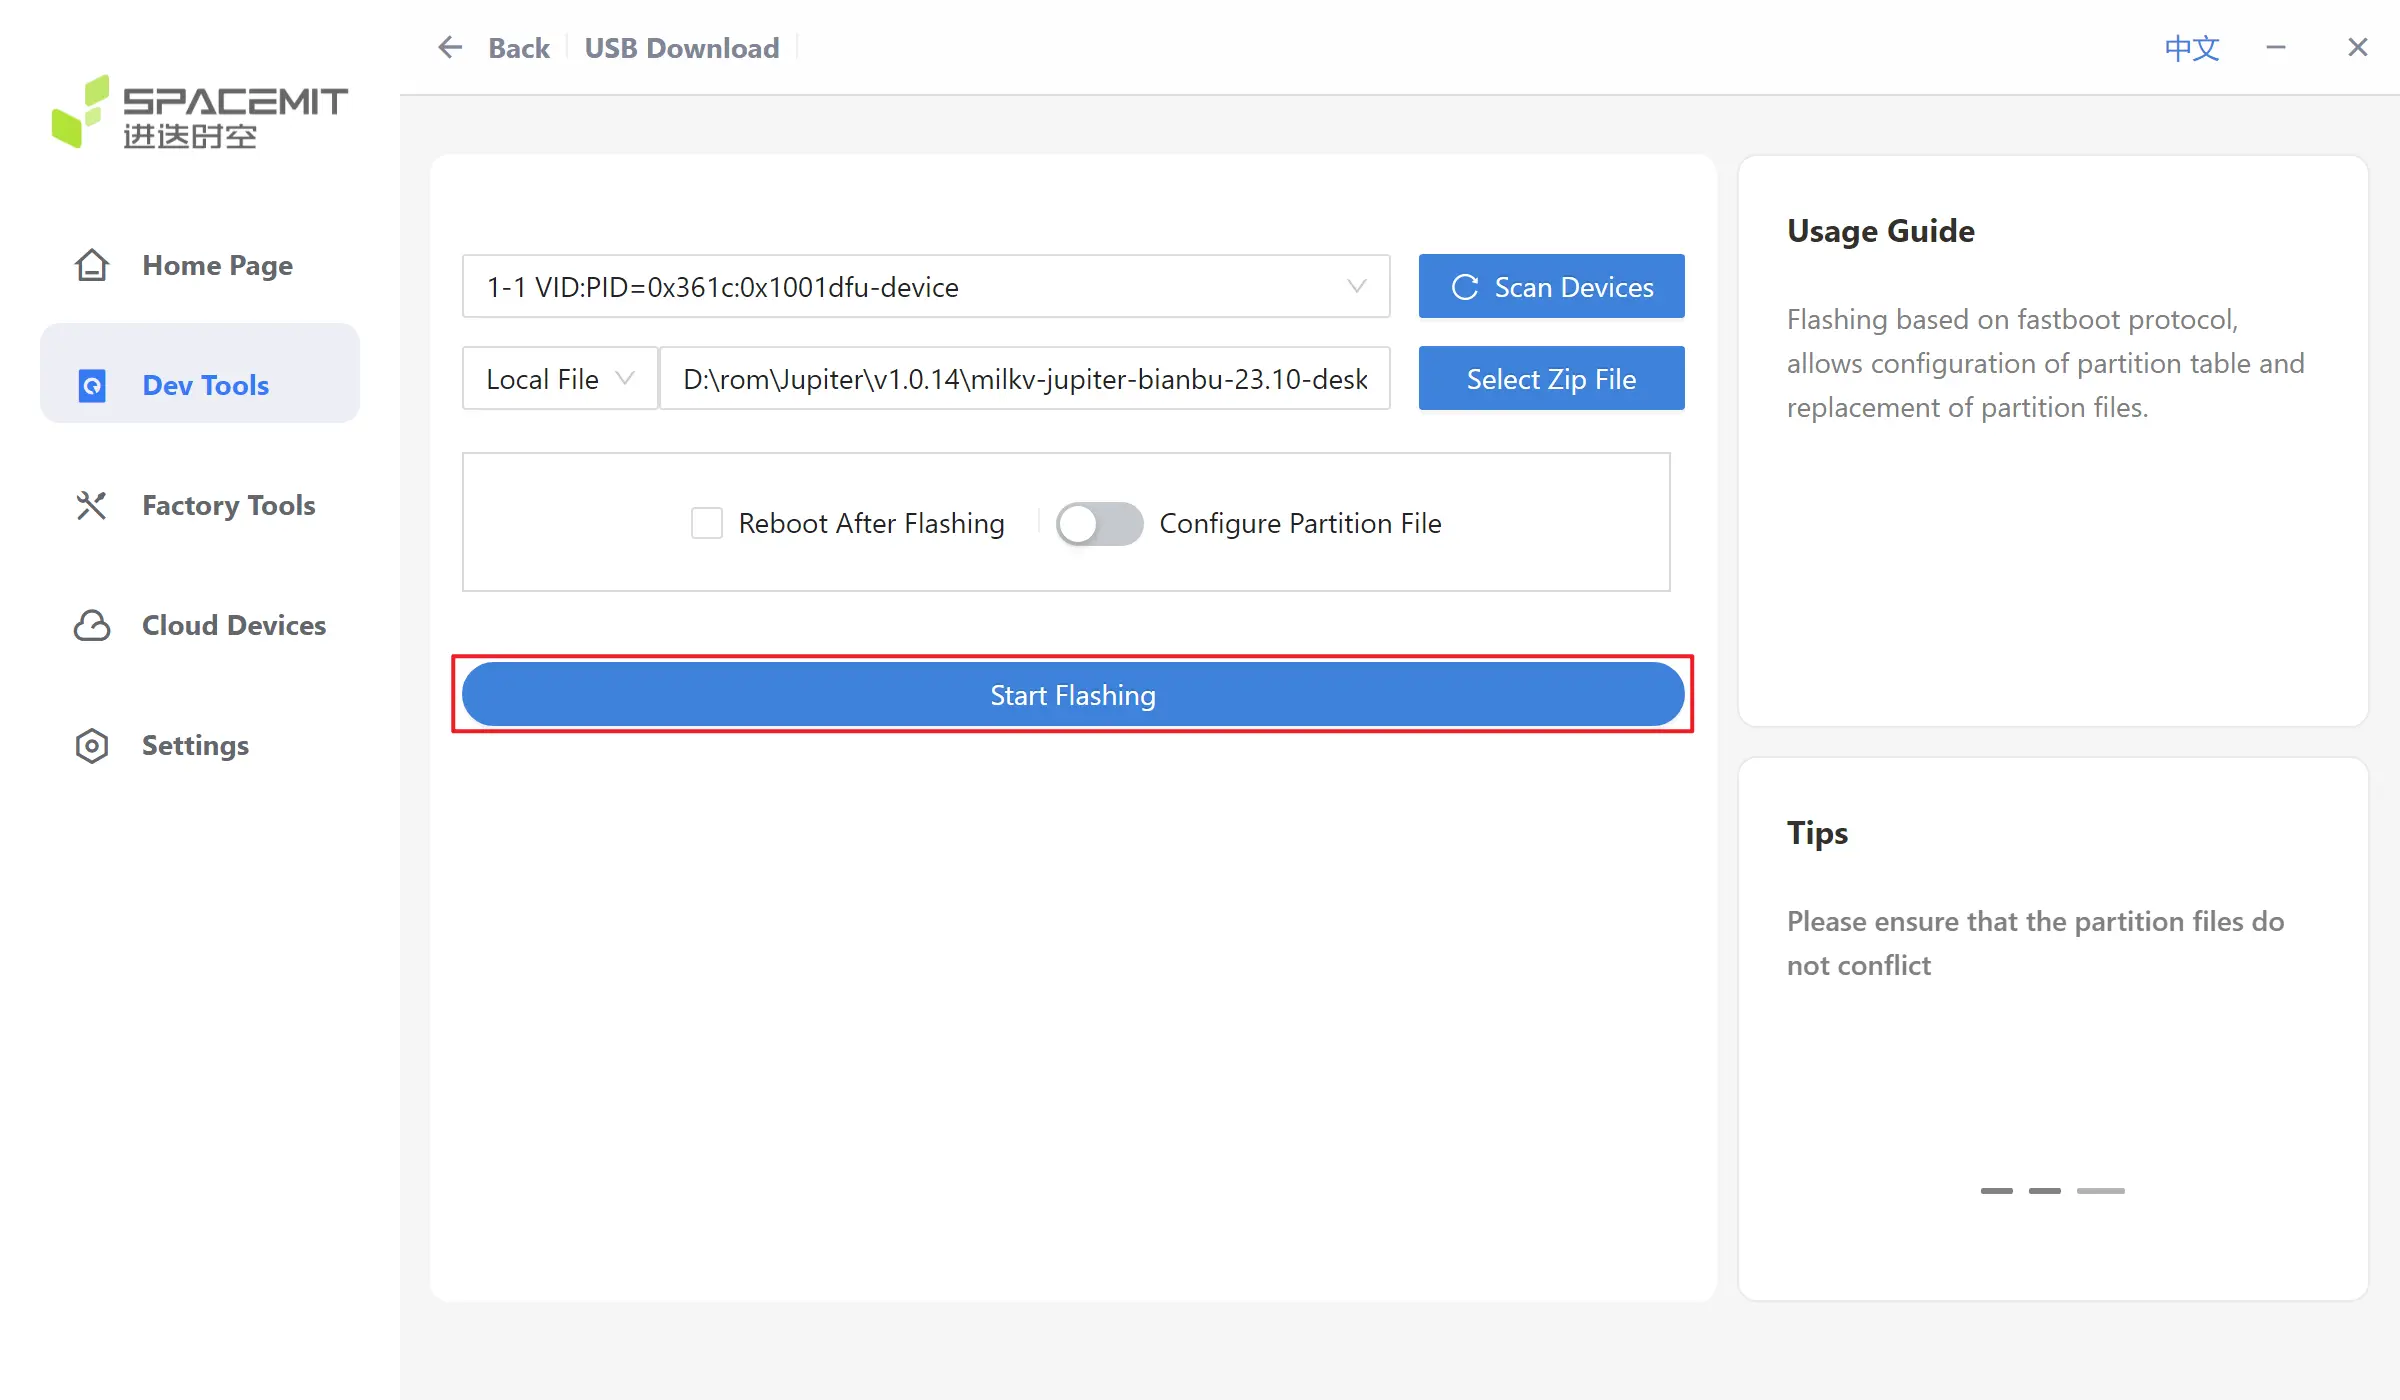
-
It will show that 100% of the burning is completed. You can power off and restart the board to enter the system.
Using fastboot
In addition to using titanflasher, you can also use the fastboot method to flash the device. The complete flashing steps of this method need to be further improved. The following flashing commands are for developers' reference only.
fastboot stage factory/FSBL.bin
fastboot continue
sleep 2

fastboot stage u-boot.itb
fastboot continue
sleep 3

fastboot flash mtd partition_2M.json
fastboot flash bootinfo factory/bootinfo_spinor.bin
fastboot flash fsbl factory/FSBL.bin
fastboot flash env env.bin
fastboot flash opensbi fw_dynamic.itb
fastboot flash uboot u-boot.itb

fastboot flash gpt partition_universal.json
fastboot flash bootinfo factory/bootinfo_sd.bin
fastboot flash fsbl factory/FSBL.bin
fastboot flash env env.bin
fastboot flash opensbi fw_dynamic.itb
fastboot flash uboot u-boot.itb
fastboot flash bootfs bootfs.ext4
fastboot flash rootfs rootfs.ext4

sleep 2
fastboot reboot


