Burn BMC Image
Your Titan comes with BMC firmware pre-installed and ready to use. Under normal circumstances, you won't need to burn the firmware yourself.
This guide is intended for specific scenarios, such as:
- Troubleshooting BMC issues when it's not functioning properly
- Upgrading to a newer BMC firmware version
This guide explains how to burn the BMC firmware image to your Milk-V Titan BMC using the AiBurn tool.
Prerequisites
Before you begin, prepare the following:
- Windows PC: The AiBurn tool only supports Windows operating system
- USB Type-C Cable: For connecting the BMC to your computer
- 12V DC Power Adapter (5525 connector, 5A or higher): For powering the Titan after burning
Step 1: Download Required Files
Download AiBurn Tool
Download the AiBurn burning tool from the official repository:
Download Link: https://github.com/milkv-titan/titan-files/tree/main/bmc
After downloading, install AiBurn on your Windows PC.
You will need to reboot your computer before using the software.
Download BMC Image
Download the latest BMC firmware image from the same repository:
Download Link: https://github.com/milkv-titan/titan-files/tree/main/bmc
Important: After downloading, extract the compressed image file before loading it into AiBurn.
Step 2: Load the Image
-
Launch the AiBurn application on your Windows PC
-
Click the folder icon to select the image file
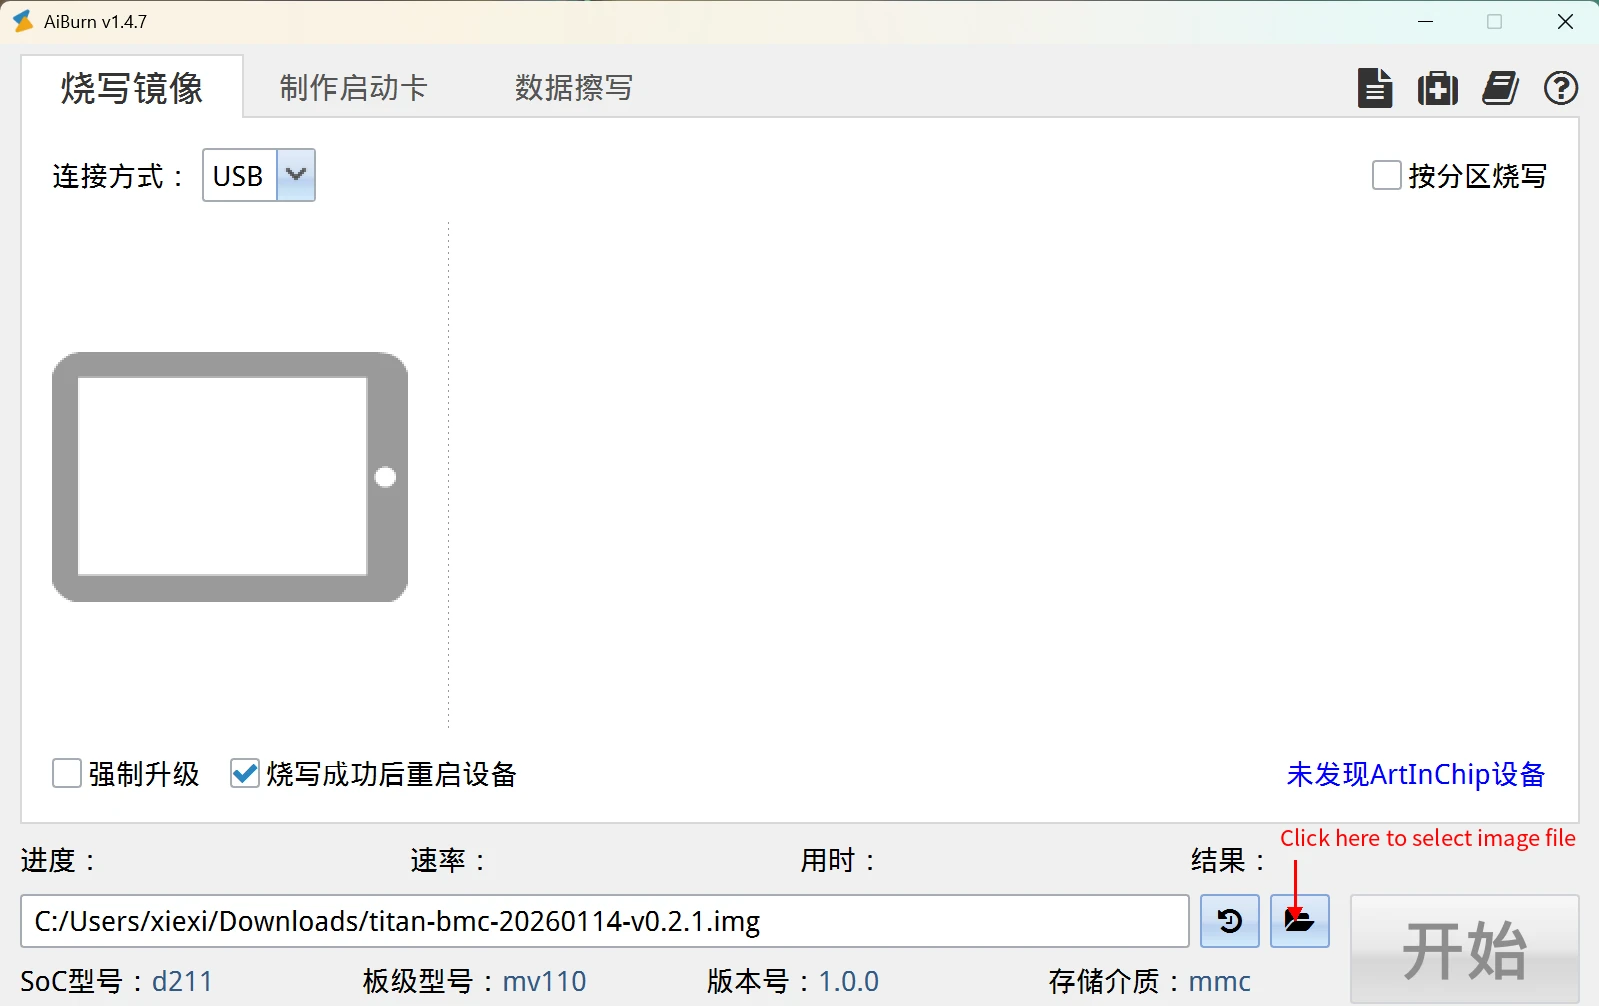
- Navigate to the extracted BMC image file and select it
Step 3: Connect the Device
Do NOT connect the 12V DC power adapter during the burning process. The BMC must be powered only via USB to enter burning mode. Connect the 12V power only after burning is complete.
To enter burning mode, follow these steps carefully:
-
Refer to the interface diagram on the Titan Hardware page to locate the BMC Boot button and BMC USB Type-C port
-
Ensure the 12V DC power adapter is NOT connected to Titan
-
Press and hold the BMC Boot button
-
While holding the button, connect the USB Type-C cable:
- One end to your Windows PC
- Other end to the BMC USB Type-C port on Titan
-
Release the BMC Boot button
-
The AiBurn tool will detect the device connection
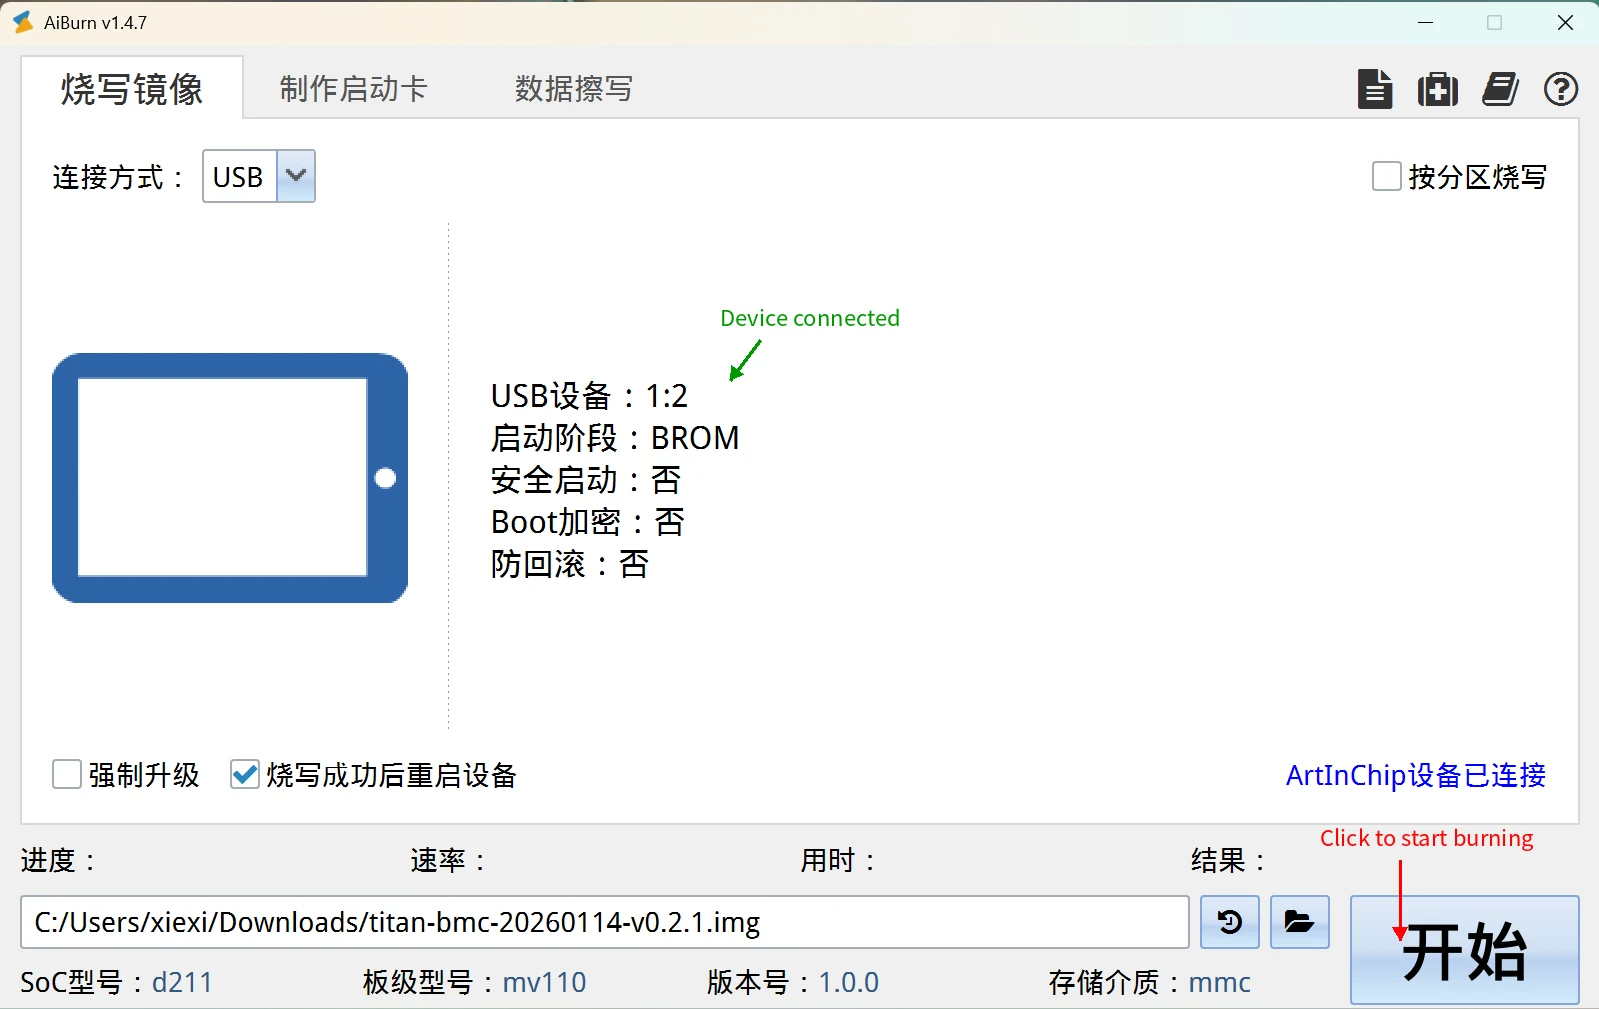
When the device is successfully connected, you will see "Device connected" status in the tool.
Step 4: Start Burning
- Click the Start button to begin the burning process
-
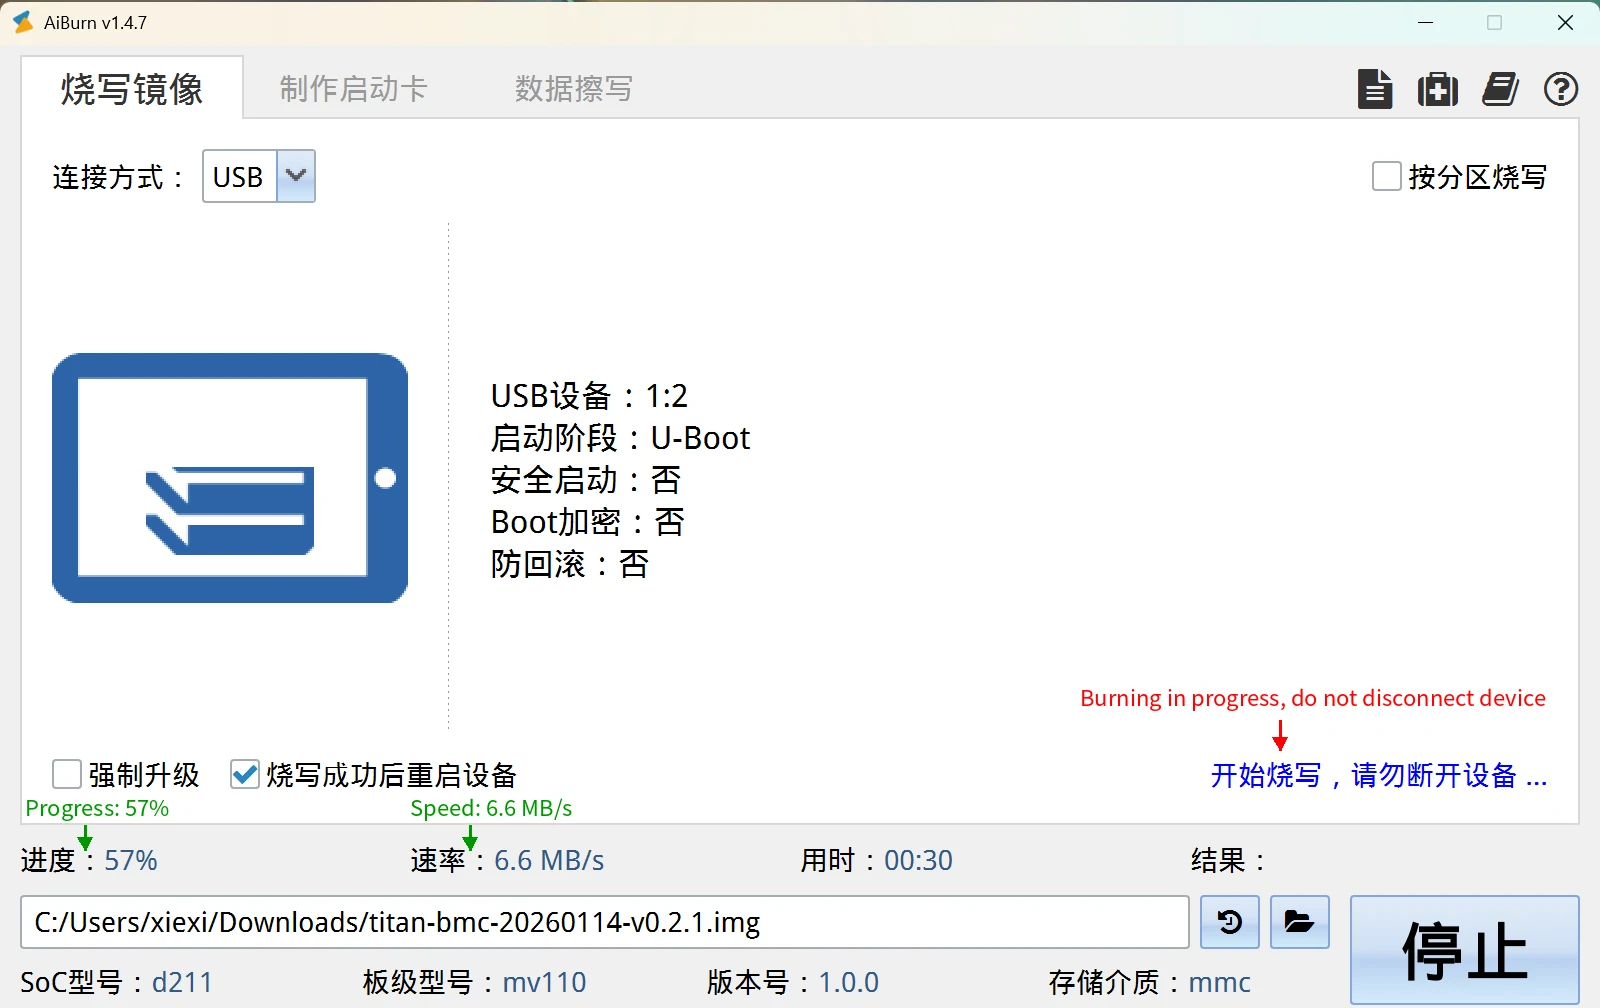
The tool will display:
- Progress: Current burning progress percentage
- Speed: Data transfer speed
- Warning: "Burning in progress, do not disconnect device"
-
Wait for the burning process to complete. Do not disconnect the USB cable during this process.
Step 5: Verify Success
When the burning is complete, you will see:

- Result: SUCCESS (displayed in green)
- Progress: 100%
Step 6: Power On the System
After successful burning:
-
Disconnect the USB Type-C cable from the BMC port
-
Connect the 12V DC power adapter (5525 connector, 5A or higher) to the Titan
-
The BMC system will automatically start
-
Wait a few moments for the BMC to fully boot up
-
You can now access the BMC web interface by following the User Guide
Troubleshooting
Device Not Detected
If AiBurn doesn't detect the device:
- Ensure you pressed and held the BMC Boot button before connecting the USB cable
- Try a different USB Type-C cable
- Check that the USB port on your PC is working properly
- Restart AiBurn and try again
Burning Failed
If the burning process fails:
- Do not disconnect the device
- Click the Start button to retry
- If it continues to fail, re-download the BMC image and verify it's properly extracted
- Ensure your USB connection is stable
System Won't Boot After Burning
If the BMC doesn't start after burning:
- Verify the power adapter is properly connected (12V DC, 5A or higher, 5525 connector)
- Wait at least 1-2 minutes for the initial boot
- Try power cycling: disconnect and reconnect the power adapter
- If issues persist, try burning the image again


