DF9GMS 180° Micro Servo
Hardware Information
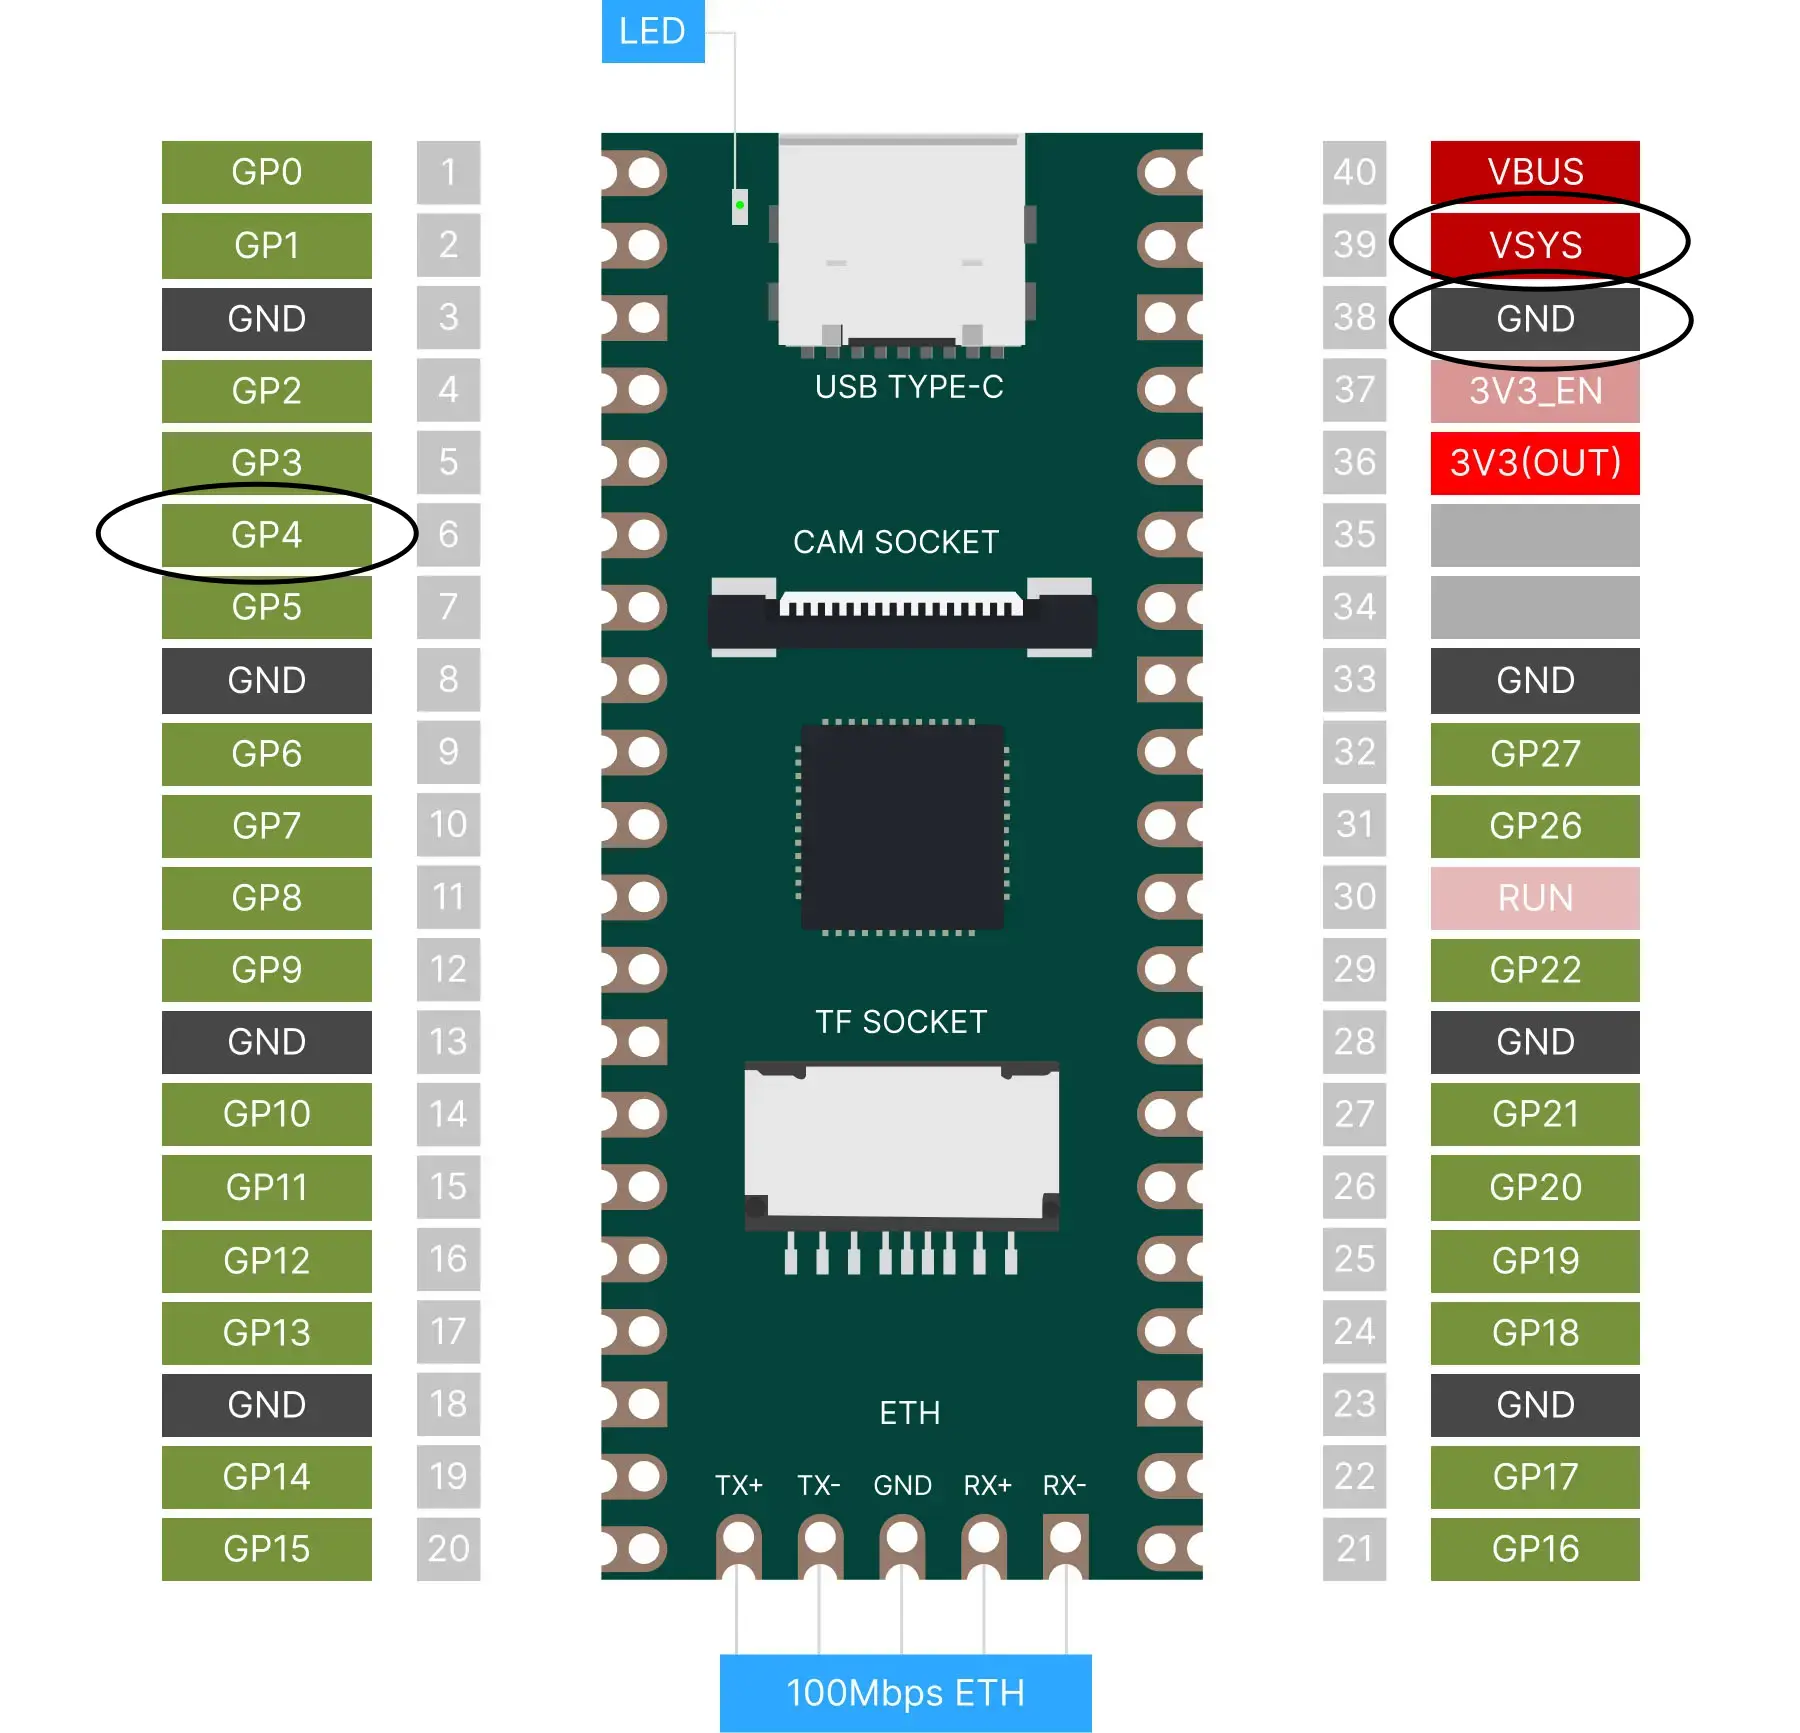
Duo pinout
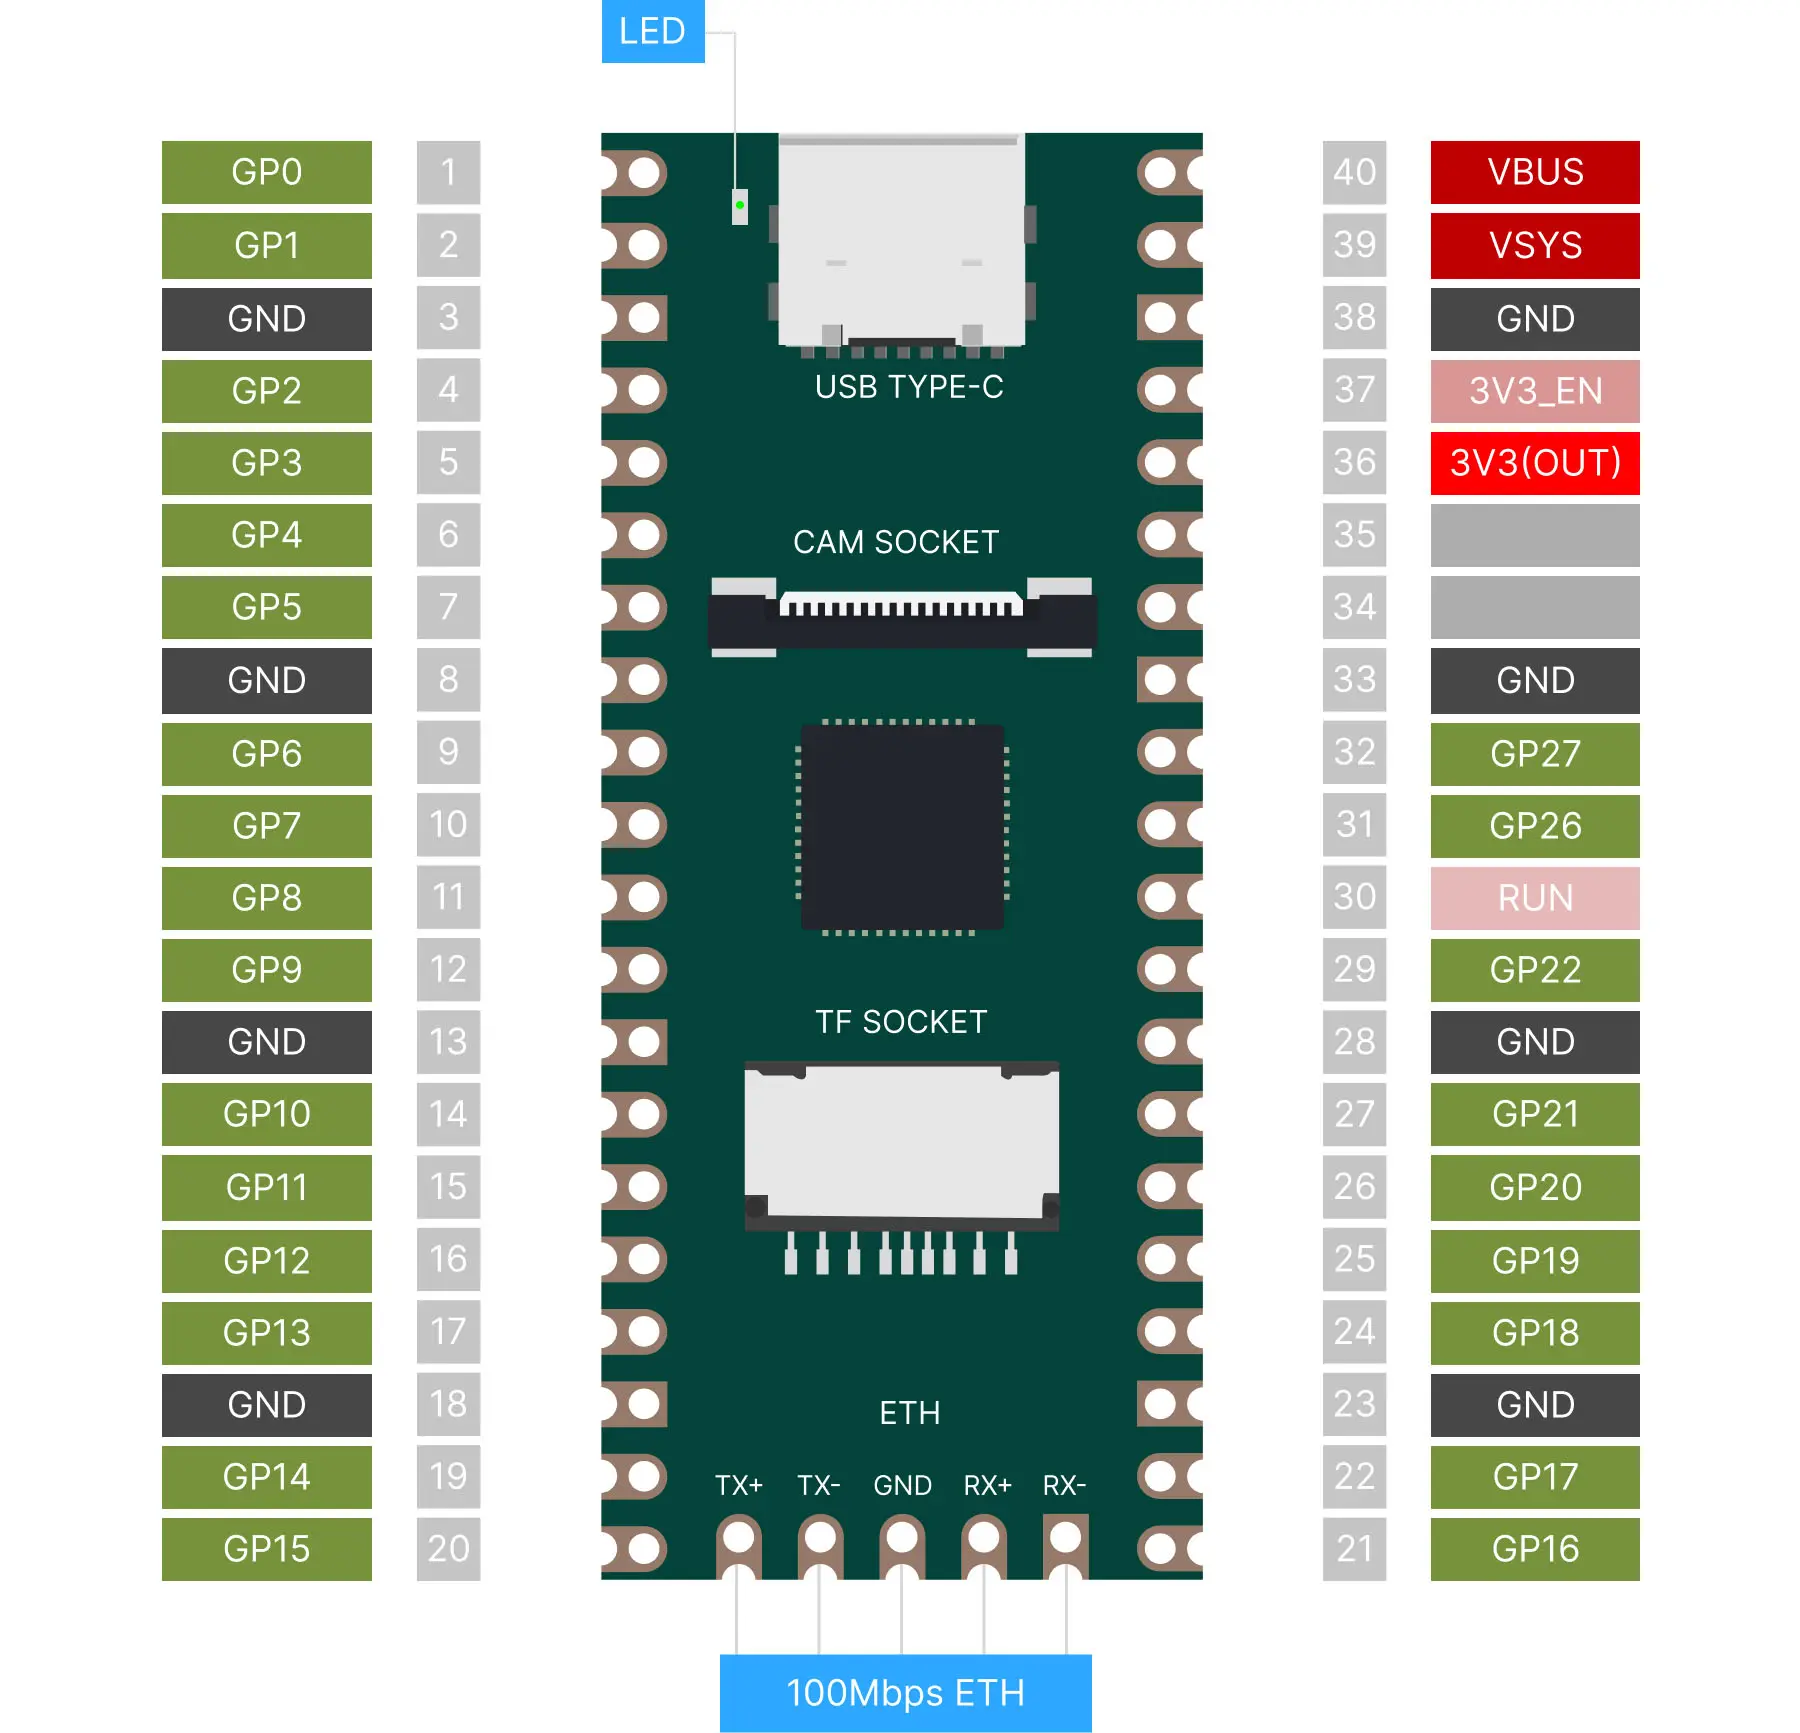
Reference Links: Duo GPIO Pinout
DF9GMS 180°
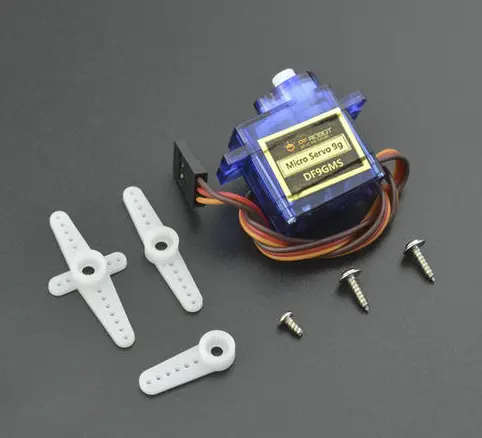
Micro Servo DF9GMS from DFRobot, this servo features a high-strength ABS transparent case with internal high-precision nylon gear set, precision control circuit and high-end lightweight hollow cup motor, resulting in a weight of only 9g for this mini servo, while the output torque reaches an amazing 1.6kg/cm.
Technical Specifications:
Operating Voltage: 4.8V
Torque: 1.6kg/cm (4.8V)
Speed: 0.14 seconds/60 degrees (4.8V)
Operating Temperature: -30 to +60 degrees Celsius
Deadband Width: 0.5 milliseconds
Physical Size: 23x12.2x29mm
Weight: 9g
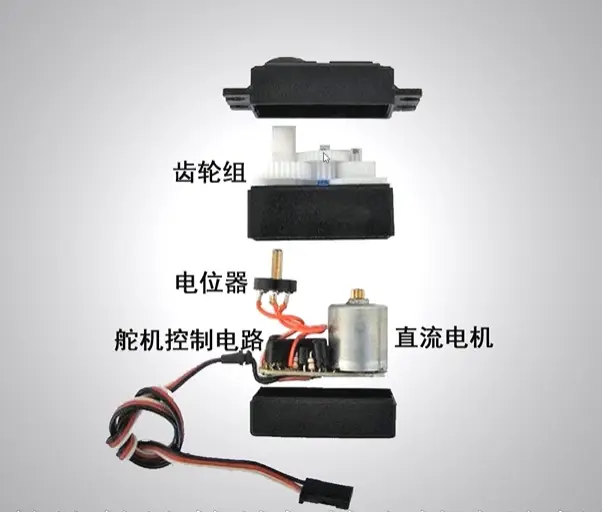
Composition and Operating Principle of DF9GMS Micro Servo
Reference connection diagram
• Hardware
o 1 x Arduino UNO control board
o 1 x DF9GMS micro servo
o Several Dupont wires
o Gray - GND, red - VCC, yellow - signal line
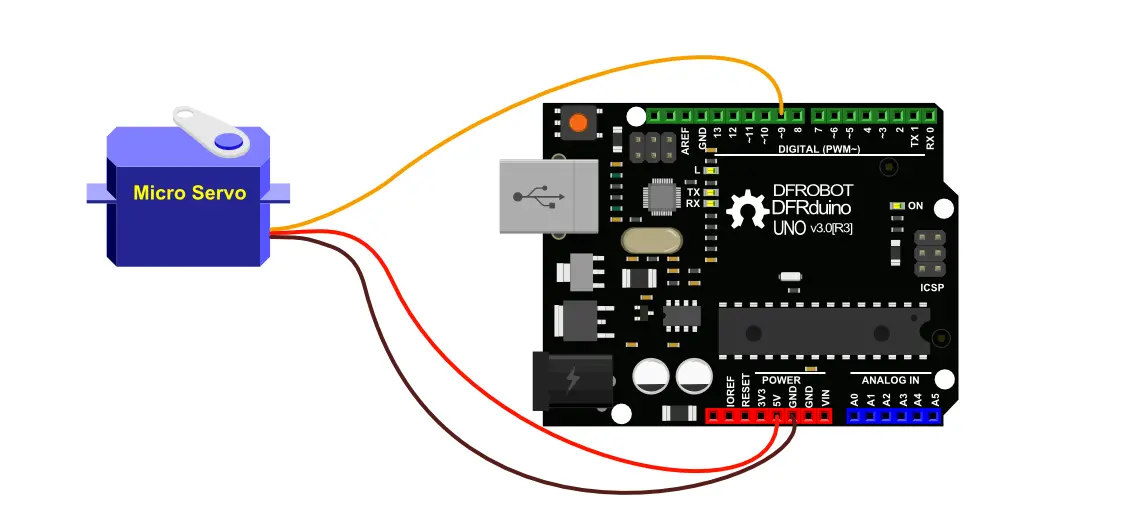
connected to the development board
DF9GMS: red wire connected to VSYS, brown wire connected to ground, orange wire connected to GP4. Circuit diagram shown below: purple circle represents DF9GMS.
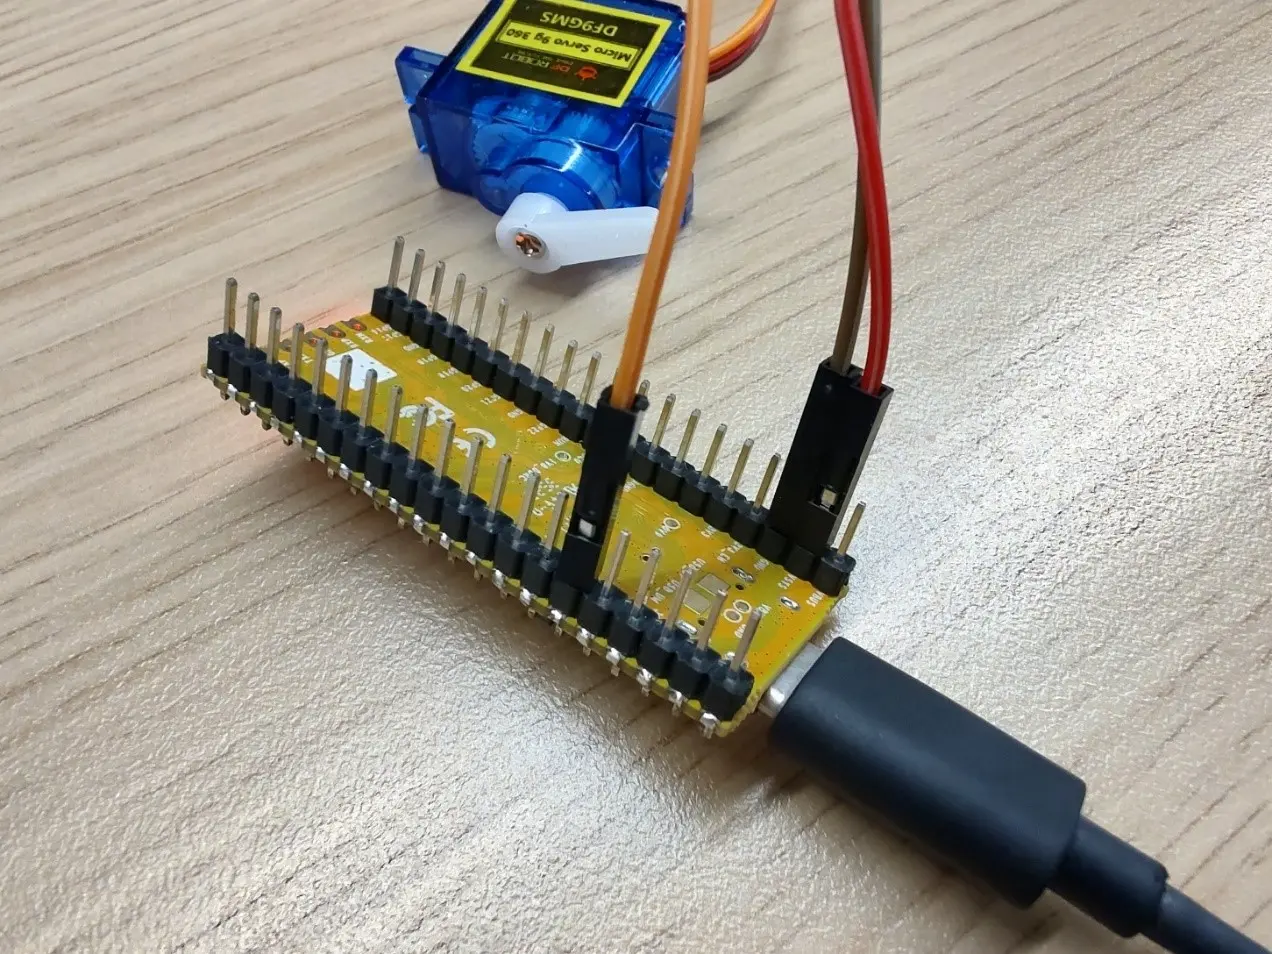
DF9GMS should be connected as follows:
Example Code:
GitHub link: https://github.com/milkv-duo/duo-examples
df9gms.c:
#include <stdio.h>
#include <unistd.h>
#include <wiringx.h>
/*
Duo
------------------------------------------
PWM operation at a fixed frequency clock of 100MHz, writing Period in units of nanoseconds.
DF9GMS 360-degree PWM Duty Cycle
------------------------------------------
0.4ms - 1.4ms CW deceleration
1.5ms Stop
1.6ms - 3ms CCW acceleration
*/
static int PWM_PIN = 4; // PWM5@GP4
int main()
{
long i;
// Duo: milkv_duo
// Duo256M: milkv_duo256m
// DuoS: milkv_duos
if(wiringXSetup("milkv_duo", NULL) == -1) {
wiringXGC();
return -1;
}
wiringXPWMSetPeriod(PWM_PIN, 20000000); // 20ms
wiringXPWMSetDuty(PWM_PIN, 1500000); // 1.5ms stop
wiringXPWMSetPolarity(PWM_PIN, 0); // 0-normal, 1-inversed
wiringXPWMEnable(PWM_PIN, 1); // 1-enable, 0-disable
delayMicroseconds(1000000); // 1s
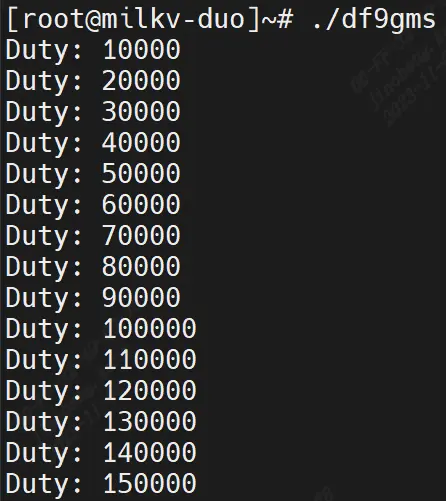
for (i = 10000; i< 3000000; i += 10000) // 10 us
{
wiringXPWMSetDuty(PWM_PIN, i);
printf("Duty: %ld\n", i);
delayMicroseconds(50000); // 50ms
}
wiringXPWMSetDuty(PWM_PIN, 1500000); // 1.5ms stop
return 0;
}
Makefile:
TARGET=df9gms

ifeq (,$(TOOLCHAIN_PREFIX))
$(error TOOLCHAIN_PREFIX is not set)
endif

ifeq (,$(CFLAGS))
$(error CFLAGS is not set)
endif

ifeq (,$(LDFLAGS))
$(error LDFLAGS is not set)
endif

CC = $(TOOLCHAIN_PREFIX)gcc

CFLAGS += -I$(SYSROOT)/usr/include

LDFLAGS += -L$(SYSROOT)/lib
LDFLAGS += -L$(SYSROOT)/usr/lib
LDFLAGS += -lwiringx

SOURCE = $(wildcard *.c)
OBJS = $(patsubst %.c,%.o,$(SOURCE))

$(TARGET): $(OBJS)
	$(CC) -o $@ $(OBJS) $(LDFLAGS)

%.o: %.c
	$(CC) $(CFLAGS) -o $@ -c $<

.PHONY: clean
clean:
	@rm *.o -rf
	@rm $(OBJS) -rf
	@rm $(TARGET)
Build environment on Ubuntu20.04
You can also use Ubuntu installed in a virtual machine, Ubuntu installed via WSL on Windows, or Ubuntu-based systems using Docker.
-
Install the tools that compile dependencies.
sudo apt-get install wget git make -
Get example source code
git clone https://github.com/milkv-duo/duo-examples.git -
Prepare compilation environment
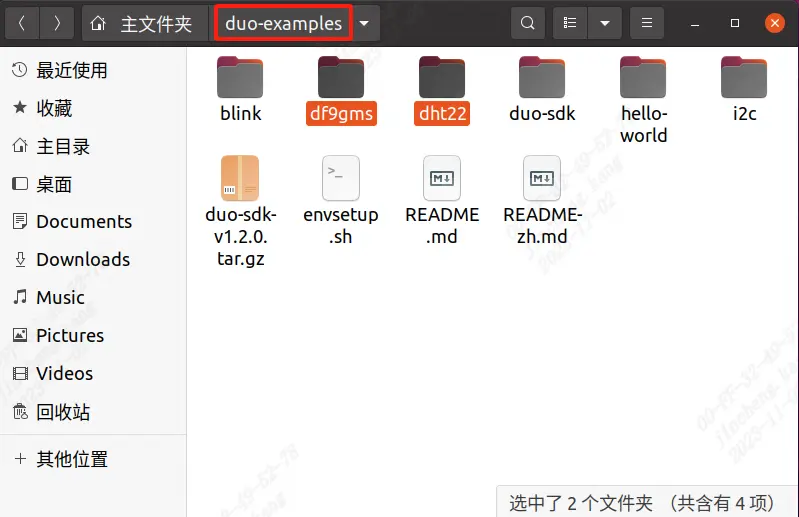
cd duo-examples
source envsetup.sh
The first time you source it, the required SDK package will be automatically downloaded, which is approximately 180MB in size. Once downloaded, it will be automatically extracted to the
duo-examplesdirectory with the nameduo-sdk. When source it next time, if the directory already exists, it will not be downloaded again. -
Compile testing
Take hello-world as an example, enter the hello-world directory and execute make
cd hello-world
make
After the compilation is successful, send the generated
helloworldexecutable program to the Duo device through the network port or the USB network. For example, the USB-NCM method supported by the default firmware, Duo’s IP is 192.168.42.1, the user name isroot, and the password ismilkvscp helloworld [email protected]:/root/After sending successfully, run ./helloworld in the terminal logged in via ssh or serial port, and it will print
Hello, World![root@milkv]~# ./helloworld
Hello, World!At this point, our compilation and development environment is ready for use.
Operation Procedure
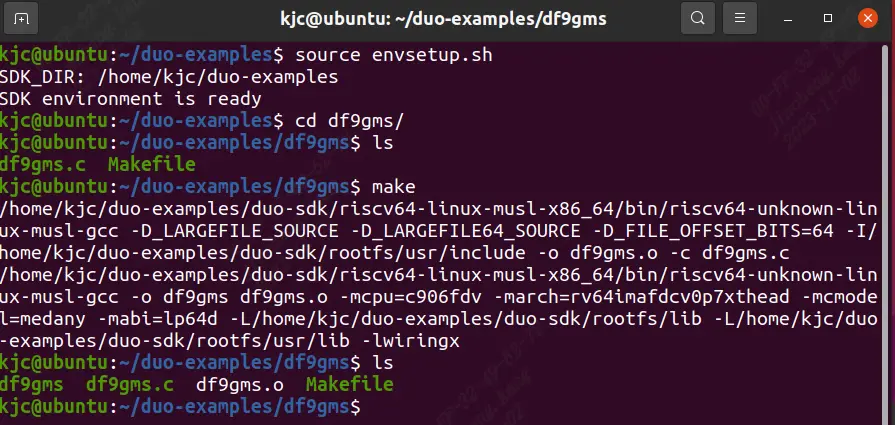
Next, compile it. Taking df9gms as an example, enter the directory of the example and simply execute make
cd df9gms
make it
Make an error report and source it. After compiling successfully, you will get the df9gms executable program. As shown in the figure below.
Then upload df9gms to the root path of the development board, and enter ./df9gms to run it. The screenshot of successful running is shown below