Introduction
This example runs on a Duo device, using a 240x320 resolution SPI interface display to run the LVGL test program.
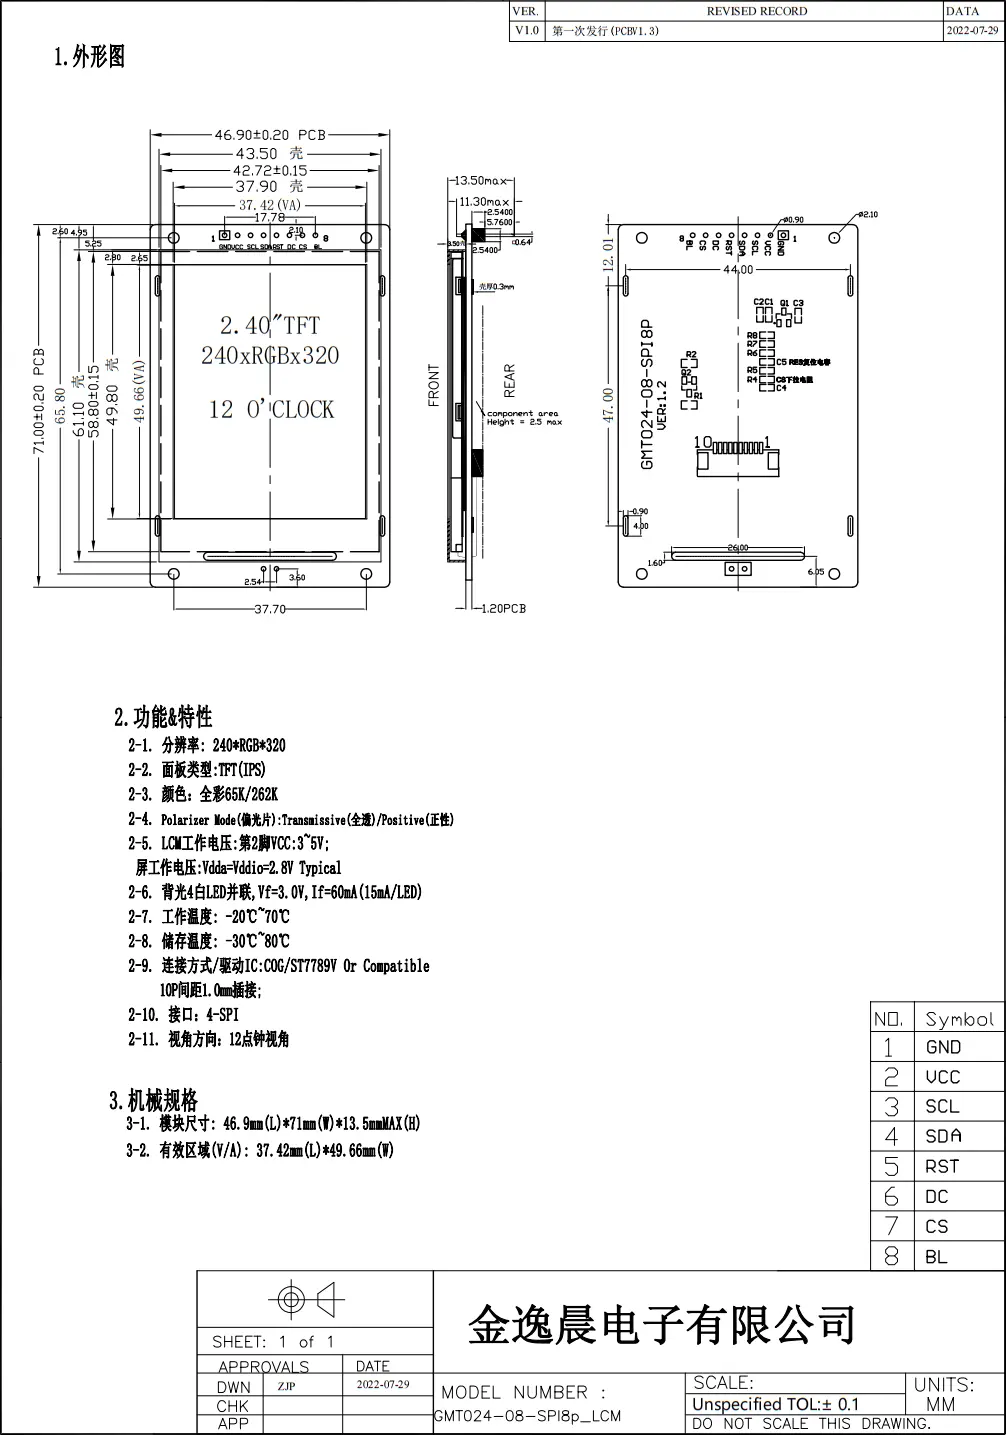
You need to prepare the Milk-V Duo development board (or Duo256M), SD card, and an ST7789V chip LCD screen. The full-color 2.4-inch screen used here has a resolution of 240*320 and the interface method is SPI. You can choose different ones as needed. size screen. For screens with different resolutions, please note that the following configurations should be modified accordingly.
Bring up the SPI display
Compile firmware
Get the official SDK: https://github.com/milkv-duo/duo-buildroot-sdk.git
git clone https://github.com/milkv-duo/duo-buildroot-sdk.git
Get Duo LVGL Demo: https://github.com/milkv-duo/duo-lvgl-fb-demo.git
git clone https://github.com/milkv-duo/duo-lvgl-fb-demo.git
Enter the SDK directory and apply a patch to the SDK kernel to support the ST7789V chip (the patch is in the duo-lvgl-fb-demo.git repository above):
cd duo-buildroot-sdk
git apply --reject ../duo-lvgl-fb-demo/duo-kernel-fb_st7789v.patch
Confirm that the kernel configuration has support for turning on FB TFT (the latest Buildroot SDK already supports it by default):
CONFIG_FB=y
CONFIG_FB_TFT=y
CONFIG_FB_TFT_ST7789V=y
The location of the kernel configuration file:
- Duo:
build/boards/cv180x/cv1800b_milkv_duo_sd/linux/cvitek_cv1800b_milkv_duo_sd_defconfig - Duo256M:
build/boards/cv181x/cv1812cp_milkv_duo256m_sd/linux/cvitek_cv1812cp_milkv_duo256m_sd_defconfig - DuoS SD:
build/boards/cv181x/cv1813h_milkv_duos_sd/linux/cvitek_cv1813h_milkv_duos_sd_defconfig - DuoS eMMC:
build/boards/cv181x/cv1813h_milkv_duos_emmc/linux/cvitek_cv1813h_milkv_duos_emmc_defconfig
Compile SD card firmware:
- Duo
./build.sh milkv-duo - Duo256M
./build.sh milkv-duo256m - DuoS SD
./build.sh milkv-duos-sd - DuoS eMMC
./build.sh milkv-duos-emmc
After compilation, burn the corresponding img file in the out directory to the microSD card.
Hardware connection
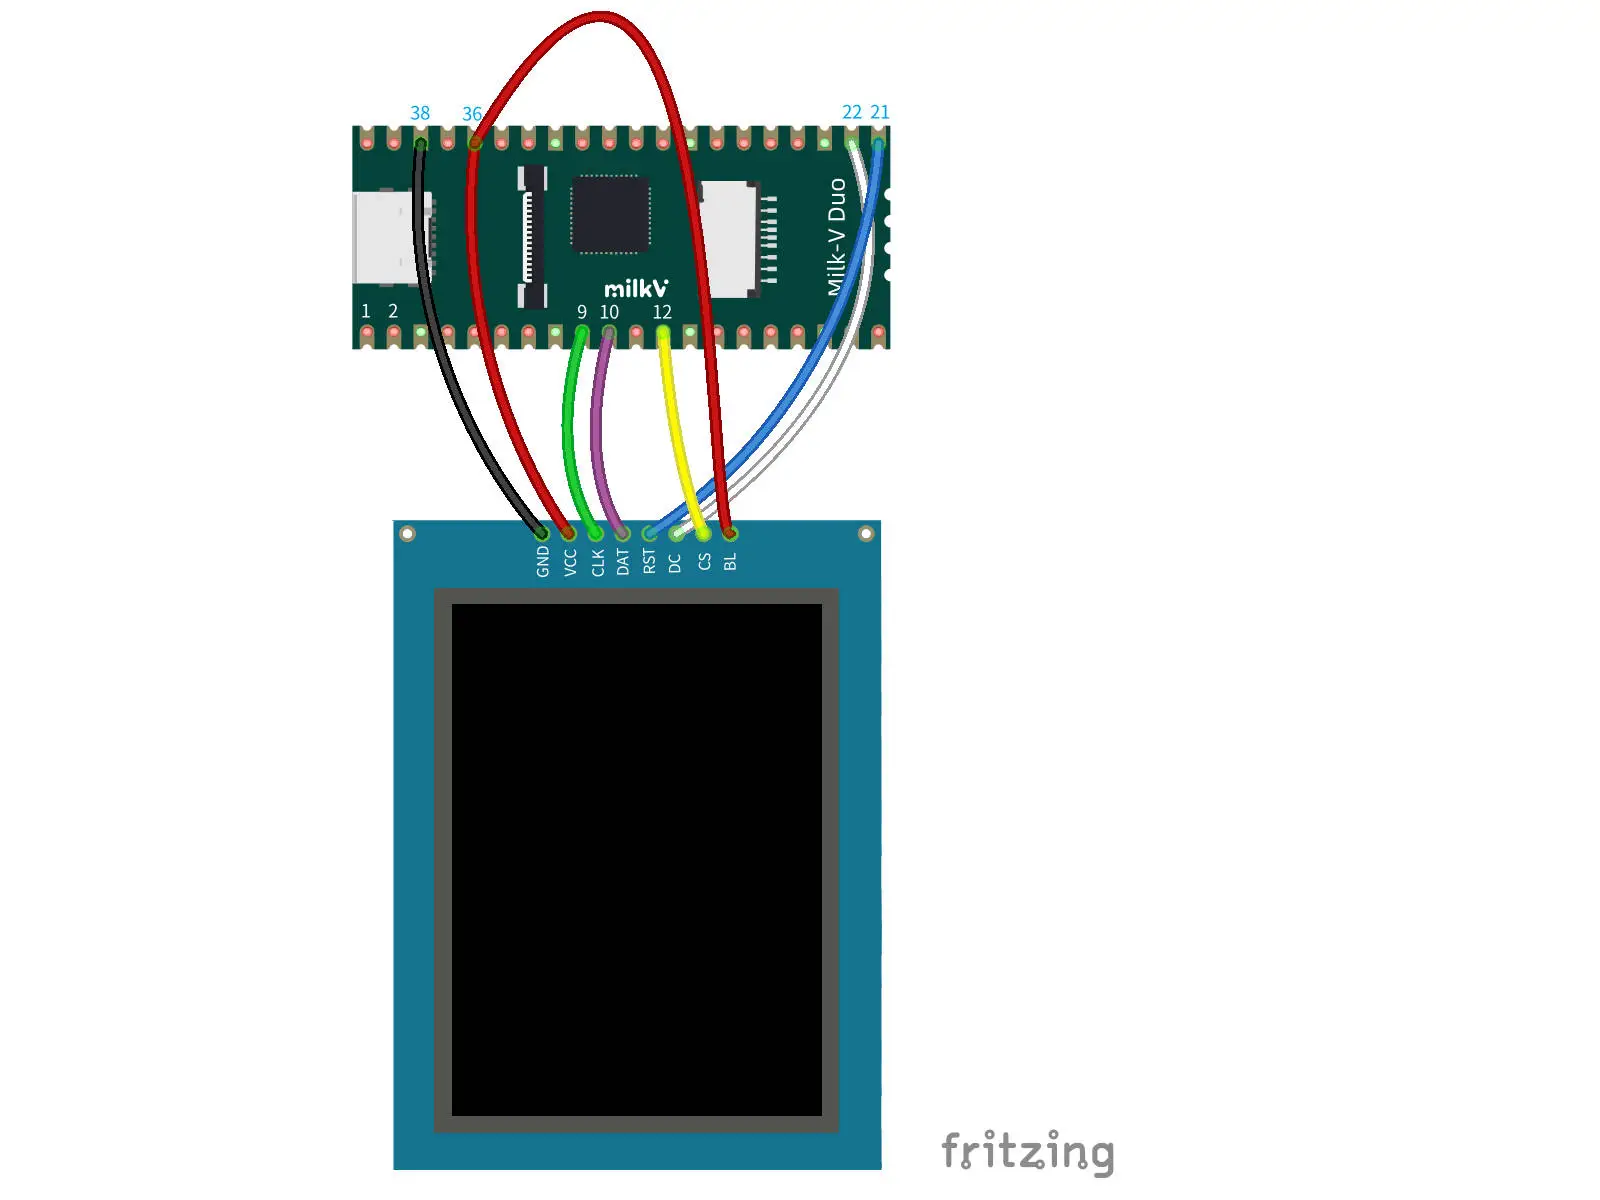
Next, perform wiring configuration based on the Duo pin position reference. Note that the BL pin of this display is the backlight enable pin, and the backlight is on when the pin level is high.
Duo and Duo256M
| Duo/Duo256M Pin | ST7789V |
|---|---|
| PIN 38: GND | GND |
| PIN 36: 3.3V(OUT) | VCC |
| PIN 9: SPI2_SCK | SCL |
| PIN 10: SPI2_SDO | SDA |
| PIN 21: GP16 | RES |
| PIN 22: GP17 | DC |
| PIN 12: SPI2_CS_X | CS |
| PIN 36: 3.3V(OUT) | BL |
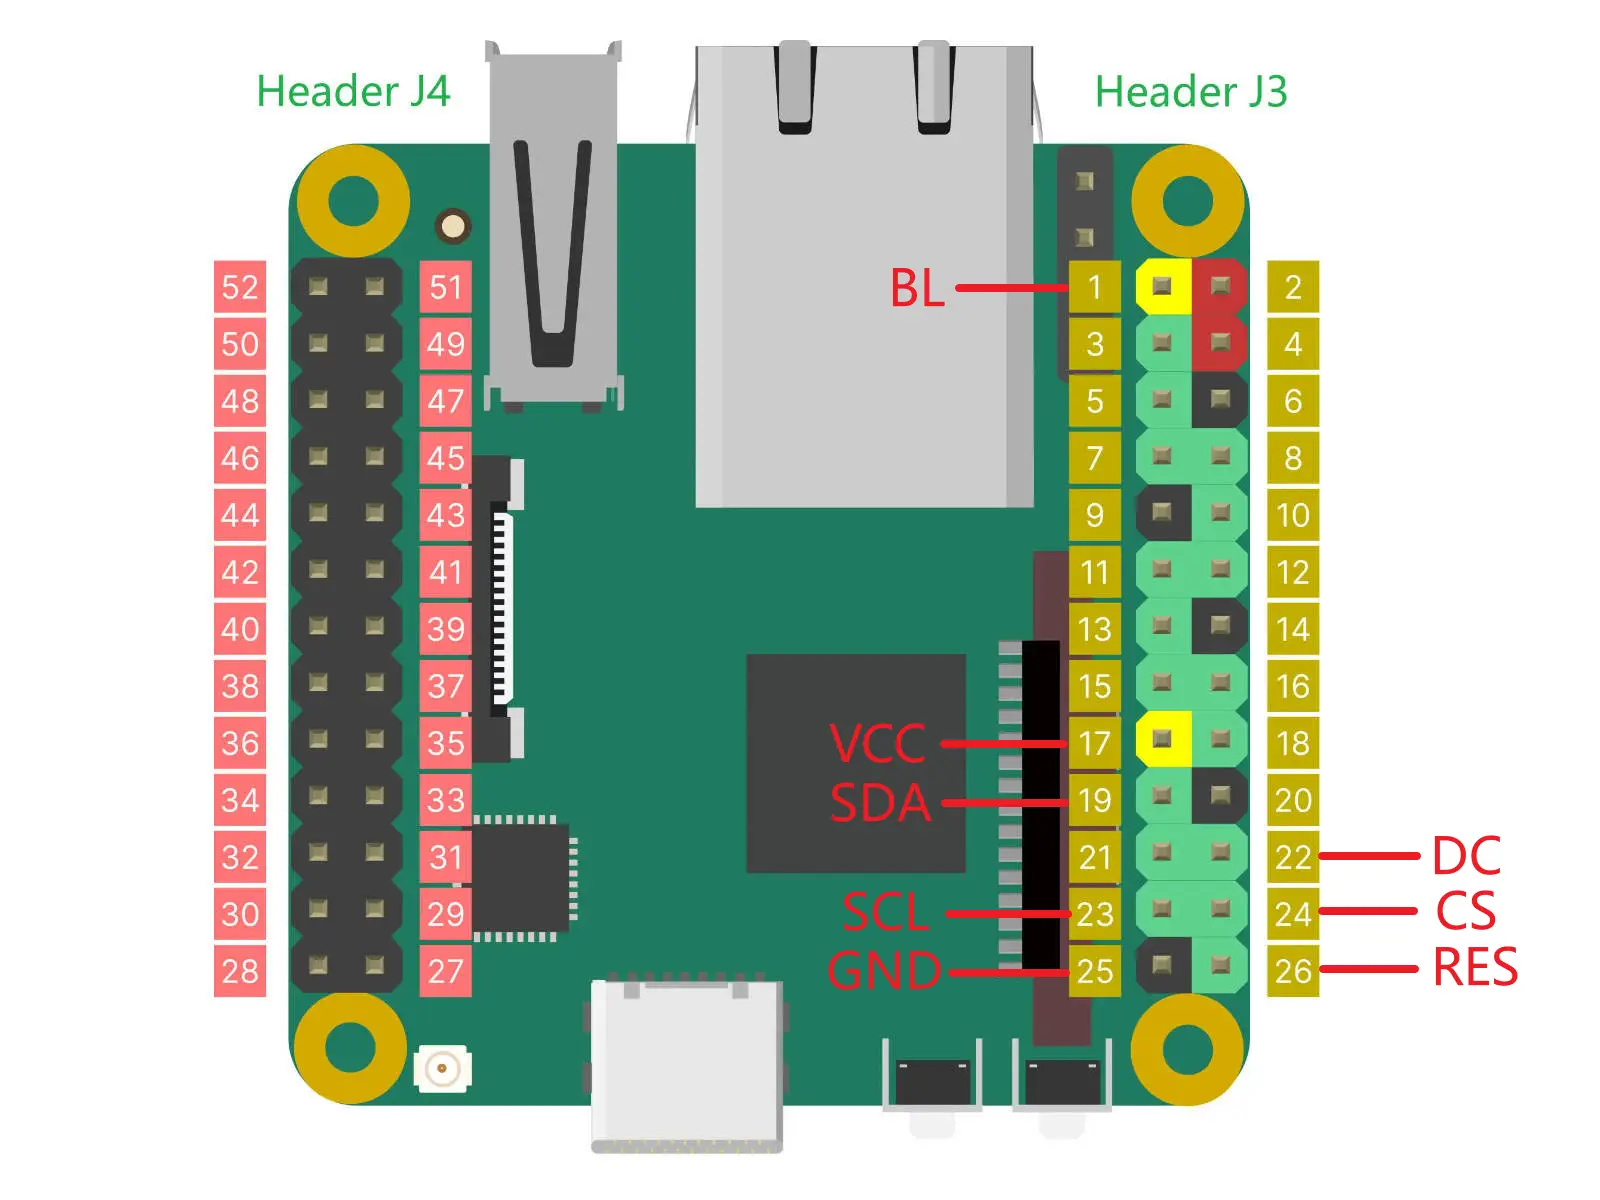
DuoS
| DuoS Pin | ST7789V |
|---|---|
| PIN 25: GND | GND |
| PIN 17: 3V3 | VCC |
| PIN 23: SPI3_SCK | SCL |
| PIN 19: SPI3_SDO | SDA |
| PIN 26: A28 | RES |
| PIN 22: A18 | DC |
| PIN 24: B16 | CS |
| PIN 1: 3V3 | BL |
Test screen display
Insert the microSD card burned above into Duo, power on, log in to the Duo console through the serial terminal or SSH, and check whether the ST7789V driver is normal:
[root@milkv-duo]~# dmesg | grep st7789v
[    0.998809] fb_st7789v spi0.0: fbtft_property_value: buswidth = 8
[    1.005243] fb_st7789v spi0.0: fbtft_property_value: debug = 0
[    1.011392] fb_st7789v spi0.0: fbtft_property_value: rotate = 0
[    1.017613] fb_st7789v spi0.0: fbtft_property_value: fps = 60
[    1.529233] graphics fb0: fb_st7789v frame buffer, 240x320, 150 KiB video memory, 4 KiB buffer memory, fps=62, spi0.0 at 48 MHz
If the above display shows that the driver has been loaded normally.
Screen displaying artifacts:
cat /dev/random > /dev/fb0
Clear the screen (black screen):
cat /dev/zero > /dev/fb0
If the screen can display artifacts and black screens normally, it means the screen can be used normally.
LVGL test
Download LVGL fb demo source code
Download the lv_port_linux_frame_buffer source code. LVGL has provided the Linux fb project, which has integrated the lvgl and lvgl_drivers sub-repositories through the git submodule sub-repository.
This repository has been integrated into the Duo LVGL Demo code downloaded earlier, and is adapted to Duo and the SPI display, and can be compiled and tested directly.
Download toolchain
Download toolchain:
git clone https://github.com/milkv-duo/host-tools.git
You can also directly use the host-tools directory in the buildroot SDK, which is the same.
Enter the tool chain directory and export the tool chain to the environment variable:
cd host-tools
export PATH=$PATH:$(pwd)/gcc/riscv64-linux-musl-x86_64/bin
Verify that the toolchain is available:
riscv64-unknown-linux-musl-gcc -v
The version information of the toolchain can be displayed normally, that is, the toolchain is available.
Compile LVGL
Enter the lv_port_linux_frame_buffer directory in the Demo code and execute:
make clean
make -j
After compilation is completed, the demo program will be generated in the build/bin directory and copied to the Duo device through the scp command:
scp demo [email protected]:/root/
The password is milkv.
Log in to the Duo terminal console through the serial port or SSH:
Add executable permissions to the demo program:
chmod +x demo
Run the test program:
./demo
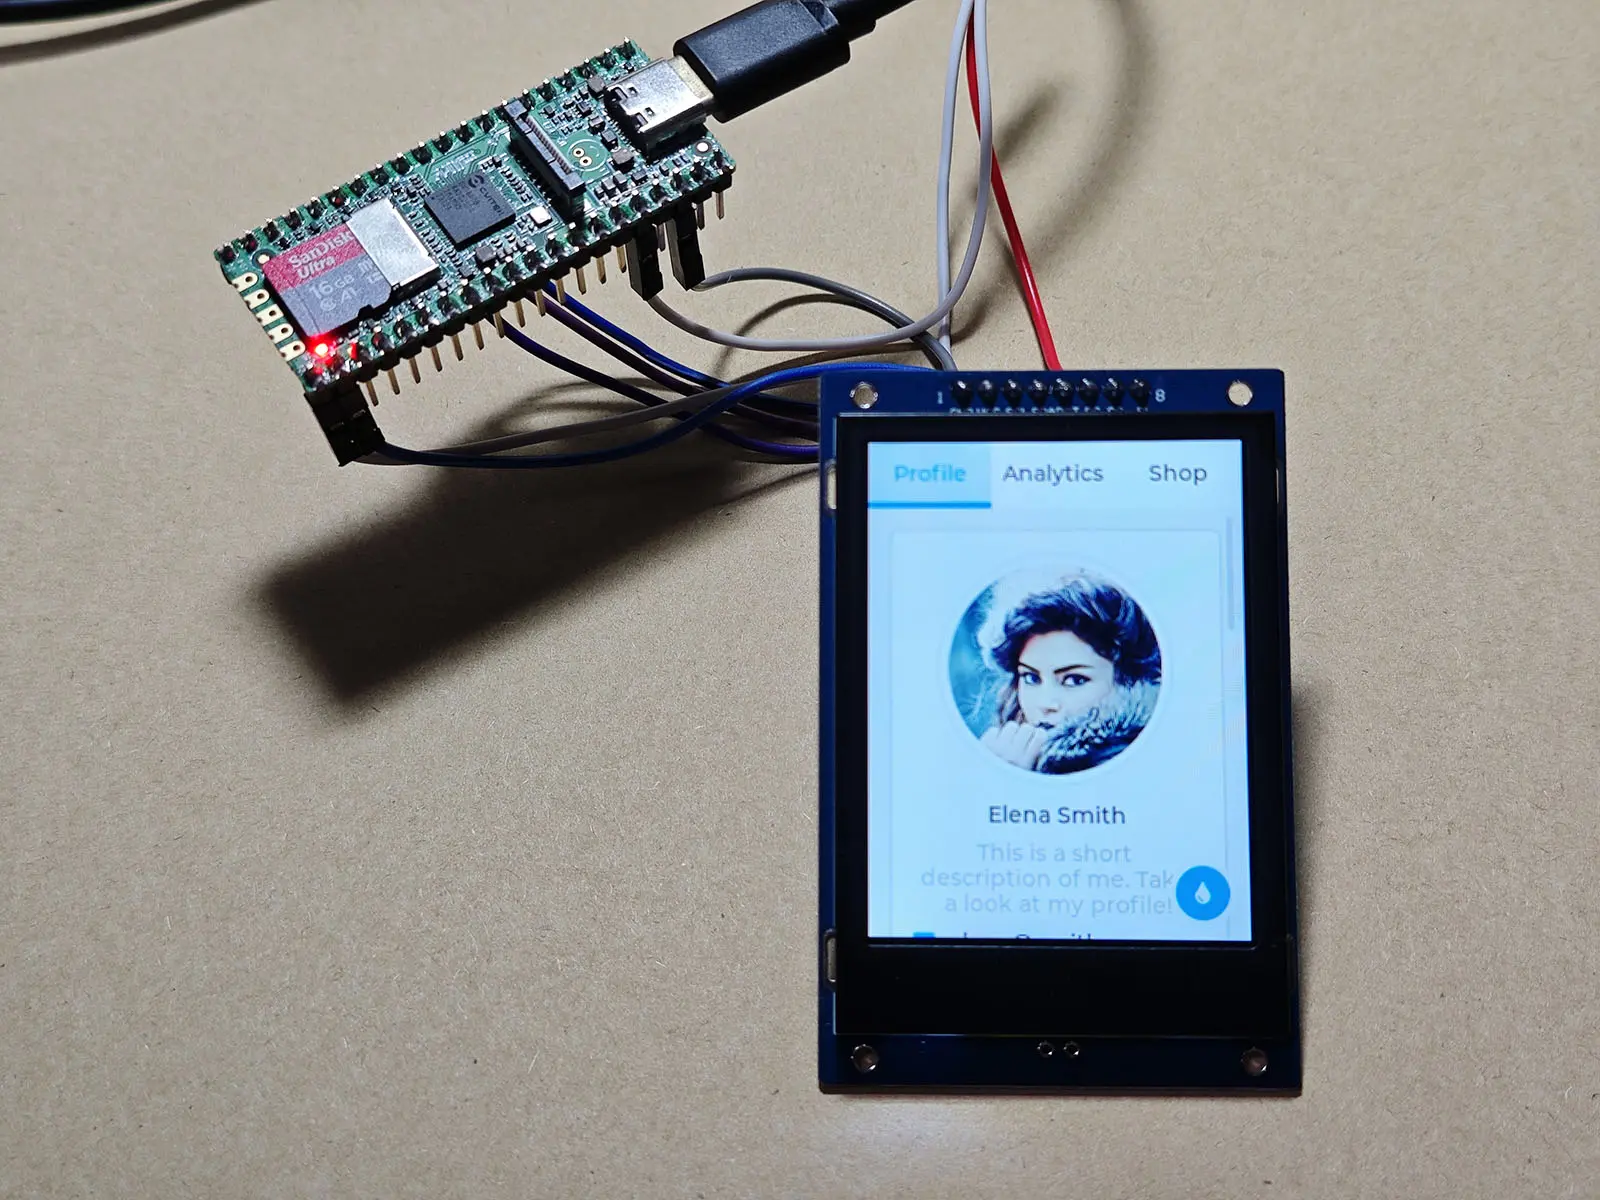
You can see the widget Demo of lvgl:
*If the color is wrong in subsequent runs, you can modify LV_COLOR_16_SWAP to 1.
Benchmark test sample
Modify the macro definition in lv_conf.h, change LV_USE_DEMO_WIDGETS to 0, change LV_USE_DEMO_BENCHMARK to 1 and recompile:
make clean
make -j
Use the same method to upload the generated demo to Duo for testing. Note that when uploading again, the demo program running in Duo needs to exit (Ctrl+C) first.
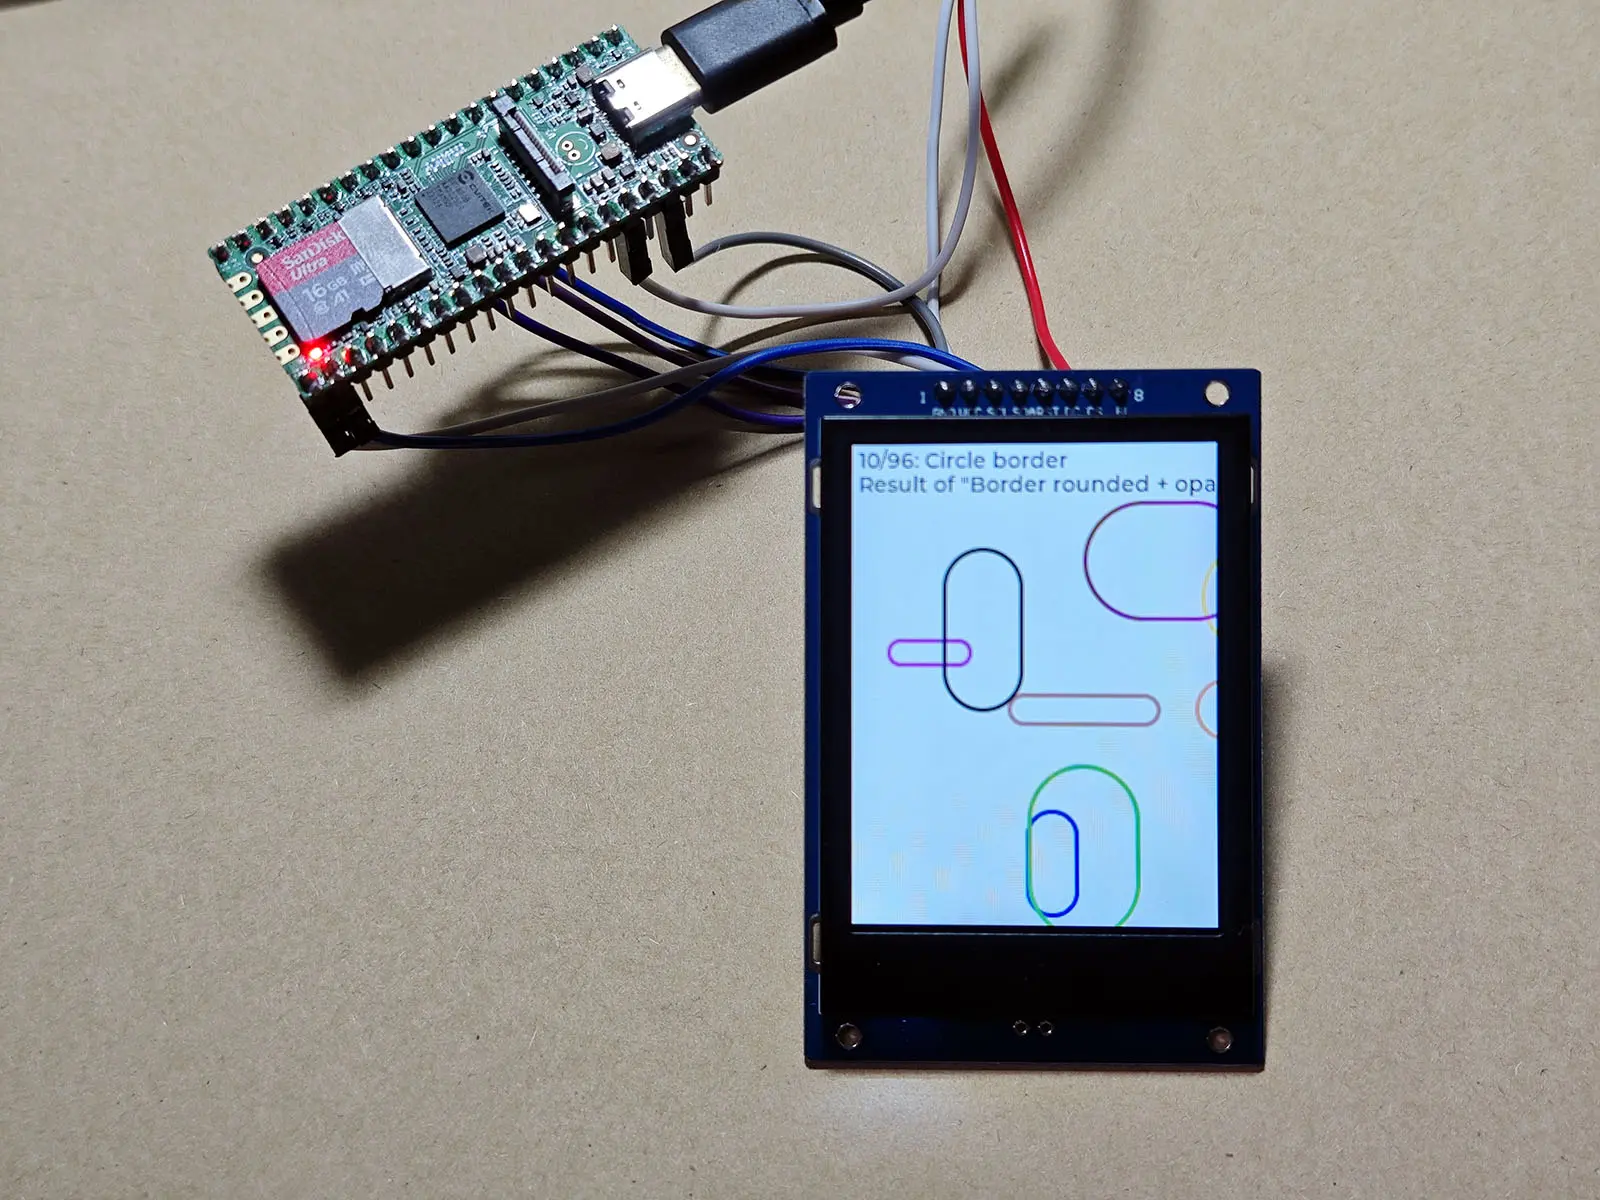
After running this test, statistical results will be generated:

The test result is FPS: around 100.


