Set up the working environment
USB NET setup
To use USB networking, we enabled CDC-NCM and DHCP by default on the system.
The USB network used by firmware before V1.1.2 is RNDIS. If you are using an older version, please update to V1.1.2 or a newer system image.
CDC-NCM is driver-free on Linux, macOS, and the latest Windows systems. You can log in to Duo's terminal directly using ssh [email protected].
Windows
If your Windows system is older, you need to manually install the CDC-NCM driver as follows:
-
Connect Duo, Duo256M or DuoS to your computer via a Type-C cable.
-
The
CDC NCMdevice appears in the Device Manager with a yellow exclamation mark indicating that the driver is not installed.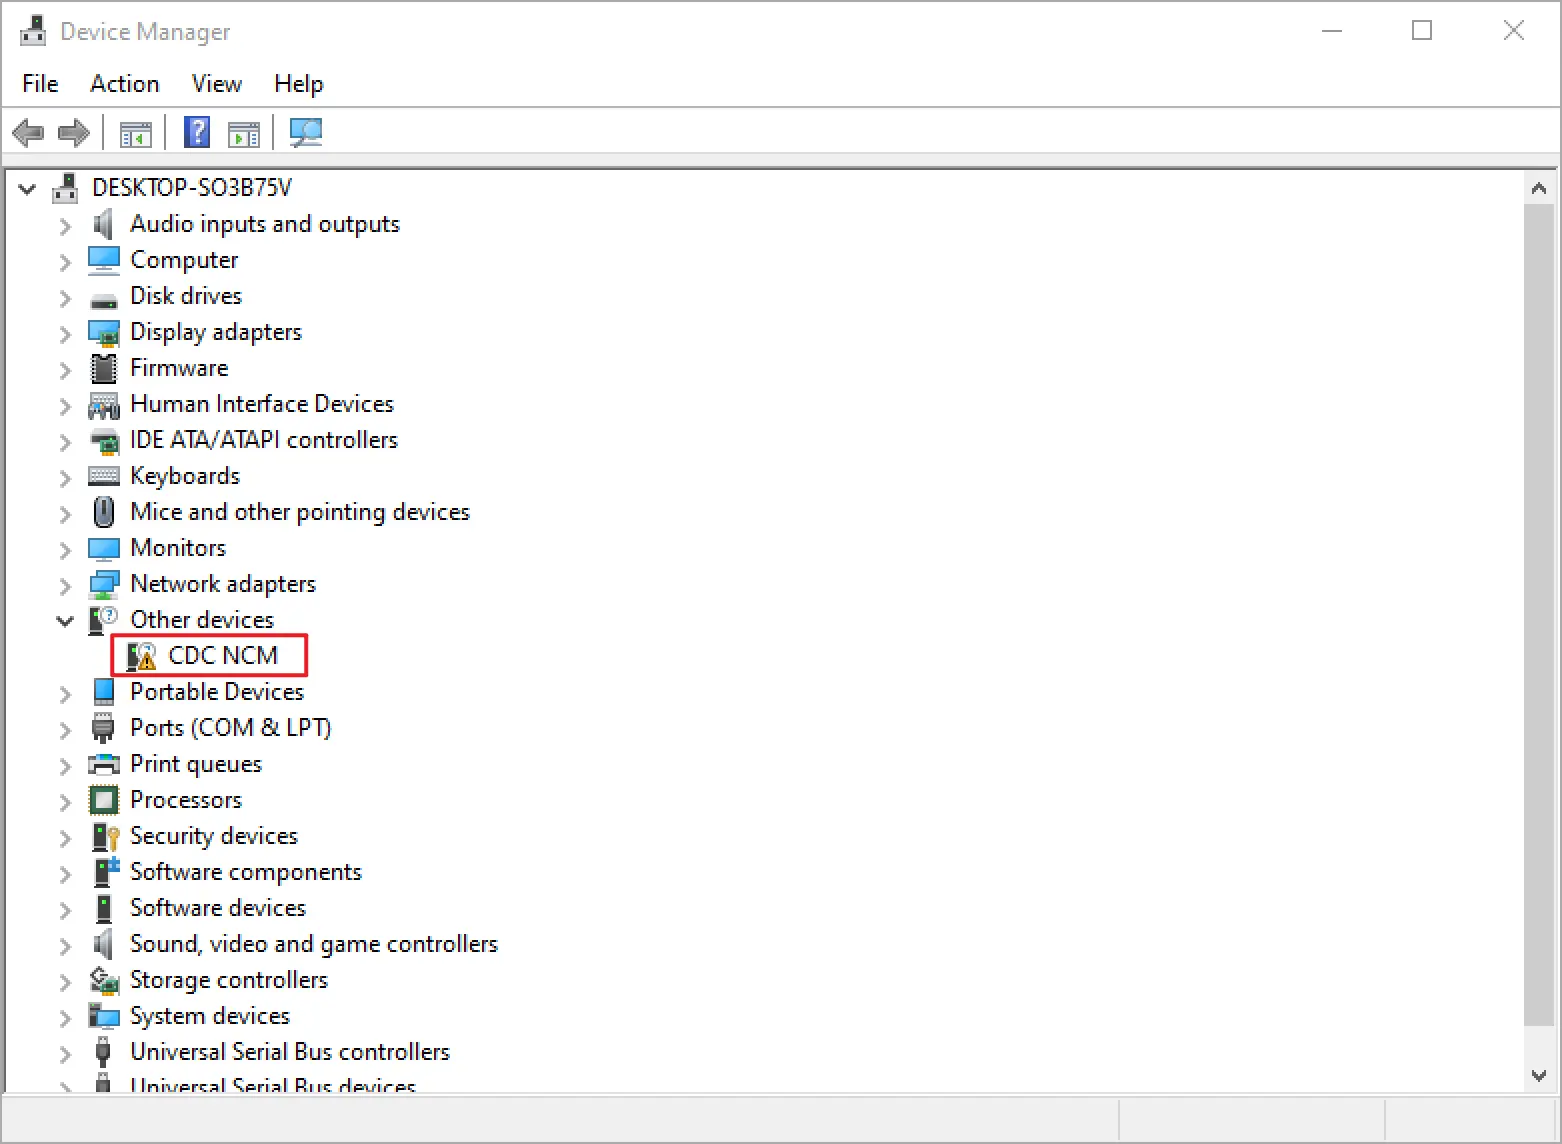
-
Select
CDC NCMand right-click to selectUpdate Driver.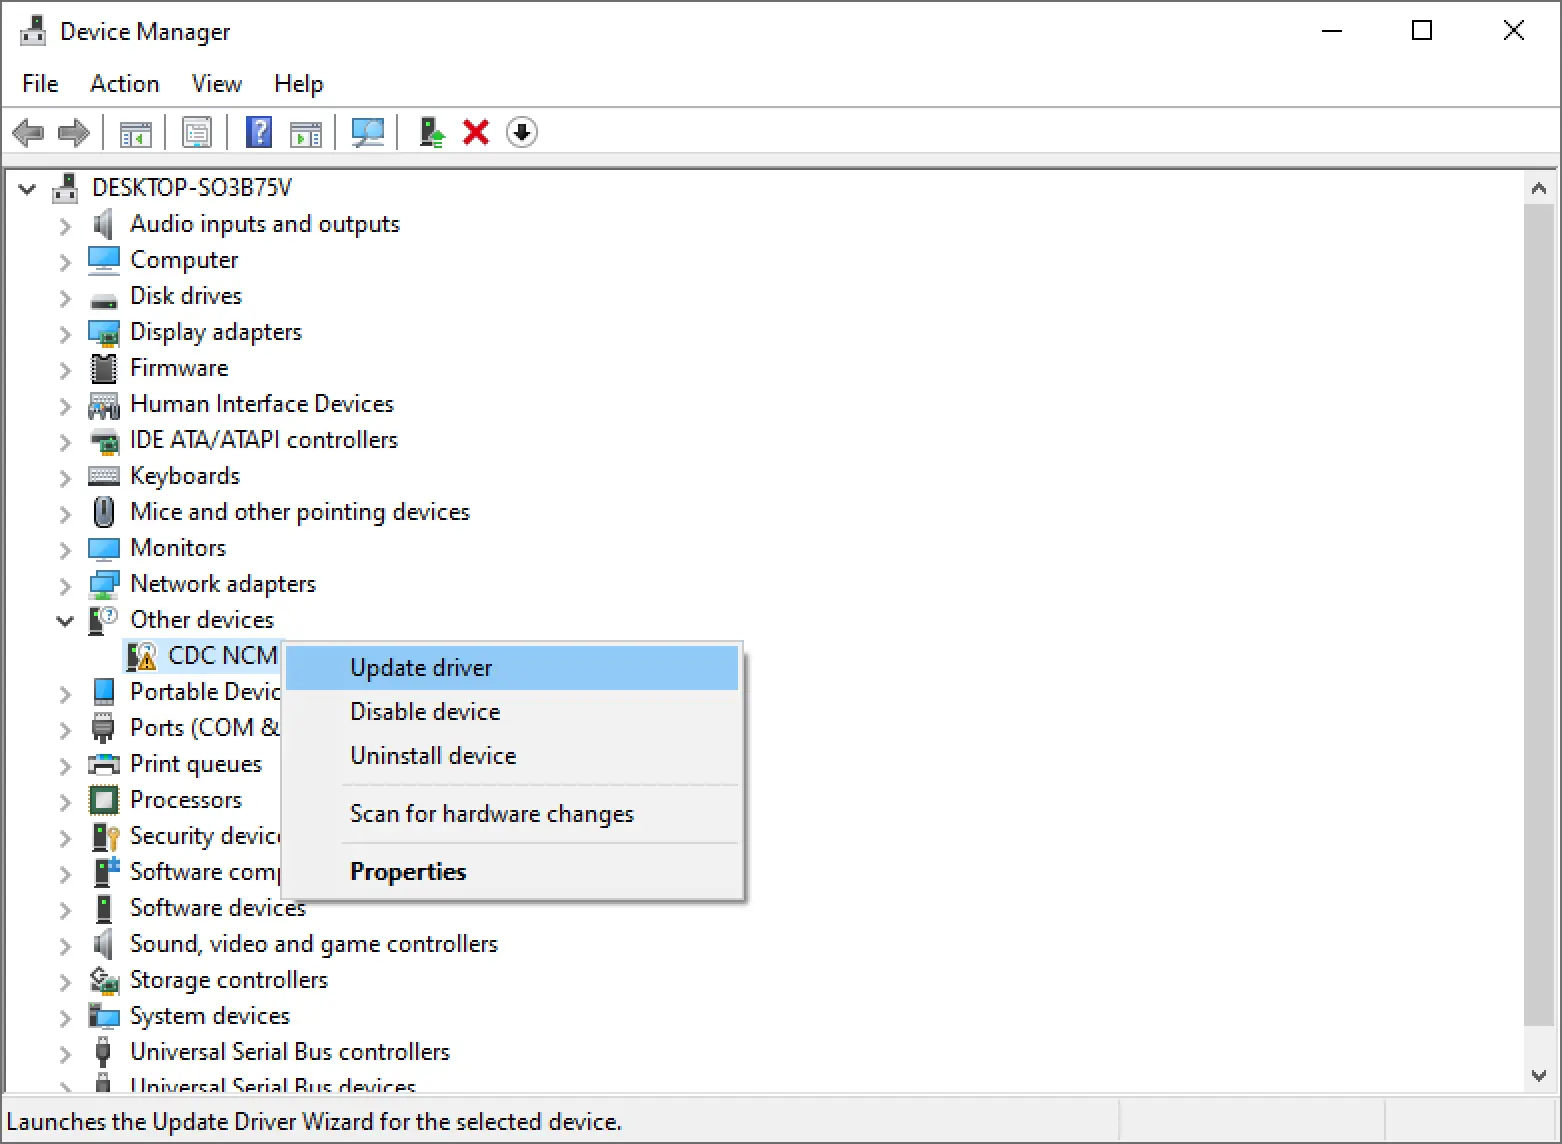
-
Select
Browse my computer for drivers.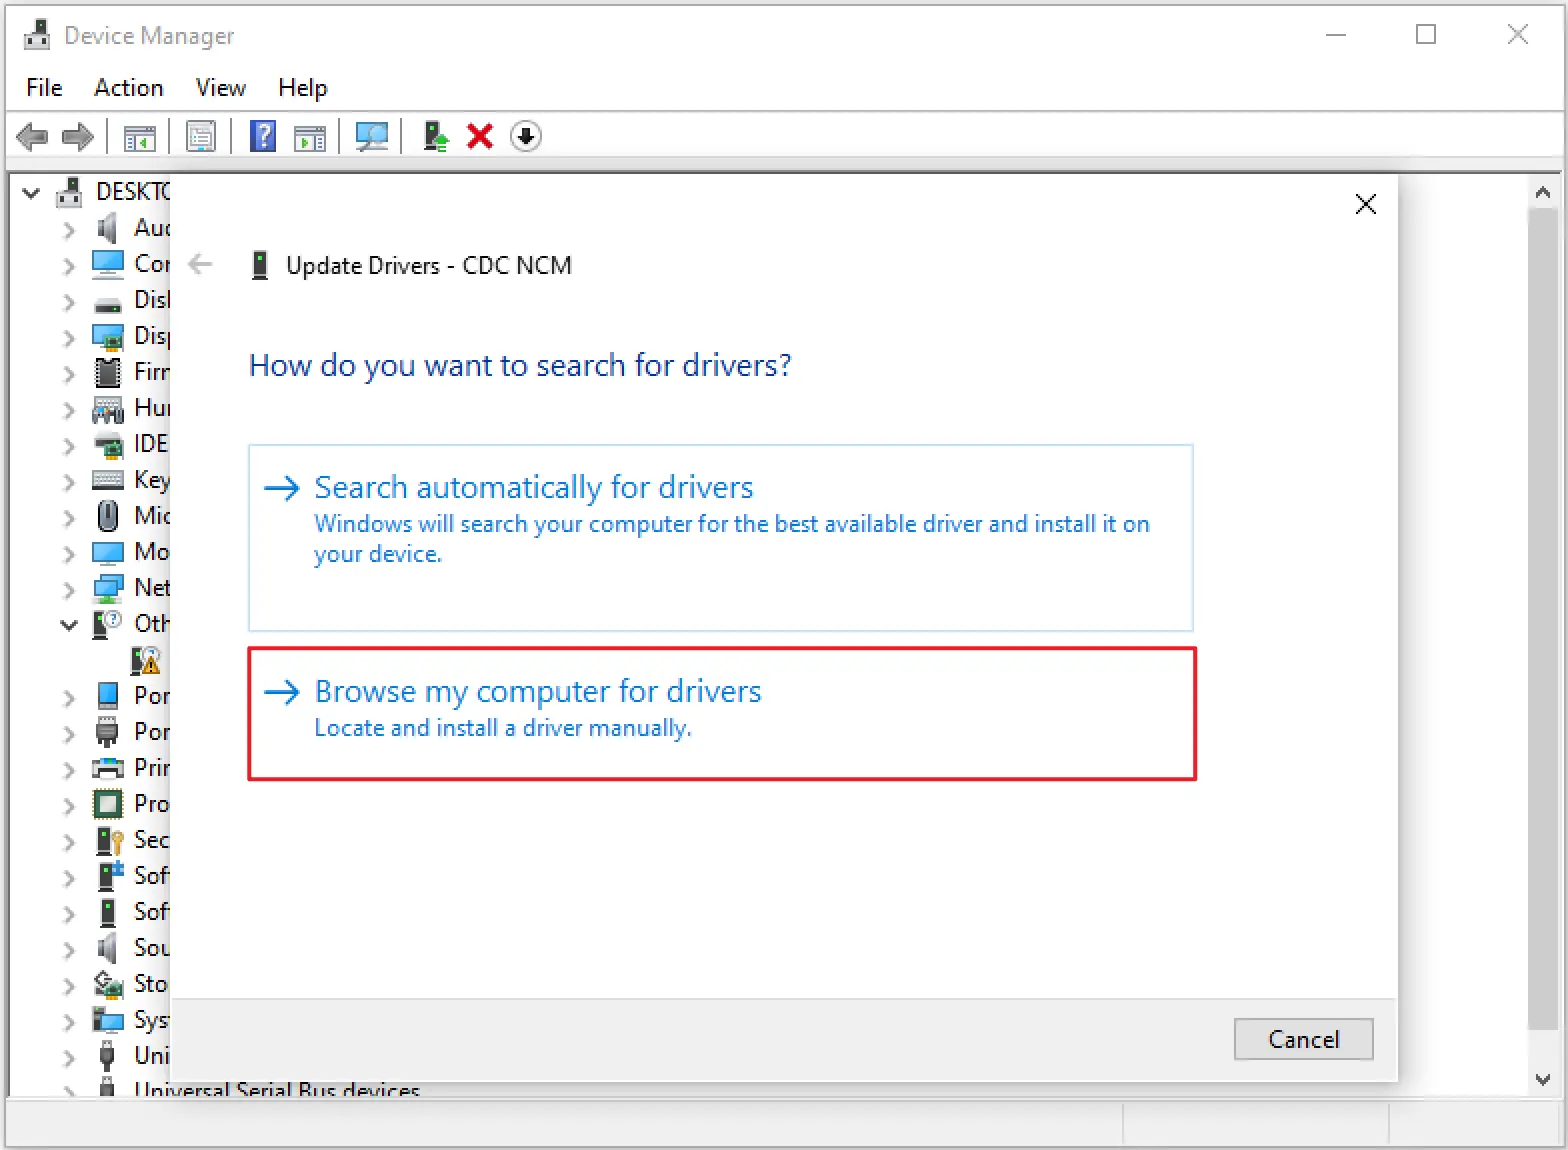
-
Select
Let me pick from a list of available drivers on my computer.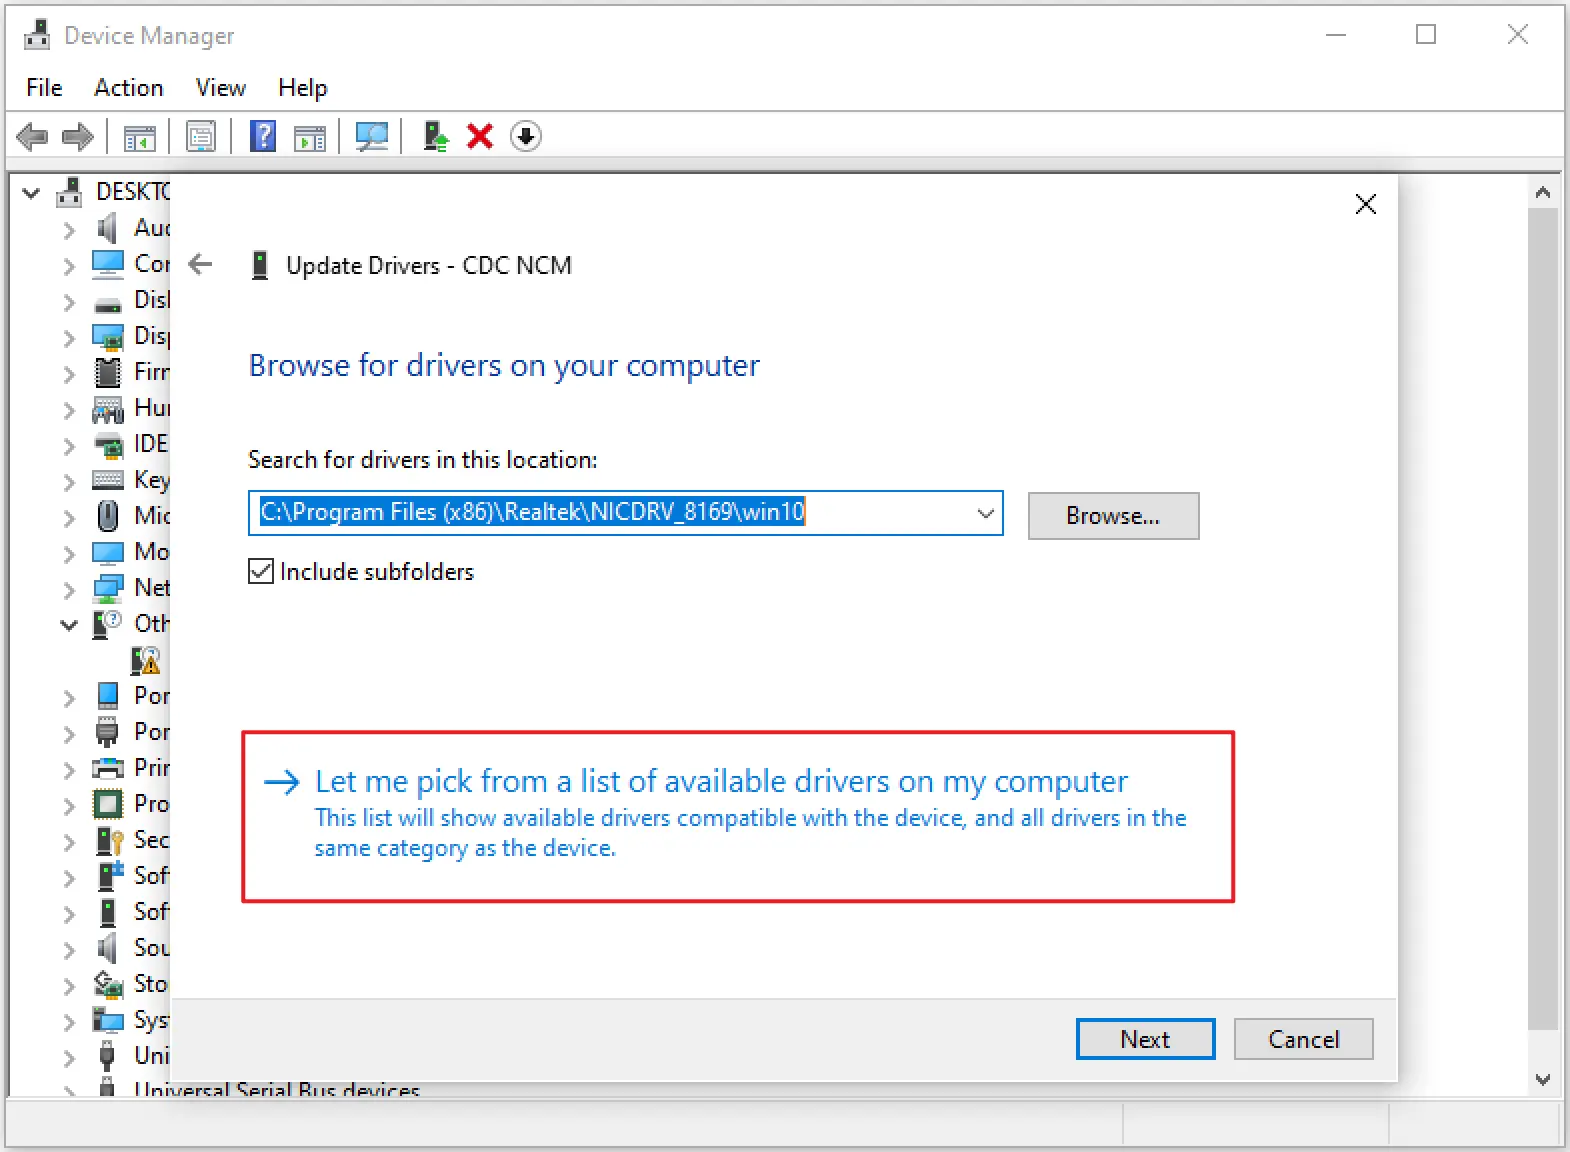
-
Select
Network Adapters.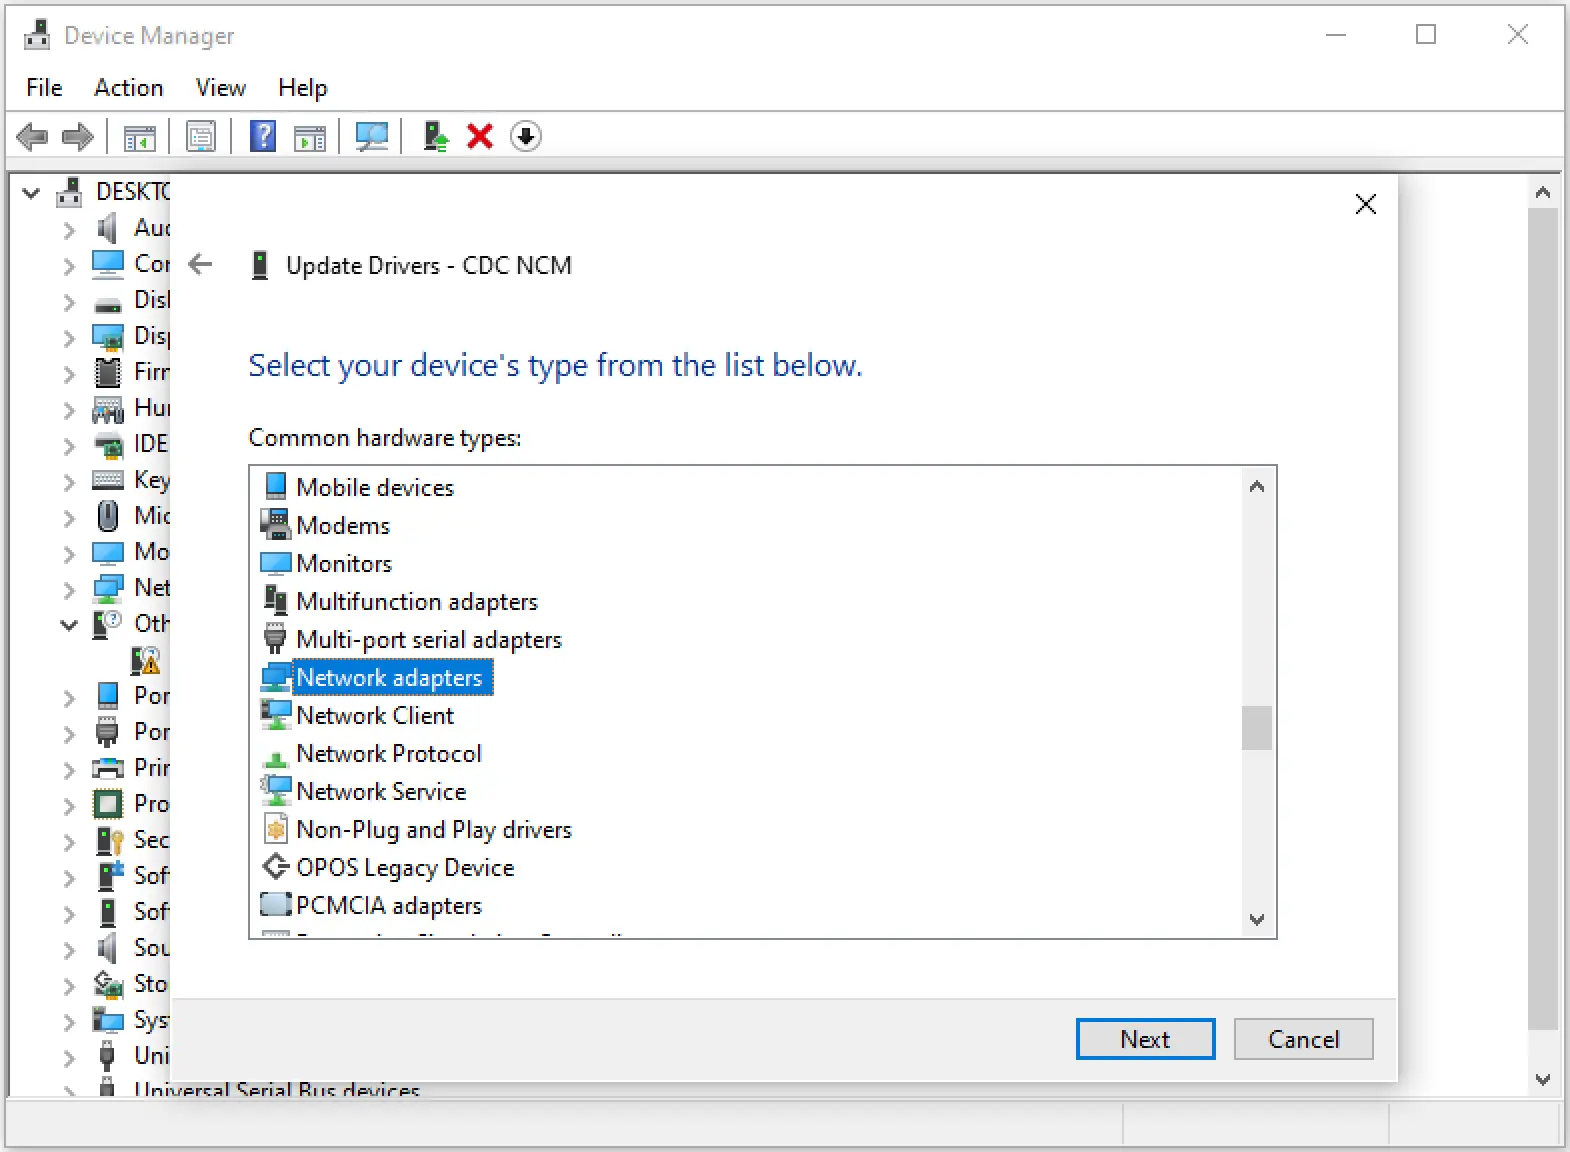
-
Select
MicrosoftinManufacturerandUsbNcm Host DeviceinModel.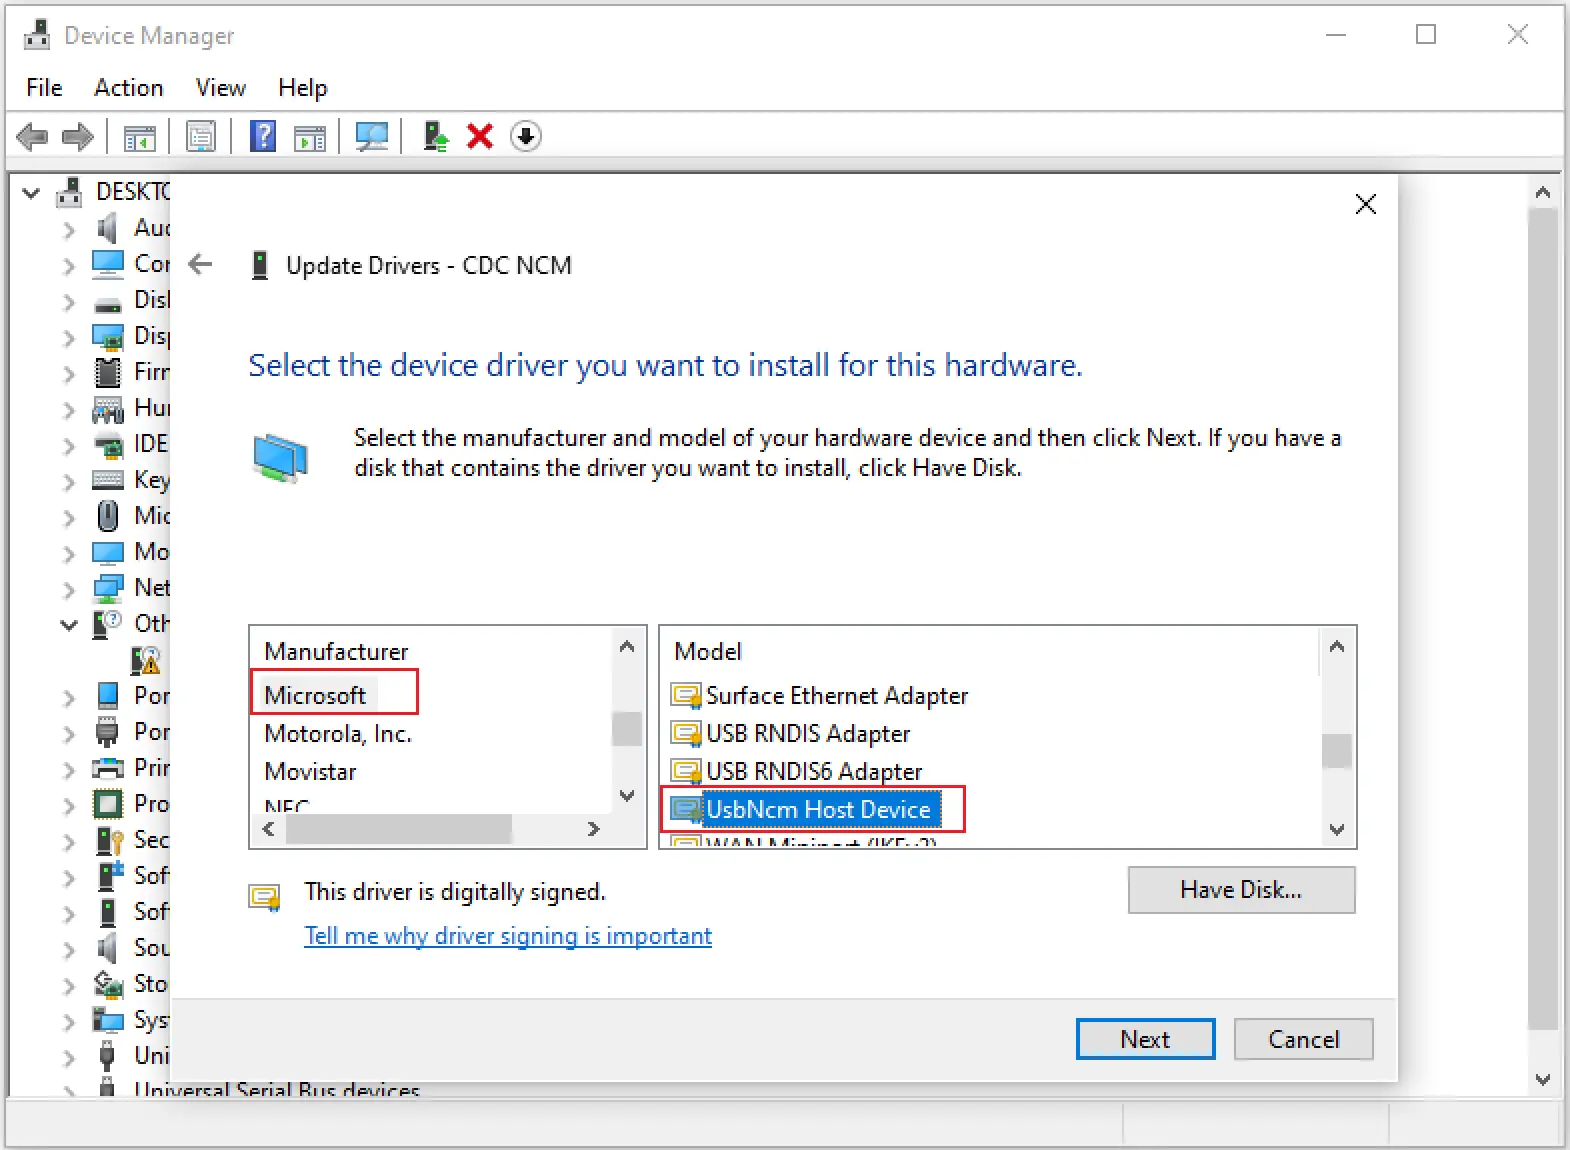
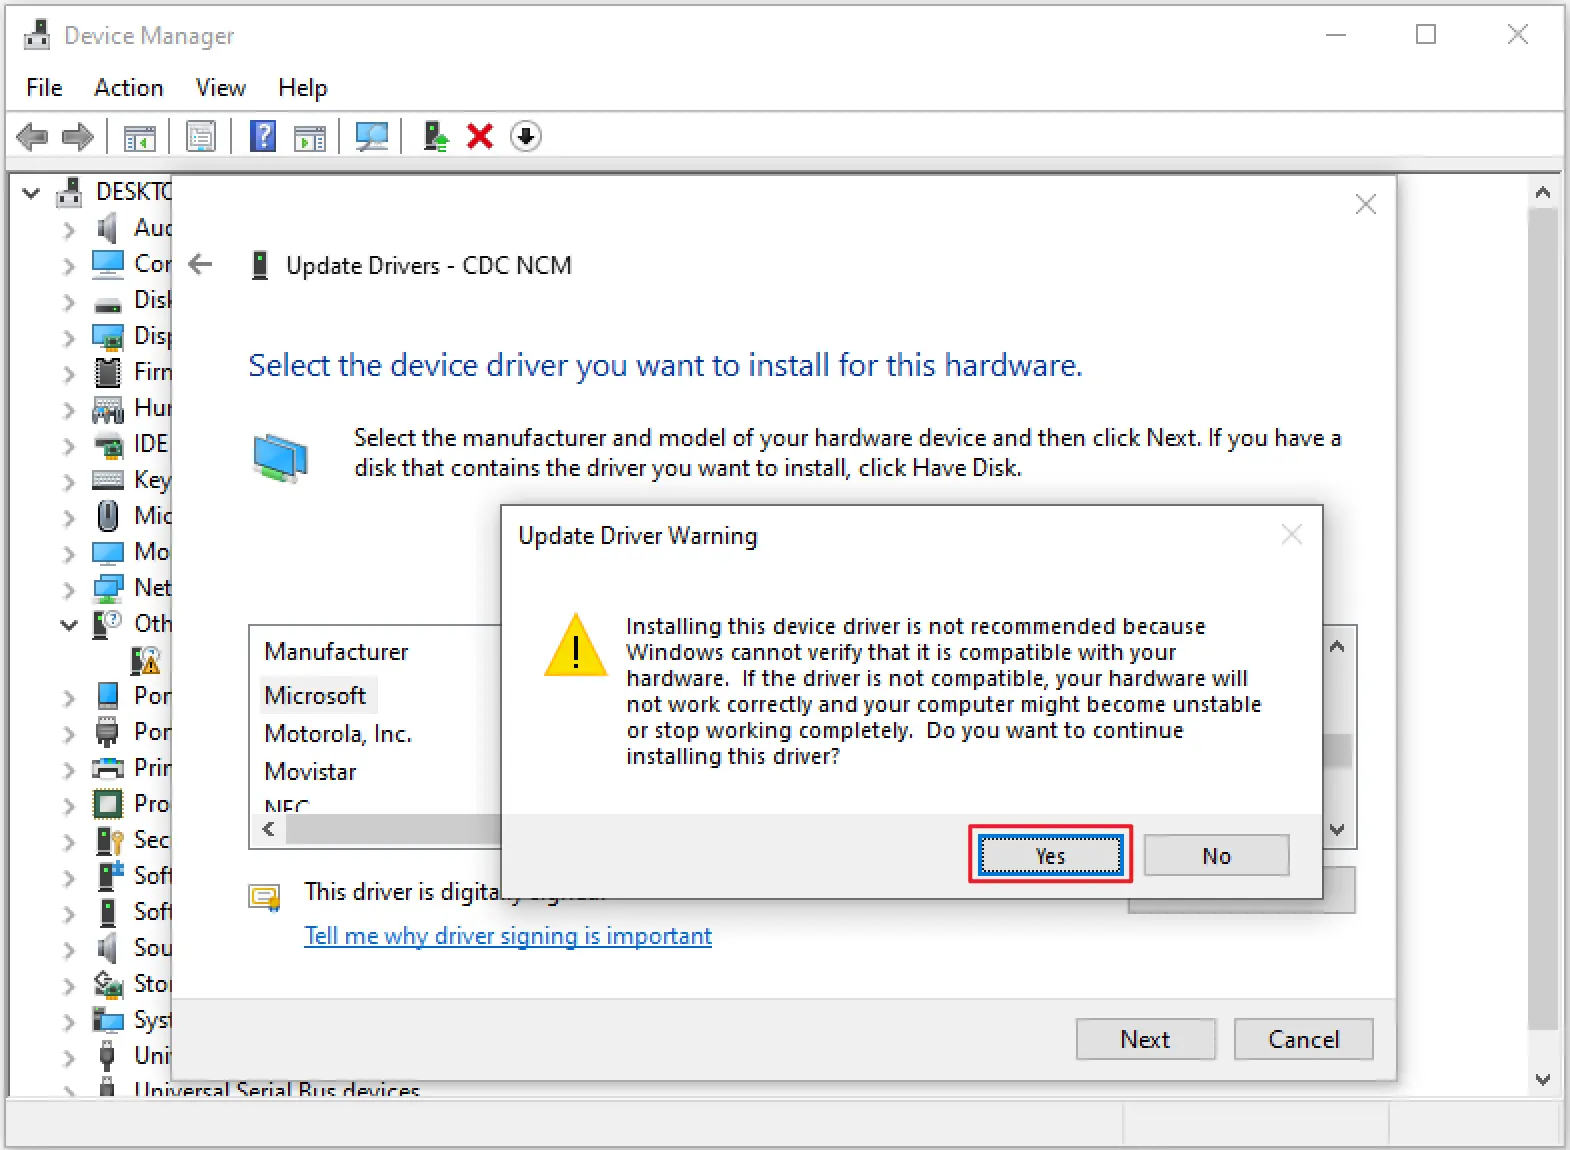
-
Ignore the warning message.
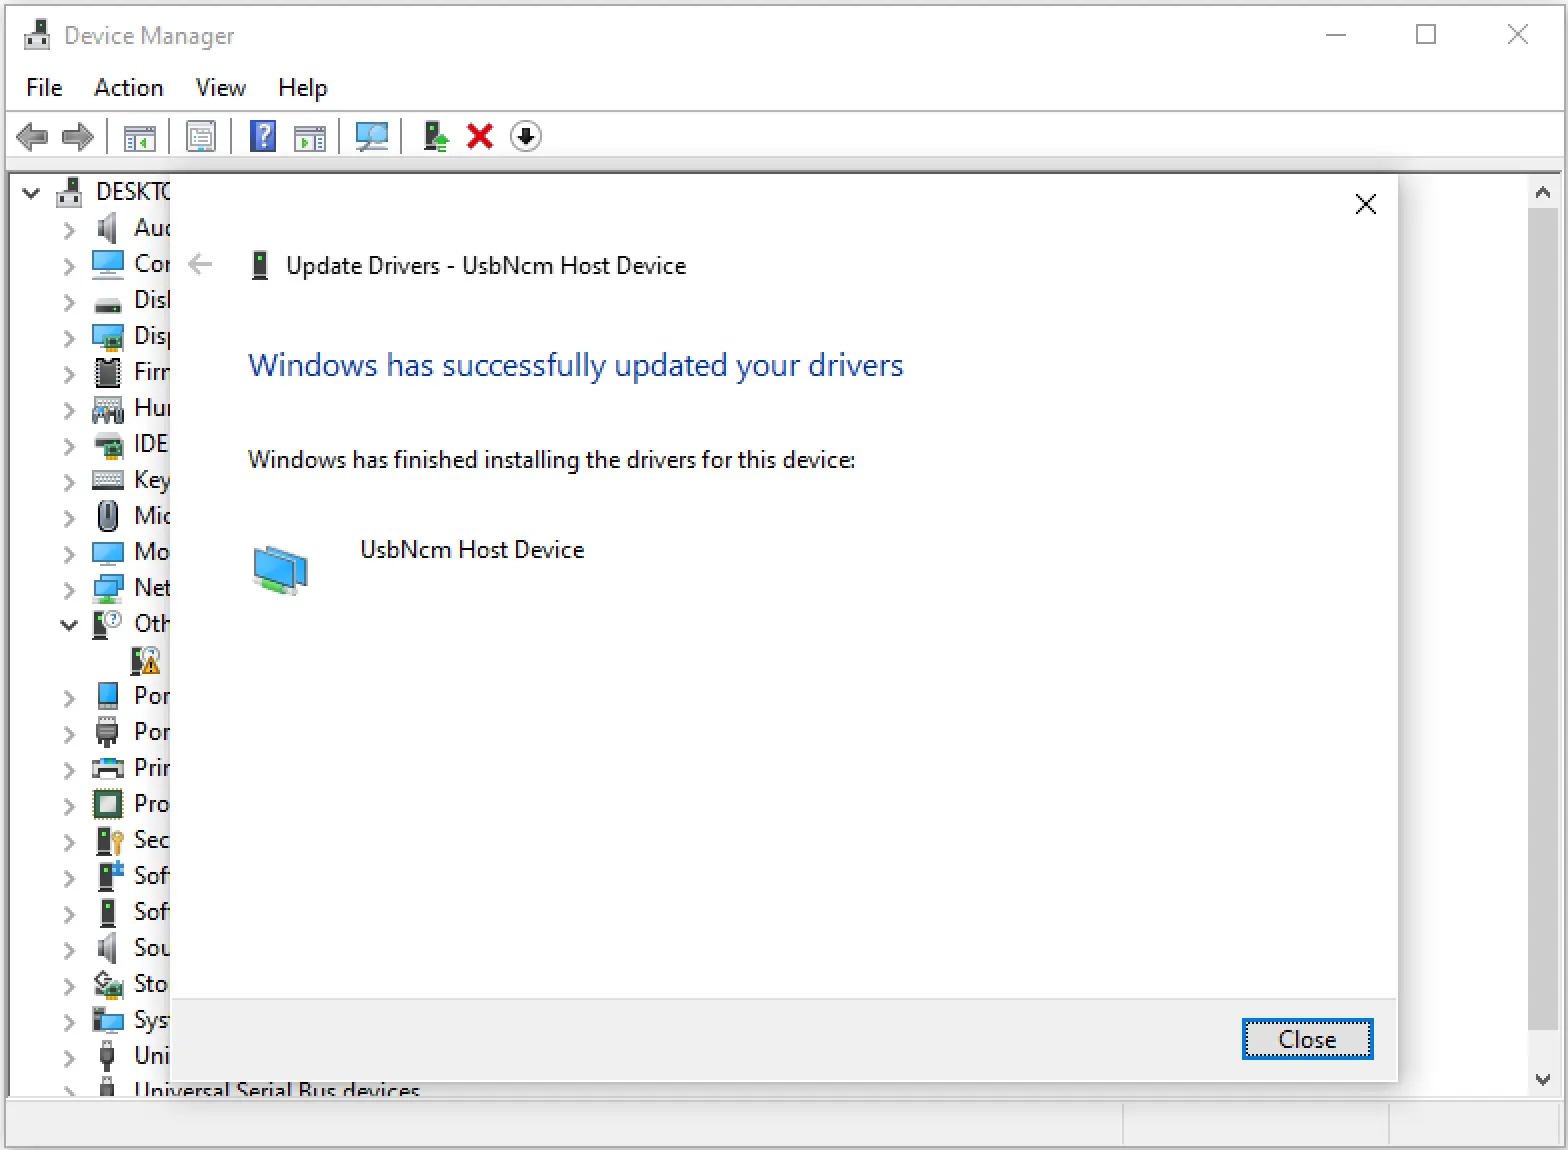
-
The driver was installed successfully.
-
Check
Network Adapter,UsbNcm Host Deviceis displayed normally.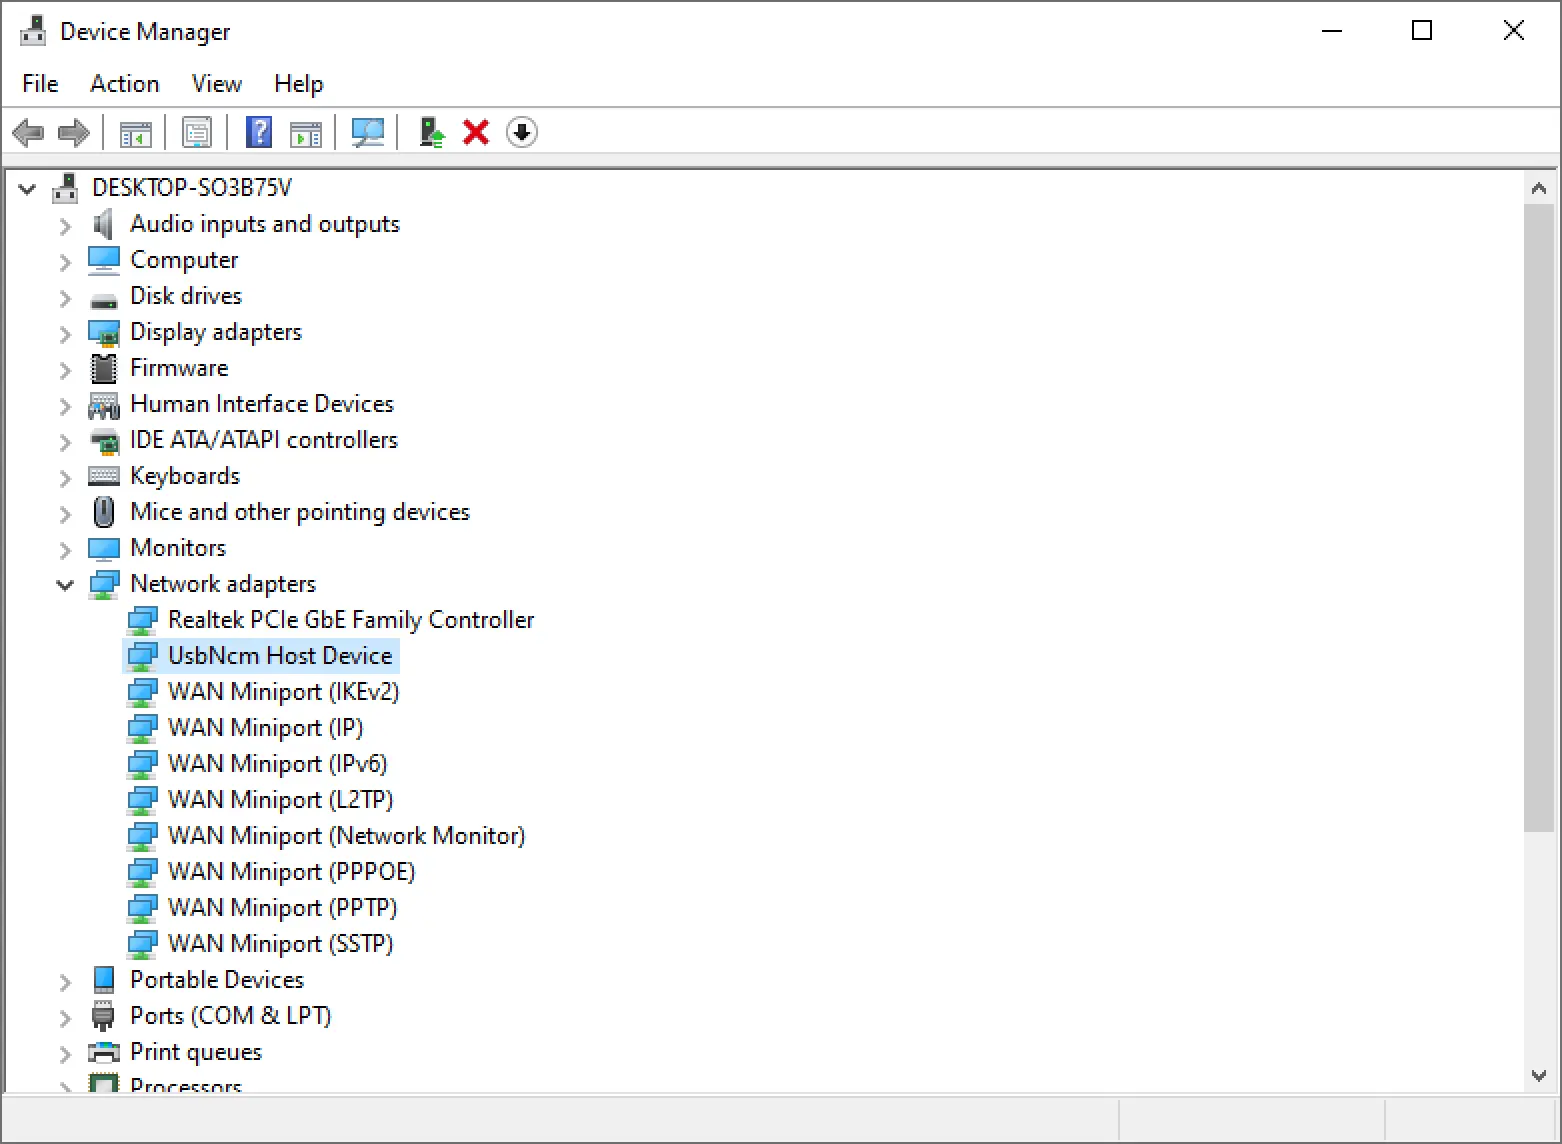
-
Use the
pingcommand to test.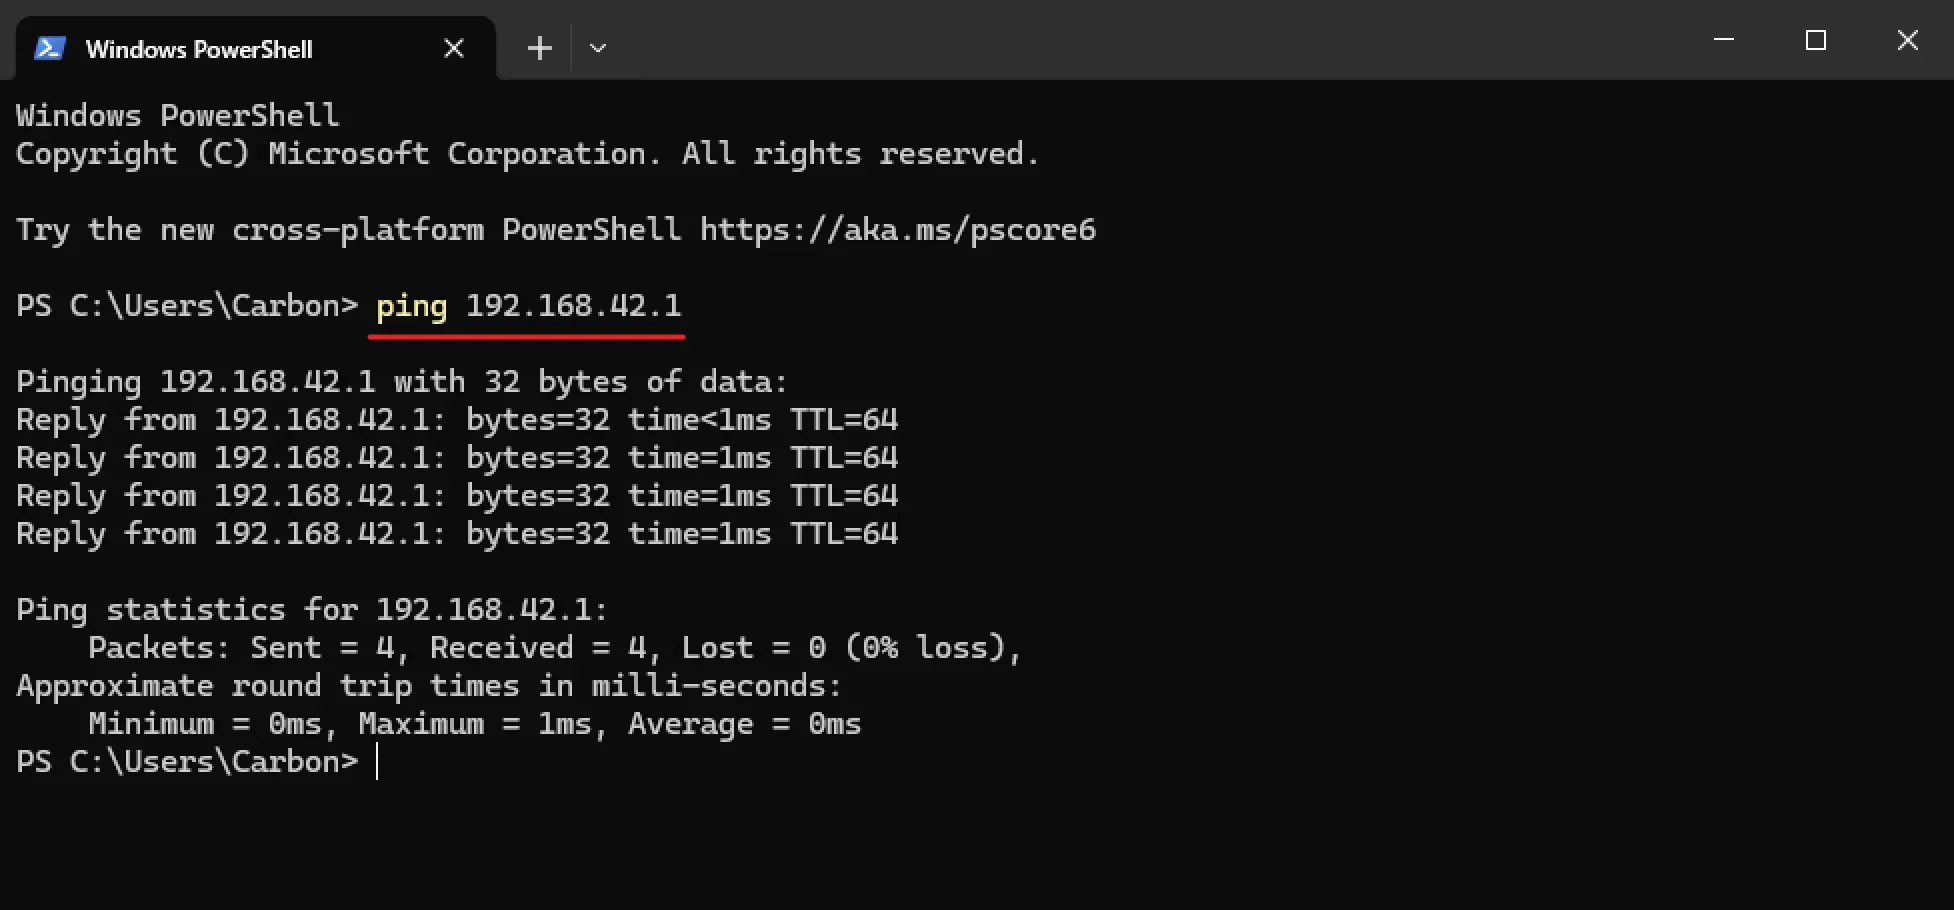
Linux & macOS
Open the terminal and use the ping command to test:
ubuntu@linux:~$ ping 192.168.42.1 -c 5
PING 192.168.42.1 (192.168.42.1) 56(84) bytes of data.
64 bytes from 192.168.42.1: icmp_seq=1 ttl=64 time=2.00 ms
64 bytes from 192.168.42.1: icmp_seq=2 ttl=64 time=2.13 ms
64 bytes from 192.168.42.1: icmp_seq=3 ttl=64 time=2.13 ms
64 bytes from 192.168.42.1: icmp_seq=4 ttl=64 time=2.01 ms
64 bytes from 192.168.42.1: icmp_seq=5 ttl=64 time=2.13 ms

--- 192.168.42.1 ping statistics ---
5 packets transmitted, 5 received, 0% packet loss, time 4006ms
rtt min/avg/max/mdev = 2.003/2.081/2.132/0.059 ms
SSH
Windows
-
Open the terminal and enter
ssh [email protected]. The following prompt will appear for the first connection. Just enteryes.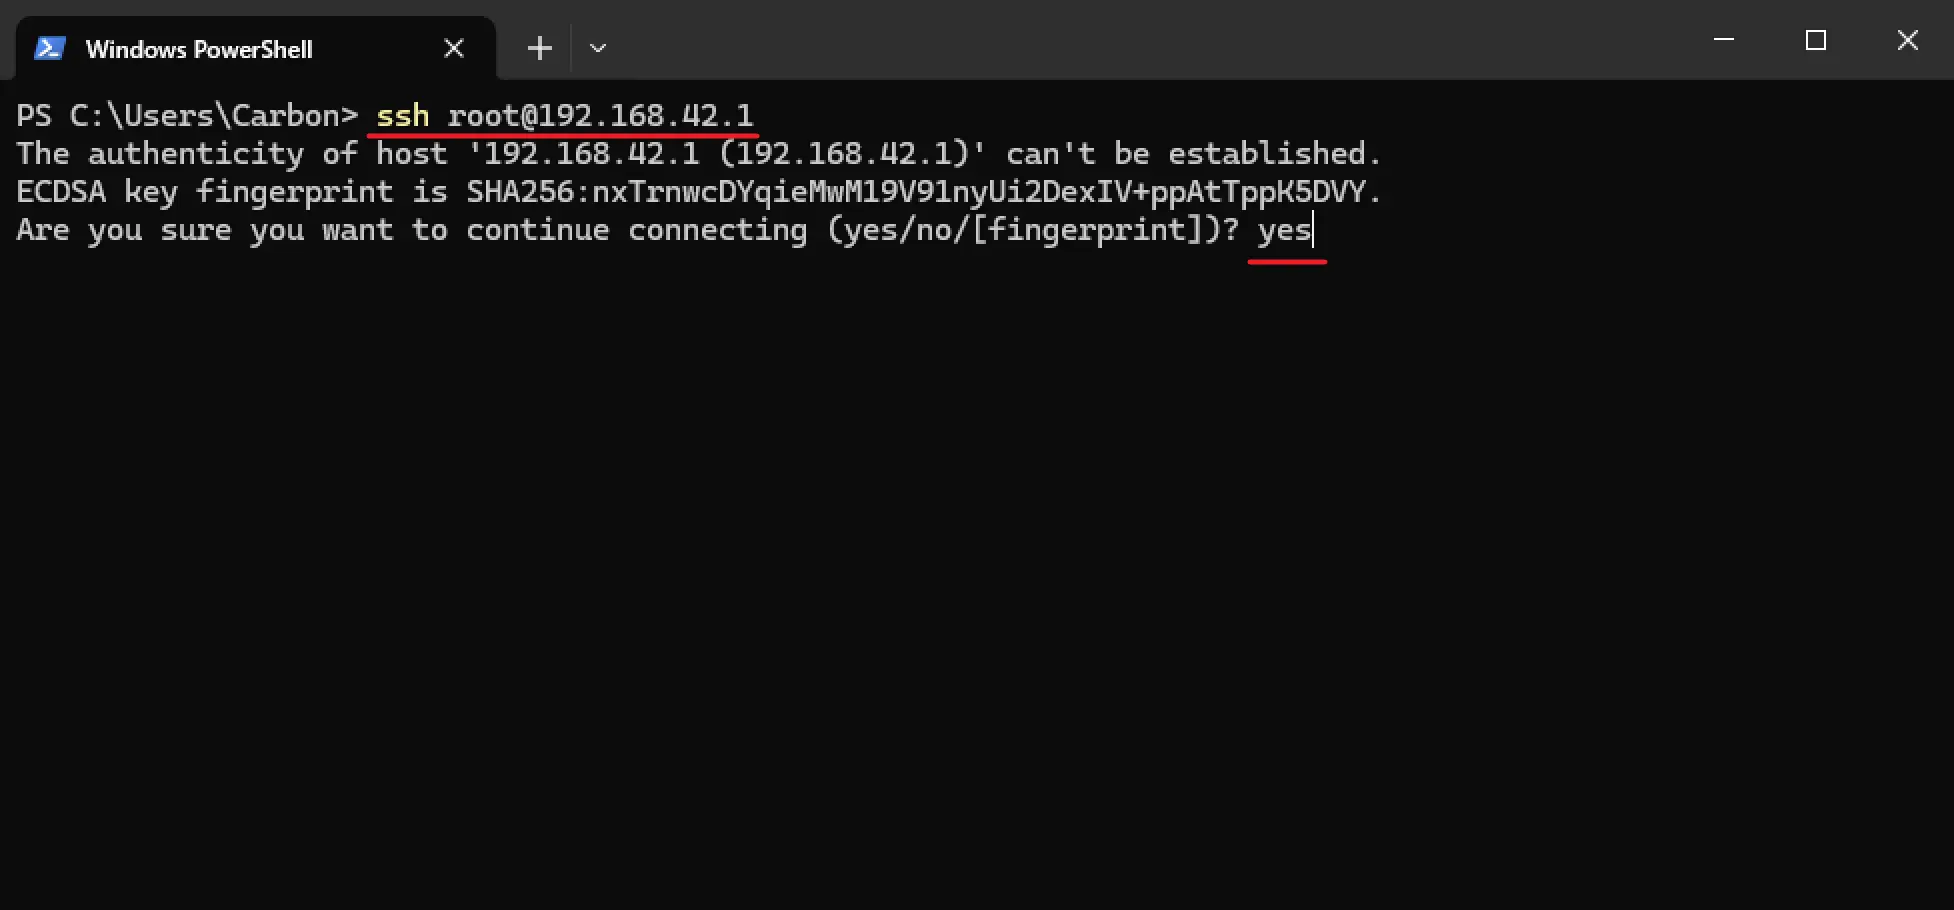
-
Enter the password
milkv(the password will not be displayed) and log in successfully.
Extended root partition
Extended root partition for SD card boot mode
Check current disk usage
Run command df - h to view current disk partition and usage.
[root@milkv-duo]~# df -h
Filesystem Size Used Avail Use% Mounted on
/dev/root 752M 185M 526M 26% /
devtmpfs 159M 0 159M 0% /dev
tmpfs 159M 0 159M 0% /dev/shm
tmpfs 159M 116K 159M 1% /tmp
tmpfs 159M 36K 159M 1% /run
/dev/mmcblk0p1 128M 3.6M 125M 3% /boot
Root partition (/dev/root): 752M, 185M used, 526M remaining.
Run the command fdisk -l to view detailed information about the disk and partitions.
[root@milkv-duo]~# fdisk -l
Disk /dev/mmcblk0: 29.54 GiB, 31719424000 bytes, 61952000 sectors
Units: sectors of 1 * 512 = 512 bytes
Sector size (logical/physical): 512 bytes / 512 bytes
I/O size (minimum/optimal): 512 bytes / 512 bytes
Disklabel type: dos
Disk identifier: 0x00000000

Device         Boot  Start     End Sectors  Size Id Type
/dev/mmcblk0p1 *         1  262144  262144  128M  c W95 FAT32 (LBA)
/dev/mmcblk0p2      262145  266240    4096    2M  0 Empty
/dev/mmcblk0p3      266241 1839104 1572864  768M 83 Linux
Disk name: /dev/mmcblk0 Total size: 29.54 GiB (31719424000 bytes) Total number of sectors: 61952000 sectors Sector size: 512 bytes Partition table type: DOS (MBR)
The root partition we want to expand is /dev/mmcblk0p3. Remember the starting sector 266241 of this partition.
Note: /dev/mmcblk0p1 is the boot partition, do not move it.
Use parted to expand the root partition
- Run the command
parted -s -a opt /dev/mmcblk0 "resizepart 3 100%"to resize the partition 3rd partition of mmcblk0 (mmcblk0p3) to fill the remaining available space on the SD card.
[root@milkv-duo]~# parted -s -a opt /dev/mmcblk0 "resizepart 3 100%"
You can check with fdisk that the partition size is now filling the SD while the starting sector didn't change:
[root@milkv-duo]~# fdisk -l
Disk /dev/mmcblk0: 14.56 GiB, 15634268160 bytes, 30535680 sectors
Units: sectors of 1 * 512 = 512 bytes
Sector size (logical/physical): 512 bytes / 512 bytes
I/O size (minimum/optimal): 512 bytes / 512 bytes
Disklabel type: dos
Disk identifier: 0x3b39a00d

Device         Boot  Start      End  Sectors  Size Id Type
/dev/mmcblk0p1 *         1   262144   262144  128M  c W95 FAT32 (LBA)
/dev/mmcblk0p3      266241 30535679 30269439 14.4G 83 Linux
The file system is still not filling the partition.
- Extend the file system
After the partition resize operation is complete, you need to extend the file system to use the new partition size.
[root@milkv-duo]~# resize2fs /dev/mmcblk0p3
resize2fs 1.46.2 (28-Feb-2021)
Filesystem at /dev/mmcblk0p3 is mounted on /; on-line resizing required
old_desc_blocks = 3, new_desc_blocks = 118
- View the expanded root partition
[root@milkv-duo]~# df -h
Filesystem      Size  Used Avail Use% Mounted on
/dev/root        30G  178M   28G   1% /
devtmpfs        159M     0  159M   0% /dev
tmpfs           159M     0  159M   0% /dev/shm
tmpfs           159M  116K  159M   1% /tmp
tmpfs           159M   36K  159M   1% /run
/dev/mmcblk0p1  128M  3.6M  125M   3% /boot
Root partition (/dev/root): 30G, 178M used, 28G remaining.
Others
Modify the IP address of the USB network
The default IP address of USB network is 192.168.42.1. If you need to modify this address, for example, when the same computer is connected to multiple Duo devices, the IP of each Duo needs to be set to a different one. This can be achieved by modifying the following two files in the Duo device:
#!/bin/sh

/etc/uhubon.sh device >> /tmp/ncm.log 2>&1
/etc/run_usb.sh probe ncm >> /tmp/ncm.log 2>&1
if test -e /usr/bin/burnd; then
  /etc/run_usb.sh probe acm >> /tmp/ncm.log 2>&1
fi
/etc/run_usb.sh start ncm >> /tmp/ncm.log 2>&1

sleep 0.5
ifconfig usb0 192.168.42.1

count=`ps | grep dnsmasq | grep -v grep | wc -l`
if [ ${count} -lt 1 ] ;then
  echo "/etc/init.d/S80dnsmasq start" >> /tmp/ncm.log 2>&1
  /etc/init.d/S80dnsmasq start >> /tmp/ncm.log 2>&1
fi
interface=usb0
dhcp-range=192.168.42.2,192.168.42.242,1h
dhcp-option=3
dhcp-option=6
Enable Swap
What is Swap
Swap, also known as virtual RAM, is used to support storing data in hard disk when physical memory (RAM) is full. Sometimes Swap is also used in parallel to increase cache capacity even if the physical memory is not used up yet.
This may cause wear and tear on your microSD card leading to a shorter drive lifespan! It is strongly recommended to enable swap functionality only when there is insufficient memory available!
How to enable Swap on Duo
There are two ways to enable Swap, one is to use Swap partition, the other is to use Swap file. In versions before v1.1.3, Duo's image reserves a 256M partition as a Swap partition. In v1.1.3 and later versions, the Swap file method is used uniformly.
Use the latest system image:
https://github.com/milkv-duo/duo-buildroot-sdk/releases
Execute the following command in the Duo terminal to create a 256M Swap file (the file size and location can be customized):
fallocate -l 256M /mnt/swapfile
chmod 600 /mnt/swapfile
mkswap /mnt/swapfile
swapon /mnt/swapfile
Then run the swapon --show or free -h command to check if swap is enabled (256M):
[root@milkv-duo]~# swapon --show
NAME          TYPE   SIZE USED PRIO
/mnt/swapfile file 255.8M   0B   -2
[root@milkv-duo]~# free -h
              total        used        free      shared  buff/cache   available
Mem:          28.3M       14.3M        3.7M       76.0K       10.3M       11.2M
Swap:        255.8M           0      255.8M
If you need to automatically load Swap at startup, you can use this command to configure:
echo "/mnt/swapfile swap swap defaults 0 0" >> /etc/fstab && sync
After restarting, use the swapon --show or free -h command to check that Swap has been automatically loaded.


