Object Detection Based on YOLOv5
1. Prepare original model files under windows
Prepare the YOLOv5 development kit and yolov5n.pt file
Download the YOLOv5 development toolkit and the yolov5n.pt file. Once the download is complete, extract the toolkit and place the yolov5n.pt file in the yolov5-master directory.
Configure the conda environment
Anaconda needs to be installed in advance.
Open a new Anaconda Prompt terminal and execute conda env list to view the current environment.
(base) C:\Users\Carbon> conda env list
# conda environments:
#
base                  *  C:\Users\Carbon\anaconda3
Create a new conda virtual environment and install version 3.9.0 of python. duotpu is the name you chose.
(base) C:\Users\Carbon> conda create --name duotpu python=3.9.0
Check the current environment again after success.
(base) C:\Users\Carbon> conda env list
# conda environments:
#
base                  *  C:\Users\Carbon\anaconda3
duotpu                   C:\Users\Carbon\anaconda3\envs\duotpu
Activate the newly installed 3.9.0 environment.
(base) C:\Users\Carbon> conda activate duotpu
Confirm that the activation is successful.
(duotpu) C:\Users\Carbon> conda env list
# conda environments:
#
base                     C:\Users\Carbon\anaconda3
duotpu                *  C:\Users\Carbon\anaconda3\envs\duotpu
Then, you can use the following command to install PyTorch version 1.12.1. Please choose the specific installation command based on your requirements. The subsequent process only requires the use of CPU.
# CUDA 10.2
conda install pytorch==1.12.1 torchvision==0.13.1 torchaudio==0.12.1 cudatoolkit=10.2 -c pytorch

# CUDA 11.3
conda install pytorch==1.12.1 torchvision==0.13.1 torchaudio==0.12.1 cudatoolkit=11.3 -c pytorch

# CUDA 11.6
conda install pytorch==1.12.1 torchvision==0.13.1 torchaudio==0.12.1 cudatoolkit=11.6 -c pytorch

# CPU Only
conda install pytorch==1.12.1 torchvision==0.13.1 torchaudio==0.12.1 cpuonly -c pytorch
Then cd the terminal path to the yolov5-master path of the development kit and enter pip install -r requirements.txt to install other dependencies.
(duotpu) C:\Users\Carbon> cd Duo-TPU\yolov5-master

(duotpu) C:\Users\Carbon\Duo-TPU\yolov5-master> pip install -r requirements.txt
Generate original model file
Create a new main.py file in the yolov5-master directory and write the following code in the file:
import torch
from models.experimental import attempt_download
model = torch.load(attempt_download("./yolov5n.pt"),
map_location=torch.device('cpu'))['model'].float()
model.eval()
model.model[-1].export = True
torch.jit.trace(model, torch.rand(1, 3, 640, 640), strict=False).save('./yolov5n_jit.pt')
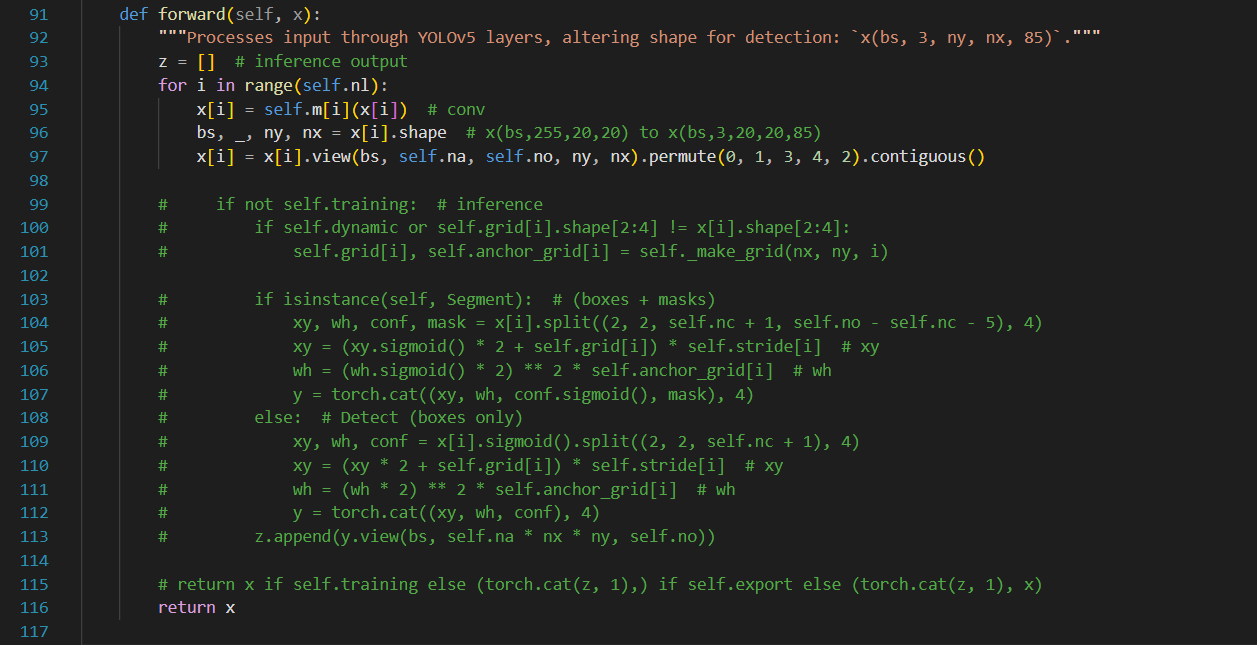
Then find the yolov5-master/models/yolo.py file, comment the code from lines 99 to 115, and add the code return x on line 116, as shown below:
In addition, this file also needs to be modified:
C:\Users\Carbon\anaconda3\envs\duotpu\Lib\site-packages\torch\nn\modules\upsampling.py
When using conda on linux the file is located at:
~/anaconda3/envs/duotpu/lib/python3.9/site-packages/torch/nn/modules/upsampling.py
Make the following changes around line 153

After the modification is completed, run the python main.py file and the yolov5n_jit.pt file will be generated in the yolov5-master directory. This file is the required original model file.
(duotpu) C:\Users\Carbon\Duo-TPU\yolov5-master> python main.py
Exit the conda environment (optional)
The model files we need have been generated above. You can use the conda deactivate command to exit the conda environment:
(duotpu) C:\Users\Carbon\Duo-TPU\yolov5-master> conda deactivate
If you no longer need this conda virtual environment (duotpu), you can delete it with the following command:
conda env remove --name <envname>
2. Configure Docker development environment
Refer to here. After configuring the Docker development environment, return here to continue the next step.
If you are using a configured Docker development environment, please make sure to follow the Docker configuration tutorial to execute command source ./tpu-mlir/envsetup.sh after starting Docker, otherwise errors may occur in subsequent steps.
3. Prepare the working directory in Docker
Create and enter the yolov5n_torch working directory, note that it is a directory at the same level as tpu-mlir, and put the model files and image files into this directory
# mkdir yolov5n_torch && cd yolov5n_torch
Create a new Windows terminal and copy yolov5n_jit.pt from windows to Docker
docker cp <path>/yolov5-master/yolov5n_jit.pt <container_name>:/workspace/yolov5n_torch/yolov5n_jit.pt
<path> is the file directory where the yolov5 development kit is located in the windows system, and <container_name> is the container name, such as
docker cp C:\Users\Carbon\Duo-TPU\yolov5-master\yolov5n_jit.pt DuoTPU:/workspace/yolov5n_torch/yolov5n_jit.pt
Go back to the Docker terminal and put the image file into the current directory (yolov5n_torch)
# cp -rf ${TPUC_ROOT}/regression/dataset/COCO2017 .
# cp -rf ${TPUC_ROOT}/regression/image .
${TPUC_ROOT} here is an environment variable, corresponding to the tpu-mlir directory, which is loaded in the source ./tpu-mlir/envsetup.sh step in the previous configuration of the Docker development environment.
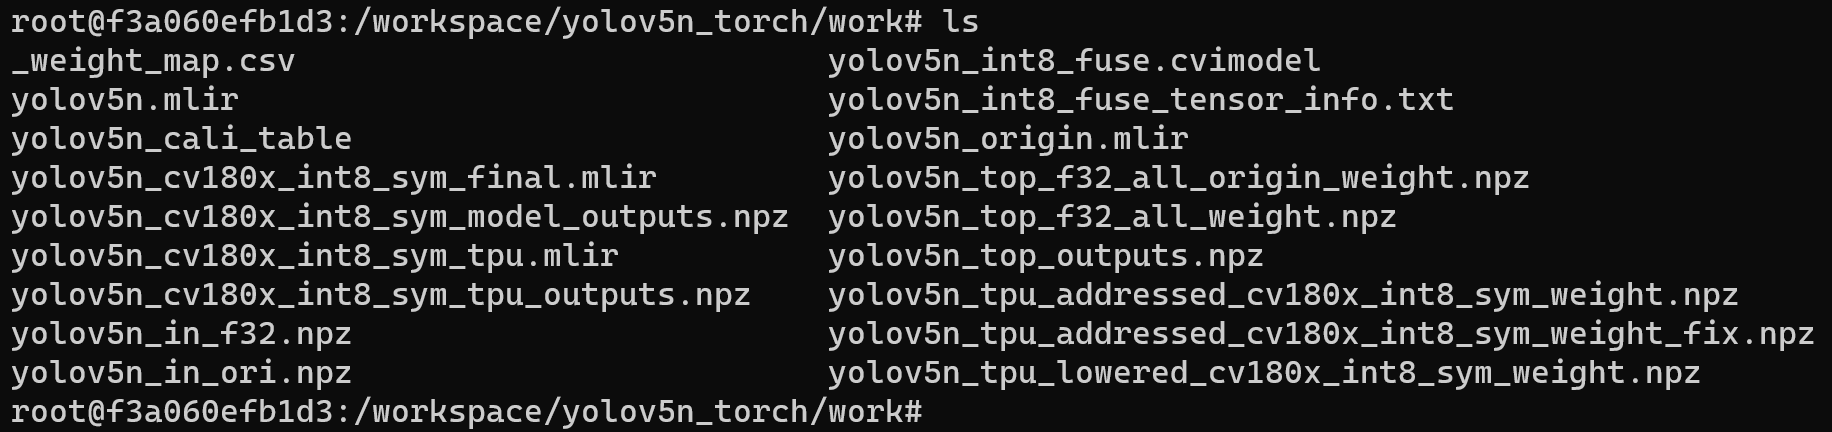
Create and enter the work working directory to store compiled files such as MLIR and cvimodel
# mkdir work && cd work
4. YOLOv5n-TORCH Model conversion
The Duo development board is equipped with the CV1800B chip, which supports the ONNX series and Caffe models. Currently, it does not support TFLite models. In terms of quantized data types, it supports quantization in BF16 format and asymmetric quantization in INT8 format.
The steps for model conversion are as follows:
- Convert TORCH model to MLIR
- Generate calibration tables required for quantification
- MLIR quantization into INT8 asymmetric cvimodel
TORCH model converted to MLIR
In this example, the model is RGB input, mean and scale are 0,0,0 and 0.0039216, 0.0039216, 0.0039216 respectively
The command to convert TORCH model to MLIR model is as follows
# model_transform.py \
--model_name yolov5n \
--model_def ../yolov5n_jit.pt \
--input_shapes [[1,3,640,640]] \
--pixel_format "rgb" \
--keep_aspect_ratio \
--mean 0,0,0 \
--scale 0.0039216,0.0039216,0.0039216 \
--test_input ../image/dog.jpg \
--test_result yolov5n_top_outputs.npz \
--output_names 1219,1234,1249 \
--mlir yolov5n.mlir
Example of successful operation
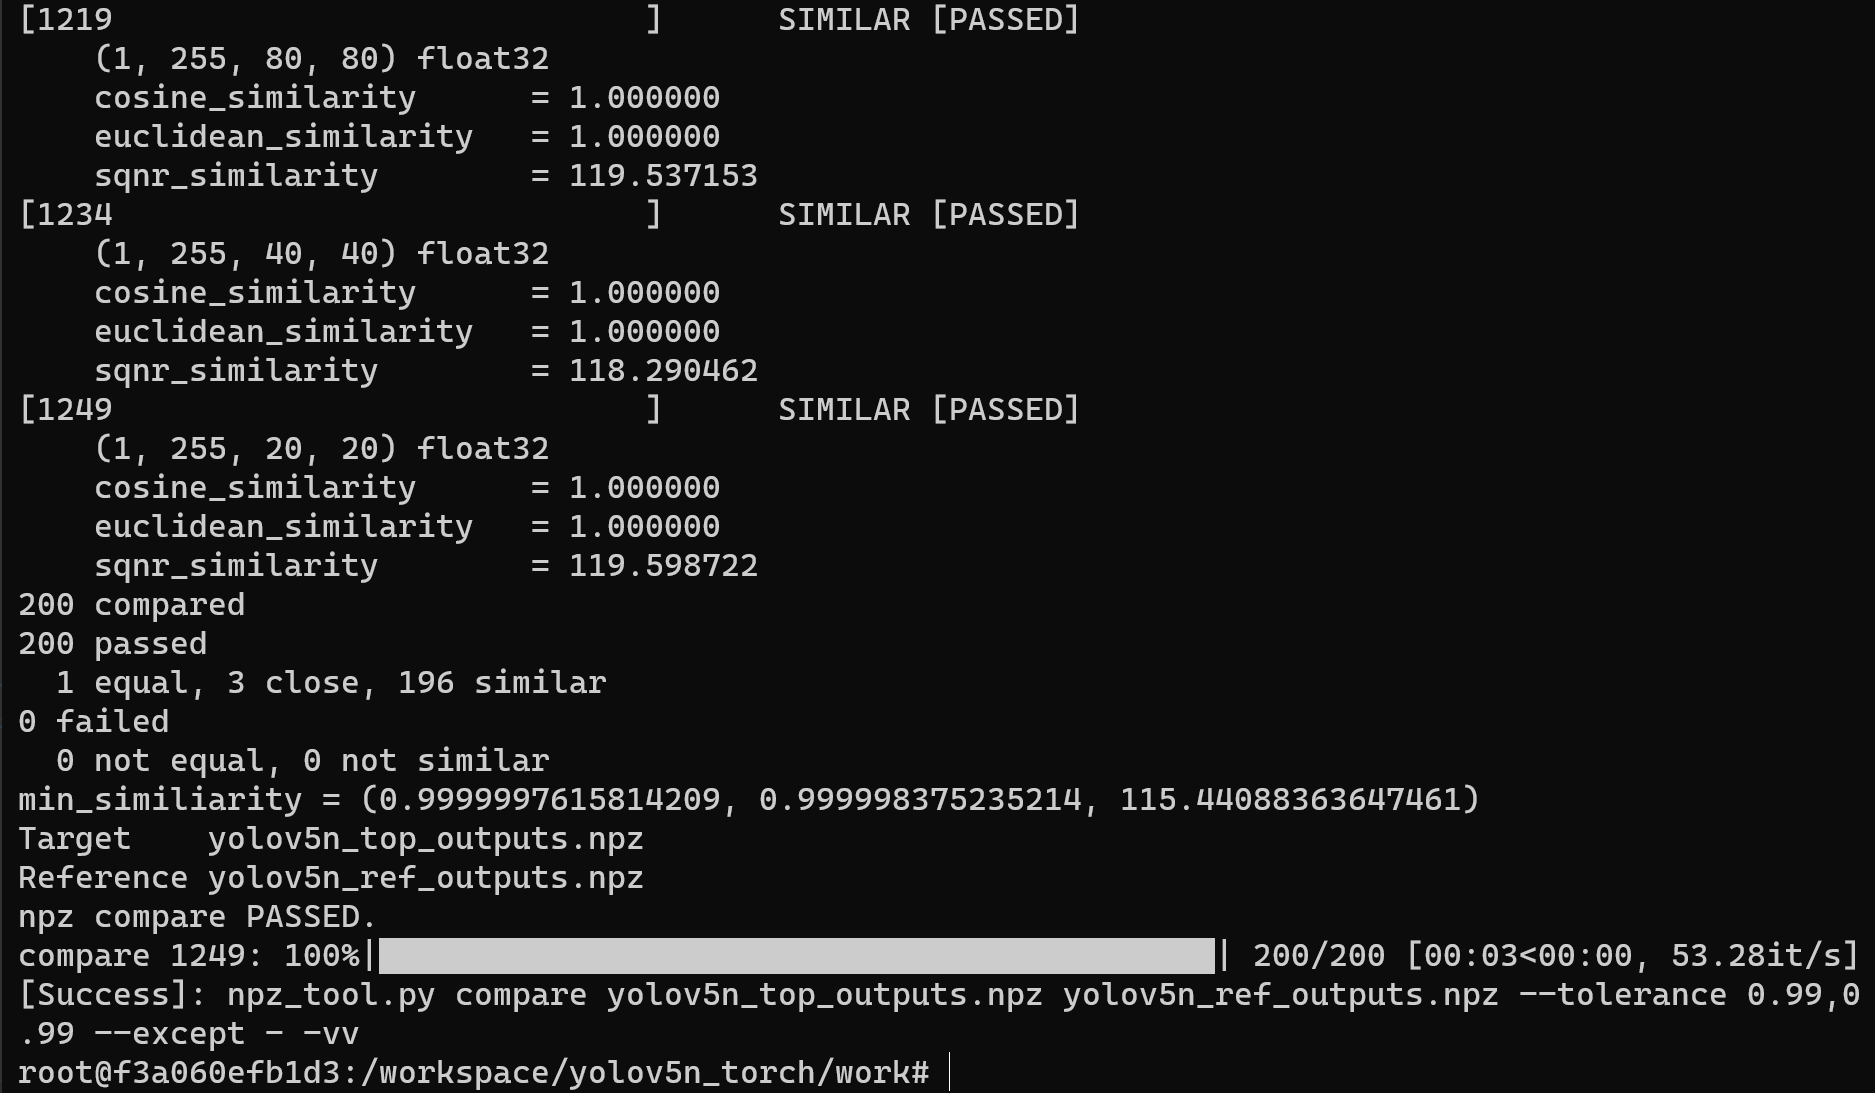
After converting to the MLIR model, a yolov5n.mlir file will be generated, which is the MLIR model file. A yolov5n_in_f32.npz file and a yolov5n_top_outputs.npz file will also be generated, which are the input files for subsequent model conversion.

MLIR to INT8 model
Generate calibration tables required for quantification
Before converting to the INT8 model, you need to generate a calibration table. Here we use the existing 100 pictures from COCO2017 as an example to execute calibration.
# run_calibration.py yolov5n.mlir \
 --dataset ../COCO2017 \
 --input_num 100 \
 -o ./yolov5n_cali_table
Example of successful operation

After the operation is completed, the yolov5n_cali_table file will be generated, which is used for subsequent compilation of the INT8 model.

MLIR quantized into INT8 asymmetric cvimodel
The command to convert MLIR model to INT8 model is as follows
# model_deploy.py \
 --mlir yolov5n.mlir \
 --quantize INT8 \
 --calibration_table ./yolov5n_cali_table \
 --chip cv180x \
 --test_input ../image/dog.jpg \
 --test_reference yolov5n_top_outputs.npz \
 --compare_all \
 --tolerance 0.96,0.72 \
 --fuse_preprocess \
 --debug \
 --model yolov5n_int8_fuse.cvimodel
If the development board you are using is not Duo, please replace the fifth line -- chip cv180x in the above command with the corresponding chip model.
When using Duo 256M/Duo S , it should be changed to -- chip cv181x.
Example of successful operation
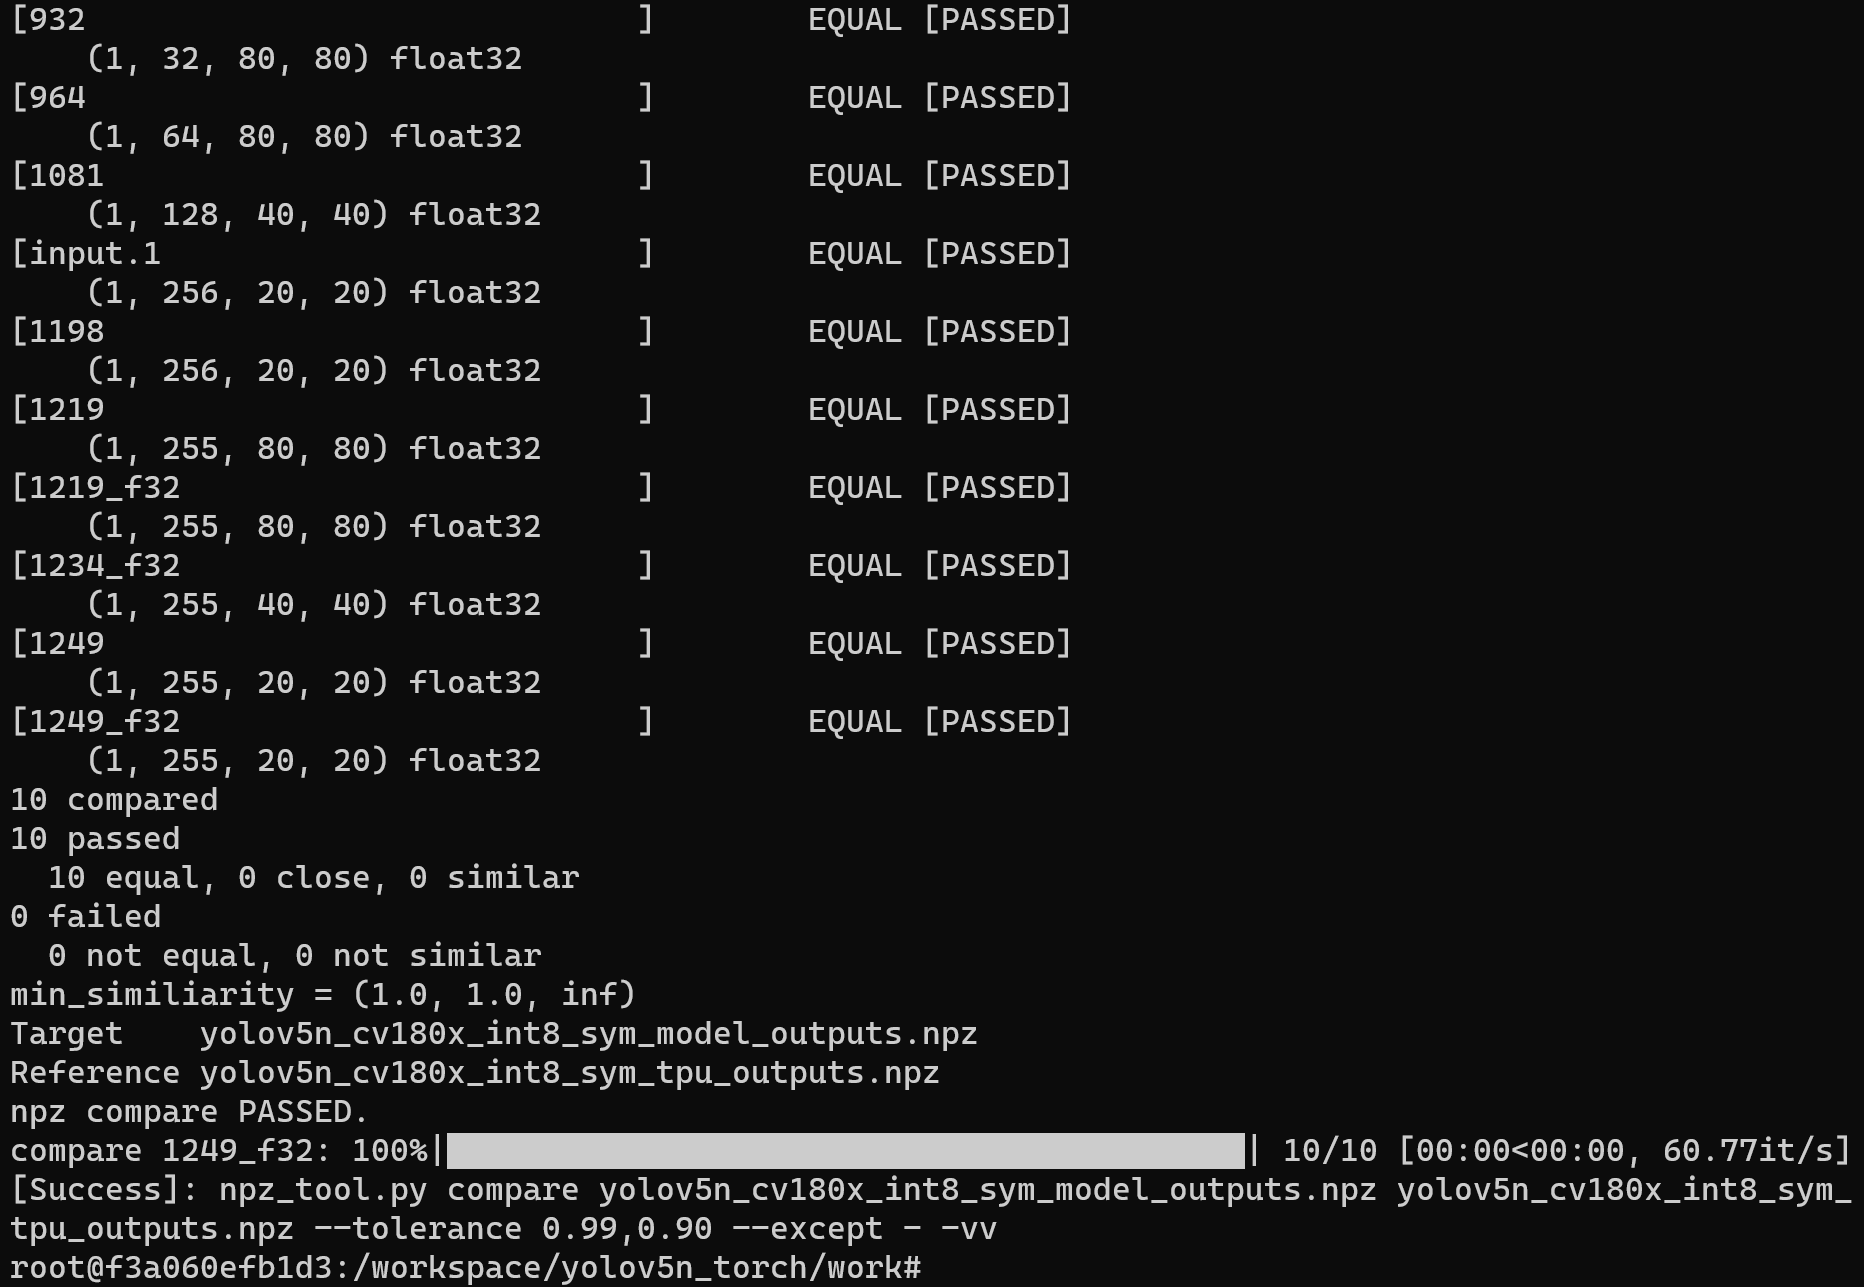
After compilation is completed, the yolov5n_int8_fuse.cvimodel file will be generated.
5. Validate on Development Board Duo
Connecting the Duo development board
Complete the connection between the Duo development board and the computer according to the previous tutorial, and use tools such as mobaxterm or Xshell to open a terminal to operate the Duo development board.
Get tpu-sdk
Switch to the /workspace directory in the Docker terminal
cd /workspace
Download tpu sdk, if you are using Duo, execute
git clone https://github.com/milkv-duo/tpu-sdk-cv180x.git
mv ./tpu-sdk-cv180x ./tpu-sdk
Else,if you are using Duo 256M/Duo S , execute
git clone https://github.com/milkv-duo/tpu-sdk-sg200x.git
mv ./tpu-sdk-sg200x ./tpu-sdk
Copy tpu-sdk and model files to Duo
In the terminal of the Duo board, create a new directory /mnt/tpu/
# mkdir -p /mnt/tpu && cd /mnt/tpu
In the Docker terminal, copy tpu-sdk and model files to the Duo
# scp -r /workspace/tpu-sdk [email protected]:/mnt/tpu/
# scp /workspace/yolov5n_torch/work/yolov5n_int8_fuse.cvimodel [email protected]:/mnt/tpu/tpu-sdk/
Set environment variables
In the terminal of the Duo board, set the environment variables
# cd /mnt/tpu/tpu-sdk
# source ./envs_tpu_sdk.sh
Perform Object Detection
On the Duo board, perform object detection on the image
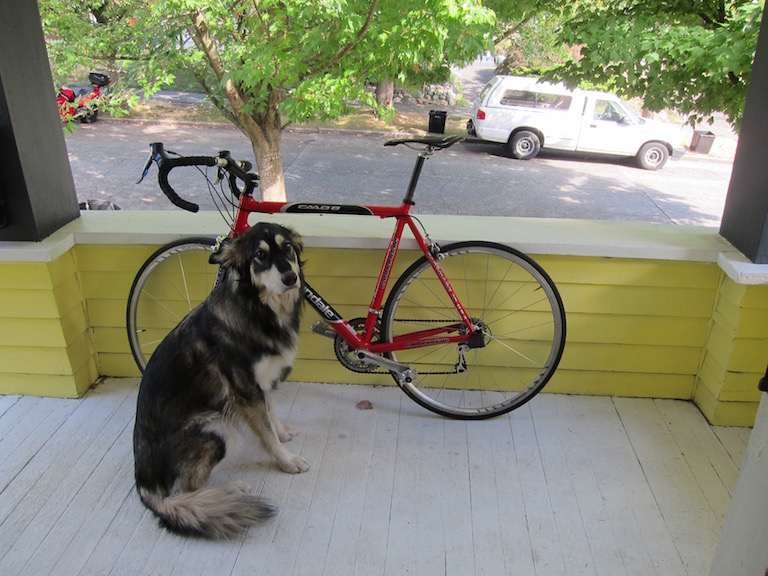
In the terminal of the Duo board, use the yolov5n_int8_fuse.cvimodel model for object detection
# ./samples/samples_extra/bin/cvi_sample_detector_yolo_v5_fused_preprocess \
 ./yolov5n_int8_fuse.cvimodel \
 ./samples/samples_extra/data/dog.jpg \
 yolov5n_out.jpg
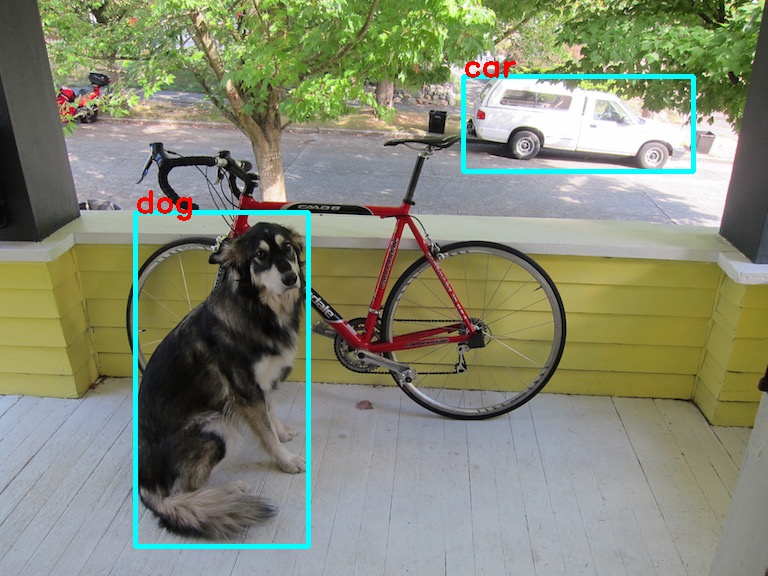
Example of successful detection result
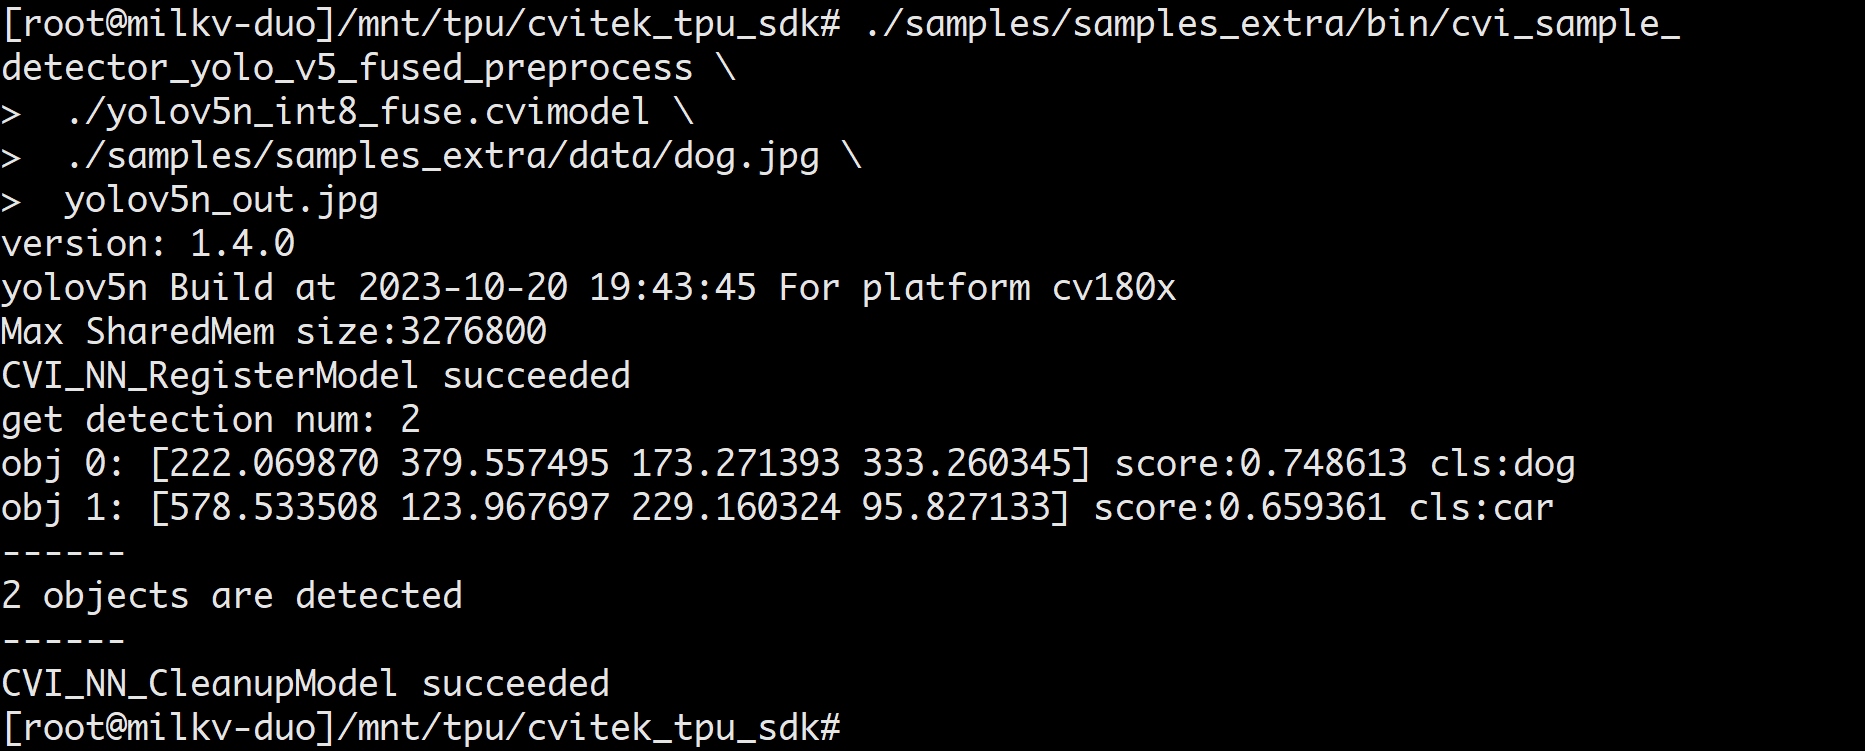
After successful operation, the detection result file yolov5n_out.jpg will be generated, which can be pulled to the PC through the scp command in the Windows terminal.
scp [email protected]:/mnt/tpu/tpu-sdk/yolov5n_out.jpg .

View test result files on a Windows PC